Customers are primarily responsible for bringing in income to your business, so it’s important to make them feel satisfied all the time. In Moonlighter, you can do all sorts of things to satiate the needs of your customers, and that includes fulfilling their requests.

Side quests have always been a staple element in video games. Without quests, you wouldn’t be able to get fully immersed in the world of video games and discover new things about their lore. Customer requests in this game can be a good source of money at the start, almost as good as selling dungeon loots. This guide will tell you how to get started in accepting quests and how to complete them efficiently.
1. Upgrade your Shop to Level 2

Before you can start accepting quests, you need to save up 60,000 gold to upgrade your shop for the second time around.
To stash that amount of money, here is a list of some important money-saving tips you can use:
- Books, Designs, and Jottings are archaic items that are crucial parts of any dungeon’s culture, so they are pretty valuable. Prioritize in selling them if you find them in dungeons.
- Avoid selling Slime Gels, Empowering Crystals, and some weapon parts. They are useful to you to make potions, enchant your equipment, and upgrade your weapons and armors, and thus, making you stronger and more resilient in combat.
- Upgrade your Cash Register to get extra tips from customers.
2. Accept Customer’s requests

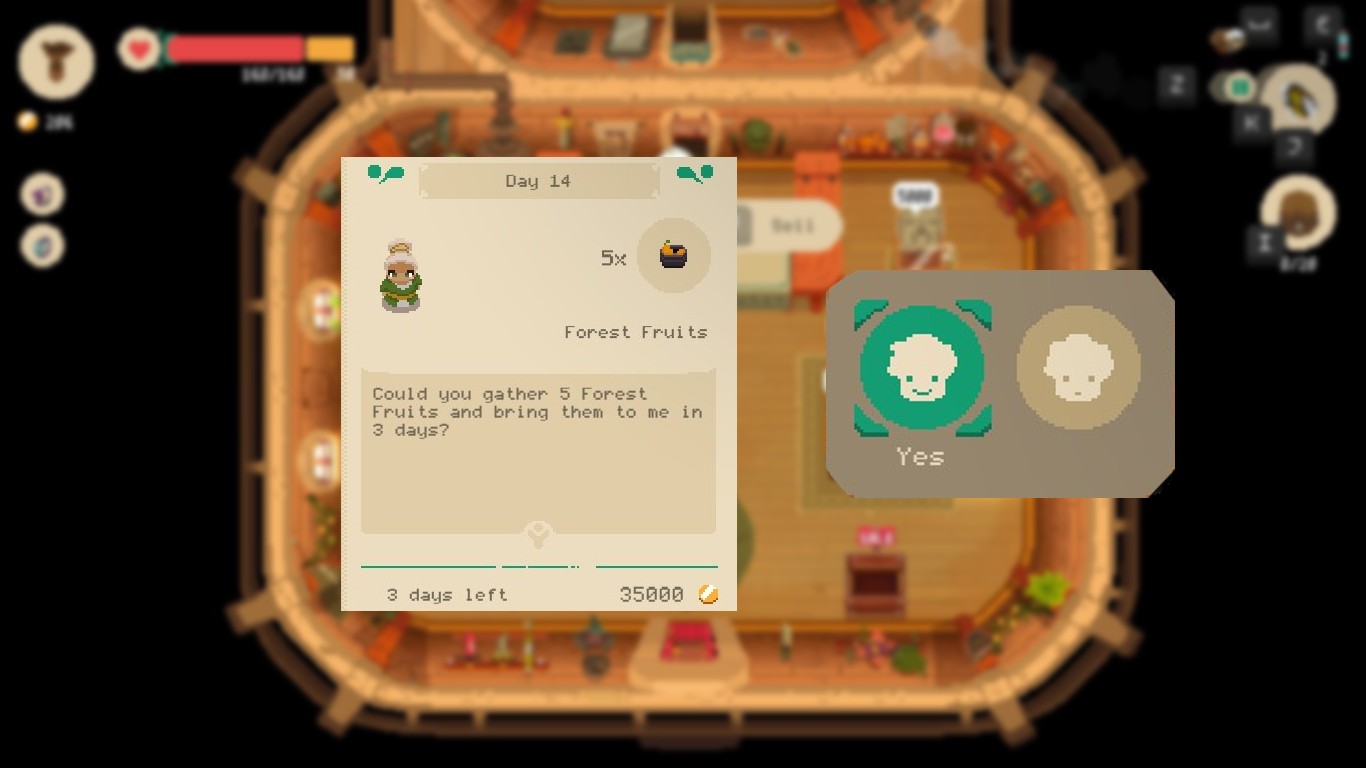
Customers who intend to ask you for favors usually line up in front of the cash register without an item in their hands. If you see someone walk up to the white cloth on the counter instead of the blue cloth, that’s when you know they have a quest for you.
Talk to these customers to start accepting their quests. There are two types of requests you may receive from them:
Fetch Quests
These quests require you to get items that drop from killing monsters. The number of items varies on occasion, and customers do not give you further information on where you can find these items. It may help if you look them up in the Merchant Notebook if you think you have picked them up at least once.
It is recommended that you should only accept a quest if you’re sure about the location of the items they’re asking for, otherwise, you can decline if you have no idea where to get them.

Kill Quests
Kill Quests will have you slaying 10 of a certain type of foes in order to gather notes from them. Fortunately, the notes that you’ll collect from killing these enemies will not take up a slot in your inventory.
Much like in Fetch quests, the customers will not give you a single hint on where to find these enemies. Accept these quests only if you think you have once encountered the monsters you’ll need to kill and if you’re sure where to find them.
3. Turn in Quests
You will only be given a few days to complete a task, whichever type of task they are. Some shop decorations can add one day to the delivery date of your pending quests. The Desert Cloth and the Desert Lava Idol both have that effect when displayed in the shop. If you have two of them together, that means you’ll get two more days before the delivery date of any quest.
To keep close tabs on all your current quests, check your calendar to make sure you can finish quests on time.

Customers who have given you quests are often the first ones to enter the shop. They usually go straight and approach the counter and talk to you about their requests. You’ll receive a decent amount of gold if you can complete a quest. Fetch and accept quests, however, you will earn more gold rewards by completing it as opposed to finishing Kill quests.
Failure to complete your quest will result in a failed mark in your calendar.


