You have finally settled on the island of your choice, but the island has a pre-set layout where hills and rivers have been laid out before you even step foot on it. The good thing is you can craft and use tools to cross rivers and climb hills to explore the entire island thoroughly.
However, taking out and switching tools to move around can be a hassle. Thus, the game included building bridges and inclines to allow ease of traversing areas and connecting land separated by rivers and for the players’ creativity.
You can start building bridges and inclines after the Resident Services gets upgraded. Once Tom Nook and Isabelle work in a bigger and fancier office, you can ask Mr. Nook about island infrastructure at the construction consultation counter.

When you talk to Tom Nook in Resident Services about infrastructure, you can ask about bridges and inclines or layout changes by moving a building or an island home.


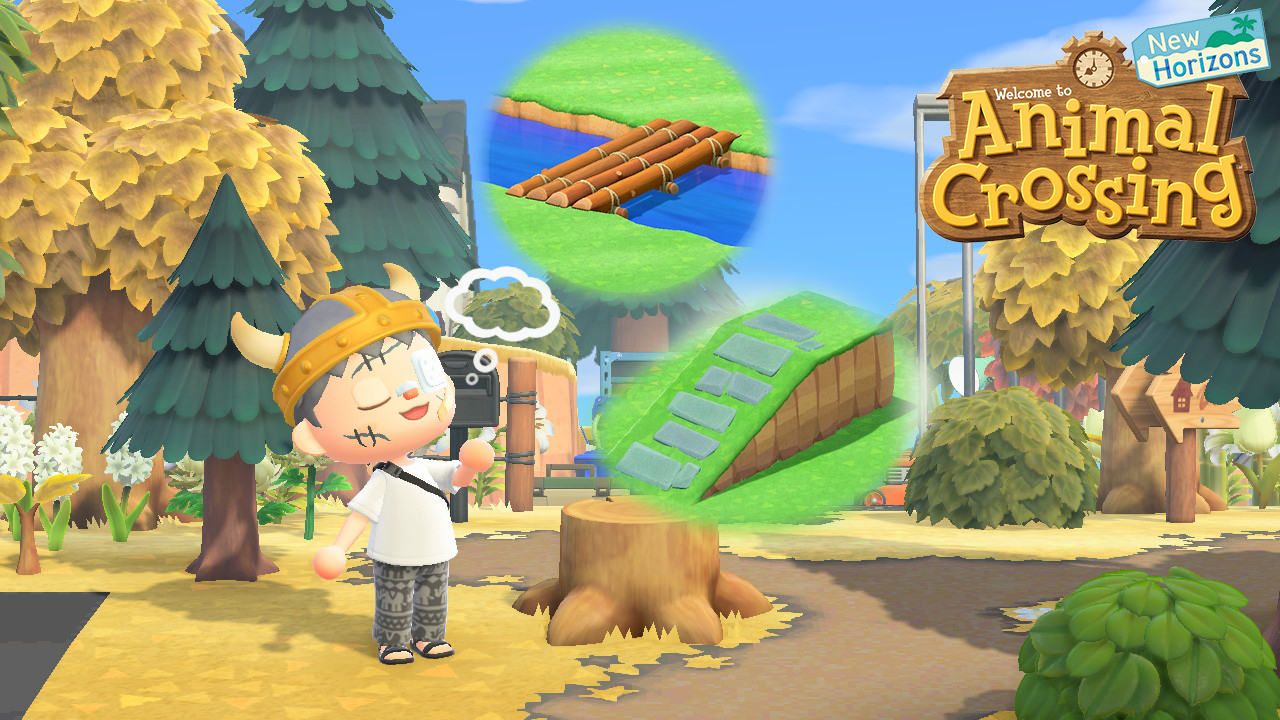
You will have the option to build a bridge, make an incline, or demolish something.

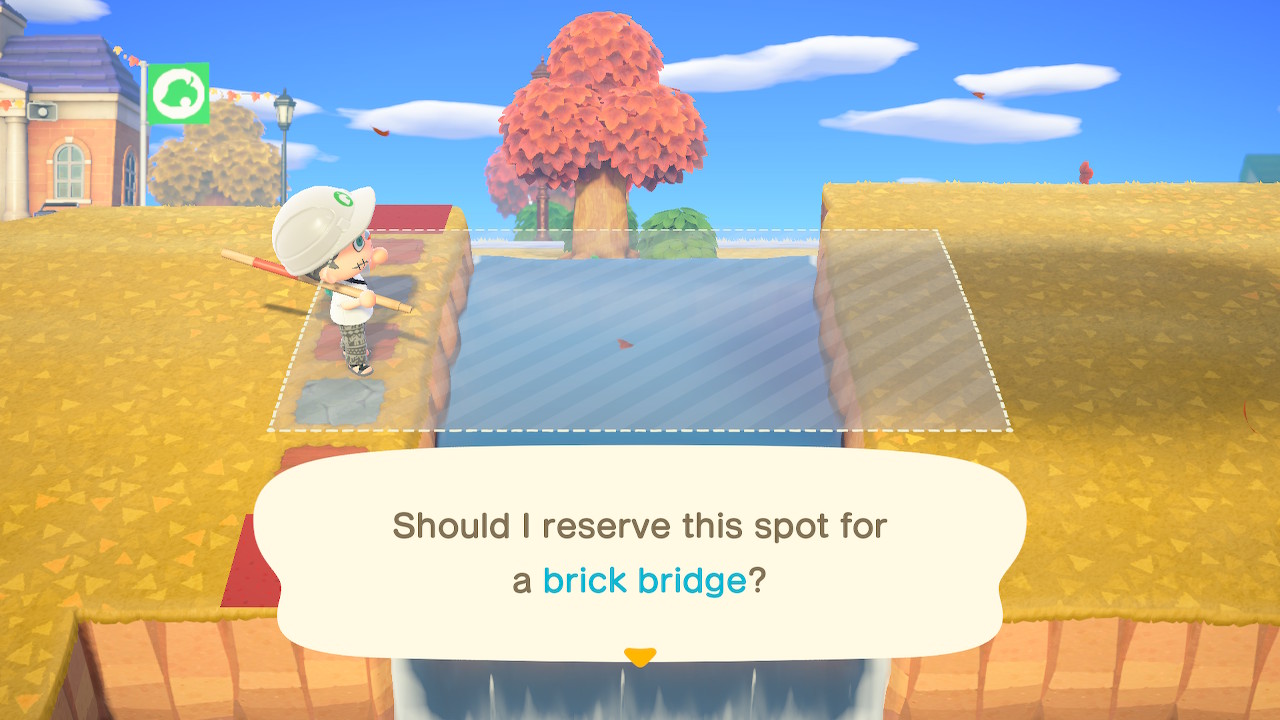
If you want to build a bridge, select that option, and you will be presented with a list of bridge types you can choose to build. The same goes when you decide to build an incline.


Each structure will cost you a certain amount of Bells, because after all, nothing is free with Nr. Nook.
After selecting a structure style, Mr. Nook will hand you a Bridge Marker Kit or an Incline Marker Kit that you can use to mark a spot where you want the structure to be built.


Make sure to have a space in your inventory when doing this transaction with Tom Nook.

Things to Consider
Aside from choosing a spot, there are other things to consider when building bridges and inclines. Despite having the freedom to create, there are still limitations regarding where and how you can make these structures.
When Building a Bridge
Below are tips on how to build a bridge.
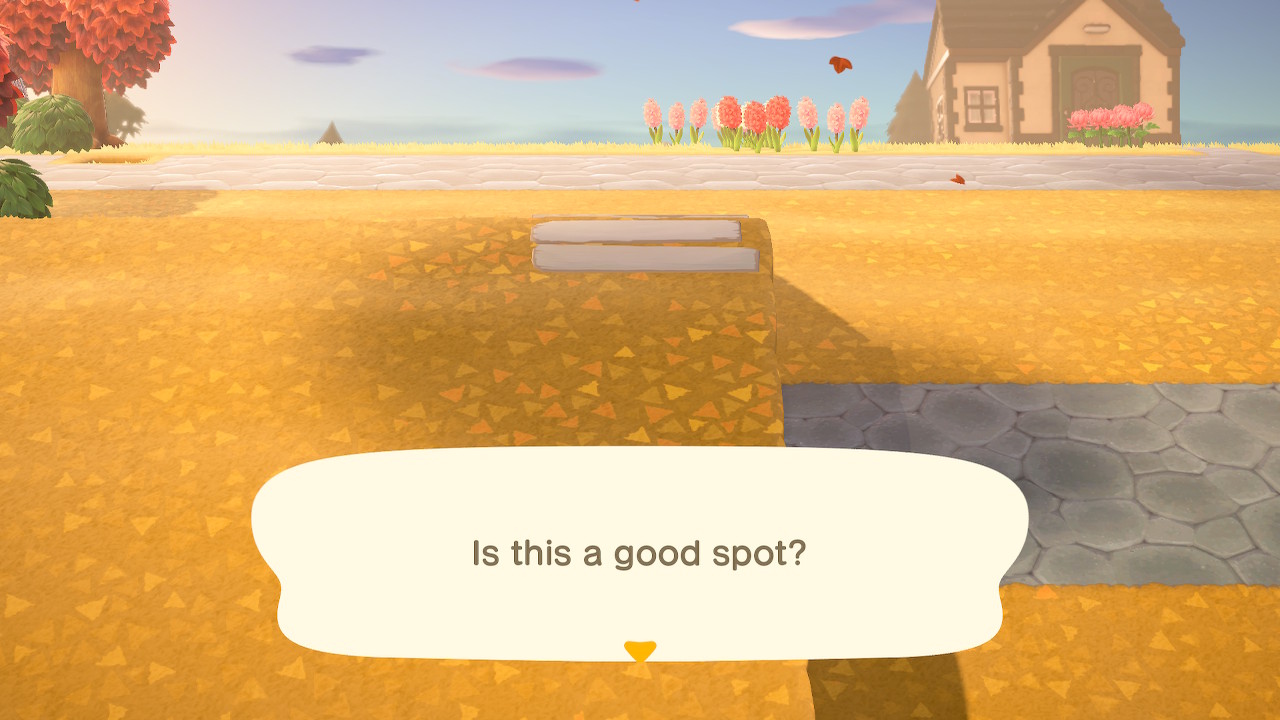
The first thing to note is that a bridge can only be built next to a river. You cannot make one to connect cliffs or higher levels of land.

The river and the land on each side should be just the correct width for you to build a bridge.
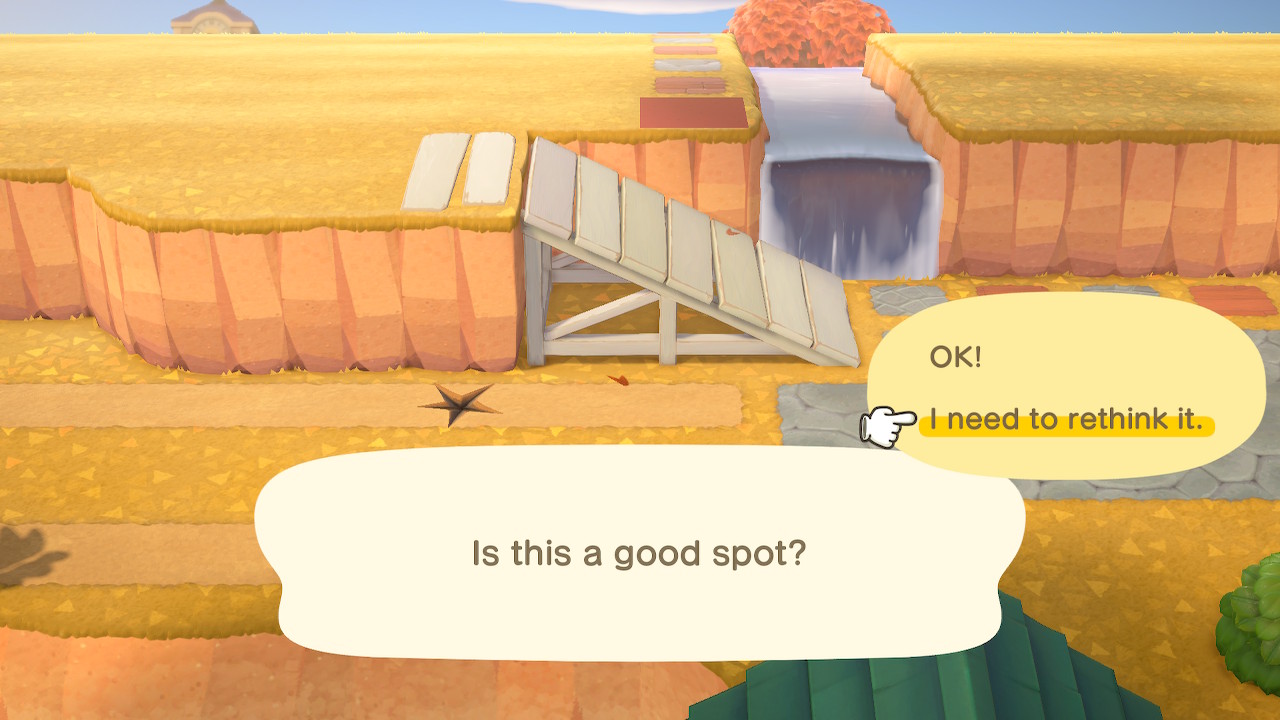
In the images below, the land has been marked using different path styles to show the number of spaces a bridge will occupy.

- The land on each side should have at least six spaces.
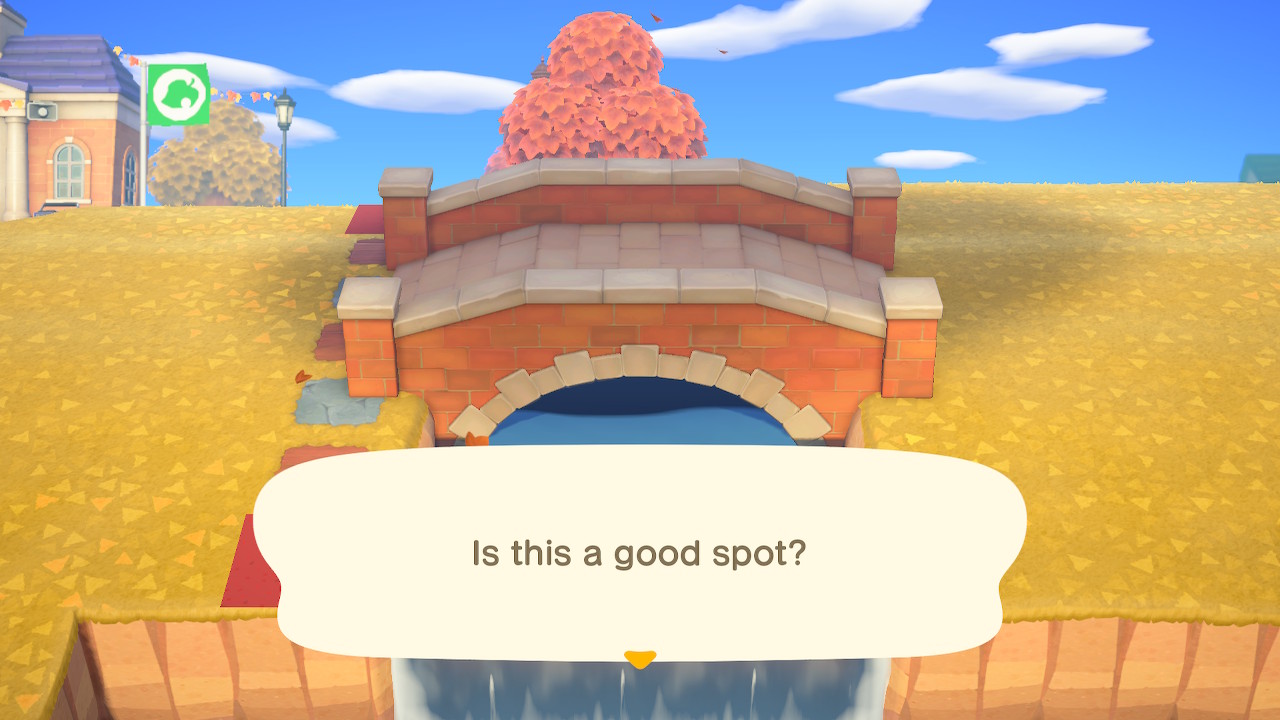
- The bridge will occupy four spaces, and one on each end will be an extra that the structure needs.
- The width of the river should be between 3 and 5.
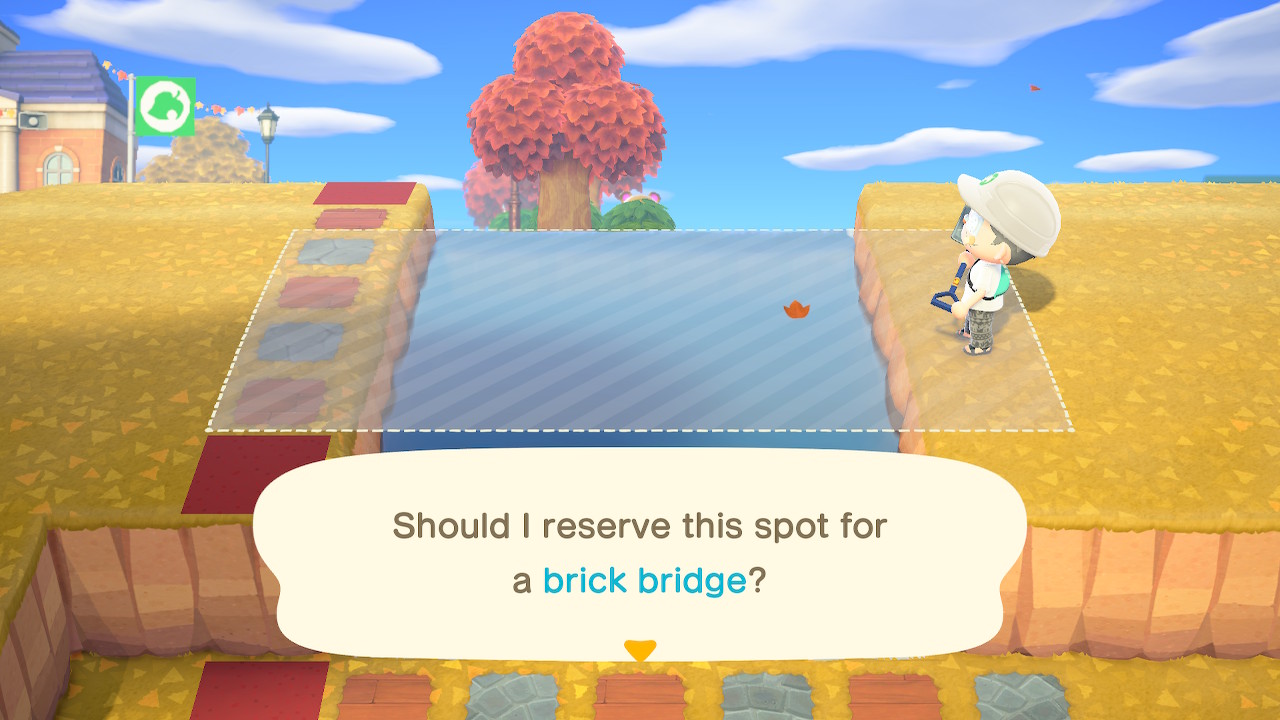
- A 2-space width river is narrow enough for you to jump across it.
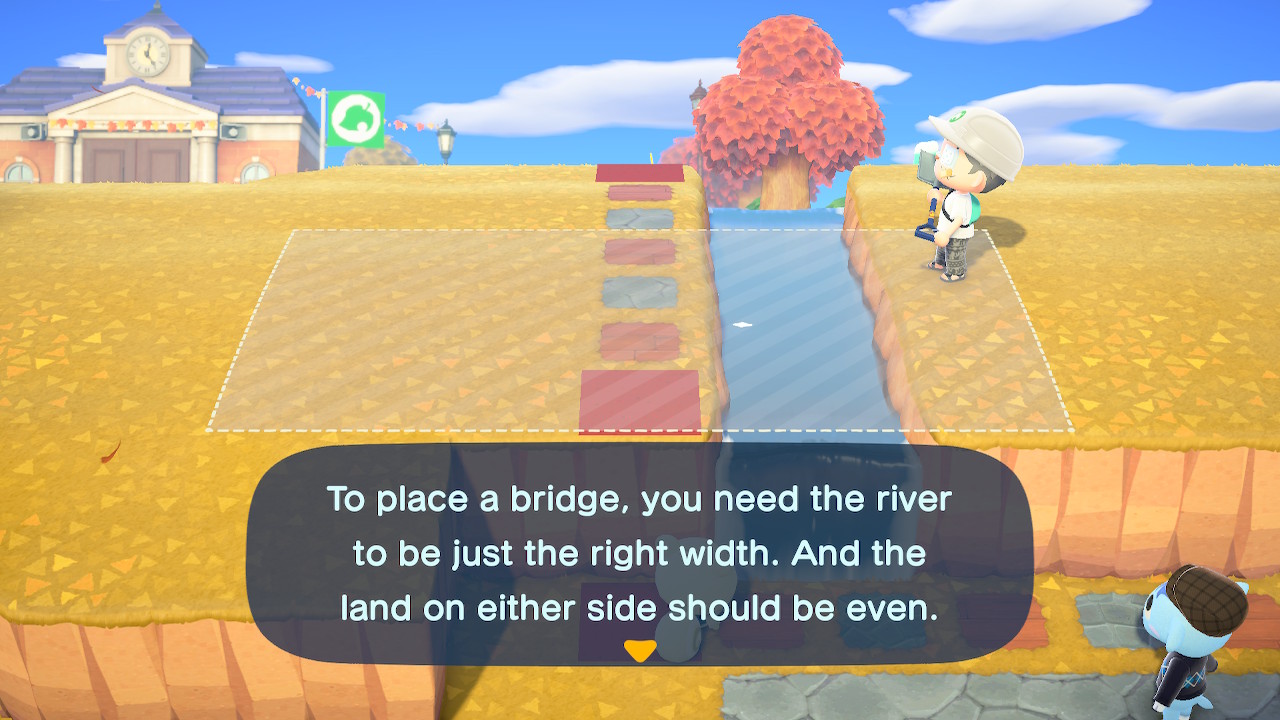
- A 6-space width river is too wide to build a bridge over it.
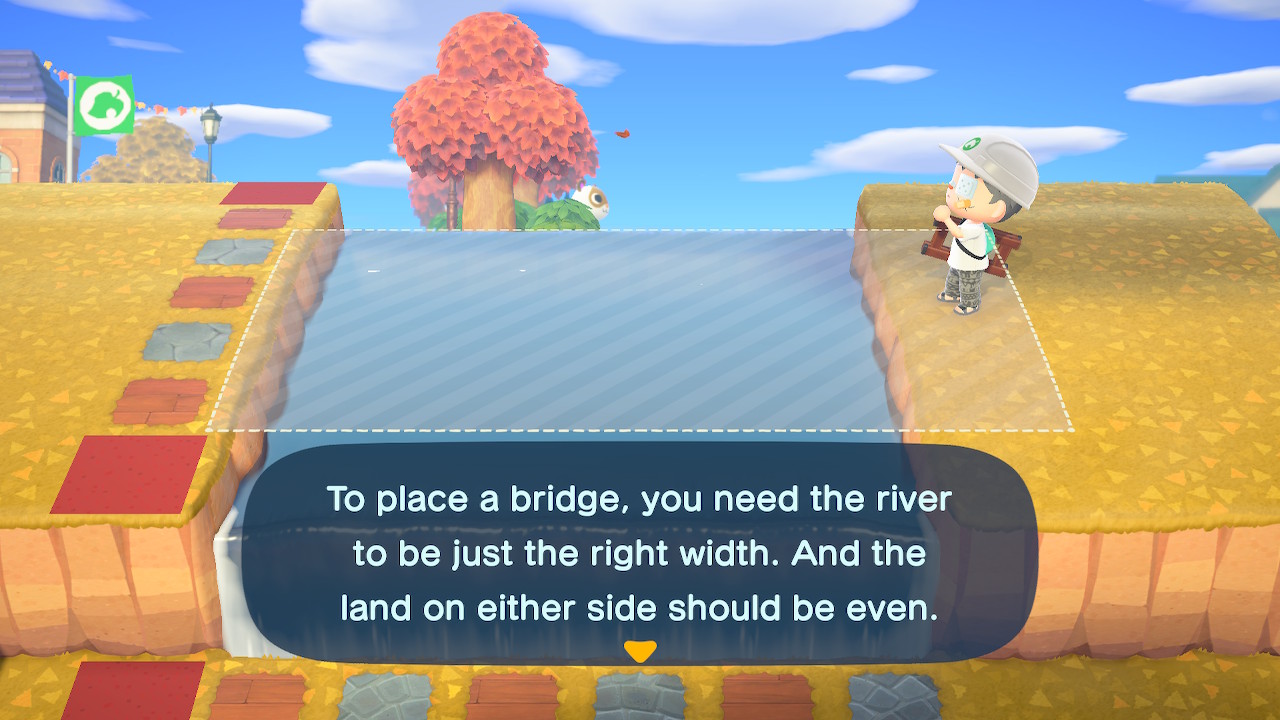
You can also build bridges in any position–even diagonal–if it meets the space requirements.


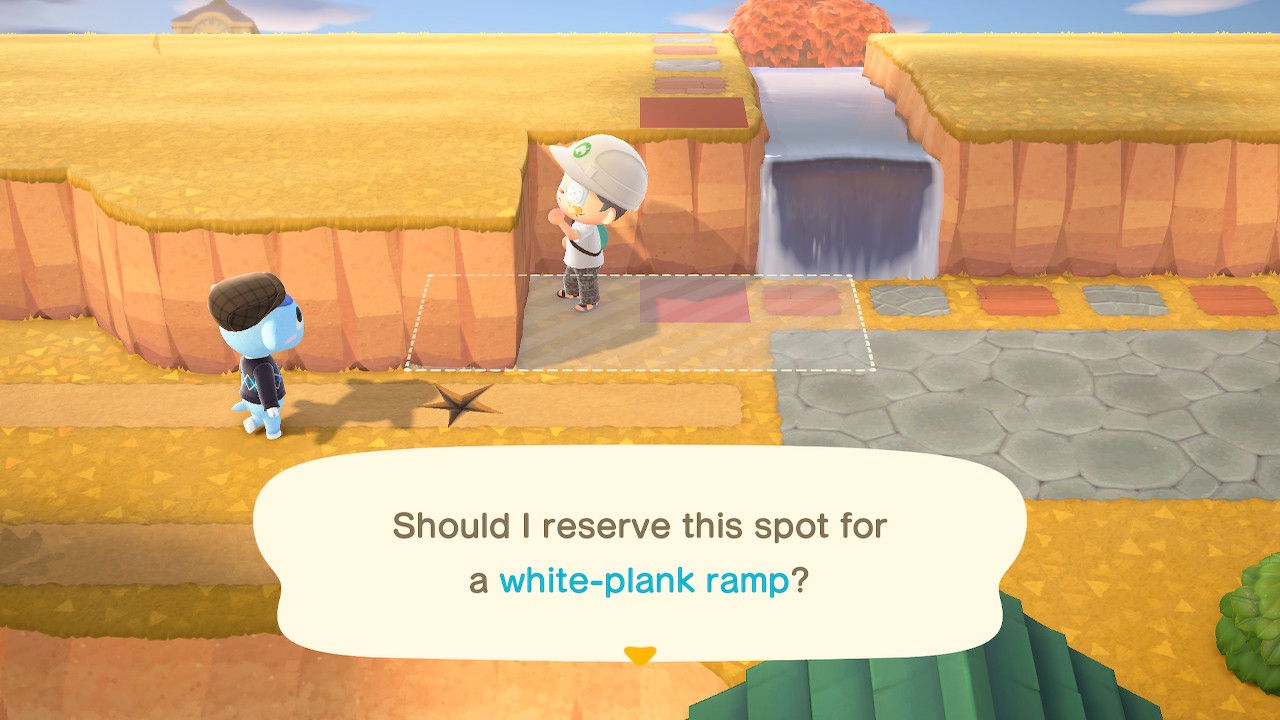
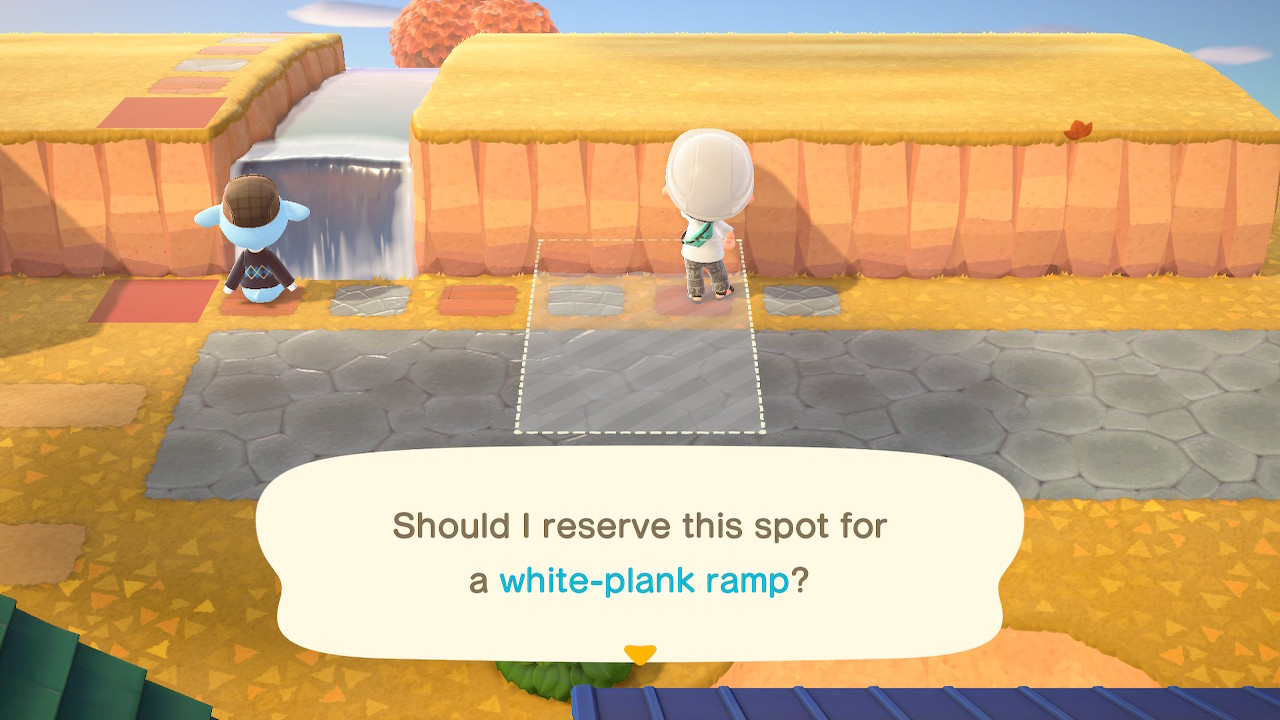
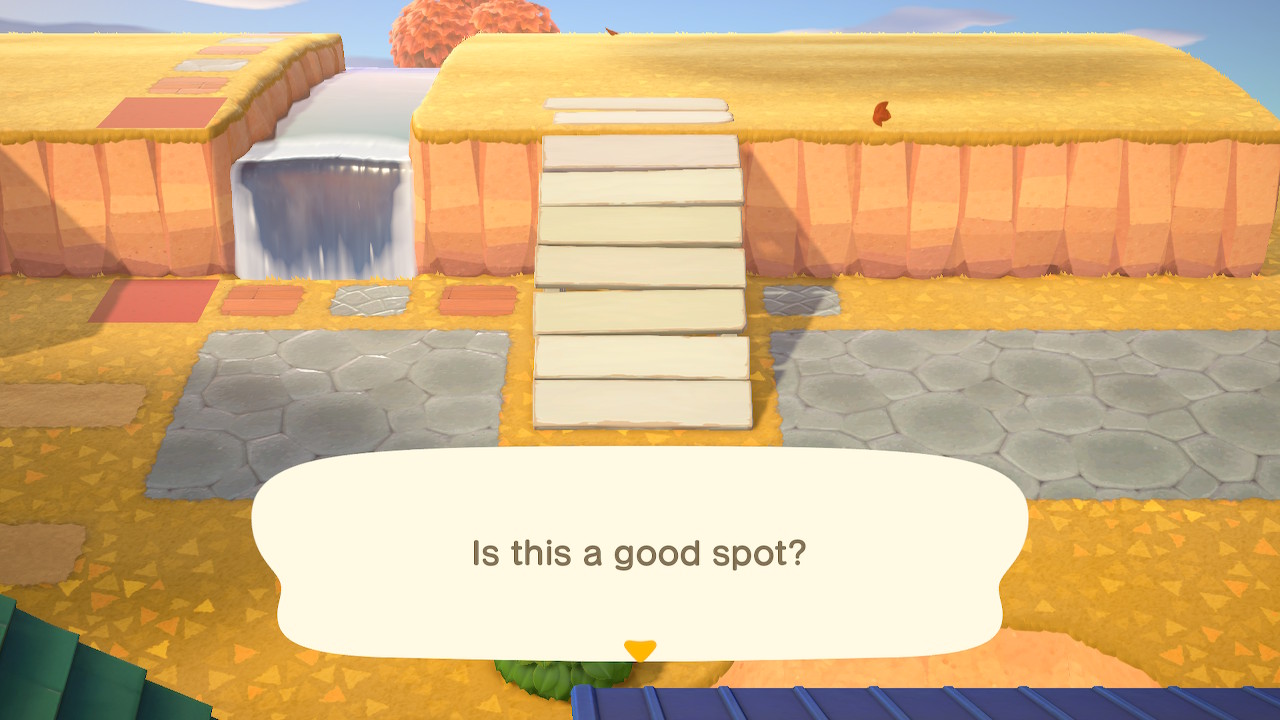
When Building an Incline
Below are tips on how to build ramps and staircases.
Inclines have a fixed width of 2 spaces.
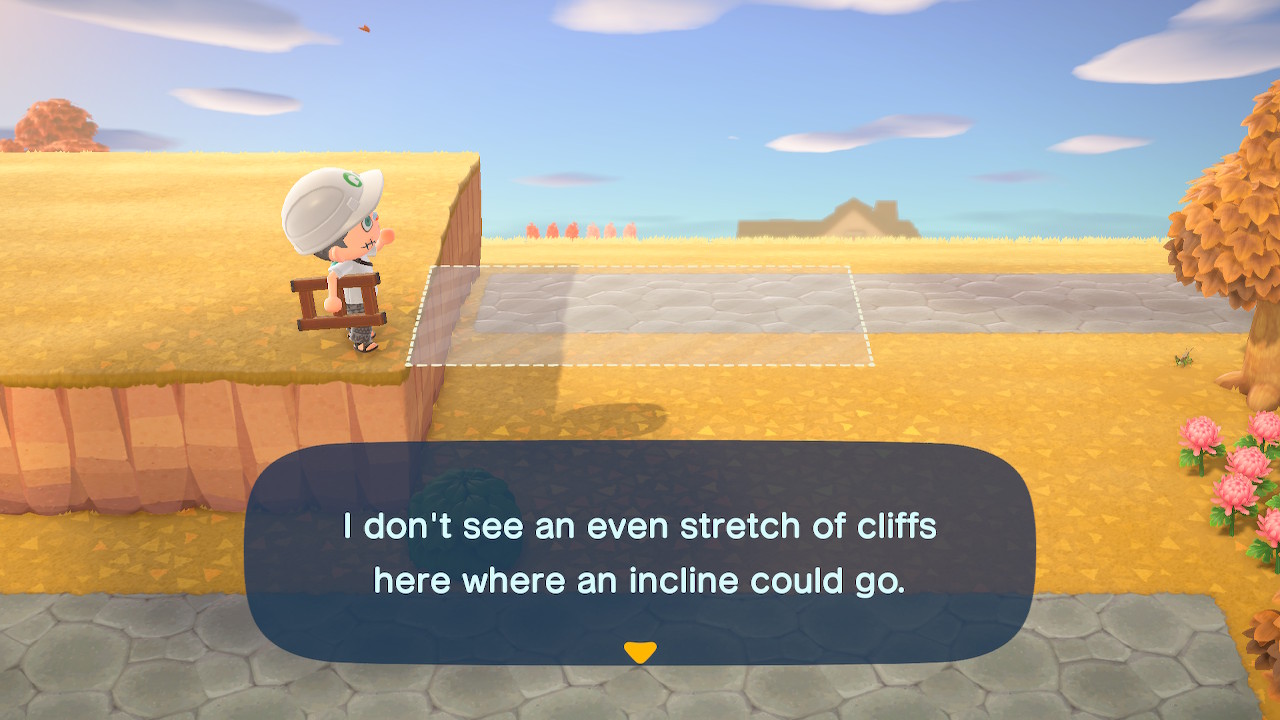
- When building an incline up a cliff with three or more spaces, it will only occupy 2.
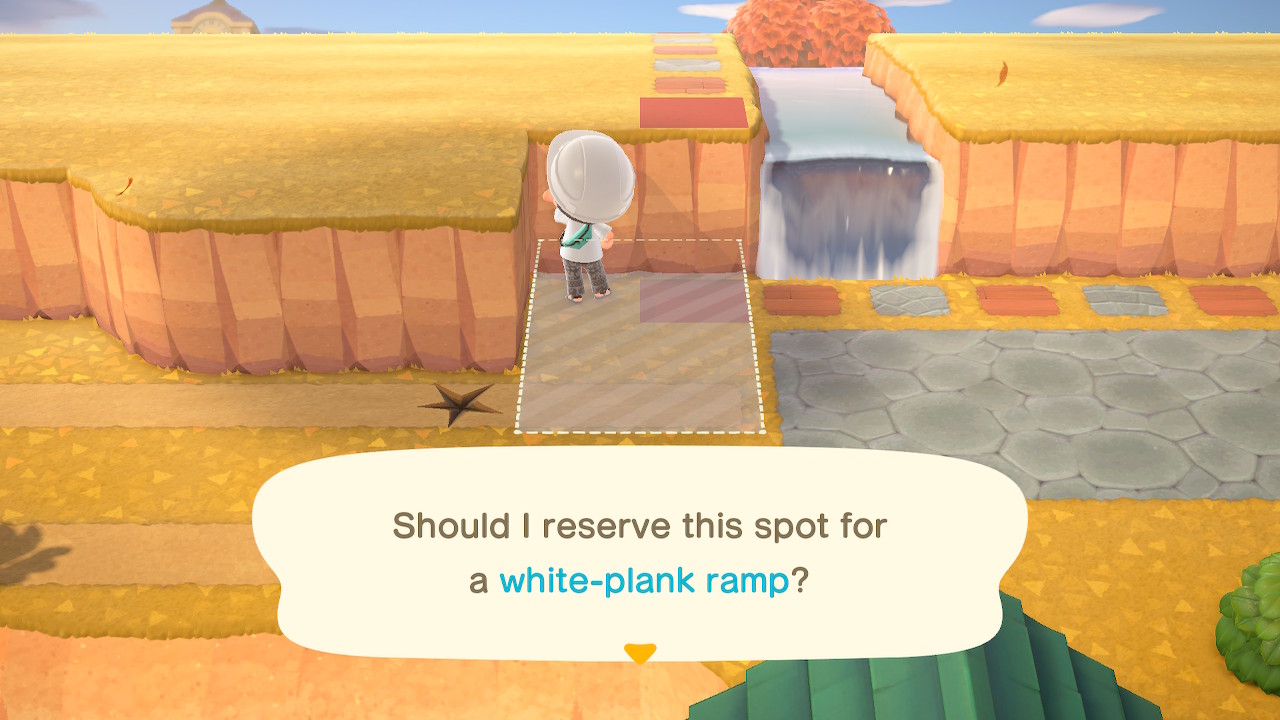
- An incline marker cannot be placed on cliff walls that are 1-space wide.
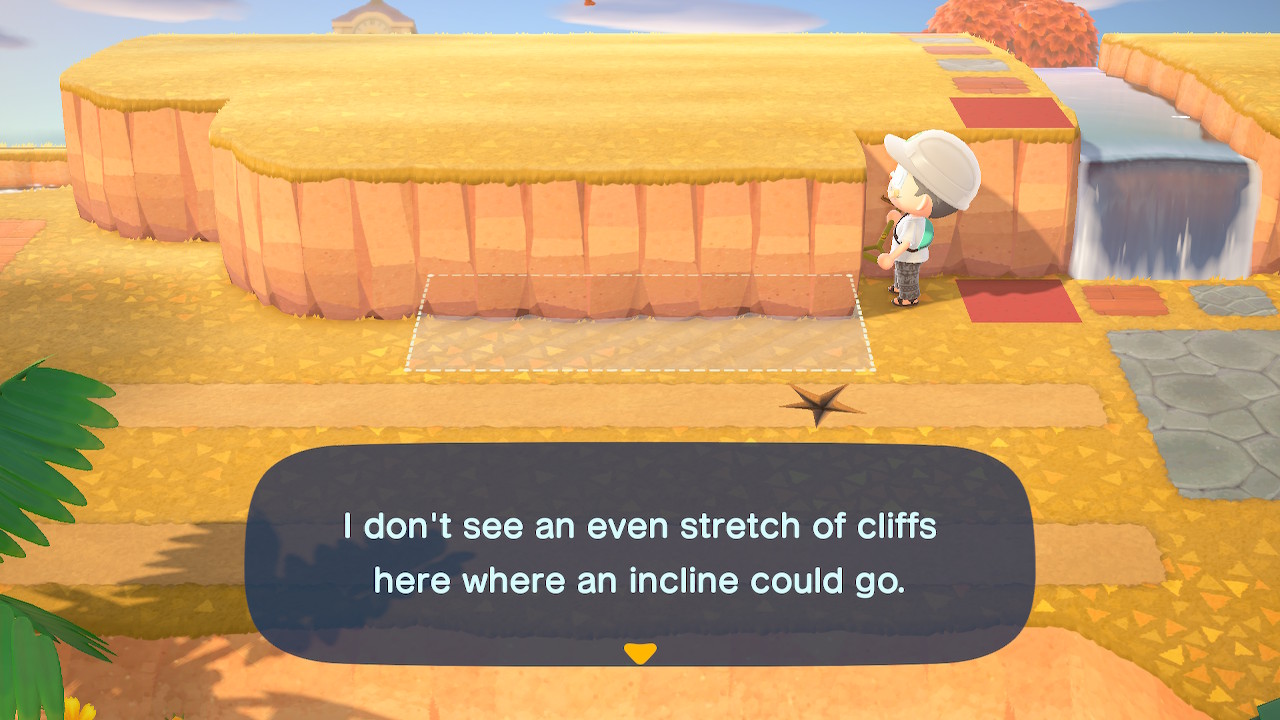
Inclines can only be built from the base of a cliff.
- You can only select and mark a space going up.
- You can’t stand at the cliff’s edge to build a ramp or a staircase.
You can build an incline on any side as long as it is up a cliff with enough space.
- A ramp or a staircase can be facing forward or sideways, from the back going up, or lie adjacent to a cliff wall.
Once you have selected and marked the spot where you want to build an incline or a bridge, Lloid will appear at the construction site.

He will be collecting donations to build the structure. Yes, all residents can contribute to the costs of building island infrastructures.

The construction will only commence after the needed amount is reached. It may take several days, so it is always better to donate yourself.
Only one infrastructure can be built each day. Even if one still needs Bells to start the construction, Tom Nook will not discuss building another structure yet.
If ever you change your mind and decide not to build anything anymore, you can always talk to Mr. Nook to have it canceled. Take note that the donations Lloid has collected will all be lost if the construction project is canceled.

However, shutting the construction project will take a day if you have already set the marker kit up on the spot. Until then, you can’t request to build another structure.
How to Demolish an Island Infrastructure
Sometimes bridges, ramps, and staircases no longer serve the purpose you initially need them for. Maybe your island has too much of it, or simply perhaps it does not fit the layout and design you are aiming for.
For whatever reason, you have the chance to remove these structures. This section will show you how to demolish an incline or a bridge.
As for all island infrastructure changes, you need to consult Tom Nook by talking to him in the Resident Services. Select the option that you want to talk about bridges and inclines and that you want to demolish one.

Mr. Nook will then let you choose which among the existing structures on the island you want to get demolished.

After selecting, you will be told that such construction service needs a fee of 10,000 Bells. You can choose to proceed or cancel the request at this point.

If you have the money and you’re willing to spend it on this service, Tom Nook will arrange the demolition service and assure you that the structure will be gone the next day.


Having island infrastructures are some of the essential features for you to fully design your island in Animal Crossing: New Horizons. Now that we have gone through the necessary things to consider in constructing bridges, ramps, and staircases, it should be a lot easier for you to build such infrastructures.