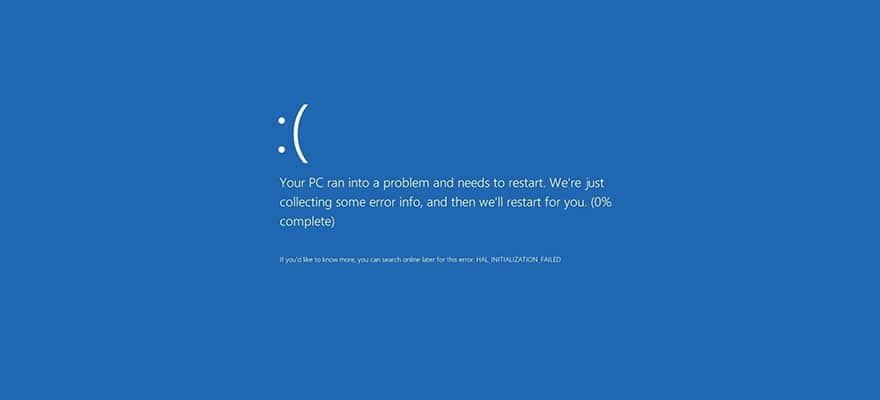
There’s nothing worse than settling down to play your favourite game, only to be interrupted by those pesky Windows notifications that you don’t even understand. Sometimes, these messages are even followed by that blood-chilling black screen—or worse, the blue screen of death! It’s not always sunshine and rainbows with our computers, unfortunately. So, what happens when you get the pop up “display driver stopped responding and has recovered”?
You don’t have to panic, that’s for sure! We’ve got a wide range of solutions for display driver stopped responding and has recovered so you can get back to doing what you love in no time at all! Keep reading to find out how you can easily fix this problem…
 Image source: Tom’s Hardware
Display Driver Stopped Responding…
If you’re a Windows 10 user—or just any old Windows user—you might have come across this issue before. It usually occurs when you’re in the middle of playing a game—like Rocket League—or watching a video. This particular error pops up at the bottom-right of your screen. Bear in mind that it’s not always the same message—there are a few variations, as you can see:
- Display driver stopped responding and has recovered
- Display driver nvlddmkm stopped responding and has successfully recovered
- NVIDIA display driver stopped responding and has successfully recovered
- Display driver stopped responding and has recovered NVIDIA
- Display driver ATI stopped responding and has successfully recovered
- Display driver stopped responding and has recovered NVIDIA kernel mode driver crash
This message will often cause your screen to go black and crash your system. As the message suggests, this issue corresponds to your display driver. So if the message contains the word “NVIDIA”, odds are, you’re looking at a problem with your NVIDIA display driver—resulting in your NVIDIA driver crashing.
Why Has This Happened?
So, you’re unable to connect to NVIDIA Windows 10, or you’re being plagued by the message “display driver stopped responding and has recovered Windows 10”—but what exactly caused this problem to begin with?
The issues all link back to your graphics system. When you’re using your computer, are you trying to play a few games at once? Or do you have several programs open at any given time? Too many visual effects or programs running in the background slows your computer down. In turn, your system memory runs low. If Windows is unable to allocate video memory, then it will close and restart the program.
Of course, it could also be due to a specific issue with your display driver—if it’s outdated, you’d need to update the driver, e.g., to one of the latest NVIDIA drivers. You might even be using an old video card that no longer has a compatible Windows driver. Additionally, it could be that it’s taken more time than is permitted by Windows for your GPU to display graphics on your monitor.
Fortunately, there are a few solutions you can try out to fix “display driver stopped responding and has recovered”. Read on to find out what they are…
Uninstall and Update Your Drivers
If you’re being plagued by the message “display driver stopped responding Windows 10” or something similar, the first easy solution is to uninstall your current driver and then update it. Ordinarily, your driver updates are automatically downloaded and installed through Windows Update.
Let’s face it, though—some of us try to put off updates until the last possible second. After all, who wants to deal with the inevitable four-hour update when we want to play games? If this sounds familiar enough, it explains why your driver hasn’t been updated recently. So, if you’re having trouble with your driver, all you need to do is update it.
It’s simple enough—all you need to do is follow the instructions given by Windows on updating a driver. Sound too complicated? Don’t worry—we’ll take you through all of the steps, one after the other…
- Click Start and head to Windows Settings.
- Type “Device Manager” and select it from the list.
- Find the name of your device, right-click and select Update Driver.
- For graphics cards, you can expand Display adapters, right-click on your card and select Update Driver.
- Click Search Automatically for Updated Driver Software
Of course, it’s not always so simple. Sometimes, a search for updated driver software can come up short. If Windows isn’t able to automatically find you a new driver, you can head directly to your device manufacturer’s website for instructions. You should also be aware that if you’re using an older video card, you might not be able to find a video driver that’s fully compatible with your Windows version.
If updating your driver isn’t successful, you can always try the age-old trick of uninstalling your driver altogether. All you’ve got to do is open Device Manager again, right-click on your device and select Uninstall. Then, restart your computer and Windows will try to reinstall the driver.
Change Visual Effects
Still not successful? That’s fine—you can look into changing visual effects to aid in better computer performance.
You might have noticed over the years that the more programs, browsers and tabs that you have open at once, the slower your computer can be. In fact, doing so can use up a lot of memory and—in turn—can cause a lot of performance issues like lagging and the all-too-dreaded black screen. The simplest solution to this would be to close the programs that you’re not using. In fact, you should try to do this on a regular basis to prevent future problems.
Not enough? Not to worry, you can also opt to change your computer settings to amplify performance by the way of disabling certain visual effects. If it sounds a bit too technical, relax—it’s not too complicated. All you’ve got to do is follow these directions…
- Click Start and select Control Panel.
- Search for Performance Information and Tools.
- Select Performance Information and Tools from the list.
- Click Adjust Visual Effects.
- If you’re asked for an admin password or to provide confirmation, do so.
- Select Visual Effects > Adjust for Better Performance > OK.
- You can opt for Let Windows Choose.
If you’re still struggling with issues like “display driver stopped responding Windows 10”, don’t worry—we’ve got other solutions up our sleeve!
Modify Registry Entry to Increase GPU Processing Time
When your computer—or driver—takes too long to complete a task, it is detected by the Windows feature Timeout Detection and Recover. To try and solve the problem, Windows tries to reset your graphics hardware. Unfortunately—as with most computer issues—it doesn’t always go according to plan. If your GPU doesn’t recover and reset in two seconds—the allotted time given by Windows—your system will become unresponsive. Starting to recognize this narrative? That’s because soon after this issue, the error message “display driver stopped responding and has recovered” pops up.
To try and get around this annoying problem, you can give Timeout Detection and Recovery a bit more time to complete the recovery. How does it work, you ask? Simple—you can manually alter the registry value. Read the following instructions carefully…
- Close all Windows programs.
- Open Registry Editor > Windows Key + R > type “regedit”.
- You might be prompted to enter an admin password or provide confirmation.
- Look for the registry subkey: HKEY_LOCAL_MACHINESYSTEMCurrentControlSetControlGraphicsDrivers
- On the Edit menu, click New and select a registry value from the menu—specific to your version of Windows:
- 32-bit Windows
1. Select DWORD (32-bit) value.
2. Then type “TdrDelay” as Name > Enter.
3. Double-click “TdrDelay” > enter “8” for Value data > OK. - 64-bit Windows
1. Select DWORD (64-bit) value.
2. Type “TdrDelay” as Name > Enter.
3. Double-click “TdrDelay” > enter “8” for Value Data > OK.
- 32-bit Windows
- Exit the Registry Editor and restart your computer to kickstart the changes.
Please be aware that modifying the registry requires the utmost care. You’ll encounter a lot of difficult problems along the way if you end up modifying something incorrectly. The easiest way to avoid this is to follow our instructions carefully.
Worried about doing it wrong? That’s fine—you can back up your registry before you start to make any modifications to it. This means that if something goes wrong—which it shouldn’t—you can restore the registry to an older version. It’s as simple as that!
Backing Up Registry Manually
- Click Start > type “regedit.exe” and press Enter.
- You might be asked to provide an admin password or a type of confirmation—if so, provide the necessary information.
- Once in Registry Editor, click the registry key you want to back up.
- Click File > Export.
- In the Export Registry File dialog box, choose the location you want to save the backup to. You’ll also be asked to give it a name.
- Click Save.
So, you’ve backed up your registry manually and you’ve made changes to it only for it to go wrong somewhere along the way. If you need to restore the previous version, it couldn’t be any easier…
Restoring a Manual Back Up
- Click Start > type “regedit.exe” > press Enter.
- If asked for an admin password or confirmation, then type the password or give confirmation.
- In Registry Editor, click File > Import.
- In Import Registry File dialog box, choose the location you saved your backup to and click Open.
Another method to backing up manually is creating a restore point, as we explain below…
Creating a Restore Point
- Click Start > type “create a restore point”.
- Select Create a restore point.
- Choose Create and follow the steps to create your restore point.
So, you’ve got your restore point sorted—what happens when you want to restore your registry?
Restoring from a Restore Point
- Click Start > type “create a restore point”.
- Select Create a restore point.
- Choose System Restore.
And that’s all there is to it, really. Once you’ve tried out these solutions, you shouldn’t have to deal with those pesky pop-ups again!
Well, hopefully you’ll have solved the issue of display driver not responding with our handy solutions. Now you can go back to playing on your favourite games and surfing the internet—enjoy!


