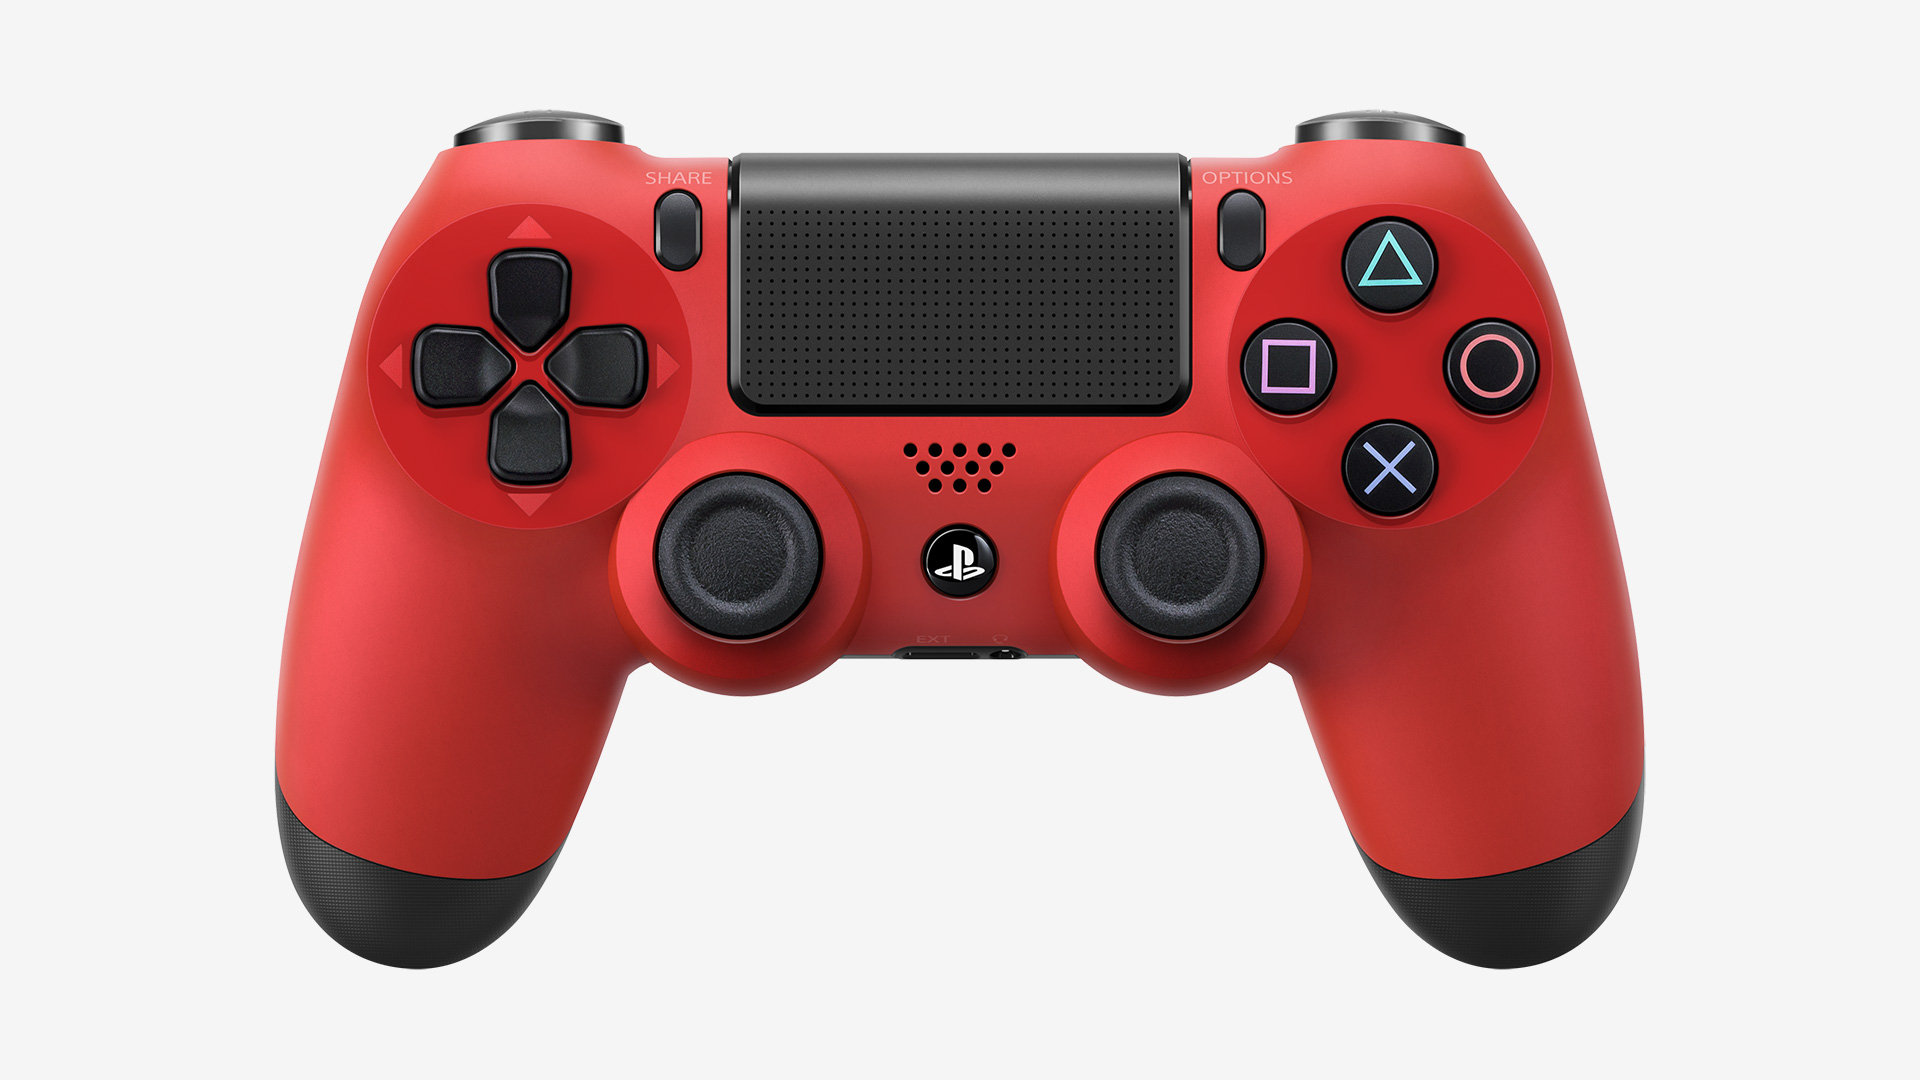
Calamity struck Frye Manor this weekend. While playing DOOM, I broke my second DualShock 4 R2 trigger. The trigger would stick, causing me to fire continually. There are actually a few times in the game where that is not a good thing, and this was the second trigger I had broken in three days. That game is intense! I looked at new controllers, but they are expensive. (After the gaming DTs set in, I did purchase a magma red DS4, and it is magnificent.)
As usual, Google had the answer to my problem. With a little YouTube video fueled courage, why not repair them myself? I am somewhat handy sometimes. Maybe. If it failed, I was no worse than before I began.
I ordered the parts from Amazon. (Here is what I ordered.) It included L2 and R2 triggers along with extra springs.
Keep in mind that this will probably void your warranty, and any damage you cause is your own. Disclaimer! Disclaimer!
- Remove the four screws on the back of the controller.
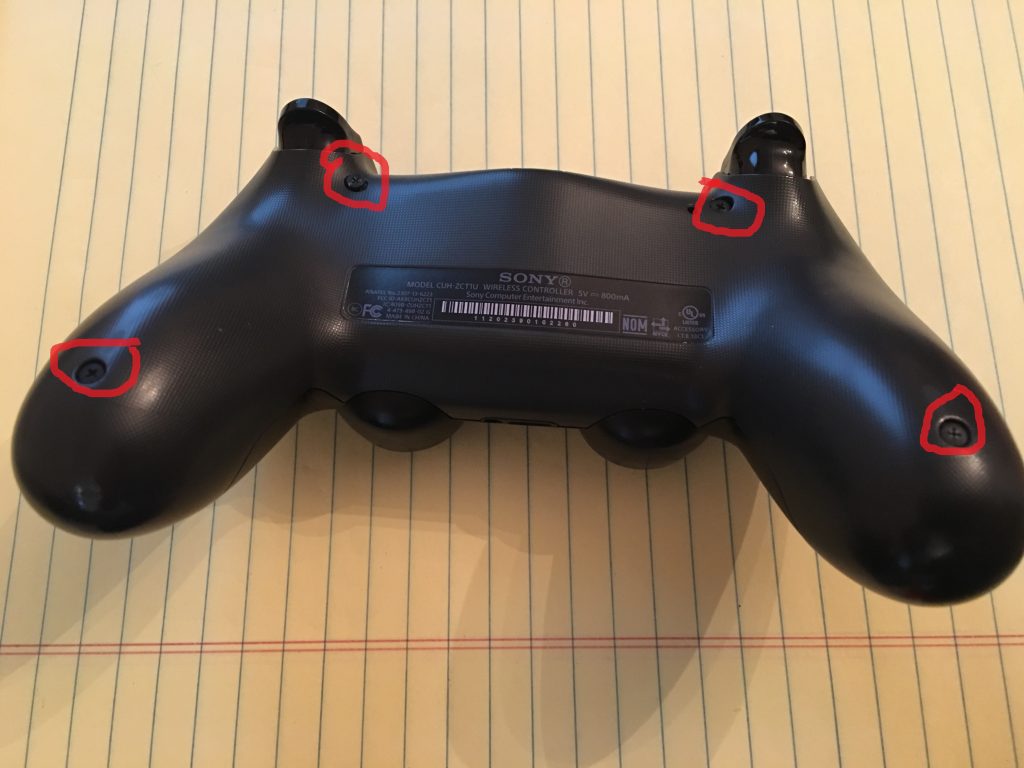
Made gracefully in MS Paint…
2. Gently squeeze the “handles” of the remote to cause the top and bottom to separate.
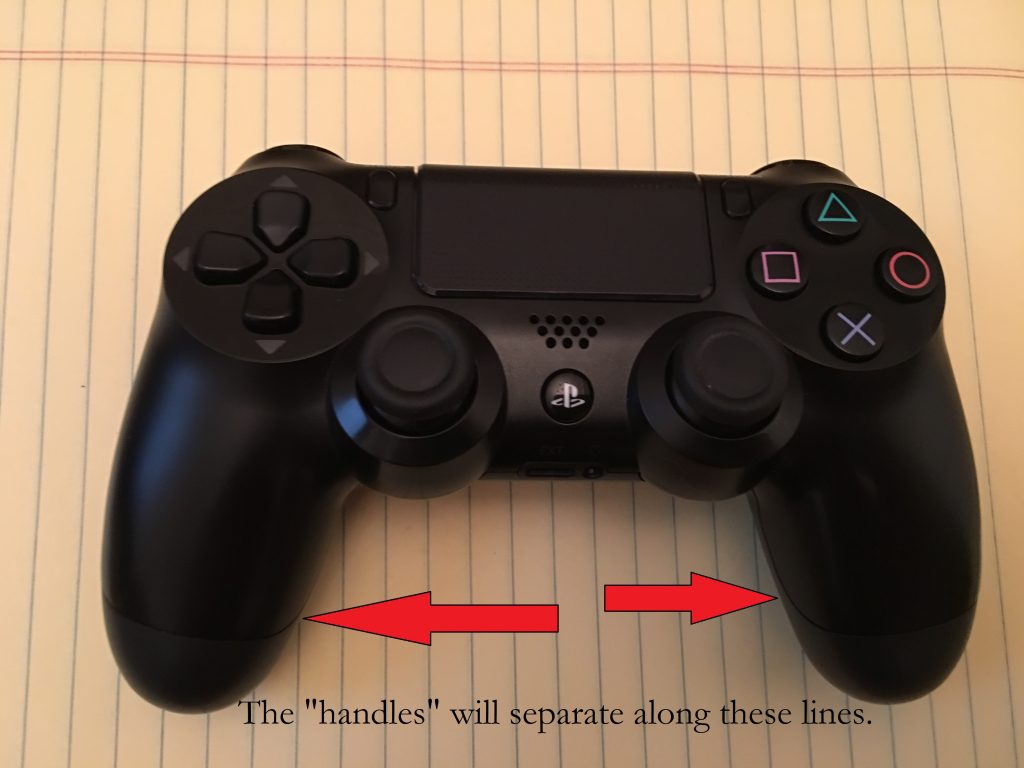
What? Photoshop is too expensive for us…
3. Slowly pull the top and bottom apart. (Or just pull it apart quickly and hope no pieces go flying like I did. Pro tip: it is not the best strategy.)
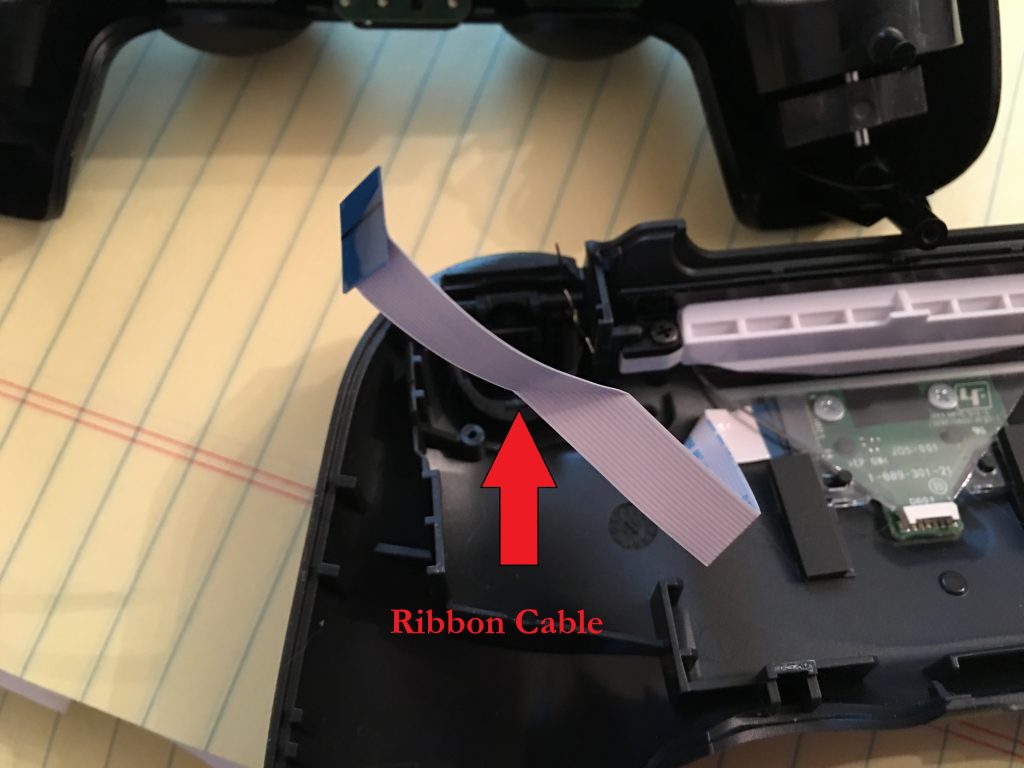
4. Disconnect the ribbon cable attaching the top and bottom by pulling it out of the slot in the top.
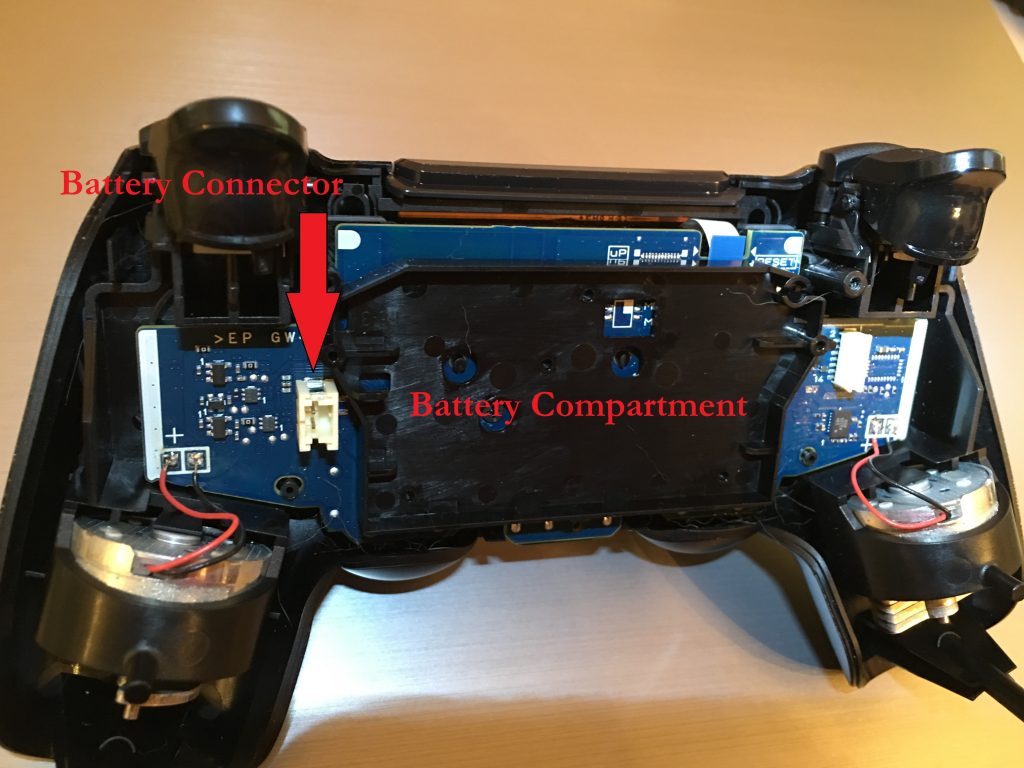
5. Disconnect the battery from the top half. It is in the way if you leave it connected.
6. Your L2 and R2 triggers may be attached to the top or bottom of the remote. Do not remove the remaining “good” trigger if it is attached to the top of the remote. It is good to see an example of what the finished result will look like, and we will be attaching them to the top anyway. If it is attached to the bottom, just push it through from the bottom while lifting up. It should pop out.
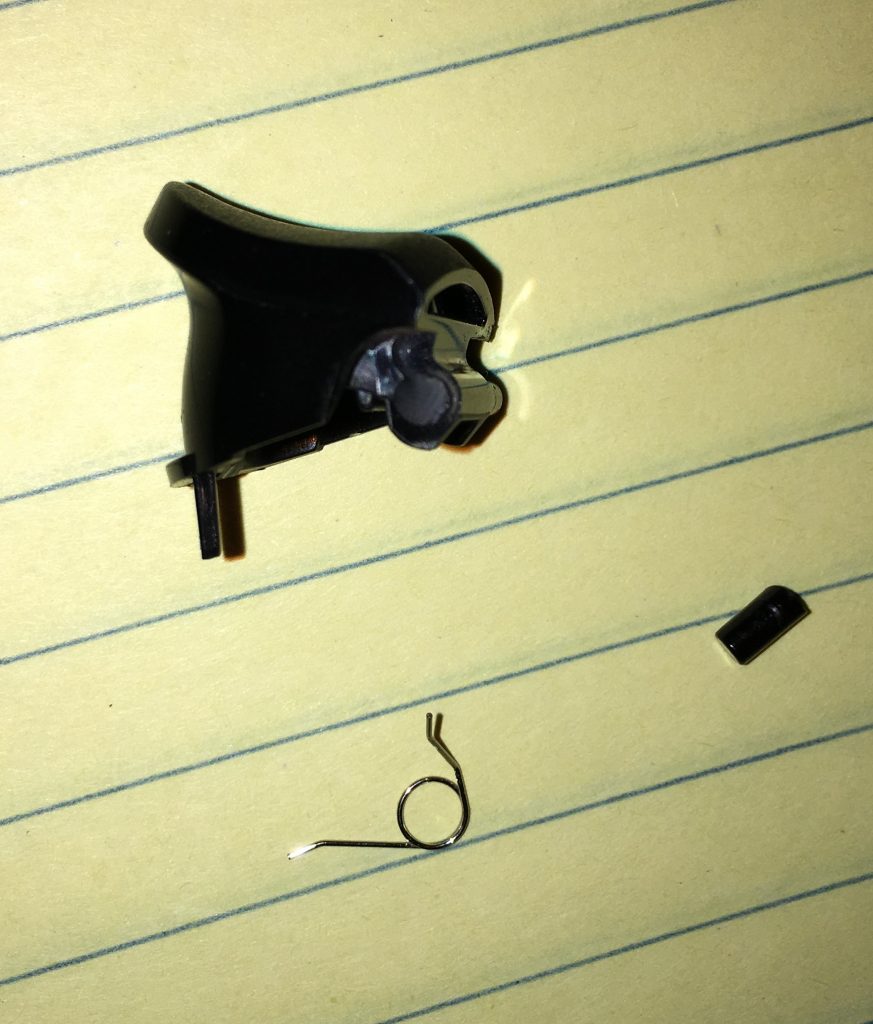
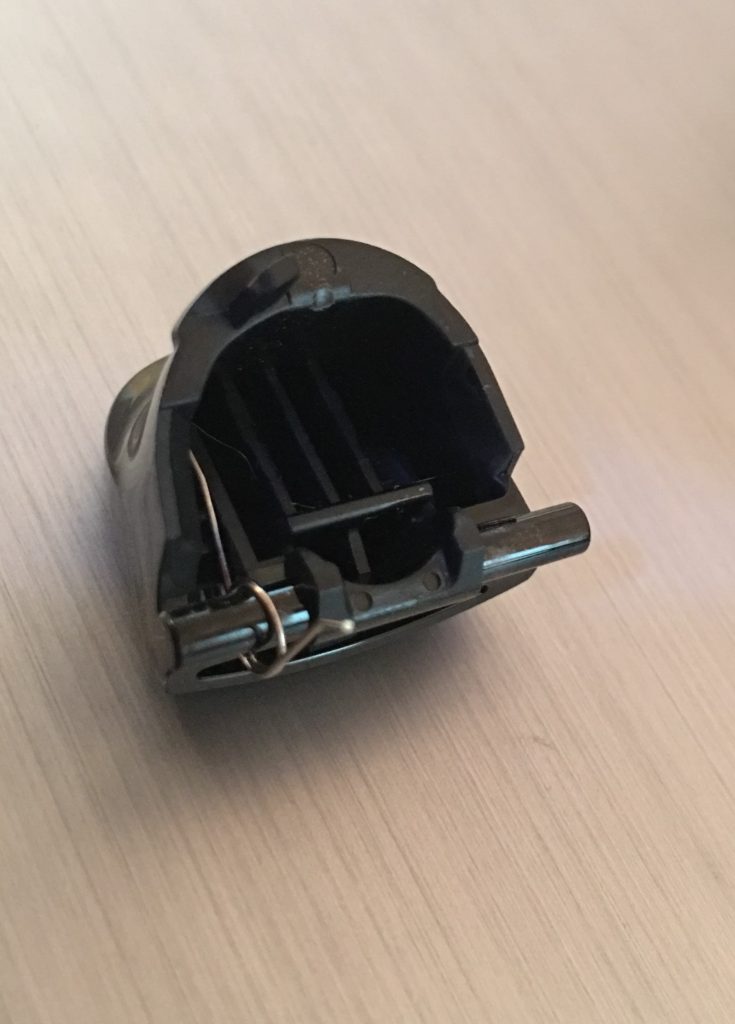
7. Remove the broken trigger from the top or bottom and any pieces from that trigger. The triggers break off a little plastic prong that connects them to the remote. My spring was also bent in one of my remotes.
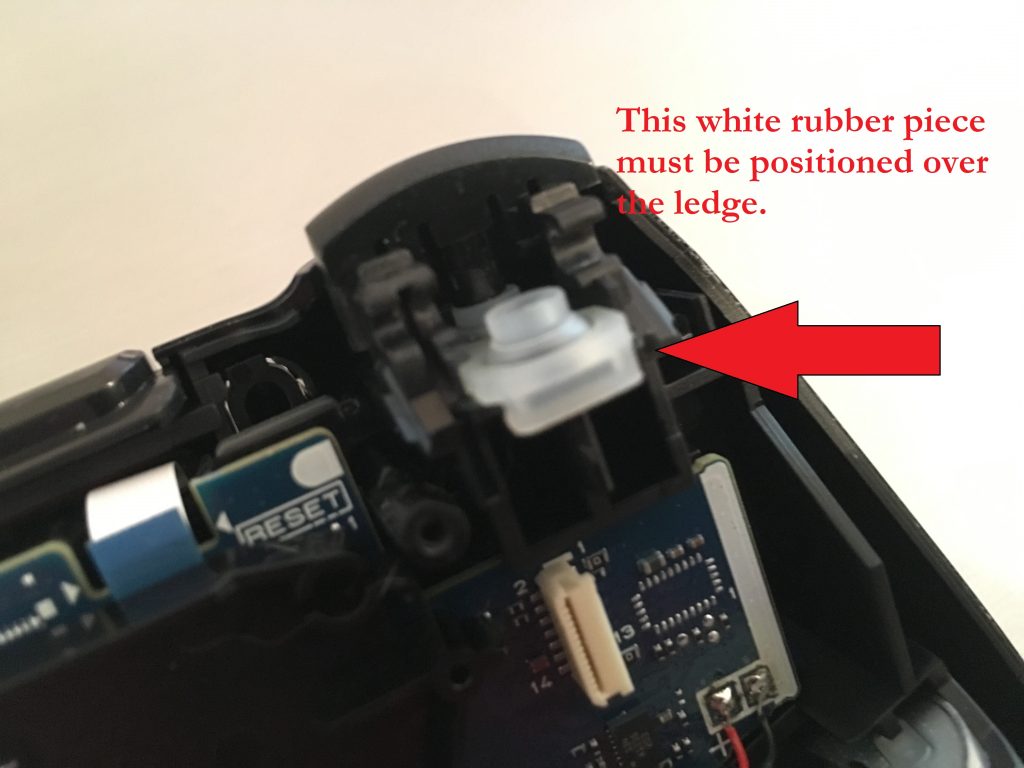
8. Make sure the white rubber button under the trigger is tucked over the ledge. It needs to stay in that position to work properly.
9. Take a new trigger and slide the loop of a working spring on the side that matches the slot in the top of the remote for that spring. The spring should look like an open V facing out from the trigger.
10. This next part can be tricky. The left side of that V will fit under the trigger, and the top side of the V will fit into the bottom of the slot on the top of the controller. (This video has a better visual of how it should be aligned.)
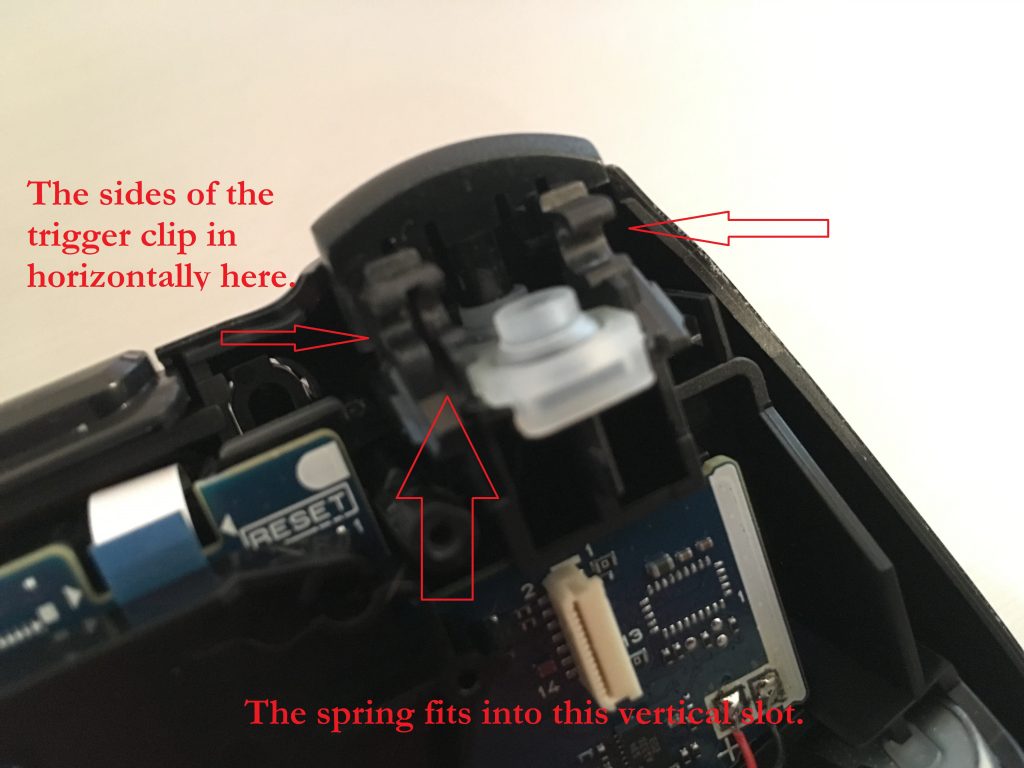 11. Snap the left and right sides of the trigger into position. If done correctly, the spring is mostly hidden, and the trigger pops back up easily.
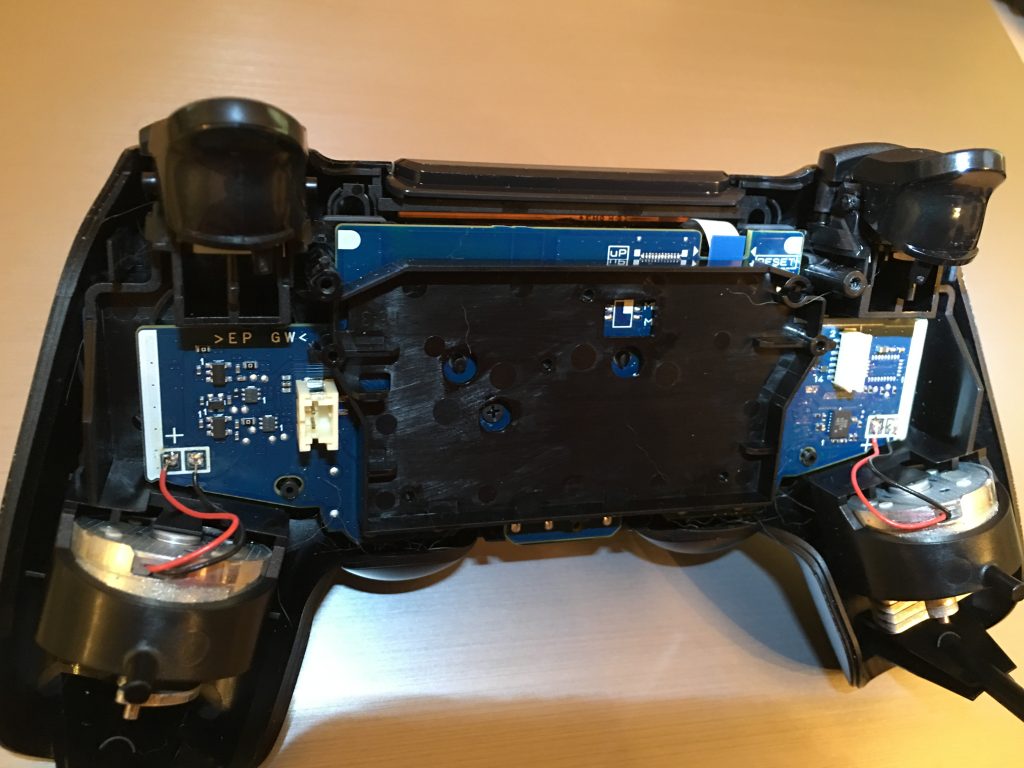
12. Once both triggers are installed into the top of the remote, try out the triggers. They should feel normal for a remote without a bottom half.
13. Reconnect the ribbon cable with the blue side facing toward the outside of the controller.
14. Reconnect the battery.
15. Place the top half of the DS4 upside down and slowly align the bottom to push those triggers through first. Holding both sides, push the pegs at the bottom of the “handles” up into the top of the remote.
16. Begin to snap the two sides together slowly, and push firmly on all edges to ensure it is seated correctly
17. Try all buttons to make sure they feel “right”.
18. Screw the case together, but do not over-tighten them. The screws will be lower than the surface of the controller.
19. Enjoy saving a ton of money!
If you have any tips that would help to save a fellow gamer a few units of their favorite currency, feel free to post them in the comments.