Elden Ring has several bosses, many of which can be challenging when you bump into them unexpectedly. One of these bosses is the Full-Grown Fallingstar Beast (that’s a mouthful).
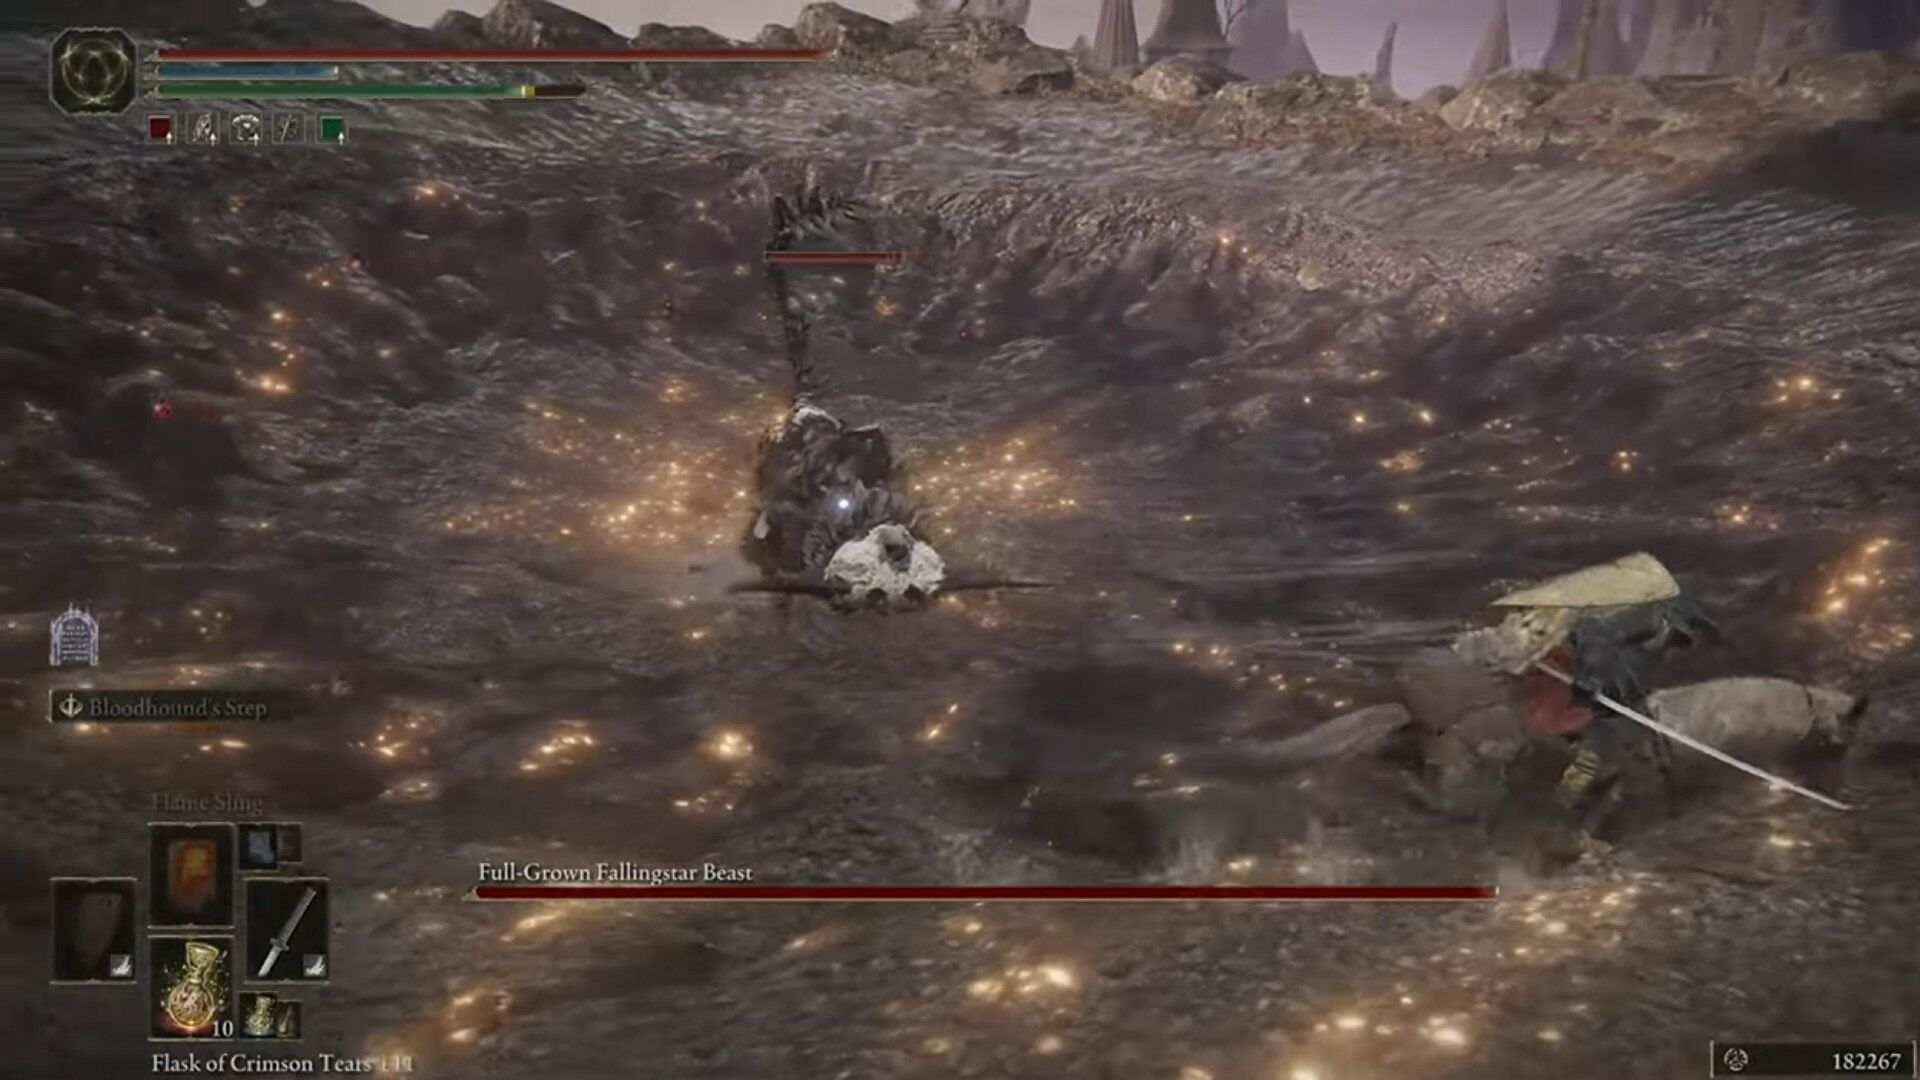
It has tricky melee attacks that are hard to read in battle. Combined with its difficult-to-dodge gravity magic, taking down this creature is challenging.
Fret not! We’re here to help you out.
Full Grown Fallingstar Beast Overview

The Full-Grown Fallingstar Beast is a tougher and trickier version of the one you may have fought at the end of the Sellia Crystal Tunnel dungeon or outside the Capital Outskirts.
Full Grown Fallingstar Beast is an aggressive melee boss that charges at the player like a bull in a China shop. Its melee attacks can chain into each other, including chaining into gravity magic.
Not only melee, but the Full Grown Fallingstar Beast also has a gravity beam, a deadly grab, and variations of a ranged rock fling attack. Making matters worse, it has phases that increase the number of moves it can combo with.
Do you need to fight Full Grown Fallingstar Beast?
Nope. The Full Grown Fallingstar Beast and the lesser versions called Fallingstar Beasts are completely optional. They do not need to be fought and can be avoided without consequence to the main story of Elden Ring.
However, Runes, items, and a colossal weapon await the player as a reward should they choose to take on any Fallingstar Beasts. The effort is worthwhile if you are brave enough to face these bosses.
Other Fallingstar Beasts?
That is right. There are three of these horrible things. Again, all three are optional and not needed to beat Elden Ring. The other two you fight are weaker than the Full-Grown Fallingstar Beast but as tough if you are unprepared.
This guide will help you defeat all three versions and explain their differences. Let us get down to business and see where you can find all three Fallingstar Beasts.
Elden Ring Full Grown Fallingstar Beast location
You can find the Full-Grown Fallingstar Beast at the tallest point of Mt. Gelmir, right before the Volcano Manor. The boss is located just southwest of the Ninth Mt. Gelmir Campsite Site of Grace.
Get to the boss arena by taking the Spiritspring (the windy jump pad Torrent can use) located by the Night Mt. Gelmir Campsite site of Grace. However, be careful; the boss will instantly engage you when you land near it. We will show you the proper pre-battle preparation before jumping in.
Also, below is a map to help show you where to go when you are ready to fight the Full-Grown Fallingstar Beast.

Elden Ring Fallingstar Beast locations
As mentioned above, there are two other Fallingstar Beasts. The first one you may encounter is at the end of the Sellia Crystal Tunnel in Caelid. It is fought in a small arena, much like the Full-Grown Fallingstar Beast.
You encounter this early, so you can understand how to beat the Full Grown Fallingstar Beast by fighting the Sellia Crystal Tunnel version. Ensure you are level 50 to 60 before going through Caelid.
A word of warning: there is no Stake of Marika near the first Fallingstar Beast, which means if you die, you must fight back through the Sellia Crystal Tunnel to reach it. (Please put a Stake of Marika closer, FromSoftware).
We recommend bolting through the tunnels to the boss if you fail to beat it. Do not waste all your Flask of Crimson Tears just trying to get there. Just run past everything; there is no shame in it!
Head to The Church of the Plague Site of Grace and go northeast to find the Sellia Crystal Tunnel.

The second is out in the open area of the Capital Outskirts on the Altus Plateau. This beast is a higher-level version of the Fallingstar Beast in the Sellia Crystal Tunnel version. To take this one on, we recommend being level 60 to 70.
Head east from the Altus Highway Junction Site of Grace to find the second Fallingstar Beast. Here is where you can find the monster on the map.

Pre-Fight Preparation
There are two ways to tackle all three Fallingstar Beasts you encounter: melee, magic, and a third cheese option for the Full-Grown Fallingstar Beast.
Of course, there is no way to beat any boss in Elden Ring. But for this guide, we will give you the most streamlined methods to ensure victory against the Full-Grown Fallingstar Beast and the lesser Fallingstar Beasts.
Here is how to prepare yourself for the crazy battles that await you.
Stat investment
Ensure you are between 80 to 100 soul levels (the higher, the better). The hike to the top of Mt. Gelmir, where the Full Grown Fallingstar Beast is difficult due to the tough enemies in your way.
There are a whole host of enemies you will need to fight to get to the Ninth Mt. Gelmir Campsite Site of Grace: Albinaurics, rotten stray dogs, spider hands, and even a 2nd NPC invasion in the form of Anastasia Tarnished-Eater.
In addition to the enemies, many ladders and areas are inaccessible by your steed, Torrent. This makes rushing past the enemies on horseback tricky.
Vigor and endurance
You will need your Vigor stat at 40 to 50 to survive this area. Although this may seem a lot, it is crucial to surviving the onslaught of attacks that the boss will hit you with.
This ensures that even if you’re caught off guard by gravity magic, you can still survive to heal yourself with a flask of Crimson Tears.
Now that HP is covered, the next stat we will focus on is Endurance. Endurance determines the size of your stamina pool and equipment load. A larger stamina meter means more opportunities to roll and avoid Full Grown Fallingstar Beast’s varying attacks. You should make sure your Endurance stat is between 30 and 40.
We recommend not putting any more into this stat as it soft caps around 50, so 30-40 is plenty to prepare you for the Full Grown Fallingstar Beast. Now that you have the base stats covered, let us dig deeper into the lesser Fallingstar Beasts you encounter.
Lesser Fallingstar Beast stat prep
Encountered earlier in the game, the lesser Fallingstar Beasts need less stat investment. However, be warned that they move just like their full-grown cousin. The Fallingstar Beast in the Sellia Crystal Tunnel requires levels 50 to 60 for this version of the boss. This means you will need a Vigor of 20 to 30 and an Endurance stat of 15 to 25.
For the Fallingstar Beast located in the Capital Outskirts, we recommend levels 60 to 70 to take it on. This means your Vigor should be between 25 to 35 and your Endurance 20 to 25. Now, look up the builds you will use against each of the three Fallingstar Beasts. We will first give you each build’s stat investment.
Melee and Magic build stats.
It is going to be an uphill battle for melee users. The rocky body of the Full Grown Fallingstar Beast and the lesser Fallingstar Beasts are resistant to Physical damage. As a result, using melee will be more of a marathon and less like a sprint.
We recommend putting as many points as possible into Strength or Dexterity, depending on your weapon. But don’t break the bank and sacrifice Vigor and Endurance, as survivability is paramount.
Also, ensure you have at least 10 to 15 points in Mind. This allows us to cast our upcoming weapon art several times throughout the battles. The high FP will be needed to cast our Spirit Ashes, which I will elaborate on later in the guide.
Magic builds have an easier time with the Full Grown Fallingstar Beast and its lesser versions. The bosses are vulnerable to Elemental damage, which makes magic super effective.
We also recommend having 40 to 50 Intelligence to maximize the damage of your spells. Just do not hurt your other stats trying to max this one out. Magic builds need Vigor to survive their lack of tankiness.
Get The Zweihander and The Academy Glintstone Staff
We are going with the Zweihander for this melee build. It has a long reach, low equipped weight, is easily accessible, and compliments a Quality build very well. The Isolated Merchant can purchase the Zweihander for 3500 Runes. You can find the merchant adjacent to the Isolated Merchant site of Grace.
We recommended getting the Zweihander leveled up to 15+ or more for the Full Grown Fallingstar Beast, 10+ to 12+ for the Altus Plateau version, and at least +9 for the Sellia Crystal Tunnel version.
The Academy Glintstone Staff, on the other hand, is one of the better high-end staff in the game at 10+. Get this staff up to 15+ for the Full Grown Fallingstar Beast.
The staff can also be farmed from the Sorcerers in Raya Lucaria Academy. Head over to the Church of the Cuckoo site of Grace. Head down the corridor and to the right through a doorway. There will be a lone Sorcerer in the room reading. You can easily kill him and run back to the site of grace to reset his position. Rinse and repeat till you get the staff. Be patient, and it will drop.
Get Lion’s Claw Ash of War/Glintstone Pebble and Glintstone Arc
The weapon art we went with for the melee build is the Ash of War, Lion’s Claw. It sends you flying before you come crashing down with your weapon. Paired with the Zweihander, you have a phenomenal reach to get in on the Full-Grown Fallingstar Beast. The Lion’s Claw hyper armor and poise damage are very high.
The poise damage allows you to get a riposte in on the boss every second use of the attack. You can obtain this weapon art in Caelid from the Lion Guardian in Fort Gael. Head south from the Fort Gael North site of Grace.

We are going with Glintstone Pebble and Glintstone Arc, two longer-range spells with quick-cast animations for the magic build.
Glintstone Pebble comes out fast and has a great animation recovery. Additionally, the wide arc of the Glintstone Arc easily hits the boss’ for large damage during its openings. While the Glintstone Arc will be used during openings, Glintstone Pebble can be cast during its melee attacks. Both spells are accessible to players before the Sellia Crystal Tunnel Fallingstar Beast.
If you started as an Astrologer, you should already have Glintstone Pebble and Glintstone Arc. It is okay if you built into magic from another class. We can obtain both spells from Sorceress Sellen for 1000 and 1500, respectively. Here is where to find Sorceress Sellen for the spells.

A case for no shields
We do not recommend using a shield on the Full Grown Fallingstar Beast or the lesser Fallingstar Beasts. These beasts quickly eat your Stamina in just a few attacks. This results in staggering you, leaving you vulnerable and open to a combo or head slam attack. If you have a build with a shield already, go with what you know. But be careful.
Remember, there is no right way to play this game!
Bring Fire Pots
Bring as many Fire Pots as possible; we will be using those to help defeat each version of the Fallingstar Beasts. Fire Pots are considered elemental damage, the Fallingstar Beast’s weakness. It takes just one Fire Pot, aimed at the head, to stop the Fallingstar Beast’s charge.
Get Demi-Human Spirit Ashes
You cannot use Torrent indoors (you probably already knew that), which means that the Sellia Crystal Tunnel Fallingstar Beast battle can be challenging for both builds.
We recommend using Demi-Human Spirit Ashes, which summons five Demi-Humans for 69 FP (nice). This Spirit Ash is great for drawing aggro from the Fallingstar Beast and the Full-Grown Fallingstar Beast, allowing players to safely engage the boss while it focuses on your Demi-Human Ashes. Get this Spirit Ash level to about +5 to ensure they survive the fights.
You must head south to the Impaler’s Catacombs on the Weeping Peninsula. You must clear the dungeon and beat the Erdtree Burial Watchdog at the end to obtain these Spirit Ashes. The boss is not difficult and can be felled early by the player.
Talisman choices
The Talismans we recommend for melee builds are the Green Turtle Talisman for increased Stamina recovery speed, the Dragoncrest Shield Talisman for the Physical damage negation, and the Erdtree’s Favor for HP, Stamina, and Equip Load. If you have a fourth slot, add whichever Talisman compliments your build.
Any armor will work for your gear if you are not over the medium equipment load. You may go with the Banished Knight set for its decent mid-late-game defense and stylishness.
Now, for those rocking a magic build, go with the Graven-School Talisman for boosting your sorceries, the Cerulean Amber Medallion for more FP, and the Cerulean Seed Talisman to get more mileage out of your Cerulean Flask uses.
The magic build will have you on Torrent throughout the fight for the Full-Grown Fallingstar Beast and the Fallingstar Beast in the Capital Outskirts. Make sure to bring Rowa Fruit with you to keep your steed healthy. Of course, have your Fire Pots handy regardless of your build.
Fight Strategy

All the Fallingstar Beasts have a great number of attacks that they implement. Many of these attacks are telegraphed by carefully reading the bosses’ movements. All three Fallingstar Beasts have the same attacks as well. The only variation between them is the level you face them at (and how hard they hit).
This means when it comes to combat, you will be using the same strategy for all three. You must also be patient as these boss fights teach players how to deal with hyper-aggressive boss battles.
Phase 1
Bull Rush and Fire Pots
The first attack is Bull Rush, an attack with multiple variations depending on what phase it is on. The beast will lower its head, and its jaws will open wide. It can use the attack up to three times. These charges have a lengthy wind-up animation, allowing you to drink potions. You will also want to use these openings to hurl a Fire Pot at its face.
Doing so will send it into the ground and vulnerable quickly. Use this moment to sling your Glintstone Arc in succession or, as a melee user, your Lion’s Claw attack to close the distance. Do not be too greedy, as the Full-Grown Fallingstar Beast recovers and attacks quickly.
Dodge the combo attacks
The next attacks are a combo series of all versions of the Fallingstar Beast perform. The first combo is a two-hit where the beast swings its head from right to left before quickly slamming its head downward, then lifting it and flicking rocks at the player. All three versions can also delay the second hit of this combo by leaving their heads in the ground before the rock volley.
The second combo is a 4-hit where the Fallingstar Beasts start with the same right-to-left motion with its head. However, this time, it will step backward while swinging its head again. The final part of the combo is a wide tail sweep that can cause Bleeding damage to you if it connects.
You can avoid the 2-hit combo at melee range by dodging the first attack, then pause before rolling forward to avoid the rock spray. This would be a great opening for a rolling poke against the Full Grown Fallingstar Beasts’ face. Rolling backward can potentially get you hit twice by the volley of rocks as the hitbox widens the further they go.
For the 4-hit, you need to anticipate by reading the side-to-side head motion that starts both combos. You would dodge the first hit normally, then roll backward three times consecutively to get out of range. You can roll a 4th time if you doubt you will avoid the tail.
Take advantage of your magic build
Magic builds can safely fire Glintstone Pebbles from a distance while going through either combo motion. Be careful, as the rock on the 2-hit combo can still hit you at range. Speaking of range, the Full Grown Fallingstar Beast can use the rock fling move independently from the combo move set. A melee user would need to roll just as the rocks come at you to avoid damage.
Watch for rock projectiles
Another ranged attack the Full Grown Fallingstar Beast and the lesser versions implement is a Rock Sweep, a quick spin with its tail that flings even more (you guessed it) rocks at you. Remember, with this attack, you are trying to dodge the rocks it sweeps up, not the tail itself.
The boss steps back on this move, so the tail misses you unless you move forward. Watch for the backleg stamping, which telegraphs this attack. As stated before, remember this attack as the rocks have a deceptive hitbox at longer ranges.
Watch the tail
The Full Grown Fallingstar Beast and the lesser Fallingstar Beast can also use a tail sweep that comes out as both a fast and slow version. The fast attack requires you to dodge backward, while the slow version is delayed. The delay on the slow sweep can deceive you into thinking it is an opening. Be patient and wait for the animation to complete before going in for damage.
Don’t get hit with the grab attack
For melee builds, be mindful of a Pincer Grab attack that the beasts have. This attack is easy to read as the boss rears back a bit, making a distinct clicking sound with its mandibles. This is your queue to dodge; it will come out quickly and deal heavy damage if you are grabbed. Wait for grab to miss before running in with your weapon art or hurling a Glintstone Arc.
Head Slam
The beasts will use two types of head slam attacks when you are within melee range. The first is a forward lunge and slams its head to the right. Dodge to your right (the boss’s left) to avoid being hit, but the attack recovers quickly and is difficult to punish.
The second attack is the boss’s backward step before smashing its head similarly. This attack is much easier to dodge as you can see the bosses move backward from the player before performing it.
Lunge and Backstep Stomps
While within melee range, the boss will rear backward on its hind legs before slamming into the ground with its forelegs. Dodge backward and do not try to punish this attack. It can do a rear leg variation of this attack if you are behind the beast and in melee range. The Full Grown Fallingstar Beast and the lesser versions can immediately start attacking after doing both versions of this attack.
Its final physical attack is a flying roll attack crashing down on the player. Dodge roll as the boss is about to land. This will ensure it lands beside you, and you can follow up with a punishment.
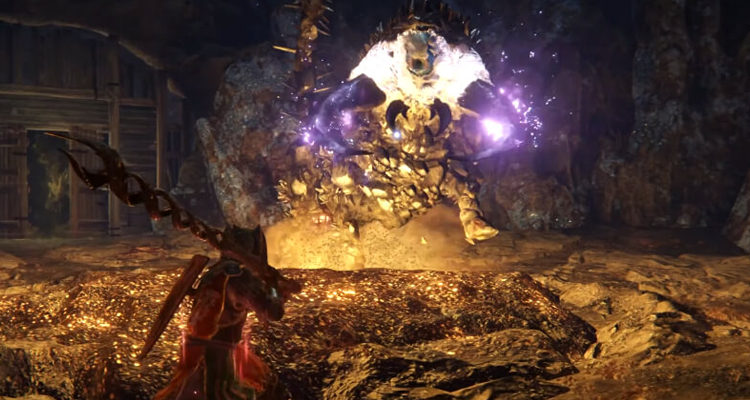
Phase 2
Once you have the Fallingstar Beast or the Full Grown Fallingstar Beast down to about 60%, their 2nd phases begin. It will always use a Reverse Gravity attack when entering its 2nd phase.
The attack comes in two stages: the boss glows purple and roars. Then, in the second stage, the beasts lift rocks and players caught around them up into the air before slamming them down for heavy damage. The first instance of this attack has the largest AOE, so use the long channel time to run out of range.
The Full Grown Fallingstar Beast and the lesser version can use this move multiple times throughout the 2nd Phase. Watch for it when the purple light surrounds the boss, and you will be fine.
This move is extremely hard to avoid in the Sellia Crystal Tunnel version of the boss fight. Try to hug the cave wall when you see it telegraphing the move in that fight.
Gravity Bolt
The next gravity attack is the Gravity Bolt, used during both phases. The boss raises its head upward, and its eyes glow purple. You will see a purple light under your feet, which is your signal to stop locking onto the boss. Sprint from the boss in a straight line.
The purple light tracks the player and summons a pillar of rock that can damage you. Sprinting allows you to avoid the first two bolts. The third is delayed as the beast roars and summons one last, larger pillar. Anticipate the attack with the roar before dodge rolling.
This attack has a long recovery and allows you to get off a Lion’s Claw to punish. Alternatively, as a magic user, you can run with Torrent, easily avoid the gravity bolt, and fire your Glintstone Arc. Watch the last gravity bolt, as Torrent has a larger hitbox than the player character.
Bull Rush 2.0
The final gravity attack that the Full Grown Fallingstar Beast and the lesser versions have is a variation of its Bull Rush ability in this phase. During the Bull Rush, it can change the final charge into a channel of a gravity beam attack. The bosses will fire a beam in a sweeping motion toward the player.
Whether melee or magic, you need to get to the back of the boss as quickly as possible. I recommend summoning Torrent to escape for the Altus Plateau Fallingstar Beast and Full Grown Fallingstar Beast. The beam deals MASSIVE damage and can potentially one-shot you. The beam tracks toward the player, so running to the back of the boss ensures that you’ll be in the safest place. From here, you can punish the boss while it is trying to finish its attack.
This move is difficult to avoid in the Sellia Crystal Tunnel version of the Fallingstar Beast boss battle. The arena is small, and you do not have Torrent. When you see the boss Bull Rush, hurl your Fire Pots at its face when it charges. This will ensure that you stop the beam and get in damage while it is down.
Patience is paramount
You must be careful and pick the right moves and moments to punish wisely. An example of this is not choosing to punish on the 4-hit combo or the Front leg/Rear leg stomp at melee range. The attacks have no recovery and result in follow-up attacks. When you doubt the bosses’ recovery animation, simply wait.
Waiting will allow you to see an attack you recognize, then go in for the punishment. Play it safe, and do not be greedy with your openings.
Magic users, of course, would need to be mindful of their distance from the boss. Ranged threats are easier to read but can devastate a squishy magic user if you misread them.
The variation and move chaining can make the Full Grown Fallingstar Beast and the lesser Fallingstar Beasts a battle of attrition. Remember: patience is key.
Related: How to Beat Lichdragon Fortissax in Elden Ring
If you are ready to give up on this boss, you can circumvent the Full Grown Fallingstar Beast version. Enter the Cheese Method.
Can you cheese Fallingstar Beast?
This would not be a FromSoftware boss if there was no way to cheese it. Enter our old friend: Poison Mist. This tried-and-true spell can help us yet again with Dark Souls. There is a special note, however. You can only use this strategy on the Full Grown Fallingstar Beast boss fight.
Cheese only works on Full-Grown Fallingstar Beast
The normal Fallingstar Beasts cannot be cheesed with Poison Mist.
The first Fallingstar Beast encountered in the Sellia Crystal Tunnel will immediately aggro you once you enter the boss room. The second one in the Capital Outskirts will only spawn when you touch the crater’s lip, immediately making the boss aggressive toward you.
It will stay aggressive even if you avoid the Capital Outskirts Fallingstar Beast. When you try to sneak up on the boss, it will start attacking you. You will have an easier time with the Capital Outskirts Fallingstar Beast as you can summon Torrent.
Unfortunately, you will have to rely solely on the help of your Spirit Ash for the Sellia Crystal Tunnel Fallingstar Beast boss battle. For this reason alone, it is arguably the toughest Fallingstar Beast when fought earlier in your playthrough.
Stat Preparation and Poison Mist
You must dip into Faith for this build and get the stat up to 12. Since we will be using a lot of casts to poison the Full-Grown Fallingstar Beast, we will need at least 25 into Mind. That allows us to get the most uses of Poison Mist, which costs 18 FP to cast. Now for the spell itself.
Now, you just need a sacred seal to cast your newfound Incantation. If you started as a Confessor or Prophet, you already have the Fingers Seal. You can purchase the seal from the Twin Maiden Husks if you do not have one. Head to the Roundtable Hold and buy it for 800 runes.
Cheese Method Strategy
Once your arsenal is ready, head to the Spiritspring below the Full Grown Fallingstar Beast arena. We will be landing on a particular ledge to avoid the boss.
Leap onto the Spiritspring and turn right as you fall. We want to land on the ledge on the crater, which will avoid the Full Grown Fallingstar Beast’s aggro. If you land too close and the boss sees, you can save and quit to try again.
Once there, jump off Torrent and sneak your way around the beast. Once you get behind the Full-Grown Fallingstar Beast, cast your Poison Mist. The spell will poison the boss and deal 2500 with each bout. Do not cast multiple Poison Mists, as the spell does not stack more poison.
Wait for the first cloud to go away before casting the second. This will save you FP and Cerulean Tear Flask usage. There you have it! It’s something to use if you get stuck on this boss. Let us see the reward received for the long, hard-fought battle against all three Fallingstar Beasts.
Rewards
Here is the breakdown of the rewards for each of the three Fallingstar Beast bosses:
Fallingstar Beast (Sellia Crystal Tunnel) Rewards
- 7,600 Runes (22,800 on NG+)
- Somberstone Miner’s Bell Bearing – Can be given to the Twin Maiden Husks in the Roundtable Hold for additional items to purchase.
- Smithing Stone
- Somber Smithing Stone 6
- Gravity Stone Chunk x4 (NG) and x10 (NG+) – Consumable item that uses FP to cause a gravitational explosion
Fallingstar Beast (Altus Plateau) Rewards
- 11,000 Runes
- Somber Smithing Stone 5
- Gravity Stone Fan – Consumable item that uses FP to emit a fan-shaped gravitational shockwave.
- Gravity Stone Chunk
Full Grown Fallingstar Beast Rewards
- 21,000 Runes (63,000 on NG+)
- Somber Smithing Stone x5
- Smithing Stone 6
- Fallingstar Beast Jaw – A Colossal Weapon with D scaling in Strength, D in Dexterity, and E in Intelligence. This weapon is a true beast (no pun intended), as it works great with mid-max builds. It also deals a combination of strike and pierce damage, which no other weapon in the game does.
We hope that this extensive guide will offer tons of help for anyone struggling with these ferocious beasts. We’d also love to hear from you if you’ve uncovered some secret formula to take down these bosses.