
Building a base and installing defenses is not enough; you must understand the game’s structural support to maximize your fortress’ durability.
Zombies and mutated creatures in 7 Days to Die have a simple pathing system. If all access points are blocked, the zombies will attack the building or weak objects near you, such as the main foundation, to bring down the building and reach you.
To avoid this, you must understand how structural support in the game works. This will help you build and install durable defenses that zombies can’t penetrate.
Table of Contents
How Structural Support Works
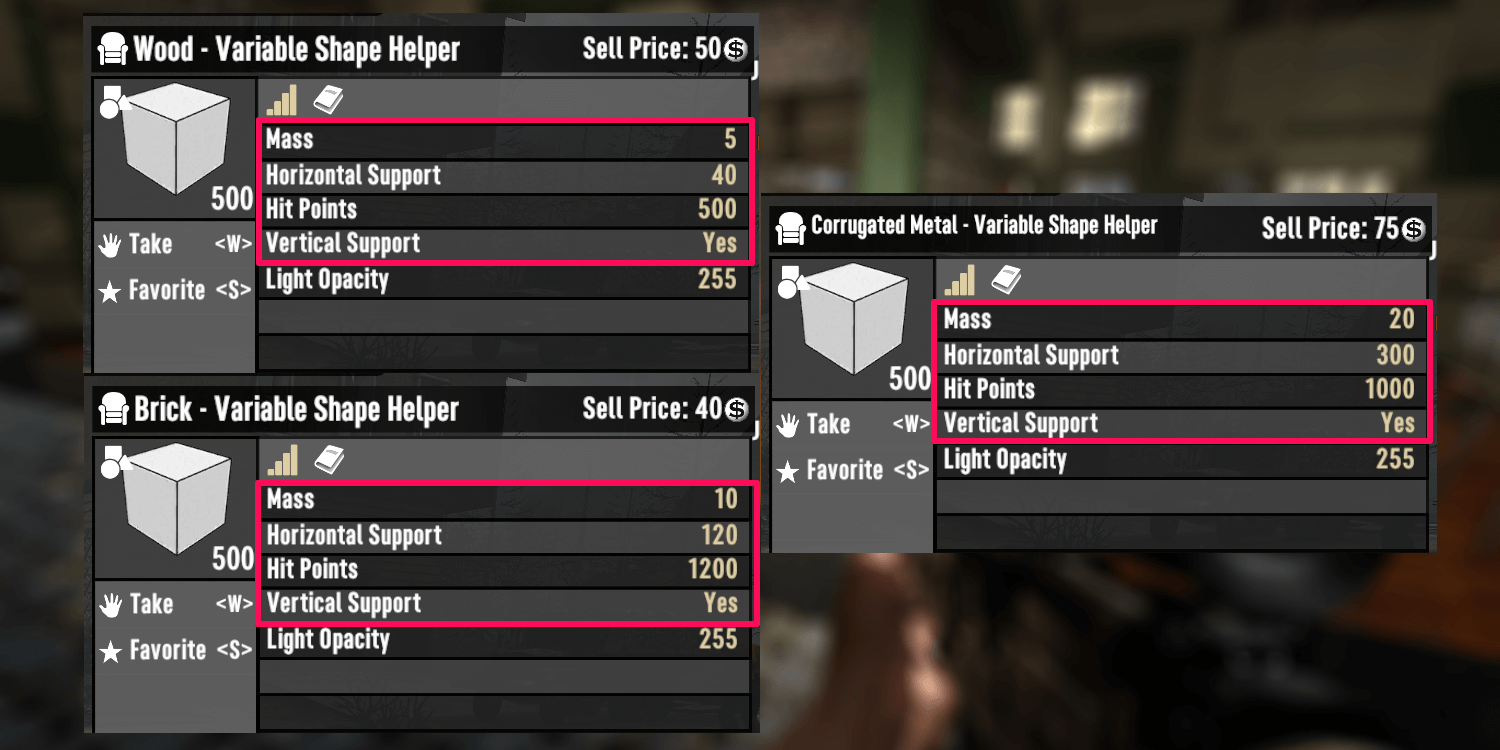
In 7 Days to Die, if you check the building block stats in your inventory (wood, brick, metal, etc), you will see that it has mass, horizontal support, and hit points. The horizontal support indicates how much block mass it can hold.
For example, the wood block has a mass of 5 with horizontal support of 40, which means it can hold 8 wood or 4 brick blocks horizontally from the main block.
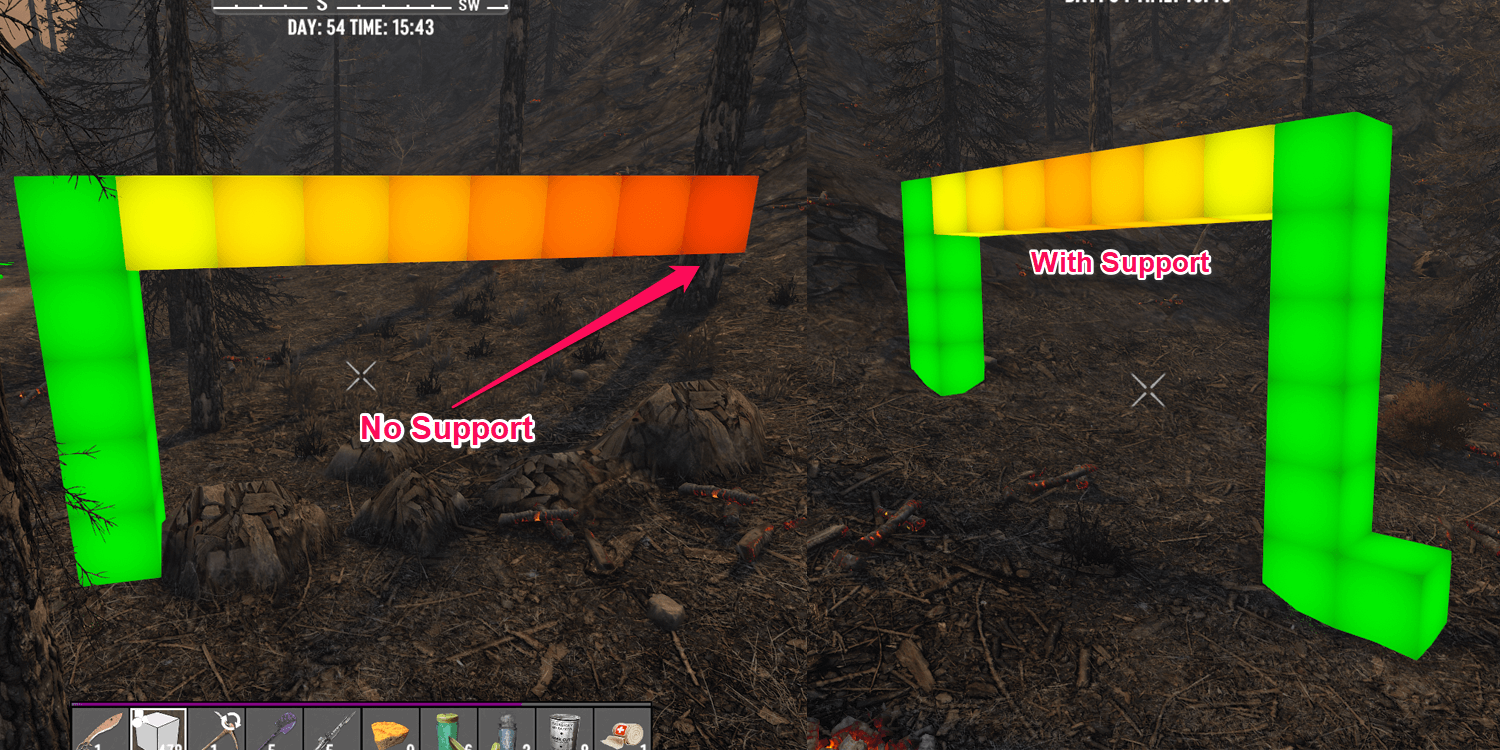
Weight is everything when it comes to building in 7 Days to Die. With each block you place, the block weakens. What will happen if you exceed the horizontal support range? The result is obvious. Your building will collapse from the weight.
As an example shown in the images, green stands for sturdy, while red indicates weakness. Weak areas of the structure are prone to collapse, which can be remedied by adding a foundation underneath it.
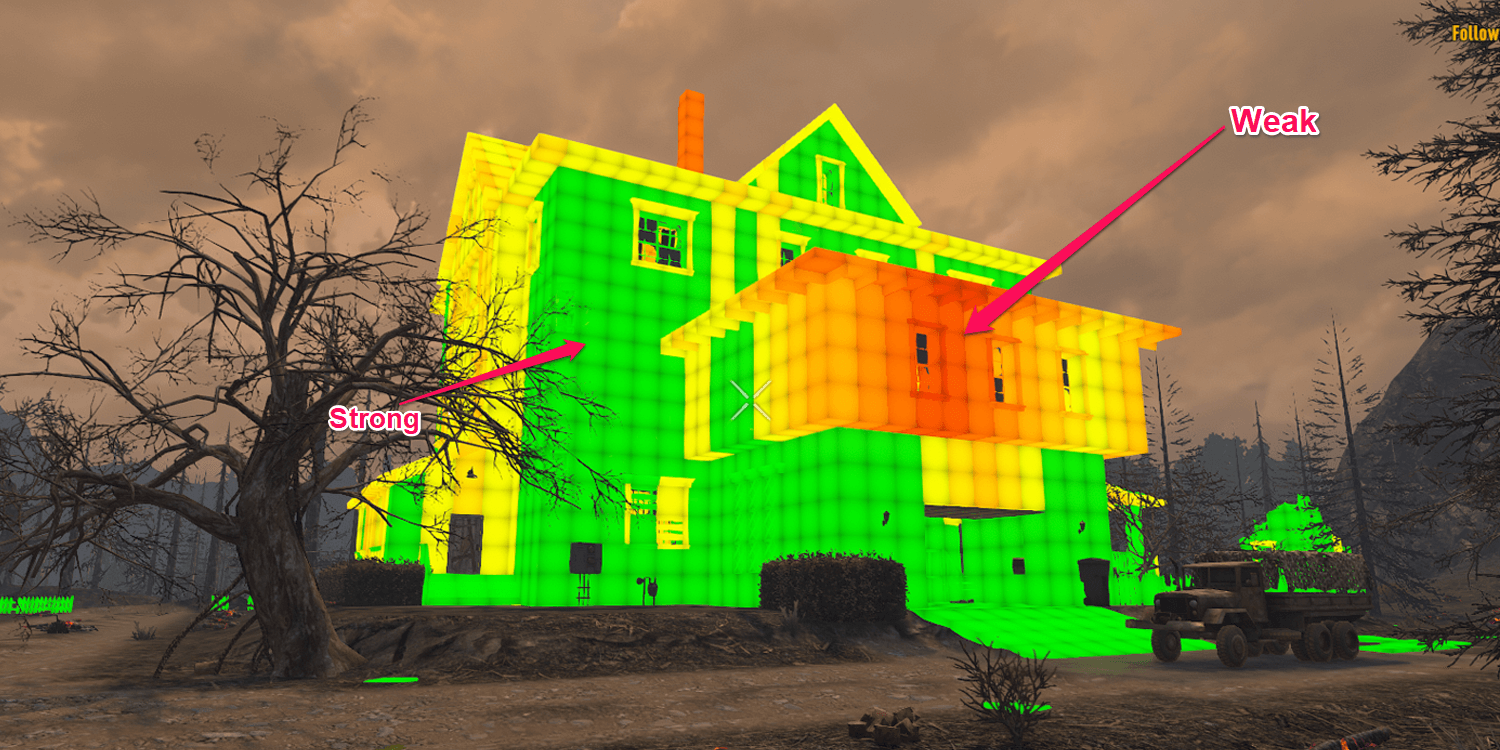
Keep in mind that Zombies attack foundations and walls if they can’t find a pathway to reach you. Once the lower part is destroyed, there’s a chance that the upper section of your base will collapse. It’s best to anchor more durable support blocks to increase the survivability of your building.
Upgrading Blocks
Fortunately, upgrading the building’s foundation and walls is easy. Point at the foundation or wall you wish to upgrade using an Axe, Hammer, or Nail Gun, then press the right mouse button. You must have enough upgrade resources in your inventory to make this work.
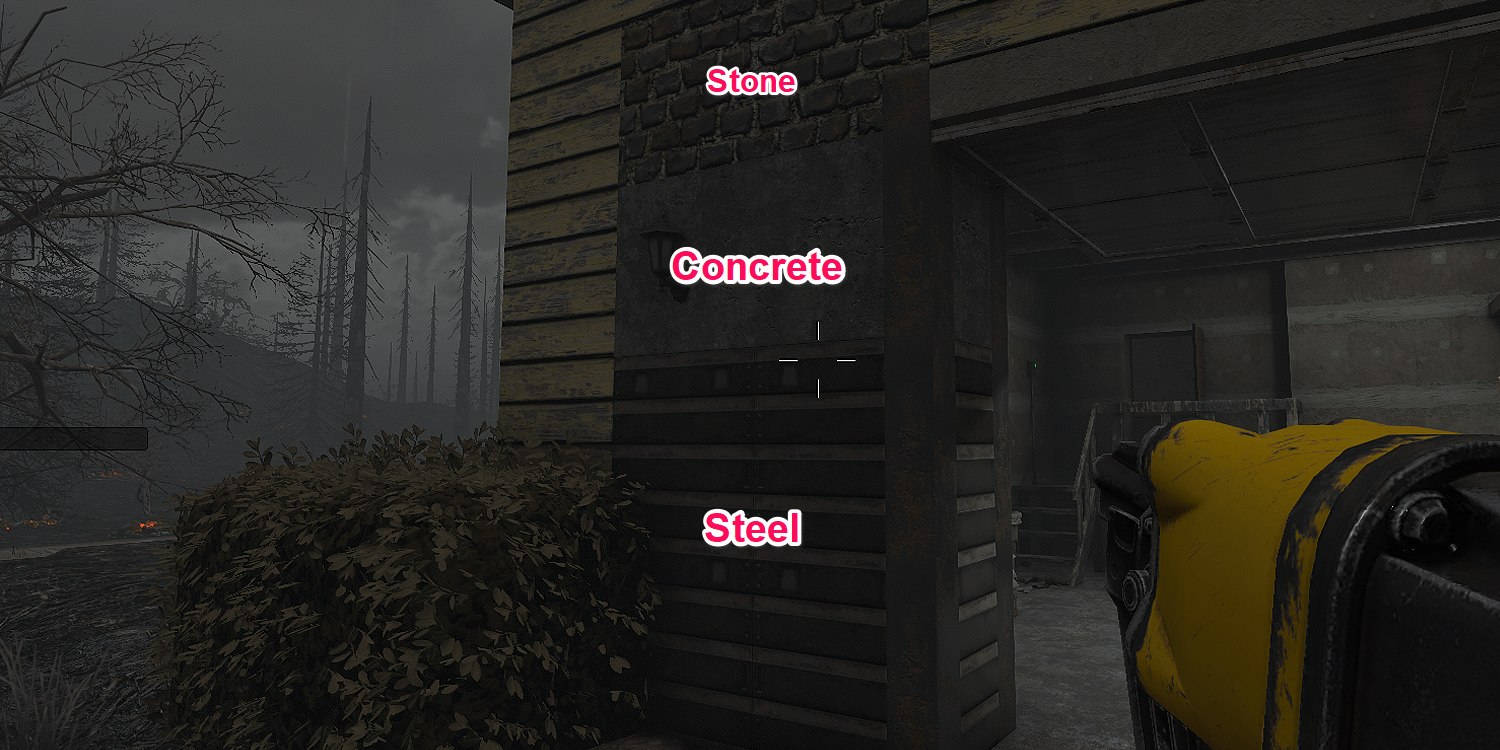
Since upgrading blocks means an increase in weight, upgrading the lower part of your foundation first is advisable to avoid collapse. The best approach for a strong base is to use Steel Block as your support foundation.
With its impressive 10,000 Hit Points and 75% Explosion Resistance, your building will survive a long blood moon horde. The only downside is creating Steel Block takes a lot of resources.
How to See Building Stability
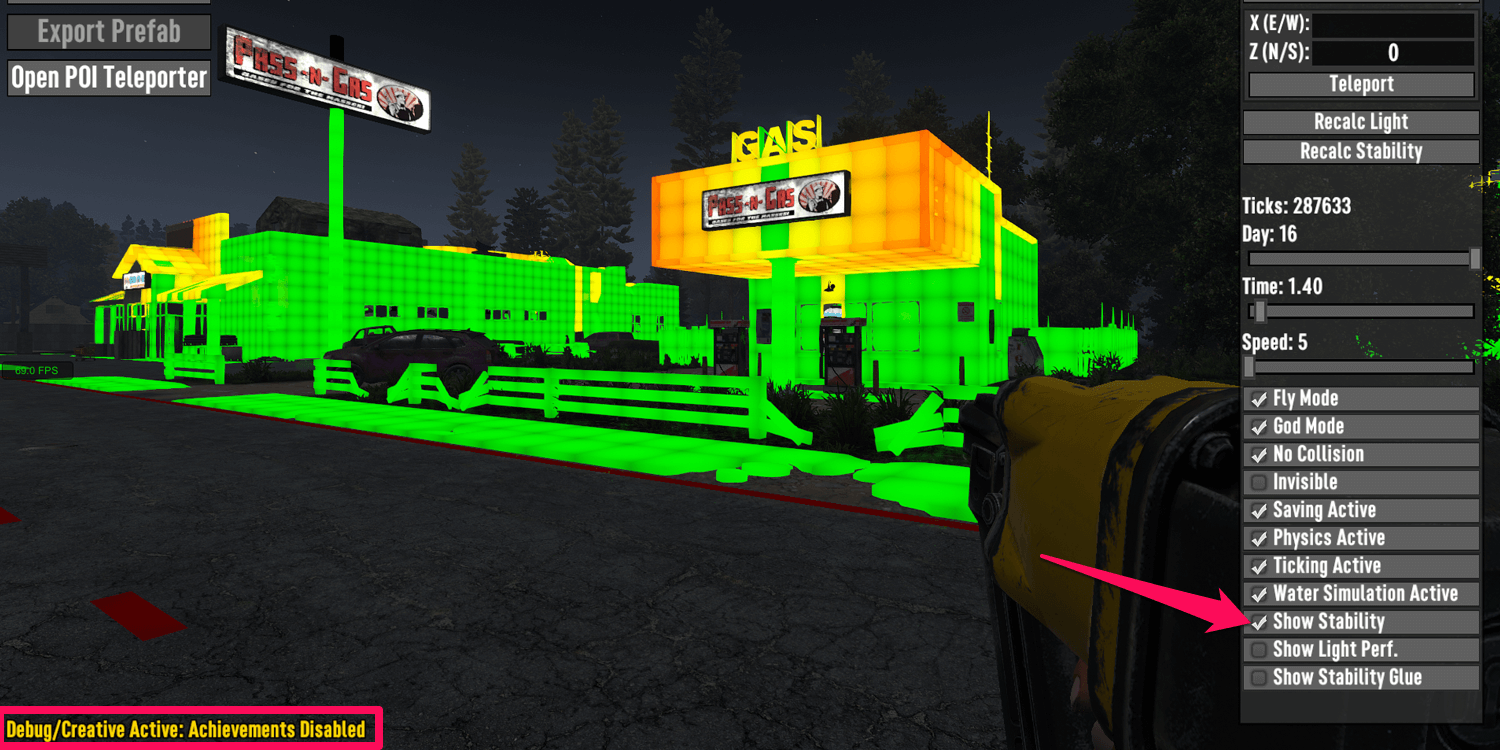
You can activate this on a PC. Be warned: activating debug or creative mode removes your ability to collect achievements. To see building stability, Press F1 on your keyboard then type the command DM. Once this is activated, Press ESC to open the Debug Window. Tick the box Show Stability to activate, then untick it if you wish to switch it off.
Conclusion
Building multiple foundations increases your chances of survival in the game. Since zombies will randomly attack different areas of your building once all access points are sealed, it’s better to leave one access open and construct an elevated pathway filled with traps. This tactic lets you control their pathing, directing them through a gauntlet of traps and turrets.
READ MORE: How to Play Crossplay in 7 Days to Die