New to Minecraft brewing? We will discuss everything you need to know about brewing potions in Minecraft.
Brewing potions in Minecraft can be tricky and confusing, especially if you are new to the game. But it is a valuable skill that can help you survive your way to the end game. Therefore, learning how to brew potions is essential. Brewing can create a wide array of consumable potions that will imbue the player with certain status effects and give them buffs such as healing, strength, invisibility, etc.
However, brewing potions is not that easy as they require special ingredients to create, and some of the potions will require additional ingredients to enhance the potion effects and duration. In this Minecraft guide, we’ve broken down what ingredients and materials you will require, including a list of all the potions you can brew and their corresponding descriptions in the game. We will break down the key equipment and ingredients you will need to start on your potion-brewing journey in Minecraft.
Brewing Equipment Checklist

There are various materials you will need before brewing your first potion. We’ve listed the fundamental items required to brew potions in the game. Note that the items listed below are all required and should be obtained before brewing Minecraft potions.
- Brewing Stand: The brewing stand is the core of potion brewing. You will use this to add and combine ingredients to create a potion. The brewing stand is also considered a villager cleric’s job site and can be found inside a village church. Alternatively, craft a brewing stand using one blaze rod and three cobblestones.
- Cauldron: The cauldron holds water for the player’s convenience. Unless you have a water source for brewing nearby, using the cauldron is highly recommended. Cauldrons can be generated in village tannery houses and be crafted using seven iron ingots.
- Blaze Powder: The blaze powder is your main fuel source for brewing. You can craft blaze powders using blaze rods dropped by blazes usually located inside the nether fortress of the Nether. This is highly required to start brewing potions.
- Glass bottle: This potion container will be used as a water source to create a water bottle.
- Water bottle: This is the base of all potions in the game. This can be created by filling a glass bottle with water from a cauldron or another water source.
How to Use a Brewing Stand in Minecraft
Here is a step-by-step guide on how to use a brewing stand in Minecraft:
- Using glass bottles, right-click on a cauldron or a water source to fill it with water. Make sure to fill up around 1-3 glass bottles for your first round of brewing.
- Open the brewing stand menu and place the water bottles in three bottom slots.
- Fill the topmost slot with the base ingredient for the potion. Refer to the ingredients list for potion brewing.
- Place the blaze powder in the left slot to fuel the brewing stand and begin the process.
- Once the potion is complete, remove the potion from the slot and click and drag it into your inventory to complete the brewing process.
- Repeat the steps until you obtain your desired potion.
How to Brew Potions in Minecraft
1. Base Ingredient

The base ingredients are the first and main ingredients to be added to the brewing stand. Every potion requires a base ingredient to determine its type before brewing it into the final potion. The list below shows the base ingredients you will need to create which potions are in the game. The modifier effect will show what effects will be added to the potion when using that specific ingredient.
| INGREDIENT | POTION TYPE | POTION MODIFIER EFFECT |
|---|---|---|
| Nether Wart | Awkward Potion | None |
| Redstone Dust | Mundane Potion | Extends Duration |
| Glowstone Dust | Thick Potion | Enhances Potency |
| Fermented Spider Eye | Potion of Weakness | Reverses a Potion’s effects |
| Gunpowder | Splash Water Bottle | Explodes on Impact |
| Dragon’s Breath | Lingering Water Bottle | Explodes on Impact and Leaves a Damaging Cloud |
You will add the base ingredient to a water bottle to turn it into one of the potion types listed above. This is a crucial step and should not be skipped when brewing potions in Minecraft.
2. Secondary Ingredient

The secondary ingredient is an ingredient that is added after the base potion is created to transform the potion into a potion with status effects. This ingredient will also influence what kind of potion will be created.
| INGREDIENT | POTION TYPE |
|---|---|
| Sugar | Potion of Swiftness |
| Rabbit’s Foot | Potion of Leaping |
| Blaze Powder | Potion of Strength |
| Glistering Melon | Potion of Healing |
| Spider Eye | Potion of Poison |
| Ghast Tear | Potion of Regeneration |
| Magma Cream | Potion of Fire Resistance |
| Pufferfish | Potion of Water Breathing |
| Golden Carrot | Potion of Night Vision |
| Turtle Shell | Potion of the Turtle Master |
| Phantom Membrane | Potion of Slow Falling |
Once you have your base potion, add the same potion to the brewing stand along with the second ingredient of your choice. Note that there is a specific base potion compatibility for each secondary ingredient. Refer to the image from the Minecraft Wiki site below for a complete guide:

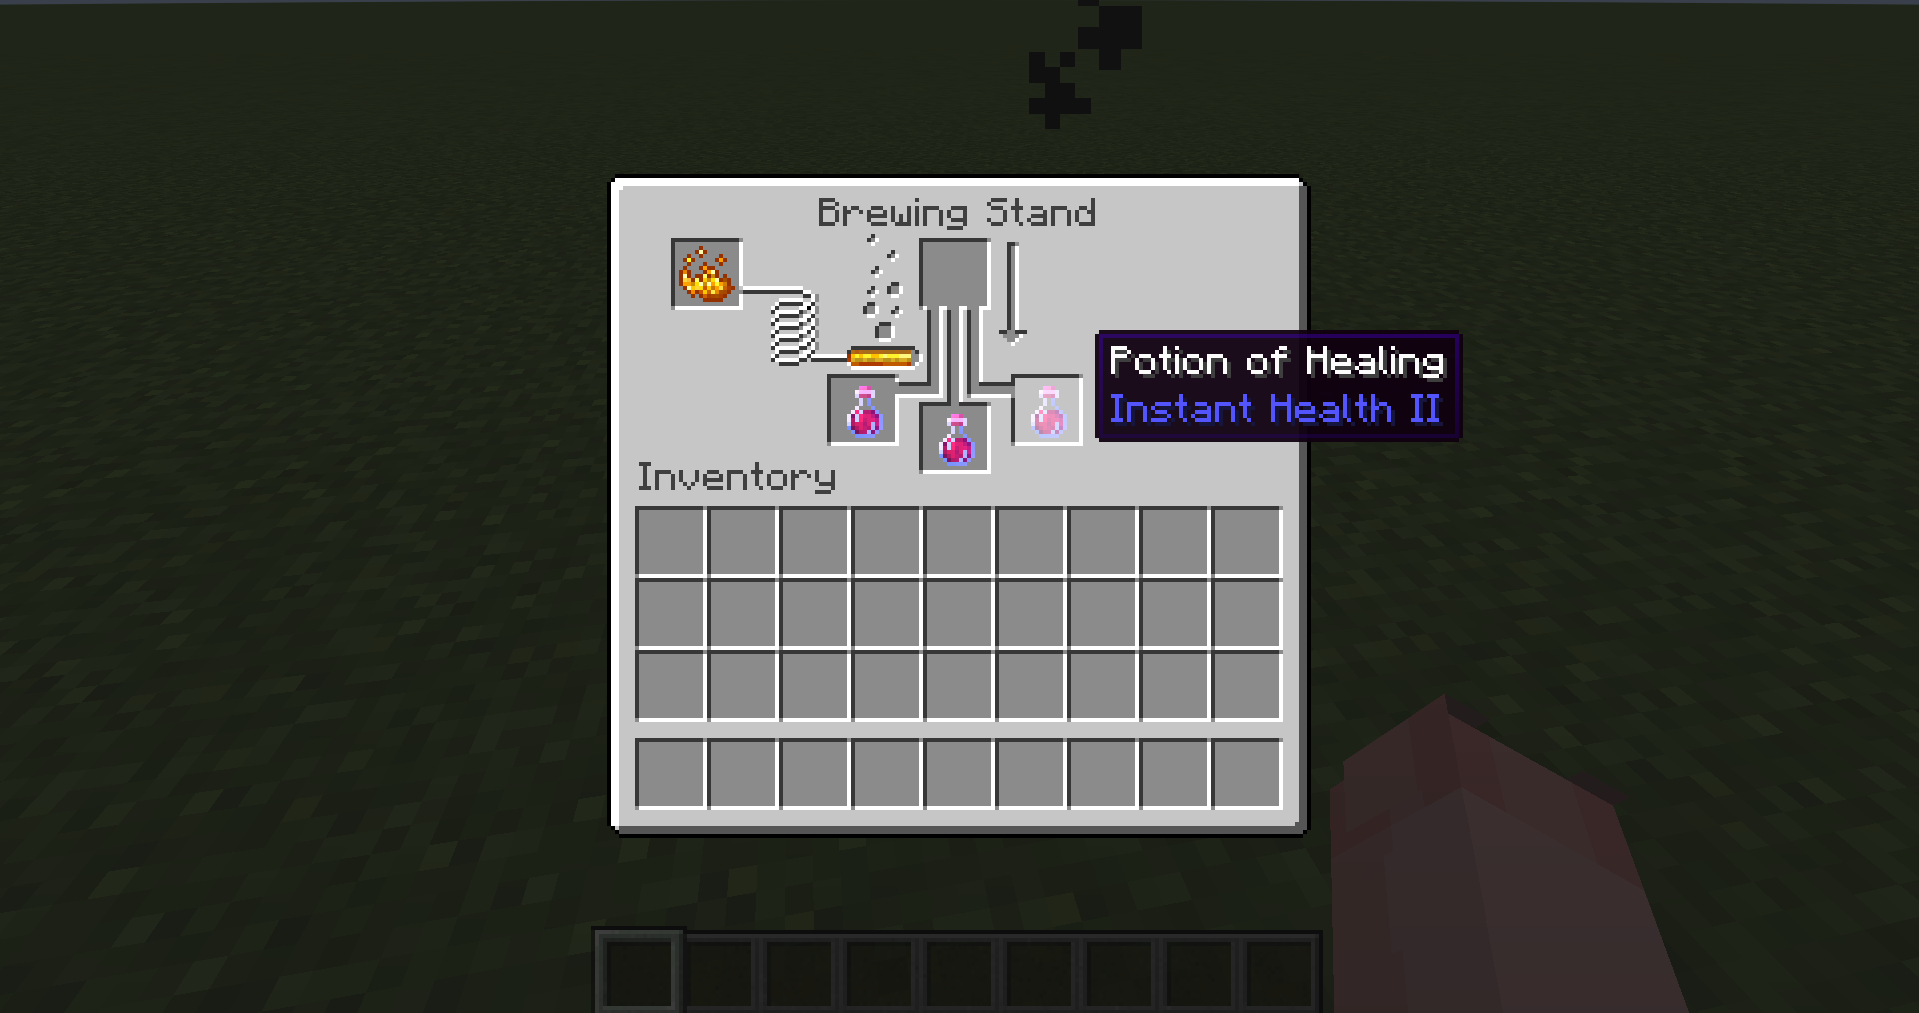
Example of the Process
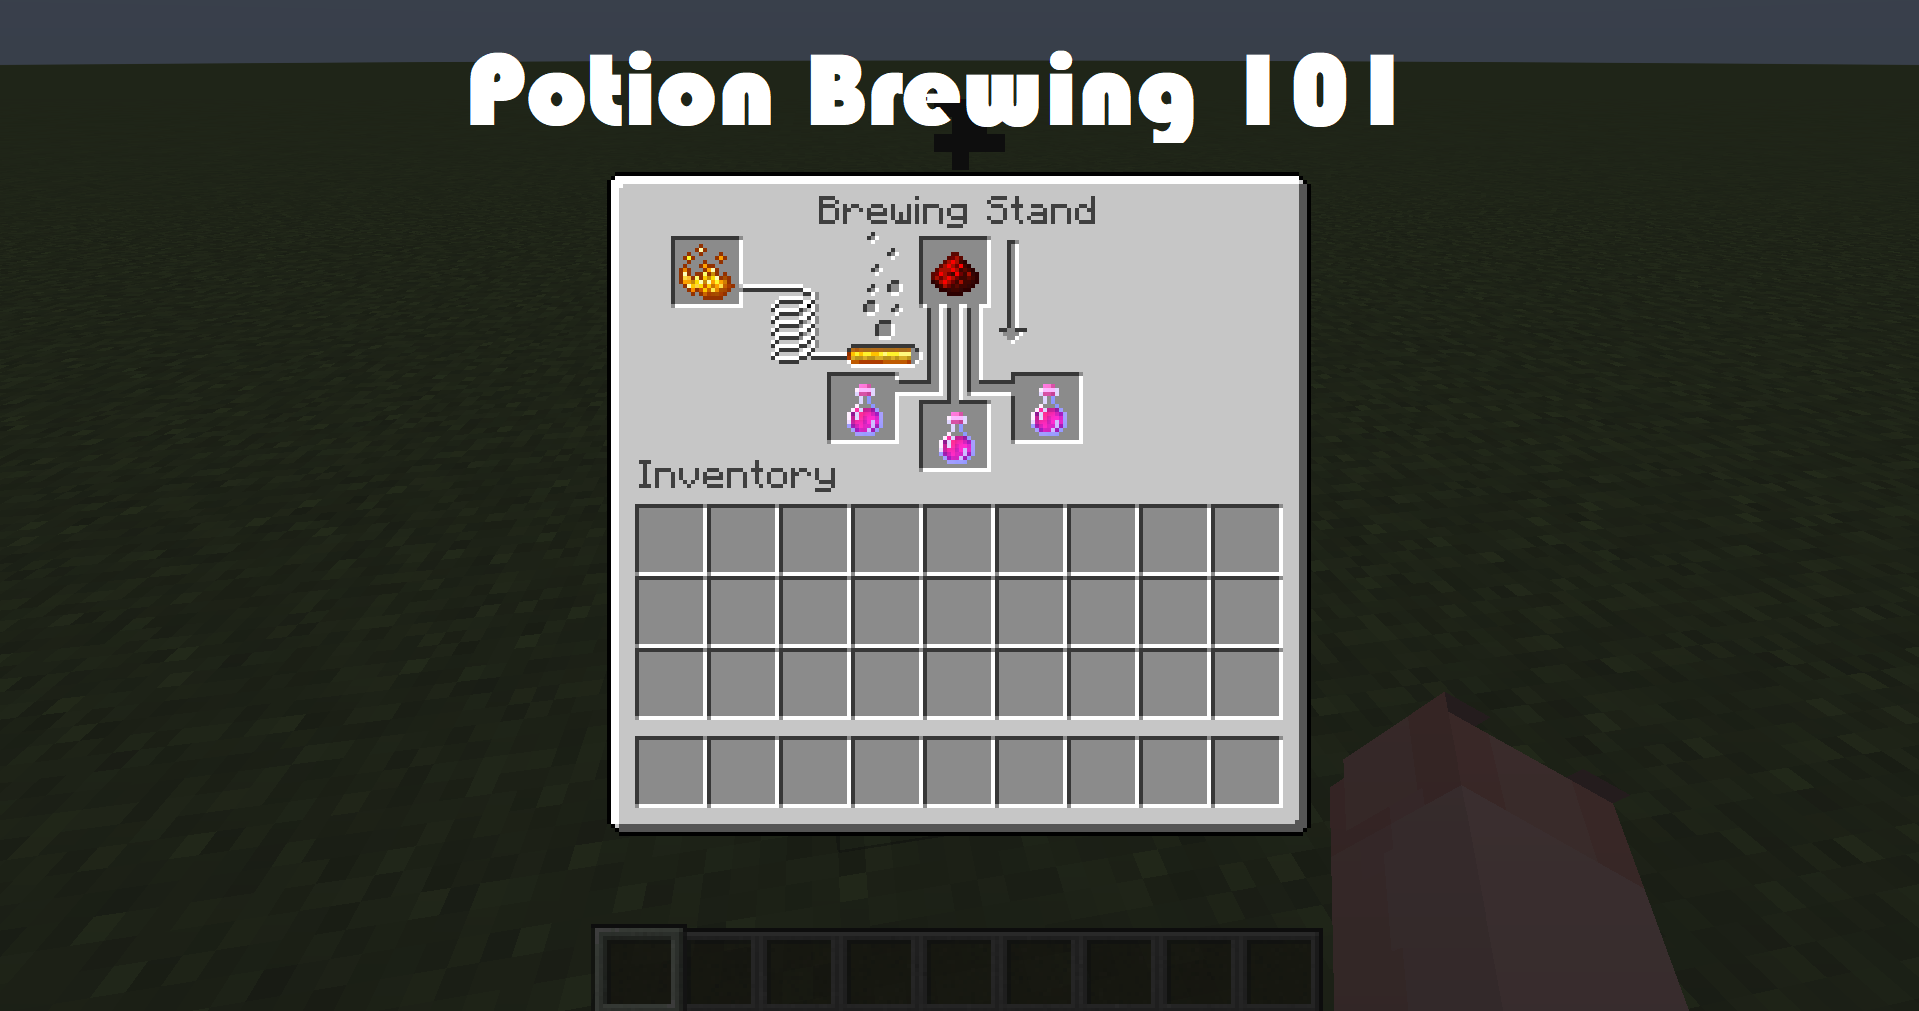
An example of a complete potion brewing process would be as follows:
- Place 1-3 water bottles in the potion slot, a blaze powder in the fuel slot, and a nether wart in the ingredient slot.

- Wait for the awkward potion to complete and leave it in the potion slot for the next step.
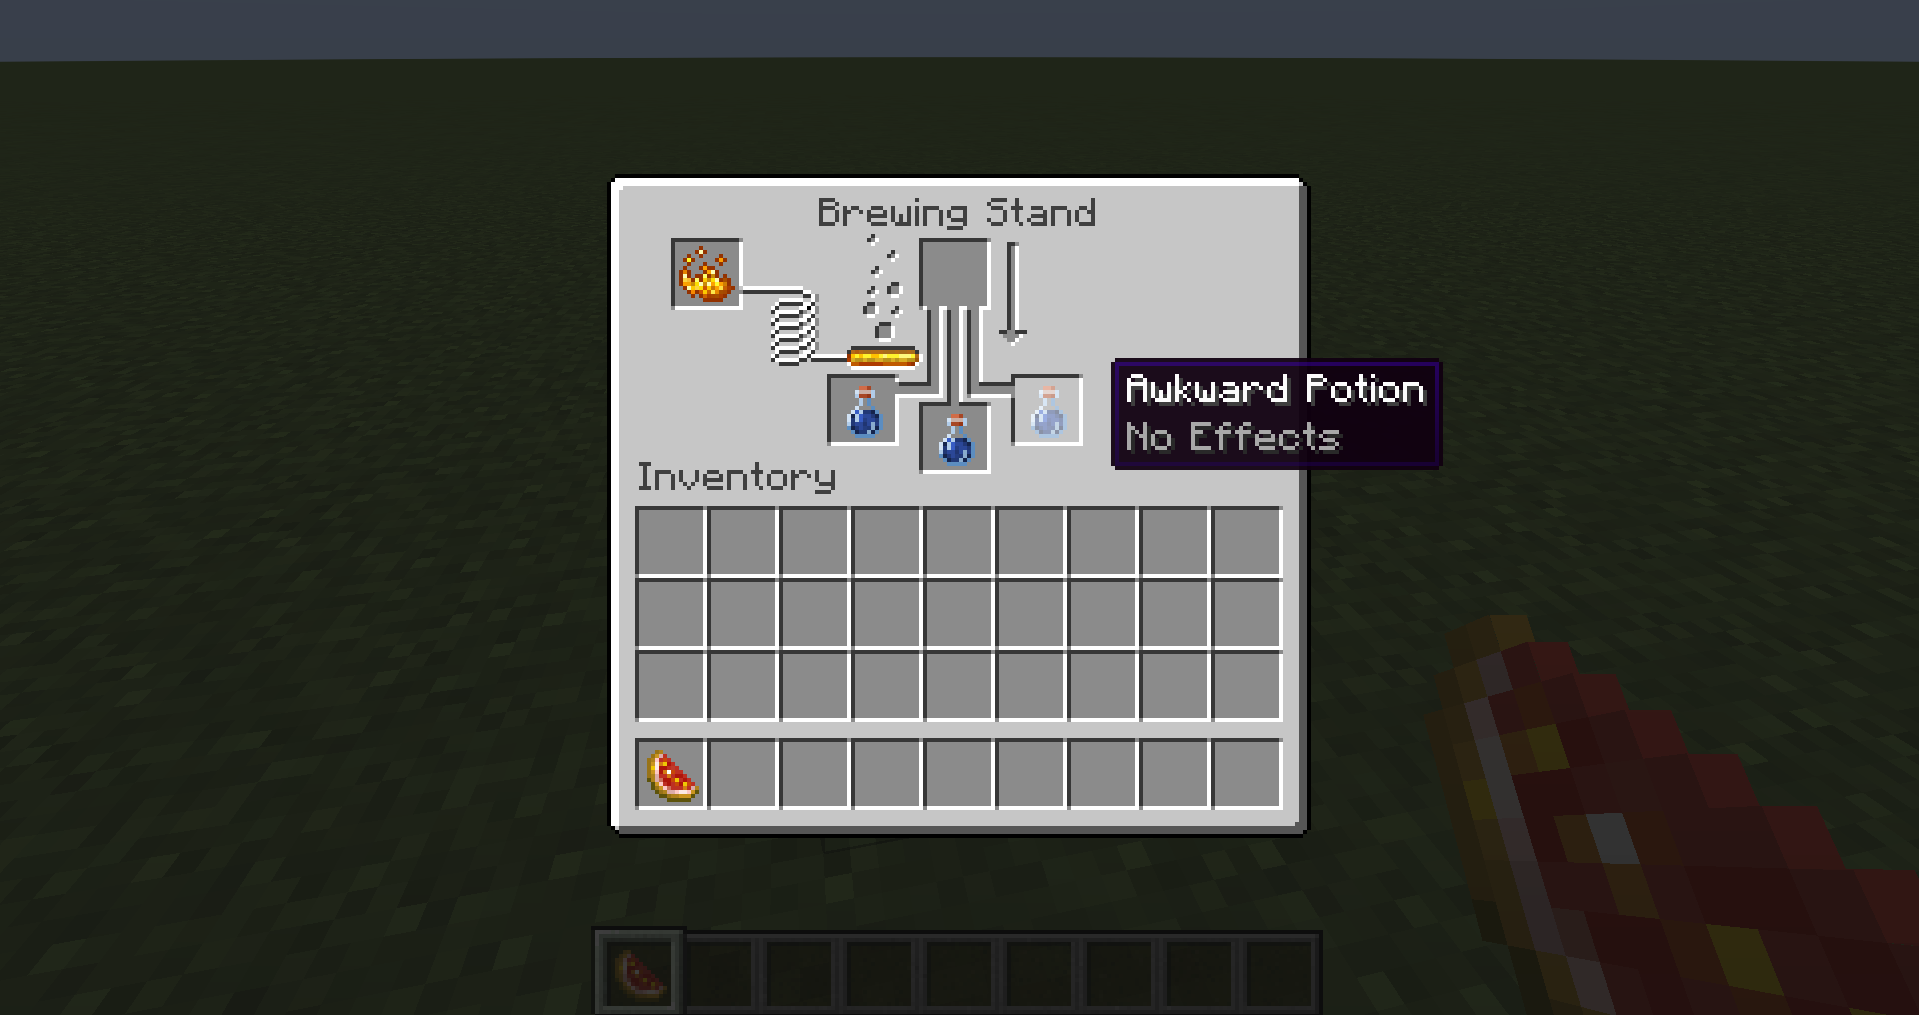
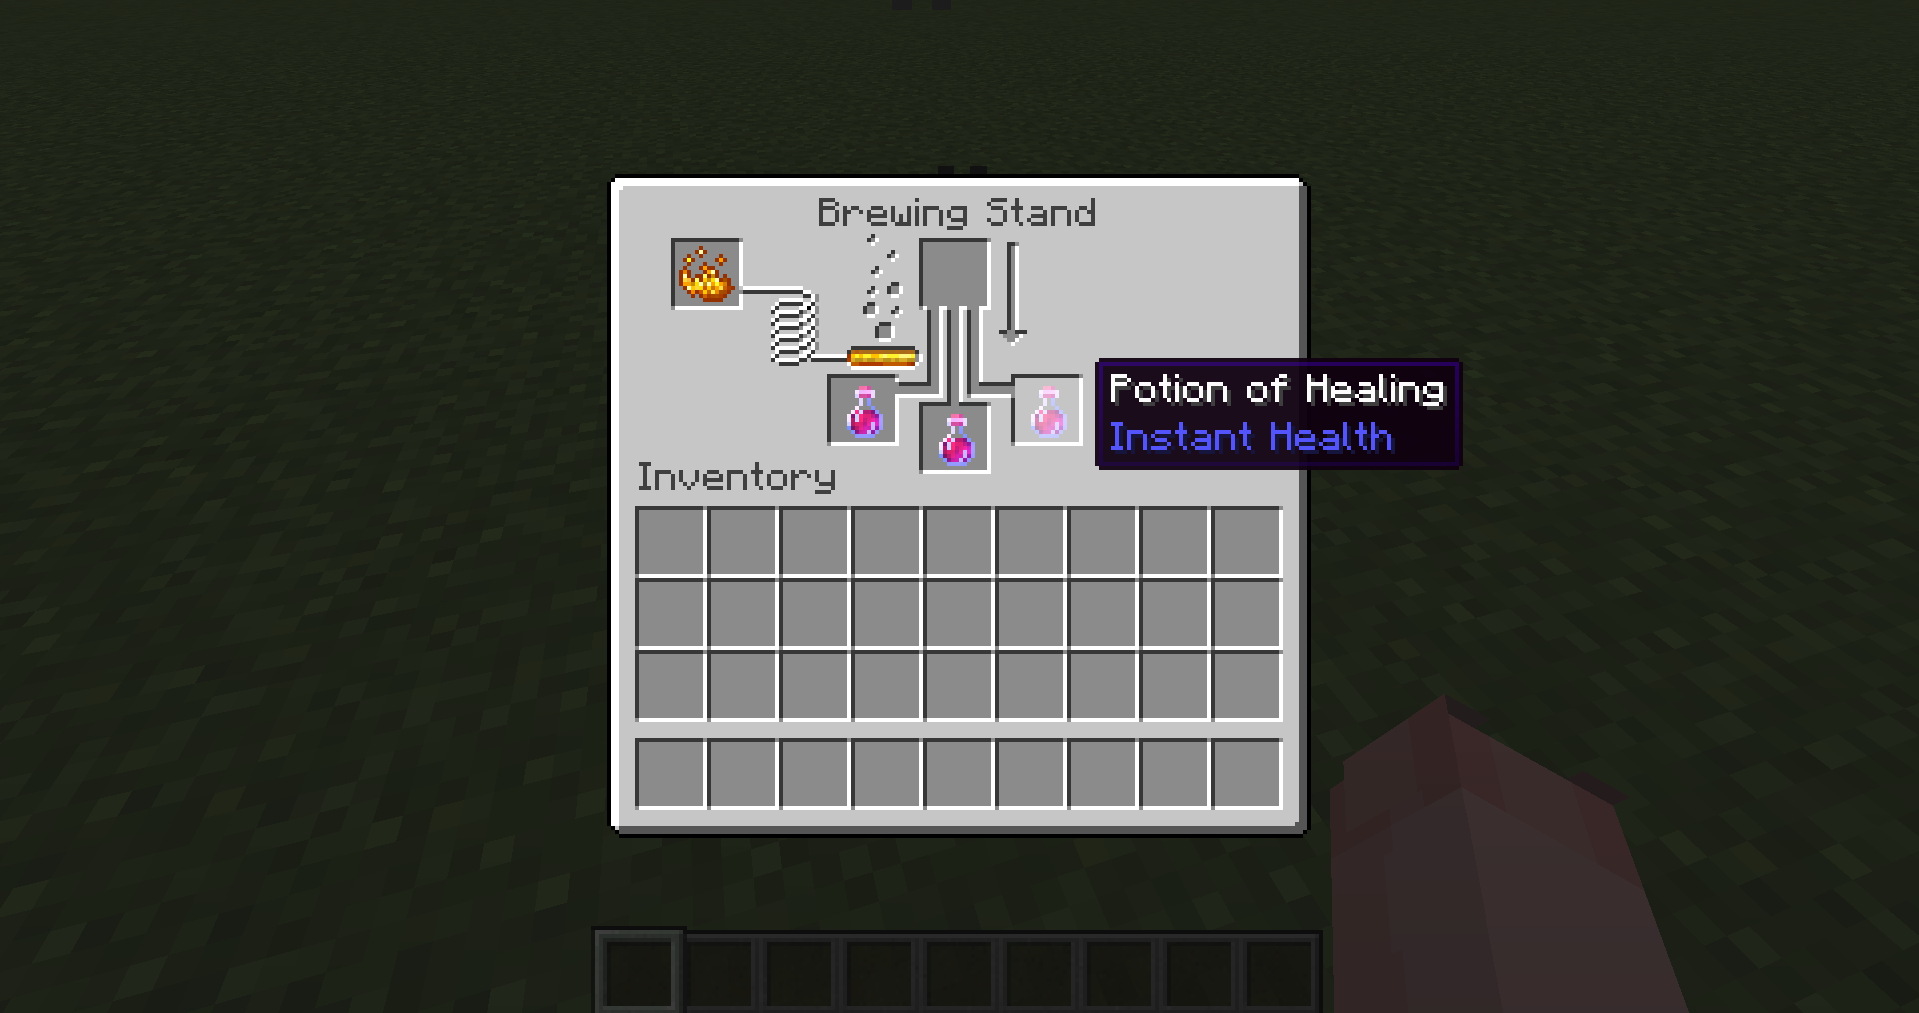
- Next, place a glistering melon slice in the ingredient slot and wait for the potion to complete brewing.
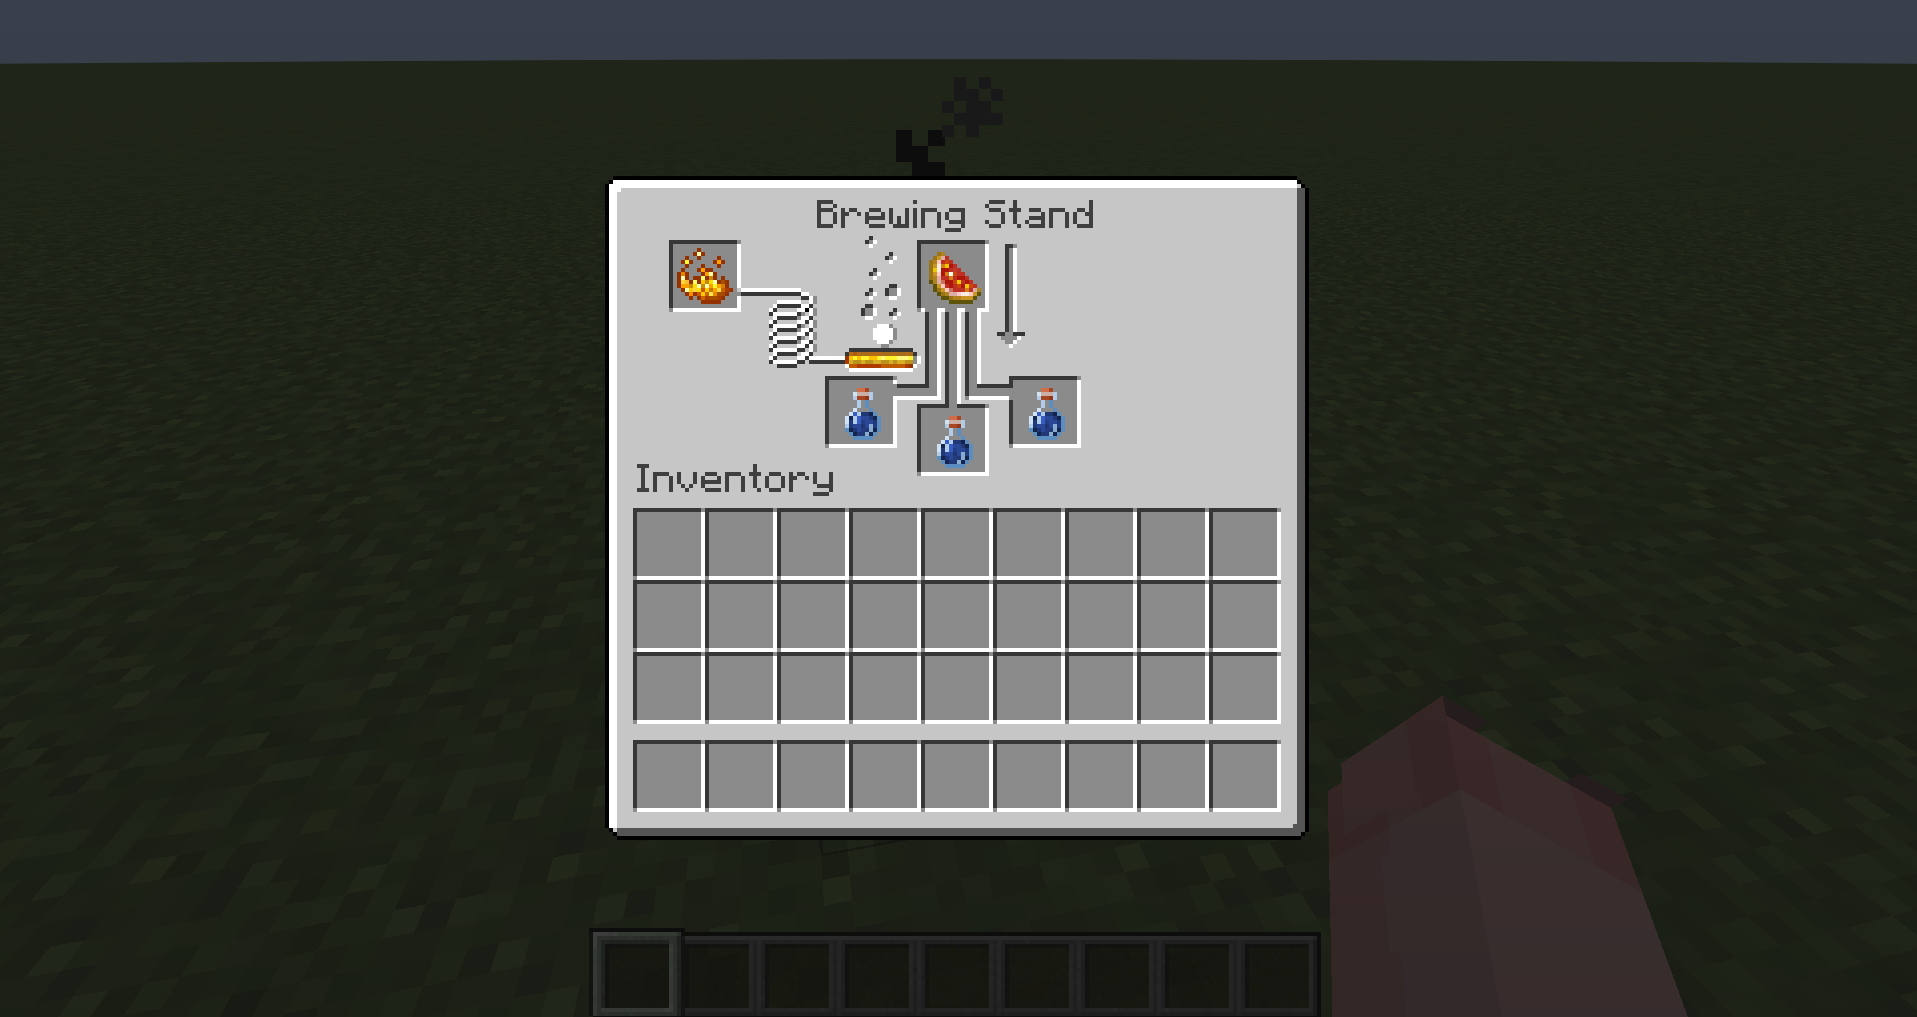
- Now that you have a healing potion, you can proceed to the next step to further enhance the potion or remove it from the potion slot and keep it in your inventory.
- If you continue brewing, keep the healing potion in the potion slot and place either a Redstone dust or glowstone dust in the ingredient slot to increase or enhance the potion’s effects or duration.
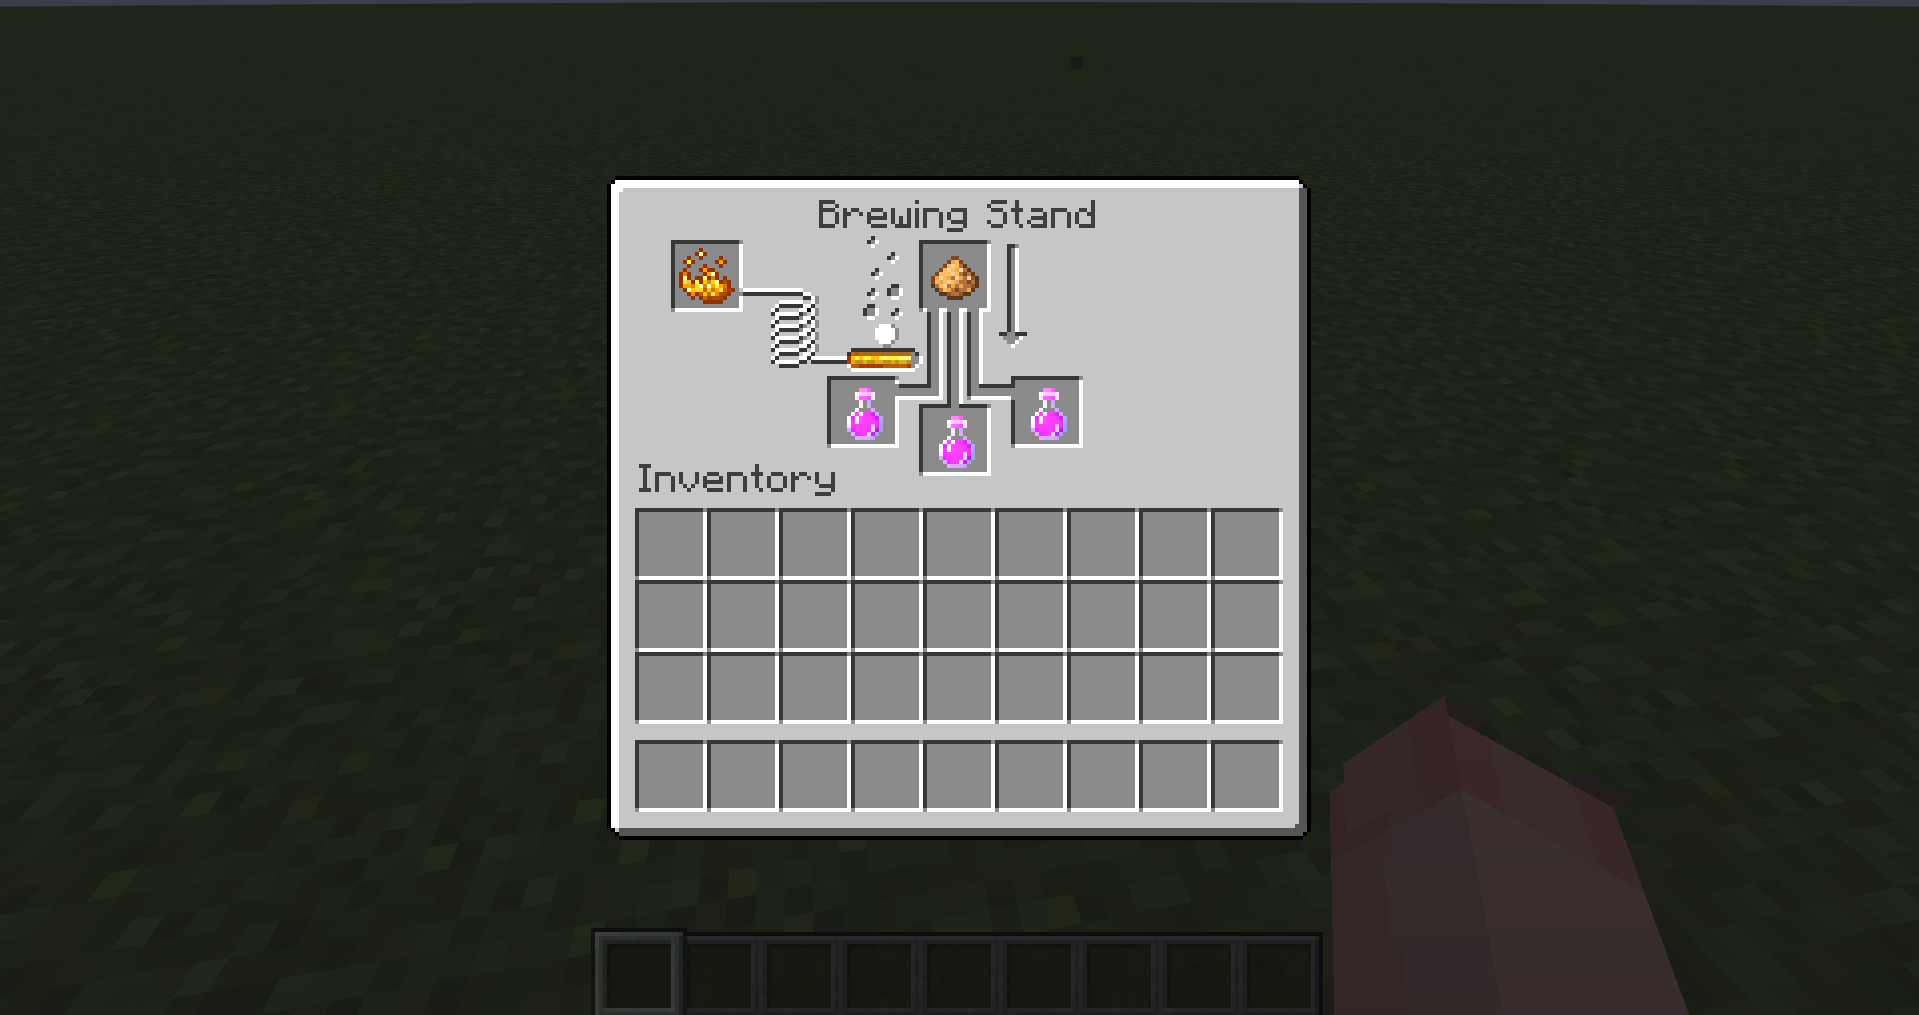
- Once completed, click and drag the potions into your inventory to complete the brewing process.
If you are as excited to start brewing your first set of potions as I am, then this is all you will need. Now that you know the basics of potion brewing, you can experiment with various recipes to create potions that suit your combat needs. Moreover, brewing potions is a great skill and can help you in dire situations in the game. Best of luck farming for the materials you need to brew tons of potions and eventually succeed in Minecraft.