Your first 10 minutes into the game is a race against time that will determine whether you survive your first day in Minecraft. This guide will show you what to do in your first 10 minutes in Minecraft and survive the night.
Minecraft, similar to the real world, also has a daylight cycle in which there is a 20-minute cycle between two different light settings in the game: daytime and nighttime. The daylight cycle is divided into two sections called day and night, wherein each setting has approximately 10 minutes in real time to cycle through. And for a Minecraft survival game mode player, these 10 minutes of daytime will become the turning point in determining whether or not they survive the dangers of the night as most hostile mobs, including phantoms, creepers, zombies, and skeletons, only spawn in darkness. Therefore, one should plan and think about what they should do so as not to waste daylight and gather as many items for survival as possible to keep themselves safe once night looms in.
What You Should Do In The First 10 Minutes
This aims to gather as much needed materials and resources as possible just before the end of the day and night when hostile mobs will spawn all around you.
From 0 Minutes to 1 Minute

The first thing you need to do once you spawn into the world is to mark your spawn point. You can use anything to mark it, such as placing a small pillar made out of either dirt, cobblestones, or planks. You may also create a pillar that will point in the direction you are planning on going. This will help you in case you might die without a bed and will have to travel back to where you last left off. If you prefer, you can also build a pillar tall enough to be seen from afar so that you can easily get back anytime. You can do this by simply doing the nerd pole strategy wherein you jump and place a block quickly below you. Another technique to note your spawn point is to check your coordinates on the debug screen. To open the debug screen, press F3 on your keyboard for Windows users and FN + F3 for Mac users. Then once the debug screen is opened, check the corresponding numbers on the XYZ section. This will mark your coordinates for your primary spawn point so remember to note this one down.
From 1 Minute to 2 Minutes

Once you’ve marked your spawn point or noted your spawn point coordinates, the next thing you need to do is to start walking in a specific direction. You need to take note of your surroundings, including the alignment of trees, any sign of a river or ocean, any passive mobs, and any resources you might encounter along the way. These will become helpful later on in navigating your way back and having a place to go in case you run out of resources such as food. Then as soon as you are walking, try to locate a good spot that will become your temporary base location for the time being. This can be the turning point for you in creating a temporary or permanent location for your base. Finding a good base building spot surrounded by plenty of resources can help you gather as many materials before nightfall. You can preferably choose an open field location such as the plains biome to have wider space in building your base or choose a forest biome where abundant wood and other resources.
From 2 Minutes to 3 Minutes

Next, you have to prioritize finding wood. This is the most important step as you will essentially build your first set of tools out of wood. Start chopping down any trees you can find close to your base until you can acquire a few logs in your inventory. Then once you have logs, you will turn them into planks. To do that, click and drag a log block in the crafting grid slots of your inventory and click and drag the newly crafted set of planks back into your inventory. Take note that a single log can create four planks per crafting. Once you have at least four planks to work with, create a crafting table by placing one plank in each of the four empty slots of the 2×2 crafting grid. Then place the crafting table down on the ground and open it by right-clicking on it. Next, craft a few sets of sticks by placing two planks next to each other on the crafting grid. Now that you have a crafting table, some planks, and some sticks, it is time to craft your wooden tools. To craft a wooden pickaxe, place three planks in a horizontal position on the top row and two sticks in a vertical manner in the center of both the middle and the bottom rows of the 3×3 crafting grid. Next, craft yourself a wooden ax by placing two planks in the middle and left slot of the top row, place another plank in the left slot of the middle row, and a stick in the center of the same row, and finally, place one stick in the center of the bottom row.
From 3 Minutes to 4 Minutes

Now that your wooden ax is with you, you can farm for more wood faster than simply using your bare hands. Since you also crafted a wooden pickaxe, you can now mine stones to obtain cobblestones. Find the nearest rock formation from your base and start mining using the wooden pickaxe. If you cannot find any rock formation, dig the ground until you find stones. Try to collect at least 25 cobblestones for crafting. Once your wooden pickaxe and wooden ax’s durability wears off, it is time for you to craft stone tools to replace them. Stone tools are stronger and more efficient than wooden tools, so it is better to craft them early to maximize resource gathering. To craft a stone pickaxe and ax, use the same recipe from crafting the wooden tools but replace the planks with cobblestones instead. Now that you have stone tools, next you will need a furnace. To craft a furnace, using eight cobblestones, place a cobblestone block in all of the slots of the 3×3 crafting grid leaving only the middle slot empty. The furnace will be used for cooking food and smelting ores later. If you have extra cobblestones, craft a stone sword to serve as your primary weapon. To craft a stone sword, place two cobblestones in a vertical position in the center of the top and middle rows, and place one stick in the center of the bottom row to form a line.
From 4 Minutes to 5 Minutes

Find animal mobs such as cows, pigs, and chickens. These mobs often roam anywhere, so it is best to look for them randomly. When you’ve located a few of them, kill them using your sword to obtain their drops. They will drop raw meat, which you can cook in your furnace to obtain cooked meat. This will become your primary food source for sustenance. Collecting at least 20-30 raw food items will help you stave off hunger and regain health points later.
From 5 Minutes to 6 Minutes

Next, you need to find sheep to craft yourself a bed for the night. Locating sheep is not easy, especially since they often spawn with different wool colors. Remember that to craft a single bed, the color of the sheep’s wool must all be the same, as you will be unable to craft a bed when using different colored wool. The easiest sheep color is white, so you must locate at least two white-colored sheep and kill them to collect their wool. To craft a bed, collect three pieces of wool and horizontally place them on the topmost row of the crafting grid and place three planks horizontally on the middle row.
From 6 Minutes to 7 Minutes

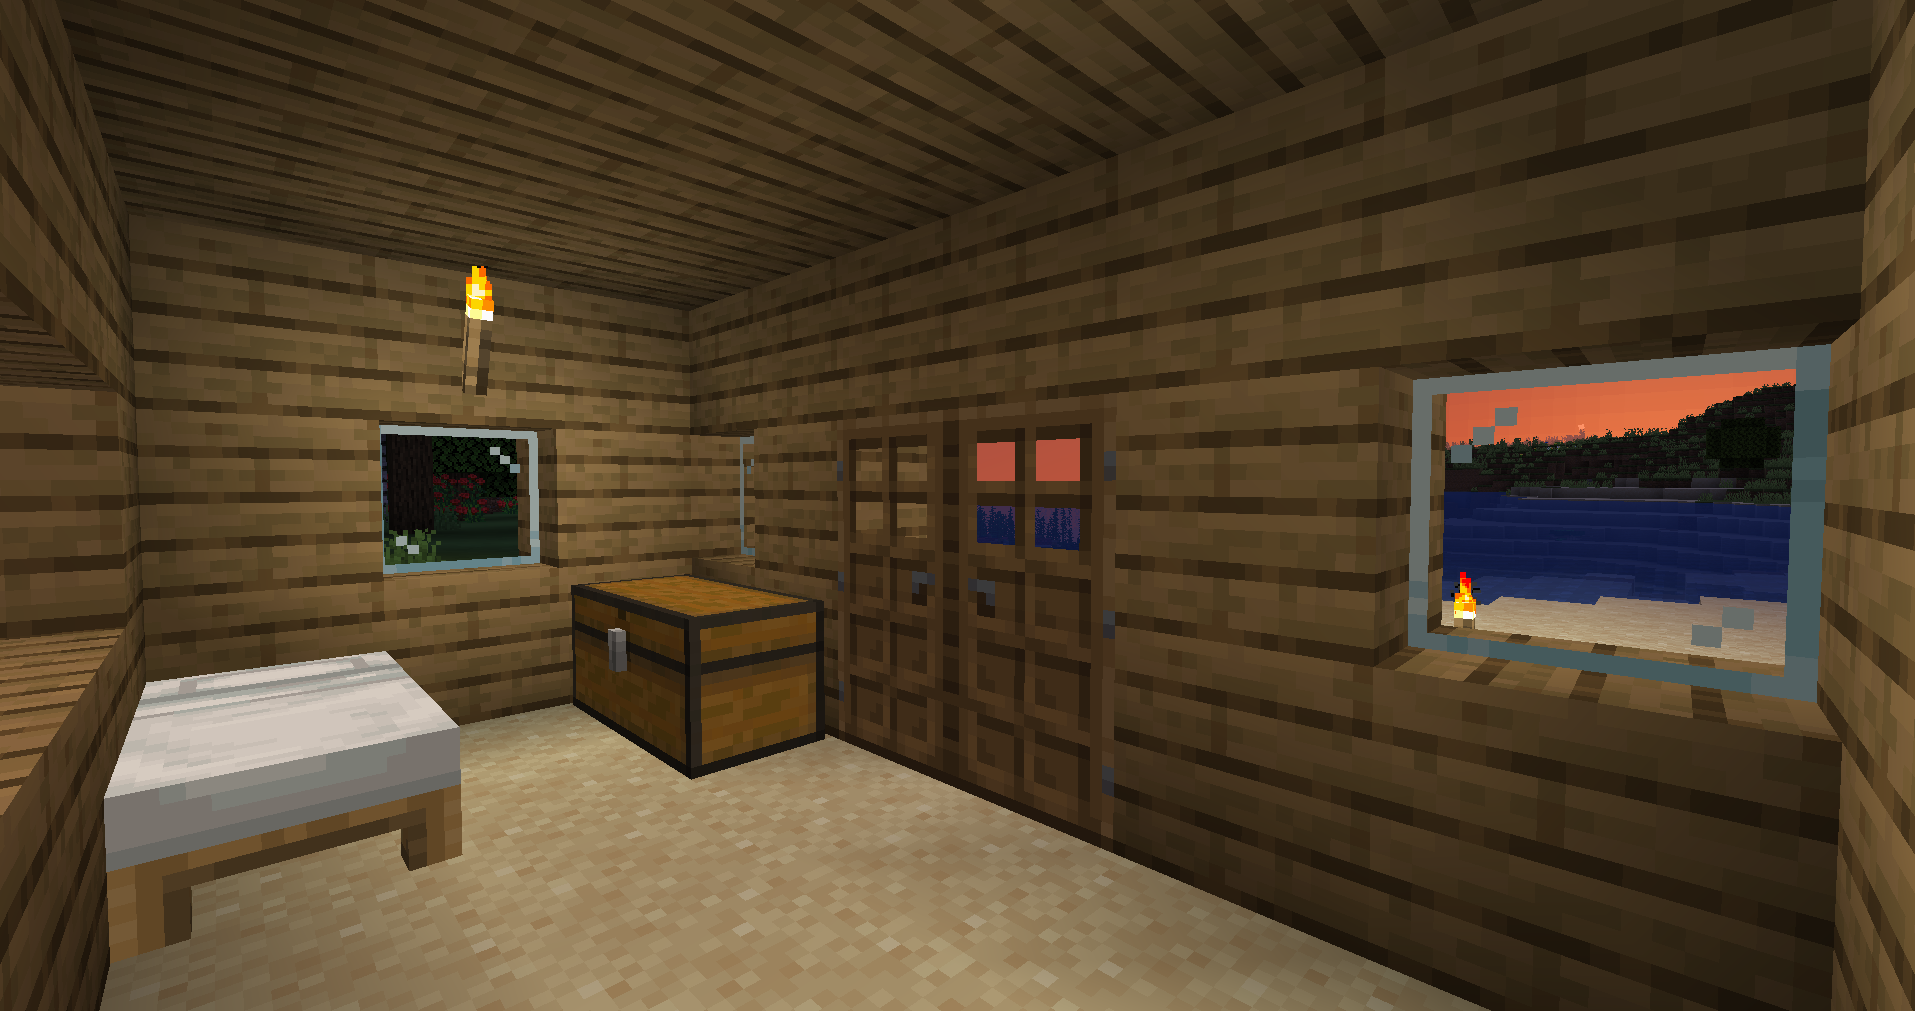
Once you have gathered enough resources and crafted a bed, a crafting table, and a furnace, it is time to build your base. Your main priority now is to create a shelter big enough to house yourself and other important items for the time being while keeping yourself safe from the outside world at night. This might require you to use more resources than you would expect, so gather enough. However, if you need more resources, collect more and come back to build a base as quickly as you can. Building a simple square shelter will do since you can expand later on, but you are free to design your base as you see fit.
From 7 Minutes to 8 Minutes

When you have built your shelter, place down your bed, crafting table, and your furnace for easier access, then prioritize crafting a light source. This will prevent any hostile mobs from spawning inside your base or shelter once night falls. You should craft torches as it is the best and easiest light source to obtain this early in the game. To craft a torch, you must obtain either coal or charcoal. Coal can be mined from coal ores found in caves, deep underground, or in mountain biomes. However, if you cannot locate coal in time, your next option is to collect charcoal instead. Smelting logs can easily obtain charcoal in the furnace. Then once you have coal or charcoal in your inventory, place one coal/charcoal and one stick next to each other in the crafting grid to craft four torches. Note that the recipe for torches requires you to place the coal or charcoal on top of the stick vertically to craft torches successfully. Then once you have a few torches, it is best to place them inside your base and around it to prevent any hostile mob from spawning near your shelter.
From 8 Minutes to 9 Minutes

Next, use the coal or charcoal as a fuel source for the furnace and start cooking the raw food items that you have obtained from animal mobs earlier. Cooked meat is better for sustaining your health and hunger points than consuming raw meat. This will take a while, so make sure to craft other necessary items such as doors and fences while you’re waiting. It is also a good idea to craft a chest or two to store items you will need later on. The recipe for crafting a single chest requires you to use eight planks and place each in a square pattern in the 3×3 crafting grid while leaving the center slot empty, similar to crafting a furnace by way of using planks instead. You can create a larger chest by placing two chests next to each other on the ground. This will merge the two individual chests, including the inside items, to form a single large chest.
From 9 Minutes to 10 Minutes

For the last minute, start doing your final preparations before nightfall. This is when you should double-check everything, such as making sure the surrounding areas are well lit with torches and if you have everything ready for the night. Once everything is done, you can choose to go to sleep by right-clicking on the bed or start gaining experience points by fighting the hostile mobs that will spawn at night. If you choose to fight them, do not do it anywhere near your base, especially when dealing with creepers, as they can blow up your entire shelter if you are not careful enough. If you choose to sleep, then your respawn point will change into your bed, and the night will be skipped, which means that you will have a whole new day to do the things you have to do.