Minecraft is a game where survivability and creativity are essential to the player’s progression. Building your very own base at the start of the game is crucial to your survival. Starter bases are one of the most important structures you should build the moment you set foot in Minecraft’s overworld. It will serve as your main defense to protect yourself from various hostile creatures that roam at night. But, building starter bases isn’t that easy – especially when you aren’t equipped with the right tools to farm for resources at the start of the game. Here, we will talk about what tools you need and how to build the best starter base in Minecraft.
What to do at the start of the game
Before you start building your base, you need to gather resources. In order to do that, you will need to equip yourself with the basic tools to make farming these resources easier and faster. Start by gathering logs by hand. Once you’ve gathered enough logs, place them in the crafting grid to create planks. 1 log will produce 4 planks. Planks will be used to produce different sets of materials such as sticks, tools, weapons, and more. Use 4 planks to build yourself a crafting table. The crafting table will be your basic utility block to create all kinds of material and items in the game. This is the most important step to create your first set of tools and weapons.

What tools will you need?
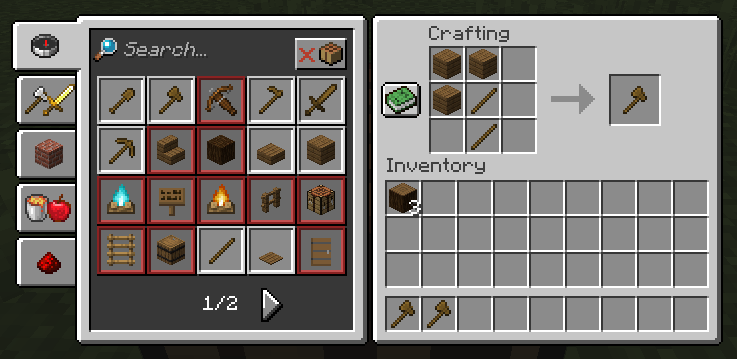
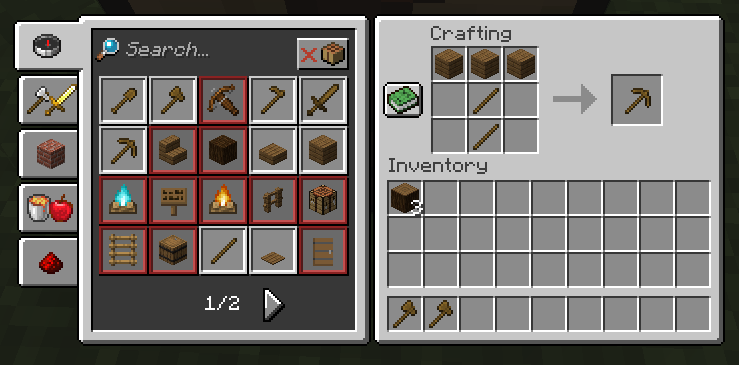
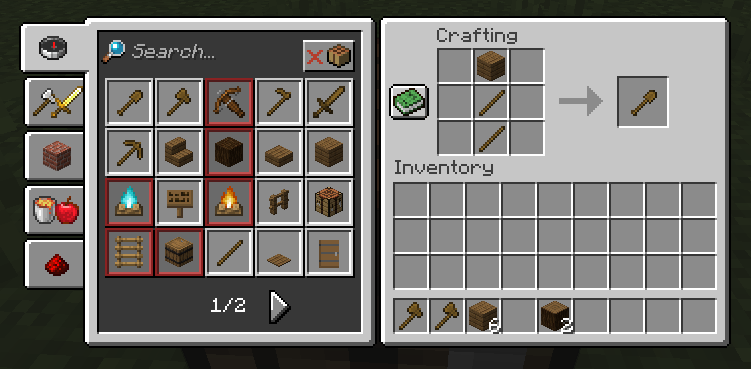
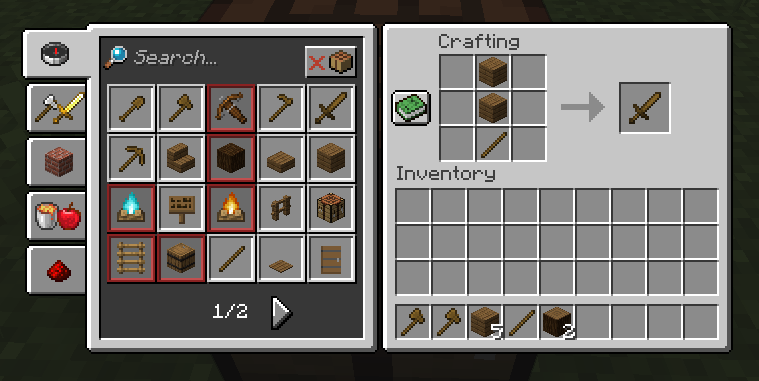
When starting off, you can use basic tools such as a wooden ax and pickaxe. But if you get the chance to gather cobblestone using your pickaxe, start gathering them right away. This will allow you to create a better set of tools such as stone ax and stone pickaxe to make gathering resources quicker and more efficient. Here is a list of all the basic tools as well as each crafting table recipe. Take note: You can only craft tools using a crafting table.
- Axe: Axes are used to efficiently chop down trees for wood. You can also use axes to chop down other wooden-based blocks such as planks. (Refer to the correct recipe below)
- Pickaxe: PIckaxes lets you gather cobblestones and coal more easily. Higher types of pickaxes can efficiently gather higher level resources such as iron, gold, and diamond. (Refer to the correct recipe below). Later into the game you’ll need higher level tools to mine certain materials like obsidian.
- Shovel: Shovels are used to efficiently dig out sand and dirt as well as other blocks like gravel. (Refer to the correct recipe below)
- Sword: The sword is a weapon that you can use to defend yourself from hostile mobs as well as use to effectively farm for food from passive mobs such as chicken, cows, and pigs. (Refer to the correct recipe below)
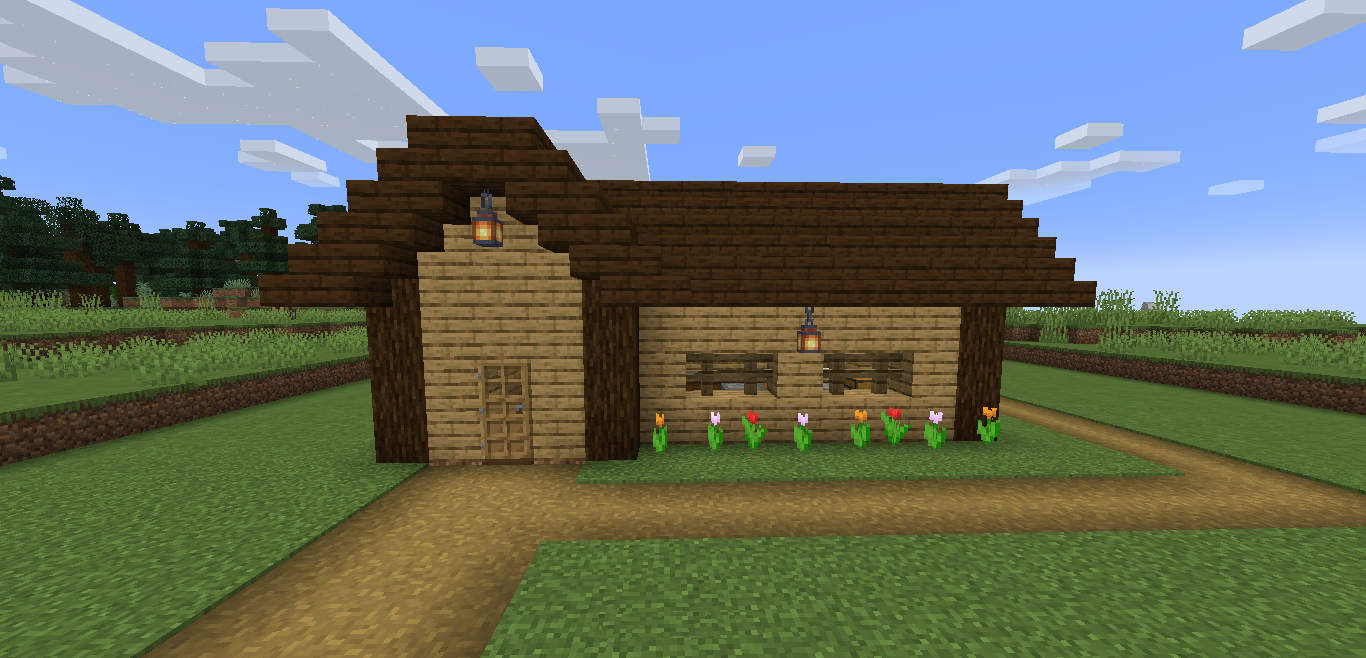
Steps To Build a Basic Starter Base
Once you have your set of tools, you are ready to gather resources. Start by chopping down lots of logs. These logs can be used to build walls as well as other things. If you can find a source of cobblestone to mine, gather as much as you can. These are the two things you should farm the most: Logs and cobblestone. Once you’ve gathered enough materials, we can start building our base.
Step 1
Find your ideal spot to build a base. Preferably in a large open area such as the plains biome. Building your base in an open area allows better navigation, base expansion, and more.

Step 2
Make an outline of your base. This is one of the most crucial steps in order to start building the foundations of your starter base. Remember to give a 1 block space for the door. The width and length of the outline will depend on how big you want your starter base to be – It’s all up to you!

Step 3
Start building the walls and foundation of your base. The height will depend on how high you want your base to be. 3 blocks high is about the average height. Make sure to leave some space for windows!

Step 4
Dig out the ground using a shovel and replace them with planks, eventually, you’ll be able to craft colorful flooring blocks to really spruce up the place. For now, keep it simple.

Step 5
Start building your roof. You’re going to need a lot of planks for this one. You don’t necessarily have to follow our design – you can simply build a flat roof to cover your base if you wish. Make sure the planks are sticking out from the walls to give it a homey feel. Using your crafting table, create a couple of stairs for the roof, and cover it using stairs. You may also create slabs using the crafting table; they can also be used to make a flat roof.

Step 6
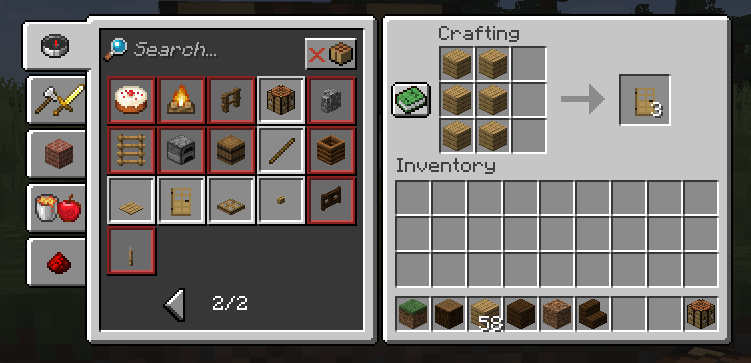
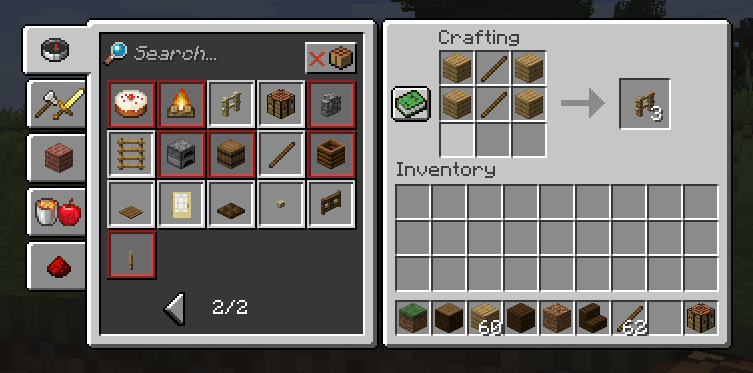
Next, we need doors and windows. To craft a door, you will need 6 planks and place them in a 2×3 pattern on the crafting grid. For the windows, you can use a fence. You will need 2 sticks and 4 planks to create a fence. You may also use glass later as you progress in the game but for now, we will use fences.
Step 7
Now that your base structure is complete, we will need to start working on the interior of the base. There are a few basic things you will need in your starter base. Here is a list below along with its corresponding recipe:
- CRAFTING TABLE: Crafting tables are used to make different kinds of items and materials.
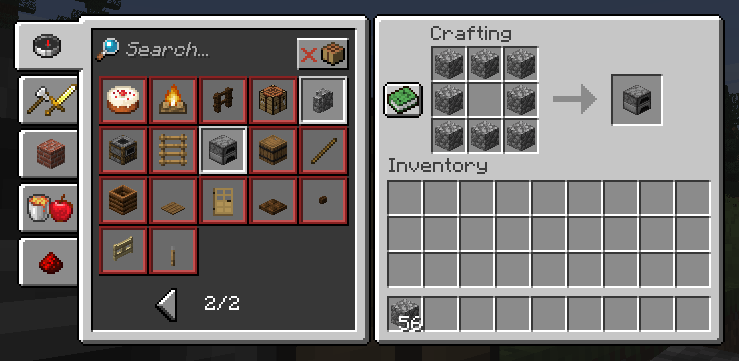
- FURNACE: Furnaces are used to smelt different items. You can also cook food using a furnace. You will need at least 2 furnaces to smelt items faster. You can use logs or planks for fuel. But an effective fuel for the furnace would be coal or charcoal. You can make charcoal by smelting 1 log in a furnace.
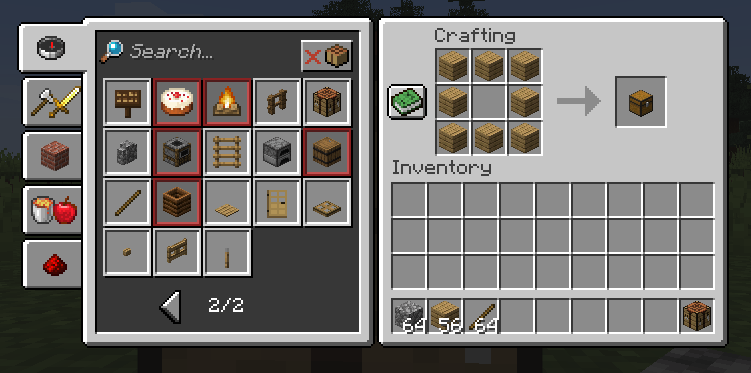
- CHEST: Chests are very important early game. They can be used to store items and you can store a lot of your gathered resources with chests. Be sure to make a couple chests to store more items. you can place 2 chests together to make an even bigger chest.
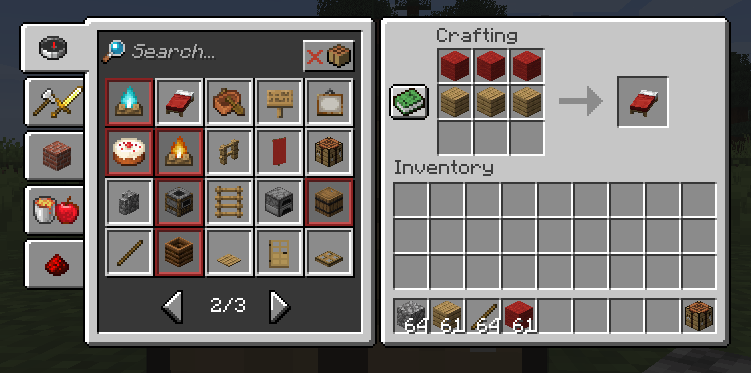
- BED: The bed is one of the most important items you should craft early. It is used for sleeping at night and to reset the spawn point directly to the bed. This will allow you to respawn next to your bed when you die, instead of spawning randomly.
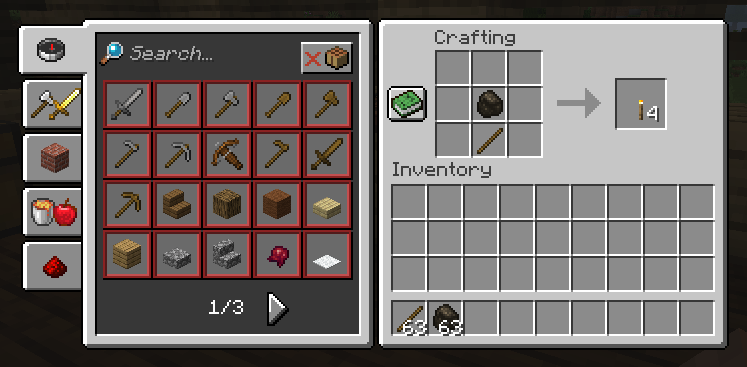
- TORCH: Torches are used to light your base. Make sure to place a decent amount of light inside and outside of your base to prevent hostile mobs from spawning near you at night. To make a torch, you will need 1 coal and 1 stick. This will produce 4 torches.
With this, your starter base should be ready. You can add additional items to make your starter base even better and more cozy. Ultimately, these are all you need to survive the first stage of Minecraft. Be sure to gather lots of resources, materials, stock up on food, and upgrade your gear to make farming for resources and killing mobs easier.