Considering Kodi began as a media player for the original Xbox, coming full circle has a kind of poetry to it. If that poetry also imbues you with the ability to stream all kinds of content from your console, all the better. This tutorial is going to show you how to install Kodi on Xbox One and add a channel or two as well.

Xbox One is a powerful console with up to 1TB of storage. While games take up a lot of that space, using some for a movie or two, some music and perhaps some TV shows is a good use of that storage. You can also stream content from a media server elsewhere in your home too if you like.
Kodi for Xbox One isn’t as fully featured as other versions due to the nature of Microsoft’s UWP system. Like Apple, Microsoft has created a self-contained ecosystem for apps that controls what an app can do, what it can access and how it works. This is to help stability and security but means there isn’t as much freedom as there is on Android or elsewhere.
Installing Kodi on Xbox One
Installing Kodi on Xbox One now is a good time. First released at the end of 2017 for the Xbox One, the developers have had time to improve stability and make some essential tweaks that helped make it worth using. The early versions of Krypton crashed quite a bit but using Kodi 18 Leia gives a bit more stability.
The other big improvement is the ability to install Kodi directly rather than having to sideload. That saves a lot of time!
- Turn on your Xbox One and TV and wait for it to load.
- Select Search and enter kodi into the box.
- Select Get when you see Kodi appear and let it install.
- Launch Kodi when finished.
If you have used Kodi before, you will see the familiar dashboard with all your options in the left menu and any content you load in the center, accessed by those left menu options. You won’t see the ability to use USB or external storage as yet as Kodi isn’t ready for that. You can set up an NFS share on a Windows computer though.
Kodi isn’t much without addons so let’s install Exodus. It’s my go-to addon that opens the doors to all kinds of content.
- Open Kodi and let it load.
- Select Settings and Unknown Sources and toggle it to on.
- Select System and then File Manager.
- Select Add source.
- Select where you see <None> and add ‘https://i-a-c.github.io’ and hit OK.
- Name it Redux and select OK.
- Go back to the System menu and select Add-ons.
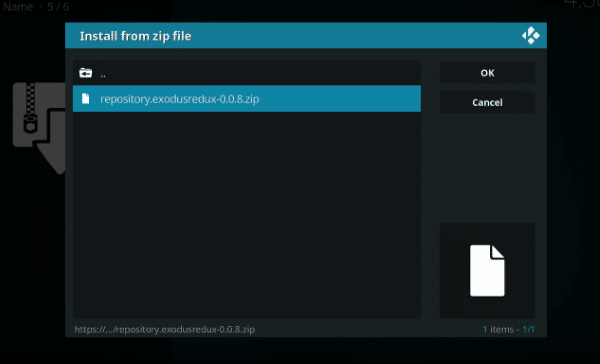
- Select Install from zip file and select Redux from the menu.
- Select the repository.exodusredux zip file.
- Select Install From Repository and select Exodus Redux Repo.
- Select Video add-ons, Exodus Redux and Install.
- Select OK to install additional addons when prompted.
- Navigate to the Kodi home screen and select Exodus Redux.
You should now have an entire world of content open to you.
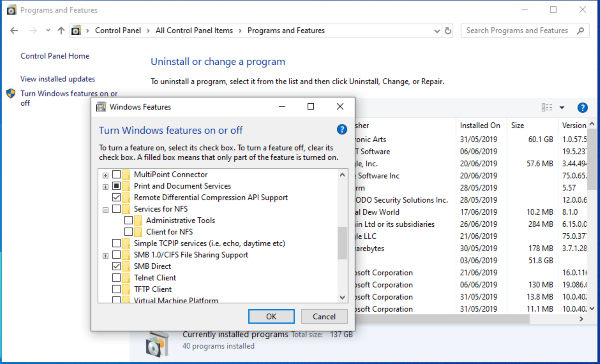
Set up an NFS share in Windows 10
At the time of writing, the Xbox One version of Kodi only works with NFS shares for streaming. That means setting up a new shared folder on your media server so it can be accessed by Kodi. It’s an extra step but is straightforward enough. Rather than repeat it all here, this page shows you how to set up NFS shares and this page has an alternative option specifically for Kodi on Xbox One.
This share limitation can be a bit of a pain but it shouldn’t impact streaming using Kodi. The final thing you need to check is that you’re always behind a VPN.
Kodi, Xbox One and VPN
Kodi is not illegal. Installing Kodi on an Xbox One is not illegal. Installing Exodus is technically not illegal. Where things get tricky is when you use one or all of them to access copyrighted content. While many streams make it clear that they are legitimate, not all of them do so it is very easy to accidentally access illegal streams using these tools.
That means doing it all within the security of a VPN is essential. You don’t want a cease and desist letter for no good reason! Check out TechJunkie’s extensive VPN coverage to learn everything you need to know about Virtual Private Networks.


