![LifeAfter Guide: 111 Tips and Tricks [by JCF]](https://playerassist.com/wp-content/uploads/2019/03/maxresdefault-2.jpg)
By JCF
A big thanks to JCF for the information in the video above.
Tips for LifeAfter
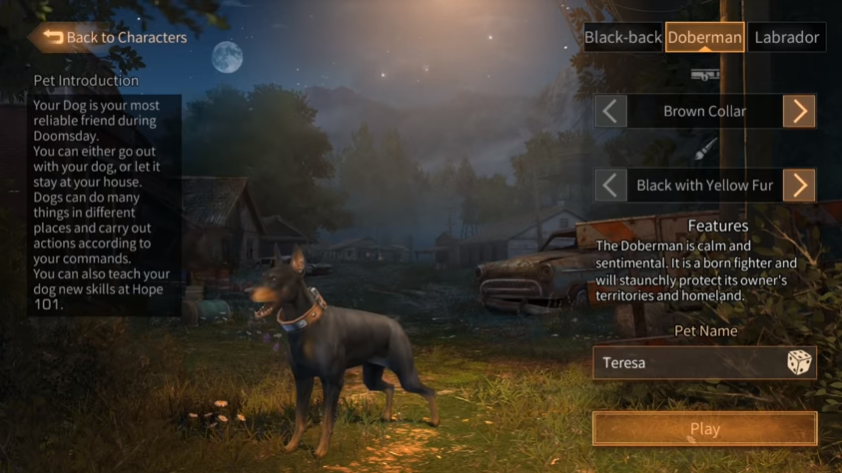
After choosing your name, you will have the option to choose your dog type. This is not a huge decision because they all start out with the same skill and their habits are randomized, but I recommend choosing the Labrador because he is given two extra slots, which I will explain why I think this is important a little later on.
You will be prompted to do a tutorial. The tutorial is a little long and it is not nearly as fun as playing the actual game, but if you are new, it’s still good to do it because it introduces you to every concept that is in the game.
And even if you are a veteran from another server, you still might want to do the tutorial if you can do it with a friend because it gives you 300 friendship points, which is by far the fastest free way to get that many friendship points.
After the tutorial is finished, the game begins and they do a great job of guiding you, but let me give you a few tips real quick for those of you who are brand new.
This tab has a list of all your quests. If you scroll down, it will tell you exactly how far along you are with completing that quest and all of the other quests you have active.
Clicking on a quest will move it to the top of the list and give you an indicator on your map if there is a specific place you need to go. Double-clicking on the tab will also bring up a list that is separated based on the different areas, which is sometimes easier to understand.
It also lets you hide quests from being listed on the tab. The second tab is your team tab, which should be pretty self-explanatory.

If you see “line B or C” next to a teammates name, that means they are in an alternate universe and one of you will need to switch over in order to do anything: seeing each other, completing quests together or even get friendship points.
But once they do switch over, they will stay in the area even if you kick them out which is helpful when you are trying to invite your whole camp to a boss fight. To add a friend, click here, then contact, then type their name.
After that, I recommend going into settings and selecting the left fixed point option and then clicking the customize button and slightly enlarging the move joystick. Then I recommend bunching all of these controls further to the corner so that you have more visibility and it is easier to look around without shooting.
I also switched my run and grenade buttons because first, it reminds me that I have but also it makes it easier to select and aim those grenades in the middle of a battle. And then lastly, I recommend increasing your crosshair sensitivity to at least 60.
All of these are important and you should check them out when they have red dots, but the most important of these is the NewbieGuide. This guide provides quests with awesome rewards, but more importantly, those quests give a linear progression to advance in the game.
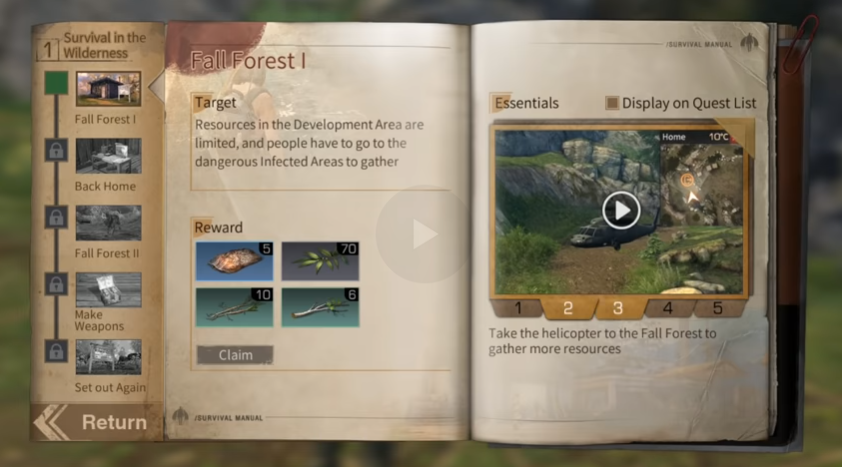
Since LifeAfter is a sandbox game, this guide is your key to progressing in the game. It will take you through every new area and teach you the basics of those areas.
That being said, there are a few things that you should know as you progress through this guide. For example, you should go to Billy and join an active camp as soon as possible.
There are countless benefits to being part of a camp and every action you take while you are playing the game can help your rank within that camp. If you want to know more about how to get all the benefits of your camp and be an awesome camp member, make sure to check out my video, including everything about camps.
Personal progression in LifeAfter has four parts. The first one is your three mastery levels.This is covered by the Newbie Guide, but it only covers the basics
.If you are used to playing games like Morrowind, you might be tempted to grind since higher level tools and weapons give a lot more experience, this would be a complete waste of time on multiple levels.
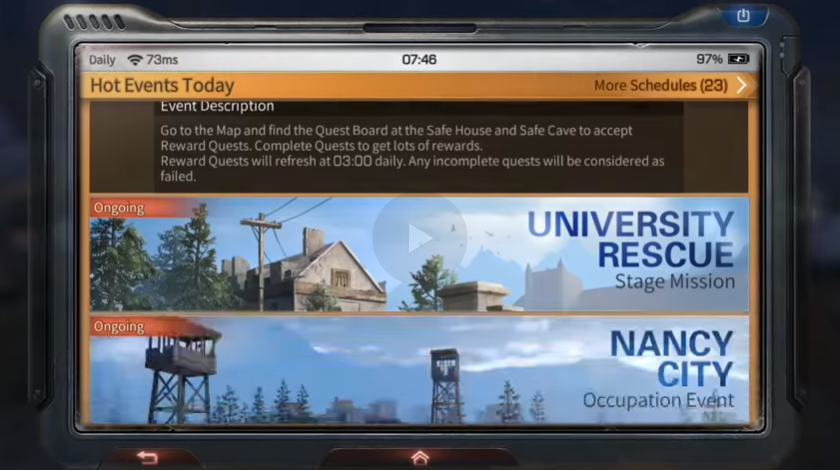
Understanding how to best get experience is crucial to leveling up quickly. The first and most obvious way is by doing everything listed in the daily tab.
This includes all of the main events and main quests that you can do every day. This list grows longer the higher level you get.
Clicking on one of these dailies will tell you exactly how much experience you can get that day, and what kind of experience you can get for completing those tasks. Which is great, but ideally you would do all of your dailies so there is not a lot of strategy to this.
The strategy comes into play with the other two ways of getting experience. The second way of getting experience is through actions. Gathering materials give you gathering experience, crafting items gives you crafting and doing damage to enemies gives you combat experience.
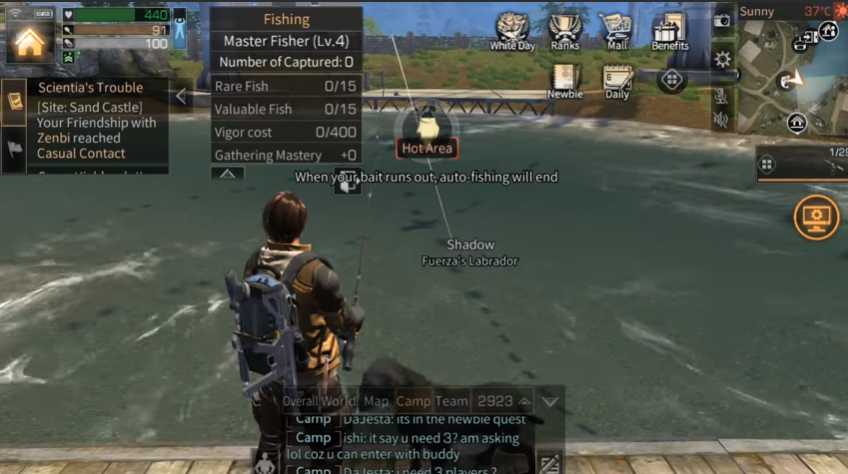
Gathering experience is, in my opinion, the most important of these three because it unlocks the most amount of options for you, but the amount of gathering experience you get drastically based on how much vigor you have in your meter. Players are given ten vigor every ten minutes with maximum storage of 600.
When your vigor is above 200, it is used twice as fast and you get twice as much so if you want to maximize your time, then you will want to make sure your vigor stays above 200.
So if you play the game in bursts like only at night or on a weekend, then you will need to learn to ration how you use your vigor. One way to do this is to save fishing and farming for bathroom breaks.
You want to make sure that you never let your vigor cap out and stay there for too long, so wait to harvest the things in your field until those times that your vigor is high, but you don’t have time to play. You can also use vigor fishing onauto at the camp dock assuming that you can leave your phone running, but this consumes a lot of vigor for not that much experience so do this if your vigor was otherwise going to go to waste.
Though it is a really good source of food twice a day, you can do the furniture recycling quest at Hope 101 to get a drumstick meal which restores 200 vigor.
This is essential for those of you who are busy during the week, but free during weekends. If you use the trick I explain later, this quest takes less than two minutes, so it can easily be done during a bathroom break, and then you can save the drumsticks for the third way to get experience is throughthe NPC’s scattered throughout the zones These NPC’s have quests that also give experience, and sometimes they are the exact same that you were given from the map bulletin so you get two rewards for the same task.
Also, if you find special items like black amber, you can give them to those NPC’s for even more rewards. Those rewards scale based on your mastery levels, so I would recommend waiting as long as possible before turning them in.
As you get to the higher levels, you will start having to choose between skills because you won’t have enough skill points to buy everything. Also, you will be given a chance to choose a profession with new skills of its own.
Make sure to choose this carefully because it costs real money if you want to change your profession later. If you are not sure what profession you should choose, make sure to check out my video describing the pros and cons of all the different professions.
The second area of personal progression is by building attachments for your weapons and armor and then upgrading them. You can build them in the armor and weapon shops at your camp or at Hope 101. After you build them, you can upgrade these attachments for huge benefits by combining them with the matching components of the same level.
Getting higher levels of components also requires combining components of the same level, meaning that each new level is twice as hard as the previous one. That type of exponential scale can get pretty overwhelming quickly so this means that in order to get all 6 of your attachments to the max of twelve stars, you will need 12,282 components, which is kind of impossible.
The easiest components to get is through doing Nancy Town. Completing all of the objectives every day will give you enough points to buy 3.5 components.
After that, you can buy four components for$3000 new dollars each at the armor and weapon shops. After that, you can buy ten components for 2000 gold each at the mall.
And then after that, you can buy ten more components a day at the mall for real money. The Hope Fund also gives the equivalent of sixteen components. This means that as a free to play player, it would take 700 days to max out your attachments and even if you are a pay to win player, it will take 445 days and hundreds of dollars.
So obviously Netease is not intending us to max out these attachments and fortunately for us, even if someone does twice as much work than us, they still only get one worthy of an advantage. The third area of personal progression is through research.
By spending formula shards and gold, you are able to unlock new formulas to build better items. Duplicate formulas are turned into FormulaR&D data which you can use at the exchange center to buy new formulas, or you can use them to upgrade the formulas you already have.
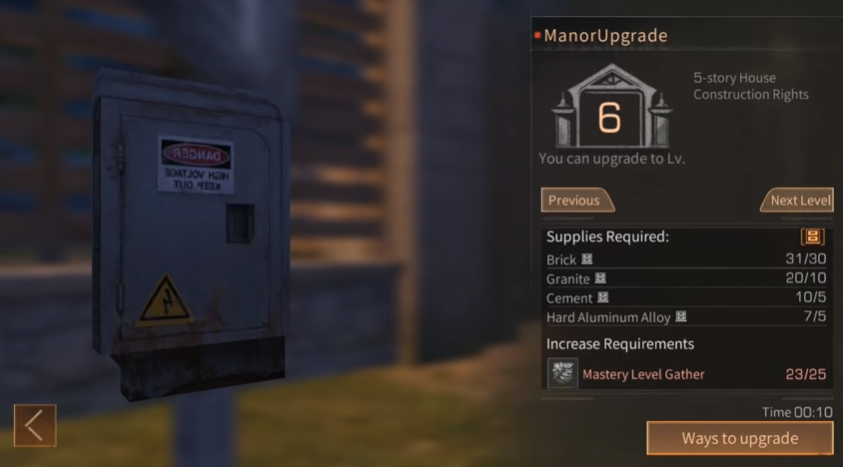
The fourth area of progression is your minor level. Upgrading your manor is the key to unlocking new weapons, work benches and everything that has to do with your house very well by the Newbie Guide. So those are the four areas of progression in this game and you need to balance working on all of them at the same time because as I showed you with the weapon are limited how much you can do on them each day.
Other than that, focus all your attention on the Newbie Guide. It will take you through each new zone as they get unlocked and explain everything that I did not explain here. So that should get you guys started, but in addition to these 54 tips, I have 57 more for you.
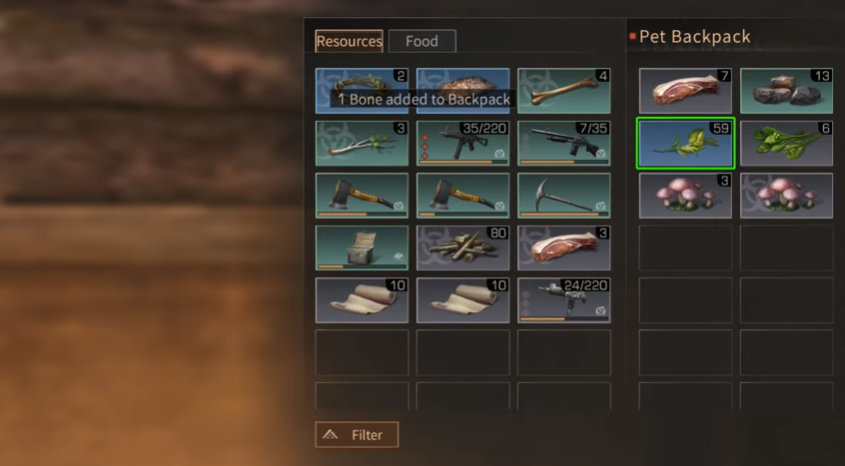
I recommend starting out by making your doga pack dog. Search dogs can find cool items, but they usually aren’t that great whereas a pack dog can provide twelve extra storage spaces, and fourteen if you have a labrador. When you consider how much it costs to increase your backpack by two slots, this is a crazy amount of storage.
And then when you become a higher level, you can spend one thousand gold to switch dog to a guard dog if you want the extra protection. They are more effective at a higher level anyway. If you are using a pack dog, I recommend keeping two extra tools in there or some iron so you can build them in the sand, snow, and swamp zones.
And then I recommend carrying four meat, four mushrooms, and four vegetables so that it easier to complete the NPC quests when they come up. I also recommend keeping some little branches in there.
They are the best item to use as gifts to gain favor with NPC’s. In the furniture recycling event, multiple people can grab the same stack, so if you have a team of four, you only need to find two large stacks to complete the whole quest.
When you unlock a new level of tools, throw away your old ones. Higher level tools give way more resources and you get more gathering experience per vigor used.
Theoretically, you would want to do this with weapons too, but weapons are a lot more so once a weapon is to low level to be useful, make sure to dismantle them for a refund some of the resources. The camp boss on Sundays and camp invasions make it to where you barely use any on your weapons, just like Miska.
But unlike Miska, you get combat mastery experience for shooting your weapon. Combat mastery usually advances the slowest because people are trying to conserve their combat mastery usually advances the slowest because people are trying to conserve the amount of experience.
Unlocking spaces in your garden will transfer when you move to a camp so it is a great way for gold early game. Also, if you have an almost broken mining rig when you transfer, it will give you a brand new one in your mailbox, which isn’t a whole lot now, but back when I transferred it was really nice.
Spending gold to ship home more items is always cheaper than buying them in the market, you might want to store some of them because as you get higher and higher level, it takes a lot more time to hit the quota in every zone available to you. Also, if you are new to a zone and are in need of a ton of those new resources, it might be good to store all of your green items at first because they usually hit quota first and then come back to get those items as you have need of them.
But if you do that, make sure you come back and fill the quota before the day ends. Using auto on fishing wastes a lot of bait, but it is really nice to be able to play AFK Honestly, fishing has the lowest experience per vigor used ratio of anything in the game so if you are wanting to advance quickly and have the time to devote to it, then you should save fishing until you have run out of vigor.
Double-clicking here while you are in a zone gives you extra information about the zone and its weather conditions. You can share with your campmate a link to almost anything in the game by selecting an item, clicking on the three dots and then this share button.
The annoying double beep you hear from time to time is the transition between day and night. If you ever get stuck on the map, click on settings and hit, “solve jam.” Once you move into the Uzi stage of the game, it is important to build multiple guns. Barrel overheating not only decreases its stats, but it makes the gun go through more durability and gains you less combat experience.
I recommend keeping atleast two guns on youat all times. In fact, I currently have four guns that I circulate through and after all four of them run out of ammo, I go to the nearest zone that is occupied by camp and reload all four of them at the same time for free.
The first time you kill a boss, you get extra rewards and you only have to get one shot off on a boss to get the reward. So if you are too low level to kill the boss of that area, then you need to get skilled at freeloading off of others. There is a mini-boss in every map in the hardest part of the zone.
They don’t drop as good of rewards, but they are still worth it if you have a good team. This rocket guy can be killed by yourself if you stand on this rock and move to avoid the red areas.
If you haven’t unlocked the stronghold of a map yet, playing card games is the fastest way to get secondary resources, but there is a limit on how many resources you can get that limit is separate for each map. In Sand Castle, the caves are not the only place that allows you to breathe.
You can hang out in the Scientia buildings, the entrance to the sandcastle stronghold battle, and Mercenary buildings. In fact, my favorite time to do the quests that require me killing mercenaries or collecting their chest is during sandstorms.
You don’t take a ton of damage until your lungs hit three dots, and entering a safe area immediately resets your lungs, so itis easy to farm the area close to those buildings you can grab one item at a time from your inbox by selecting on that item. This tab is set based on a date so make sure to use all of these points before this date, or else you will lose them.
You can store all of your items in your inbox, but I don’t recommend doing that because makes it very difficult to know what you have. Rather, I recommend making a giant storeroom with a ton of chests on your first floor and then naming those chests based on the type of materials you would like to put on it.
Then put one chest that is easy to access and use the switch and move same items buttons to put away all of your stuff quickly they all have to be on the same floor in order to make this work. In the camp boss fight, place medkits before you place ladders so that you can get while you are protected.
The biggest trick that a lot of new players don’t realize is that when you die you can click on the zone that you would like to spawn at. The quality of fish that you catch has very little to do with your location or even your bait.
Rather, the quality has almost everything to do with the fishing pole you’re using and a little bit on your fishing mastery level. That being said, you can catch different types of rare fish in different locations which unlock new recipes.
Anytime you need bandages, use stronghold point to buy tons of hemp. You will literally be able to get all of the healing you could ever want and still have thousands of points left over.
Buying trees in the first stronghold is the best way to get twigs. And buying trees in the second stronghold is the best way to get little branches, which as I said earlier is the best item to use to get favor from an NPC.
Keeping your hunger and health bar high will give you the invigorated buff, which gives you plus 5% damage, 5% movement speed, 5%collection speed, and minus 20% energy consumed when running. This is a huge buff!
And definitely makes it worth trying to keep the invigorated buff active as much as possible. Early on, you will notice that most of the items that you make are not tradable. In order to have a tradable item, you will have to have done at least one formula modification for the item that you were making, and it needs to gain a high enough score to become at least green.
When you’re making food items, they are prioritized in the reverse of how they are listed. So for example, I can choose one puffer fish and three of any item above it, and still get the puffer fish’s healing effect.
The effects are based on the quality of ingredients, but you can stretch the effects a lot further if you use cheaper items like berries to fill in the other spaces. As soon as I finish the list, I will make a video that has all of the food combinations and which ones I think are best.
If you were fighting a boss with a big group and it targets you, don’t run away or it will just reset. Rather, run around in circles until he targets someone else.
If you end up dying, stay there because people are usually really good about picking you up after the boss is killed so that you can get the reward. Make sure to use your bed to restore the durability of your armor and weapons to its every day.
This will save you a ton of resources, but I recommend doing this during the day because using the bed keeps your character in the game. Which prevents you from being able to get the hot event compensation from events that you weren’t able to accomplish that day.
If you are too busy to do everything, make sure you accept all of the quests for that day so that you get a bigger hot event compensation when the day resets.