Overview
Welcome everyone, to the Oldschool Runescape Mobile Tips and Tricks guide. This guide is designed to help you understand the basics and depths of the game and further yourself with some helpful tips.
![Oldschool Runscape Guide [Tips and Tricks] - Mobile](https://playerassist.com/wp-content/uploads/2018/11/4hs0c1ljnln1.png)
Oldschool Runescape Mobile
Introduction
Runescape or Oldschool Runescape as it’s now dubbed is an MMORPG based in a fantasy world. You go on quests, fight monsters, and everything you’d do in the typical MMO fashion.
Runescape is a bit primitive looking and with good reason. It has been around for a very long time predating most modern MMO games that exist now.
Oldschool Runescape Mobile has taken the original Runescape game and brought it to the mobile scene. This gives it a whole new life, community, and is basically a resurgence of the game.
Before you can even start playing the game you have to make an account for it. Through the app, you’ll be taken to the Runescape website where you will create your account.
All you need is your email and a password then choose your in-game username. Once your account is done you can immediately jump into the game.
Once you get into the game you are dropped into Tutorial Island. You start by making your character avatar then you’re setting off into the tutorial.
If you’re a new player or even a veteran who is returning after years of being away, do everything on Tutorial Island. It does not take very long and it lets you know about all the basics.
Game Basics
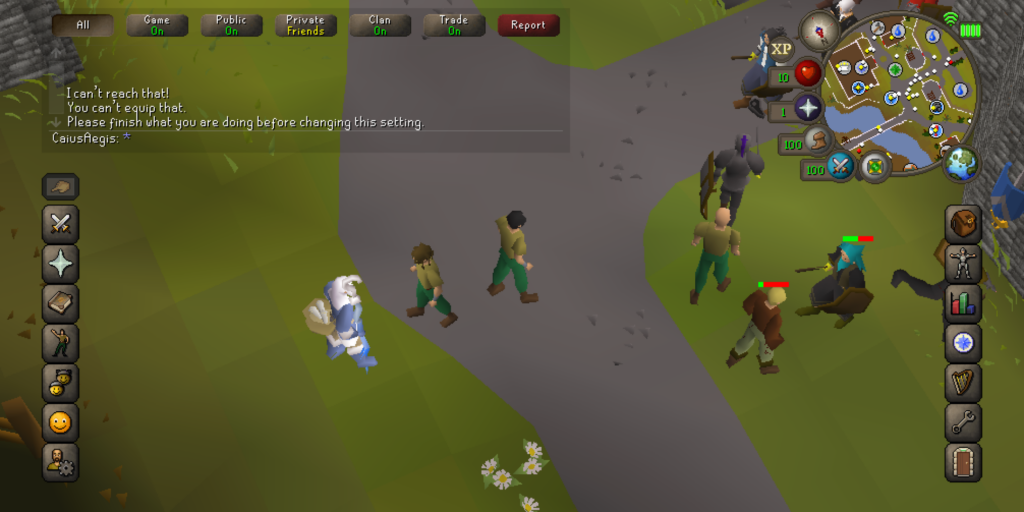
Oldschool Runescape Mobile is exactly like the version for PC. Though, the control scheme is different due to it being on a mobile device.
To move you tap the screen and your character will walk to that location. Tapping is also how you interact with objects. Opening doors, making fires, combining items, etc.
By dragging the screen you’ll rotate the world camera. And by pinch dragging, you will zoom the camera in and out depending on which way you drag.
These are the major differences in terms of basic mechanics. Everything else is pretty much spot on to the PC version for anyone who has played the game before.
Aside from the control mechanics, there is the game layout. On screen, you have the minimap in the top right corner and your taskbars on each side of the screen.
As you go through Tutorial Island your taskbars will be filled out with icons. You get a pretty good idea of what each item on your taskbar does throughout the tutorial.
On the right bar, you have your Inventory, Equipment screen, Skills, Quests, In-Game Music, Settings, and the World Switch/Logout. On the left bar, you have your Attack interface, Prayer List, Spellbook, Emotes, Clan Chat, Friends list, and Membership options.
We’ll go over each one of these to give a firm idea of what each one does.
Inventory
Your inventory is where all of your in-game items are kept. In the inventory, you’re able to use items and also combine them.
By tapping one item then tapping another some items can be combined. Like water and flour in order to make a dough.
Equipment
The Equipment screen is where all your currently equipped items are. To equip items you tap the equip tab in the equip screen and you’ll be able to select items to equip.
Skills
The Skills tab is where all of your character skills are. There are a lot of skills in this game like Fishing, Smithing, Range combat, etc.
Quests
The Quest tab has every single quest in the game. The quests are listed as Red to determine they are incomplete, they turn Yellow when they’re in progress, and Green when they’ve been completed.
In-Game Music
This tab is a little quality of life feature. It lets you change the overworld music you hear while playing the game giving you some freedom of what you listen to.
Settings
The settings tab is the options of the game. You can change base settings like sound, visuals, and other in-game options.
Logout
This tab is simply the logout function. You should log out each time you leave game instead of just closing the app.
Attack Interface
The Attack Interface controls your options during combat. Each weapon has different forms of attacking and you can choose which one your character focuses on in combat.
Prayers
Prayers are special moves that can assist you in combat. You get Prayer points from Burial Bones and you need points in order to use Prayers.
Spell Book
The Spell Book tab gives you access to your current spells you can use. You need Runes in order to cast spells and different runes give you access to different spells.
Emotes
The Emotes tab has a list of different emotes you can use. They are little animations your avatar does in order to interact with other players.
Clan Chat
Clan Chat is for players who have joined a Clan. A Clan is a group of players you can join and chat with them through Clan Chat.
Friends List
Your Friends list is where you’ll see the friends you’ve made in the game. Their usernames will be listed in the Friends list.
Account Tab
The Account tab is where you can access the ability to get a Membership. You can buy one with money or buy a Bond and sell it in the game for in-game gold. You can also check your game inbox here and change your characters name.
There are a lot of functions for each one of these tabs and they’re explained well in the tutorial.
Map Screen

The Map screen shows your general surroundings and areas of the games. In the map screen, you can’t move around but you can see all the things around you.
There are several icons in this game and they’re listed in the menu on the left side of the screen. Each icon is a different function in the game from shops to homes.
Always refer to the menu on the left if you’re looking for a specific place on the map. If you ever need to find something you will be able to locate it here.
Around the minimap are four icons that relate to your character. A heart, a star, a sho, and two Swords.

The heart is your health. The number by your health determines how much you currently have and it will decrease as you take damage.

This displays how many Prayer points you have. You can tap and hold it to show your quick Prayers menu and allows you to decide which Prayers are set into it.

This is your Run energy. By tapping it you can turn off whether or not you’re running and when you are the number will begin to decrease.
By turning it off it will replenish over time. The amount of weight you have on your character also effects how fast it drains so be sure to keep an eye on that.

Lastly is the Special Attack orb. This is a very simple one as it shows how much special attack you have remaining.
Beginning your Adventure
So now you know all the main basics of the game in terms of mechanics. And by now you should also be out of Tutorial Island and have a good grip on the game.
Stronghold of Security
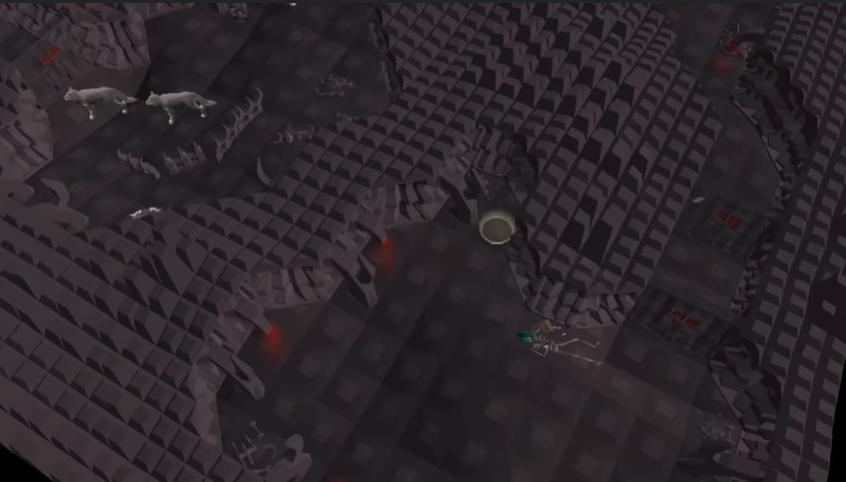
The first thing any new player should do is head to the Stronghold of Security. It’s a great place for new players to go to make some quick gold and get the best boots in the game for F2P players.
The stronghold is located in the Barbarian Village and is full of a lot of monsters that can be somewhat high level. So when you come here be sure to be equipped well and have a lot of food.
Canoe System
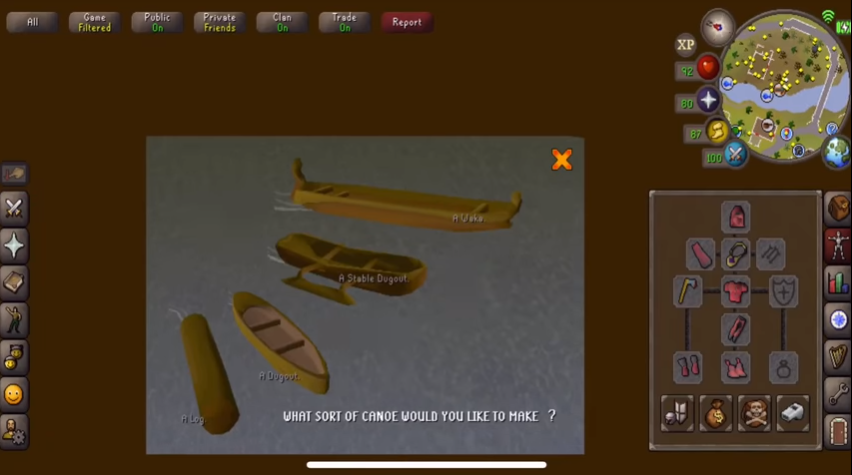
The Canoe System is essentially the fast travel in this game, not counting teleporting for players who pay. It will allow you to quickly get to places.
You need 57 Woodcutting to make the best Canoe, however, you can start using it by level 12. You also need an ax in order to cut down the tree and make it into a Canoe so be sure to grab one.
Quests
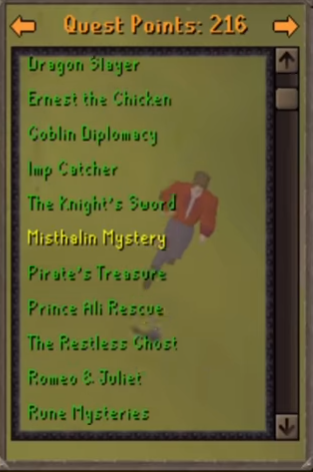
For Free to Play players, there are not very many Quests for you to train. So completing them isn’t going to be too hard or take that long.
The hardest is going to be the Dragon Slayer quest. The completion of this quest gives you the best F2P armor in the game.
Leveling-Skills
Here we’ll go over every skill available for F2P players.
Combat
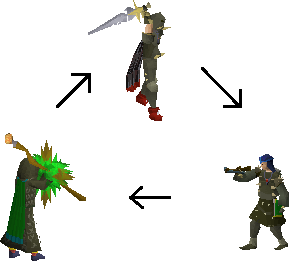
Obviously, we have to go over the Combat basics before going over the skills. Your combat section is governed by seven different skills and each one affects Combat different.
The seven skills are Attack, Strength, Defense, Magic, Ranged, Hit Points, and Prayers.
Leveling up your Attack allows you to use better weapons and Attack also determines your accuracy. Leveling Strength allows you to hit harder.
Leveling your Defense allows you to wear armor including Melee and Magic armor. Magic will increase your magic defense which means you’ll be less likely to hit by magic.
It also unlocks the ability for you to use more Magic spells. Leveling your Ranged attack allows you to increase your Ranged damage and accuracy.
Leveling your hit points allows you to give yourself more health so you can take more damage without dying. And last is Prayer which gives you more Prayer points and access to more Prayers.
Now that you understand the combat skill basics let’s get into actually training it. There are three types of combat in the game, Melee, Magic, and Range.
There is a combat triangle in this game that follows the rock, paper, scissors method. Ranged beats Magic, Magic beats Strength, and Strength beats Ranged.
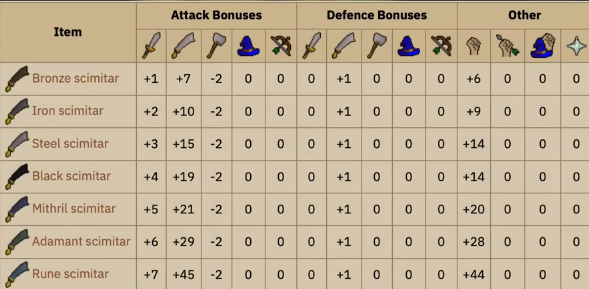
For the best Strength training, you want to equip the best Scimitar you can and wear the best armor. Also, equip the boots you get in the Stronghold of Security.
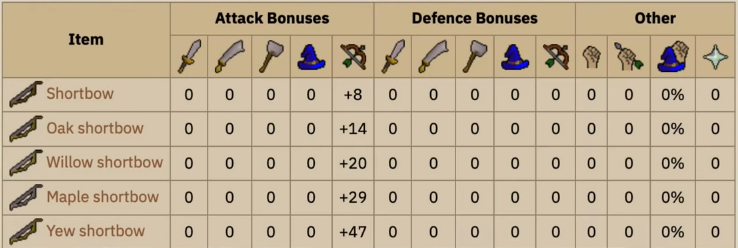
For Ranged, always use the best short bow you can. For Defense, you wanna start with leather armor then build up to studded leather than Dragonhide armor.
Magic gives you a bit more variety in terms of weapons. There are items known as Elemental Staves that give you unlimited casts of any runes of that element. For armor, the best you can wear is Wizard robes.

For actually training there are a lot of different places and methods you can go by. For the early levels, you can focus on killing Chickens to get your levels up.
Once you reach around level 5 you can start killing Cows instead. You can grind on the Cows until around level 20 which will take a bit but there are benefits.
Cows are pretty easy to bring down and they drop both hide and meat. You can cook their meat and eat it to regain health so you never have to worry about dying to them.
Once you reach high levels your places to train will expand into a bit more variety. The Stronghold becomes a very good place for late level grinding.
Non-Combat Skills
Now we will focus on the skills that have nothing to do with combat. There are a bit of them and each level up in different ways.
Woodcutting is leveled simply by cutting down trees. It’s not complex at all and it takes a bit to level up but you can get some profit as your woodcutting level increases.
Firemaking is the next step from Woodcutting. You can burn logs to gain Firemaking XP, though Firemaking doesn’t really affect much other than cooking. You can make fires by using your Tinderbox on logs.
Fishing is another resource gathering skill. You’ll use bait along with a net or rod depending on what you’re fishing for.
Cooking is another easy skill to train. The more you cook the more XP you gain but depending on what you cook gives more. Cooking Lobsters gives the best source of XP for this.
Mining is a skill where you collect Ore which can be used for the Smithing skill. Mining is straightforward as well, mining Iron gives the best XP.
Smithing is the counterpart to Mining and unlike other F2P skills, you shouldn’t train Smithing until you complete the Knight Sword Quest. This is because once you beat that quest you will immediately be taken from Smithing level 1 to level 29. Training Smithing after this comes in the form of making the best plate body armor that you can.
Crafting is a skill used to make things such as jewelry and ranged gear. I wouldn’t recommend training Crafting as a beginning because it can become very pricey.
Runecrafting is the process of creating Runes. In order to train this skill, you have to complete the Rune Mysteries quest.
After that, you can obtain a Tiara or Talisman based on that Rune. Make sure to keep it in your inventory when crafting.
Gameplay Tips
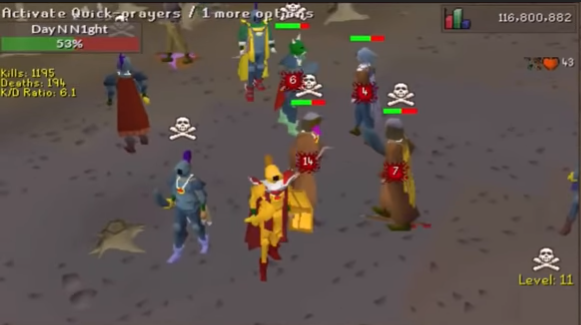
There are quite a few areas in the game that you can get to as an F2P player. The Barbarian Village is one to focus on because of it’s access to the Stronghold of Security.
The village is located south of Edgeville and west of Varrock. Low-level players should steer clear cause of the difficulty spike so come here after you’ve done some grinding on Cows.
Aside from the PvE aspect, there is the Wilderness which is a full PvP area. If you’re low-level then just avoid this place entirely.
In the Wilderness, any player can attack you at any time and vice versa. The further into the Wilderness you go the more difficult to becomes.
It’s better to wait for PvP until you’re higher in level and have better equipment. This is an MMO so grinding is a big part of the game and it does pay off in the long run.
As stated in the above sections it is highly recommended to train your skills as much as you can. Especially if you’re F2P, training your Combat skills is probably one of the most important things you can do.
Membership
Getting a Membership is entirely optional. But we’re going to go over the benefits of having a Membership and what exactly it means to be a Member.
Membership costs about $11.00 monthly if you buy it outright. But you can also become a Member if you get a Bond in the game and use that instead. Bonds can be bought with in-game gold.
Being a Member unlocks every quest and skill in Runescape. Some of the most popular skills are things like the Slayer skill.
Slayer is trained by fighting Monsters assigned by Slayer Masters. By doing this you will get quests that get you over half a million GP an hour.
Another skill is Agility. It’s not very popular due to the heavy nature of grinding but it lets you run longer and gives you the ability to unlock the graceful outfit.
Membership will also unlock way faster methods to train every F2P skill. It also unlocks every single area in the game as well.
You also get access to bosses in the game and bosses are a big part of Runescape. Bosses give items and GP when you defeat them so they’re highly profitable.
Buying a Bond is probably easier for a lot of players due to Membership costing real money. And Bonds are going to be very expensive for you to get.
Below is a video that explains a money making method to help to get yourself a Bond a little easier.
https://youtu.be/9fw7yx5zQf8
by Smallexplamp


