Creating a shelter or a base is one of the most crucial parts of every player’s playthrough in a survival game mode in Minecraft. Unfortunately, choosing a base design can be quite difficult. Moreover, choosing one as an effective temporary shelter for your first night in the game can be tricky. Since you have limited resources at the beginning of the game and even more so with limited daylight, creating a good and effective base for yourself quickly will seem challenging to say the least. But worry not, for we have created this Minecraft guide to help you choose the perfect temporary shelter for yourself and keep it tailored to your needs.
Temporary Shelters For Your First Night in Minecraft
Below is a list of some of the most common temporary shelters you can build at the start of the game. Feel free to choose the best shelter design for you and change it based on your preferences.
1. Cave Shelter

One of the quickest temporary shelters you can create is a cave shelter. As most players already know, caves and caverns can be found naturally in the overworld in almost every biome, including the desert. As such, it is highly plausible to use a cave as a shelter for your first night to protect yourself from the outside world for the time being.
To use a cave as a temporary shelter, the first thing that you must ensure is that you should have adequate lighting inside to prevent other hostile mobs from spawning inside the cave itself. Moreover, deeper caves and caverns hold hostile mobs even during daytime as it is incredibly dark inside. So, creating boundaries and walls to prevent any hostile mob from getting near you while you sleep and keeping the area well lit should be another thing to note.
While mining for cobblestones and ores on your first day, you will most likely dig out a small cave. Although it is rather difficult to create in such a short amount of time, digging a hole in a wall can also be another option for you, and this can still be considered a cave shelter. You can take advantage of this small cave as your temporary base for the evening by simply placing a wooden door to cover the cave’s opening and keeping the interior lit with torches.
As an alternative to a wooden door, you can also cover the entrance with dirt blocks for the night and dig them out come morning.
2. Tree Hut

Another great temporary base is a tree hut or treehouse. First off, search for a large tree and use dirt blocks to climb up. Then, you can use the leaves as your platform and build yourself a small hut on top of the tree. This way, hostile mobs on the ground cannot reach you easily. However, flying hostile mobs such as phantoms may spawn at night, so make sure to build a proper roof on your treehouse.
Alternatively, if the tree and the leaf canopy are large enough, you can dig into the leaves and create a room-like structure inside the leaves themselves. This will help keep you safe from hostile mobs below and prevent them from spawning inside your base, as the game mechanic prevents them from spawning on top of a block of leaves.
3. Pillared House

You can also create a pillared house or a base on top of some pillars using the safety of heights. Build a high pillar made of any material such as dirt or wooden blocks, and prioritize building the ground. Once you’ve built the floor, you can create the walls and roof to resemble a small room off the ground. Alternatively, you can create pillars made of fences to make it look like a hut and create a small staircase going to your doorway for easier access. However, keep in mind that going on for days without sleep will result in phantoms appearing in the sky at night and prevent you from sleeping at night, especially when close to your base.
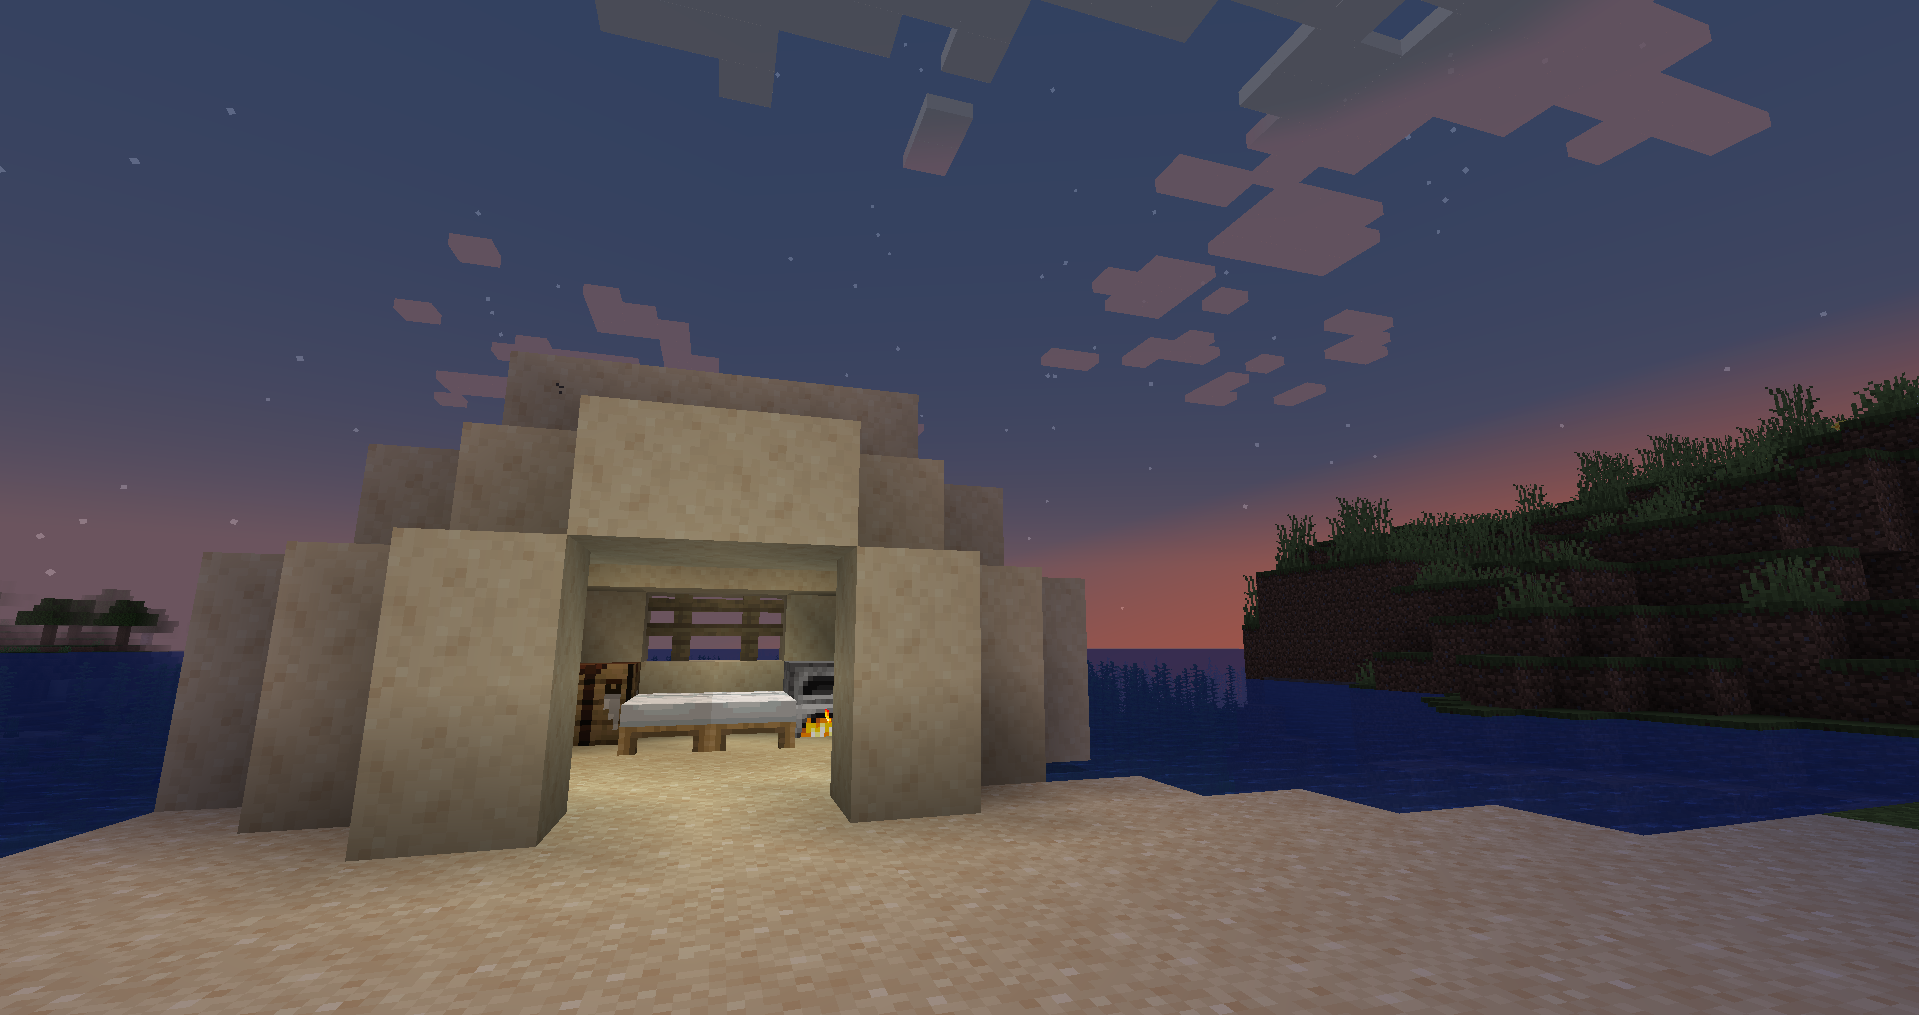
4. Beach House

Taking advantage of most hostile land mobs’ inability to spawn in the water, building your first base near the beach or on the water will keep most of your problems with mobs away. Although this may seem quite difficult, you can create a bridge starting from the shoreline toward the ocean.
To prevent yourself from falling into the water while building the bridge, you can crouch and hold the CTRL key as you place a block next to the one you are standing on. Then, once you finish building the bridge, start laying down the blocks to create a floor and continue to build the house afterward. Since you may have limited time to do this, you can build a small and simple room for the time being and expand later on.
5. Hole in the Ground

If you are in desperate need of a place to stay for the night and running out of time, you can choose to dig straight down and build a small room in the ground. To start, dig straight down from where you are standing and reach about three to five blocks deep. Then once you’ve reached the desired depth, place a single torch on the wall behind you and dig around yourself until you create a room underneath the ground.
Remember that when digging straight down, you must be vigilant at all times in case you might accidentally fall into a pit below. This is not the best temporary base to build, but it will do for the night for emergency cases.
Now that you have your room, craft some ladders on the crafting table and place them on the wall with the hole on top and going up to the surface. You can craft a ladder by using a total of seven sticks and placing them in a specific order on the 3×3 crafting grid: place a stick in the left and right slots of the top row, place a stick in the left, center, and right slots of the middle row, and lastly, place a stick in the left and right slots of the bottom row. One crafting process will provide you with three ladders. If you need more, double the crafting recipe.