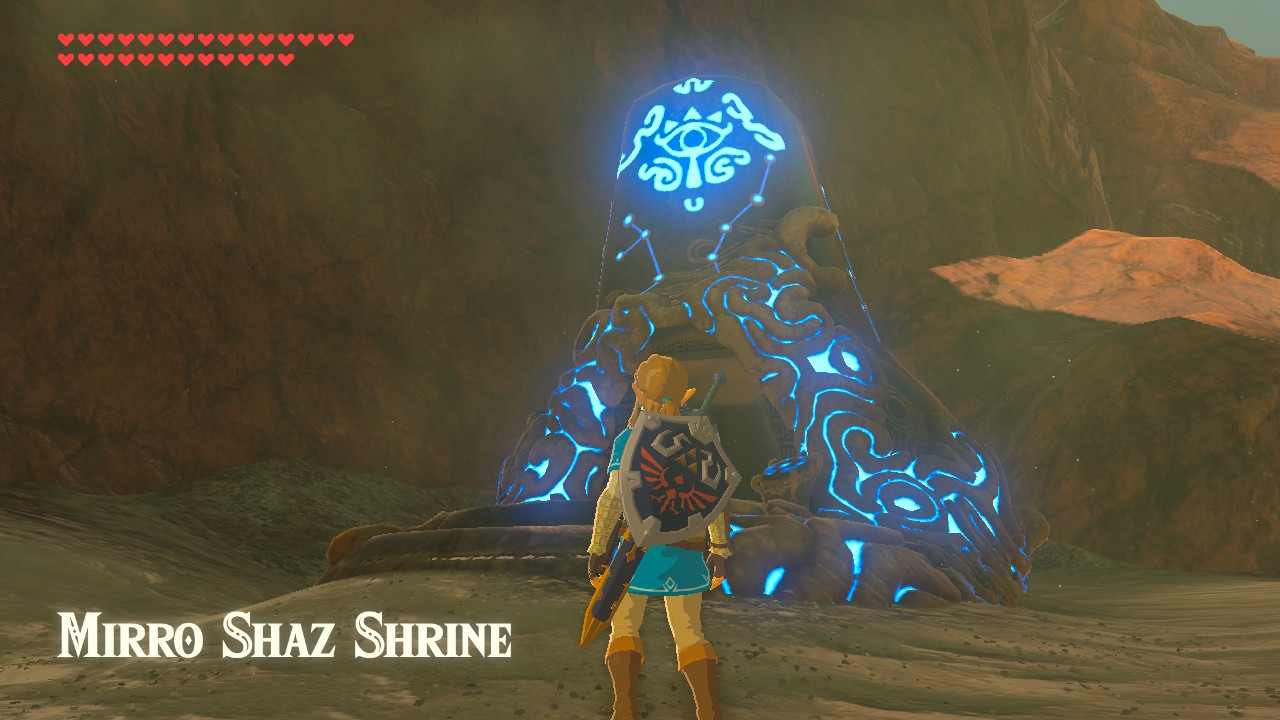
One of the Shrines in The Legend of Zelda: Breath of the Wild is the Mirro Shaz Shrine or Tempered Power. This shrine requires Link to use the Stasis Rune ability to complete various obstacles and complete the shrine. This shrine may seem hard, but it is pretty easy to complete. In this guide, you will learn how to complete the Mirro Shaz Shrine, get the chests, and claim the Spirit Orb.
Link is rewarded with Spirit Orbs for completing Shrines, and you can exchange them for more Heart Containers or Stamina Vessels. With Hyrule housing 120 Shrines, Link could get 120 Spirit Orbs. You get to decide whether you want Link to have more Hearts or more Stamina.
Location

The Mirro Shaz Shrine can be found just around Pico Pond northeast of the Woodland Stable, southeast of the Woodland Tower, northeast of Hyrule Castle, or southwest of Eldin Canyon and the Eldin Tower. The Mirro Shaz Shrine is one of eight shrines in the Woodland Tower region.
Tempered Power

Upon entering the shrine, Link is at the top of a high platform, and down below, there is a glowing orb, a switch, and a chest. On the other end of the room is a large glowing orb socket. To complete this shrine, this is what Link must do:
- Go down from the high platform and go to the chest. Open the chest to obtain an Iron Sledgehammer.
- To complete this next obstacle, Link must get the glowing orb to reach the glowing orb socket. To do this, press the up directional button and select the Stasis Rune ability, go to the glowing orb, and stand behind it so that Link is facing the glowing orb and the glowing orb socket in the distance. Then, press the L button to aim the Stasis Rune ability, press A to activate it on the glowing orb, and hit on the spot that the arrow will point towards the glowing orb socket and hit the glowing orb just enough (nearly max) so that it will fly off towards the glowing orb socket. Do not worry if you do not shoot the glowing orb on the glowing orb socket the first time. You can simply hit the switch to get another glowing orb.
- After successfully shooting the glowing orb to the glowing orb socket, the wall on the left side of the room will open up. Continue on the path.
- In the next room you will see a concrete cube that can only move in one direction, a large concrete slab in the fashion of a seesaw that is in a vertical position, and a ladder on the left and the right side of the concrete cube. Activate the Stasis Rune ability on the concrete cube and hit it as much as you can so that when the timer for the Stasis Rune ability runs out, the concrete cube will go forwards with enough force to push the bottom of the large concrete slab to bring the top end down.
- Next, go up on either ladder and use the large concrete slab as a bridge to the next part of the shrine.
- Upon reaching the top, you will find the altar and the monk. If you want, you can finish the shrine here. However, it is important to mention that there is another path on the left side of the altar that leads to a chest. Follow that path and you will again find Link at the top of a high platform.
- Drop down and you will see a chest across the moving platform, where you just dropped down. Open the chest to obtain another Iron Sledgehammer.
- In this part of the shrine, you will see that it is similar to the first part of the shrine where there is a glowing orb, a switch, and a glowing orb socket. The difference is that there are pillars that partially obstruct the way to the glowing orb socket. Additionally, there is a chest on the left side of the glowing orb that is locked behind bars. To finish this part of the shrine, activate the Stasis Rune ability on the glowing orb, hit it on the spot that the arrow will point towards the glowing orb socket but slightly to the left so that it won’t hit the pillars, and hit the glowing orb just enough (nearly max) so that it will fly off towards the glowing orb socket. If you do not succeed the first time, you can simply hit the switch to get another glowing orb. Even though “shooting” the glowing orb from the pedestal where it drops is not impossible, picking up the glowing orb and placing it in a different position so that it will not hit the pillars can help.
- After successfully shooting the glowing orb onto the glowing orb socket, the bars blocking the chest will open and the chest can be accessed. Open the chest to obtain a Giant Ancient Core.
- Finally, go back up by riding the moving platform, go back to the altar, talk to the monk, and claim your Spirit Orb!
The Mirro Shaz Shrine or the Tempered Power is one of eight shrines in the Woodland Tower region. The other shrines are the Daag Chokah Shrine or Daag Chokah’s Blessing, the Keo Ruug Shrine or the Fateful Stars, the Monya Toma Shrine or Drawing Parabolas, the Ketoh Wawai Shrine or Ketoh Wawai’s Blessing, the Rona Kachta Shrine or Rona Kachta’s Blessing, the Kuhn Sidajj Shrine or Kuhn Sidajj’s Blessing, and the Maag Halan Shrine or Maag Halan’s blessing.