The Medium has been in the line of games that require you to think on your feet but also take your time and play the game at your own pace.
Solving mysteries and puzzles is one of the most important things you will need to do in this game. These are very engaging, and are difficult to the point before being unsolvable. The story will take you on a rollercoaster, and you might have to strap in, since as you progress, the game gets harder and harder.
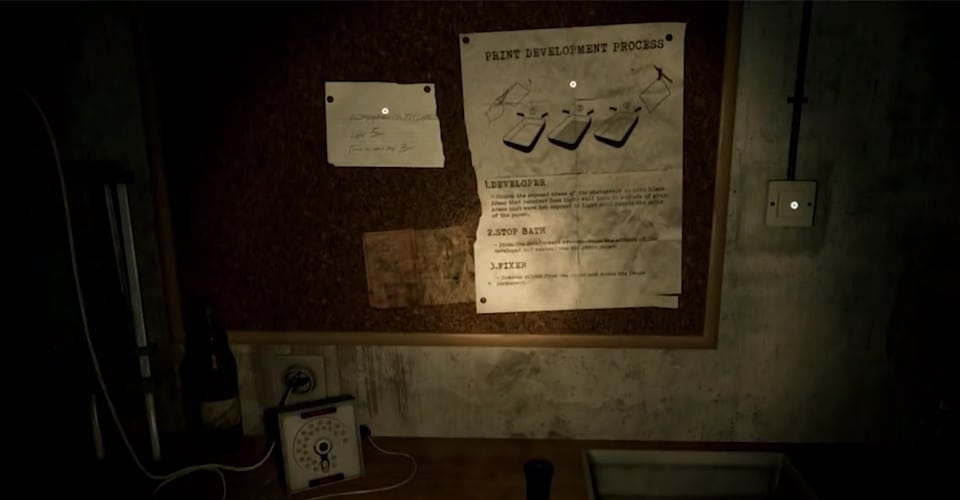
There is a certain photo development puzzle you will find, where you will need to use chemicals to uncover a hidden photo. Why such secrecy?
Photo Development Puzzle Solution – The Medium
Since I’ll reveal many spoilers if I indulge in explaining why someone would go to such lengths to destroy images, I will not do so. Instead, I will show you how you can complete the puzzle, so that you can find out yourself.
It is quite a difficult puzzle if you don’t understand photo manipulation and don’t know what exactly you need to do, but with this guide for the photo development puzzle in the Medium, everything will become clear:
- When you get to the Print Development corner of the room, flip the switch that is right next to the pinboard. The light should illuminate RED.
- You will need to find three liquids and a tray at this point. There should be a chair on the right, there will be your first liquid – FIXER.
- Left of the photo development area should be a sink. Look for it, and in it, you will find the STOP liquid.
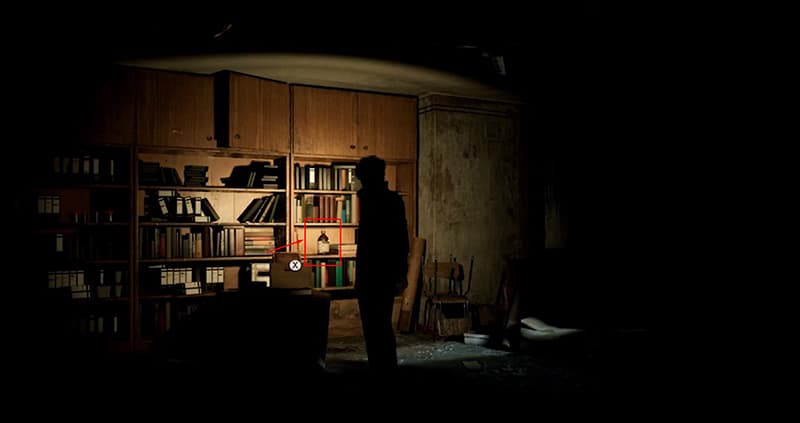
- Navigate the room until you find a cupboard. On the right side of the cupboard, you will find another liquid.
- Then, move to the left side of it, and on the ground, you will see the tray. Now, go back to the photo development area.
After that, there is still some stuff to do, so for those that don’t want to know what to do, look away now. However, if you’re having trouble completing this portion too, try this:
- Place the tray in the middle, under the pinboard.
- Put the multigrade liquid in the first tray on the far left.
- Put the Fixer liquid in the middle pan, and the STOP one on the tray on the right.
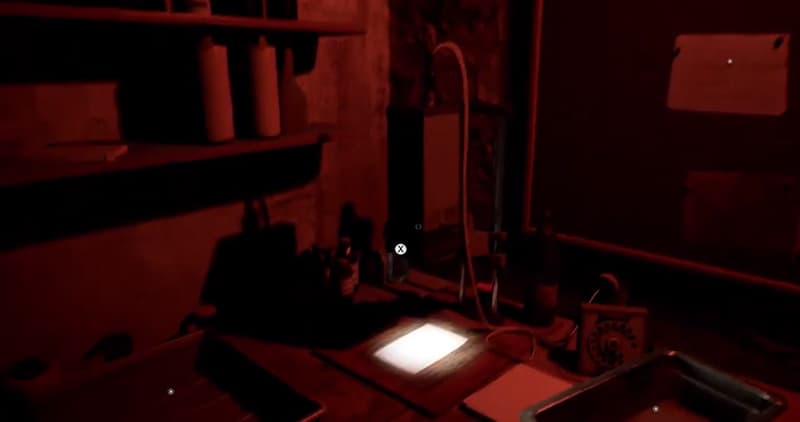
- Put a photo paper from the table under the light machine, left of the place you put the tray on.
- Take it out after 4-5 seconds and see if it is an Illuminated photo.
- Then put it in the multigrade for a couple of seconds, take it out and see if it changed to multigraded photo.
- After that, put it in the STOP liquid for a couple of seconds, and then the last one, the Fixer liquid.
These steps are time-sensitive, so you will be taking them out too soon or too late at some point, but the game will prompt you whether you have been quick or slow.
After doing the steps above a cut-scene will start and it will reveal some interesting new developments in the story.
READ NEXT : Best 5 Games Like The Medium