These Viper Wall Setups on Bind make site entry and defense easy.

Bind is a relatively small map by VALORANT standards due to the absence of a middle lane. Having no middle lane helps shrink the map and make gameplay much faster as teams focus on any two entryways found in A-site or B-site.
Viper’s Wall can be used to great effect on Bind; able to cover multiple entryways and sightlines for Attacking or Defending on the map. Viper’s Wall is also free, making it a very valuable and cost-effective ability on Bind.
We have come up with some of the Best Viper Wall Setups for both Attacking and Defending on Bind in this guide.
Viper Wall in 2022
Viper’s Toxic Screen peaked back in Patch 2.06 when the devs decided to bump up the contact decay damage for crossing Toxic Screen to 50 decay damage. This change alone made Viper’s Toxic Screen the deadliest and most cost-effective smoke ability in VALORANT.
After Patch 2.06 dropped, Viper slowly ruled the VALORANT meta thanks to her reusable smoke cover in Toxic Screen and Poison Cloud. The buffs given to Viper in Episode 2 made her a must-pick on maps such as Icebox and Bind, where she can play as an effective Sentinel-like anchor on Defense or resume her typical Controller duties on Attack.
However, Viper’s reign was cut short when Patch 4.04 dropped a year later. Viper would receive crippling nerfs that would push her back from the top of the Controller tier list and help make other Controllers like Brimstone and Omen more relevant.

Right now, Viper’s Toxic Screen doesn’t last as long as it used to because of the changes the devs made with Viper’s Fuel. Whenever Toxic Screen and Poison Cloud are active simultaneously, Viper’s Fuel bar will drain 50% faster, effectively limiting Viper’s ability to cover multiple spots simultaneously.
Toxic Screen, Poison Cloud, and Viper’s Pit now deal less initial decay damage as well (50 >>> 30), making them less deadly than they were a few patches ago.
Overall, Viper remains a decent pick on most maps in VALORANT. Her Toxic Screen can still cover space as no other Agent can. Still, Viper players now have to be mindful of the increased Fuel consumption and overall reduced duration when executing offensive and defensive plays in VALORANT.
Bind A-site Viper Wall
You can look at Bind A-site as two separate sections – A-Default and A-Triple Box. Typically, the Attacking team will want to take control of both A-Showers and A-Short simultaneously upon site entry. This ensures that the entire site is accounted for and that rotational lanes toward the A-site are covered.
That said, you can use Viper’s Wall to split up A-site, focus on either an A-Default plant or an A-Triple Box plant, and then play post-plant defense with your Snake Bite lineups.
On Defense, Viper Wall’s large coverage means you can block both A-Short and A-Showers on Defense, making it nearly impossible for the Attacking team to rush in from both areas.
Bind A-site Default Wall (Attacking)
- Stand against this wall in A-Lobby:

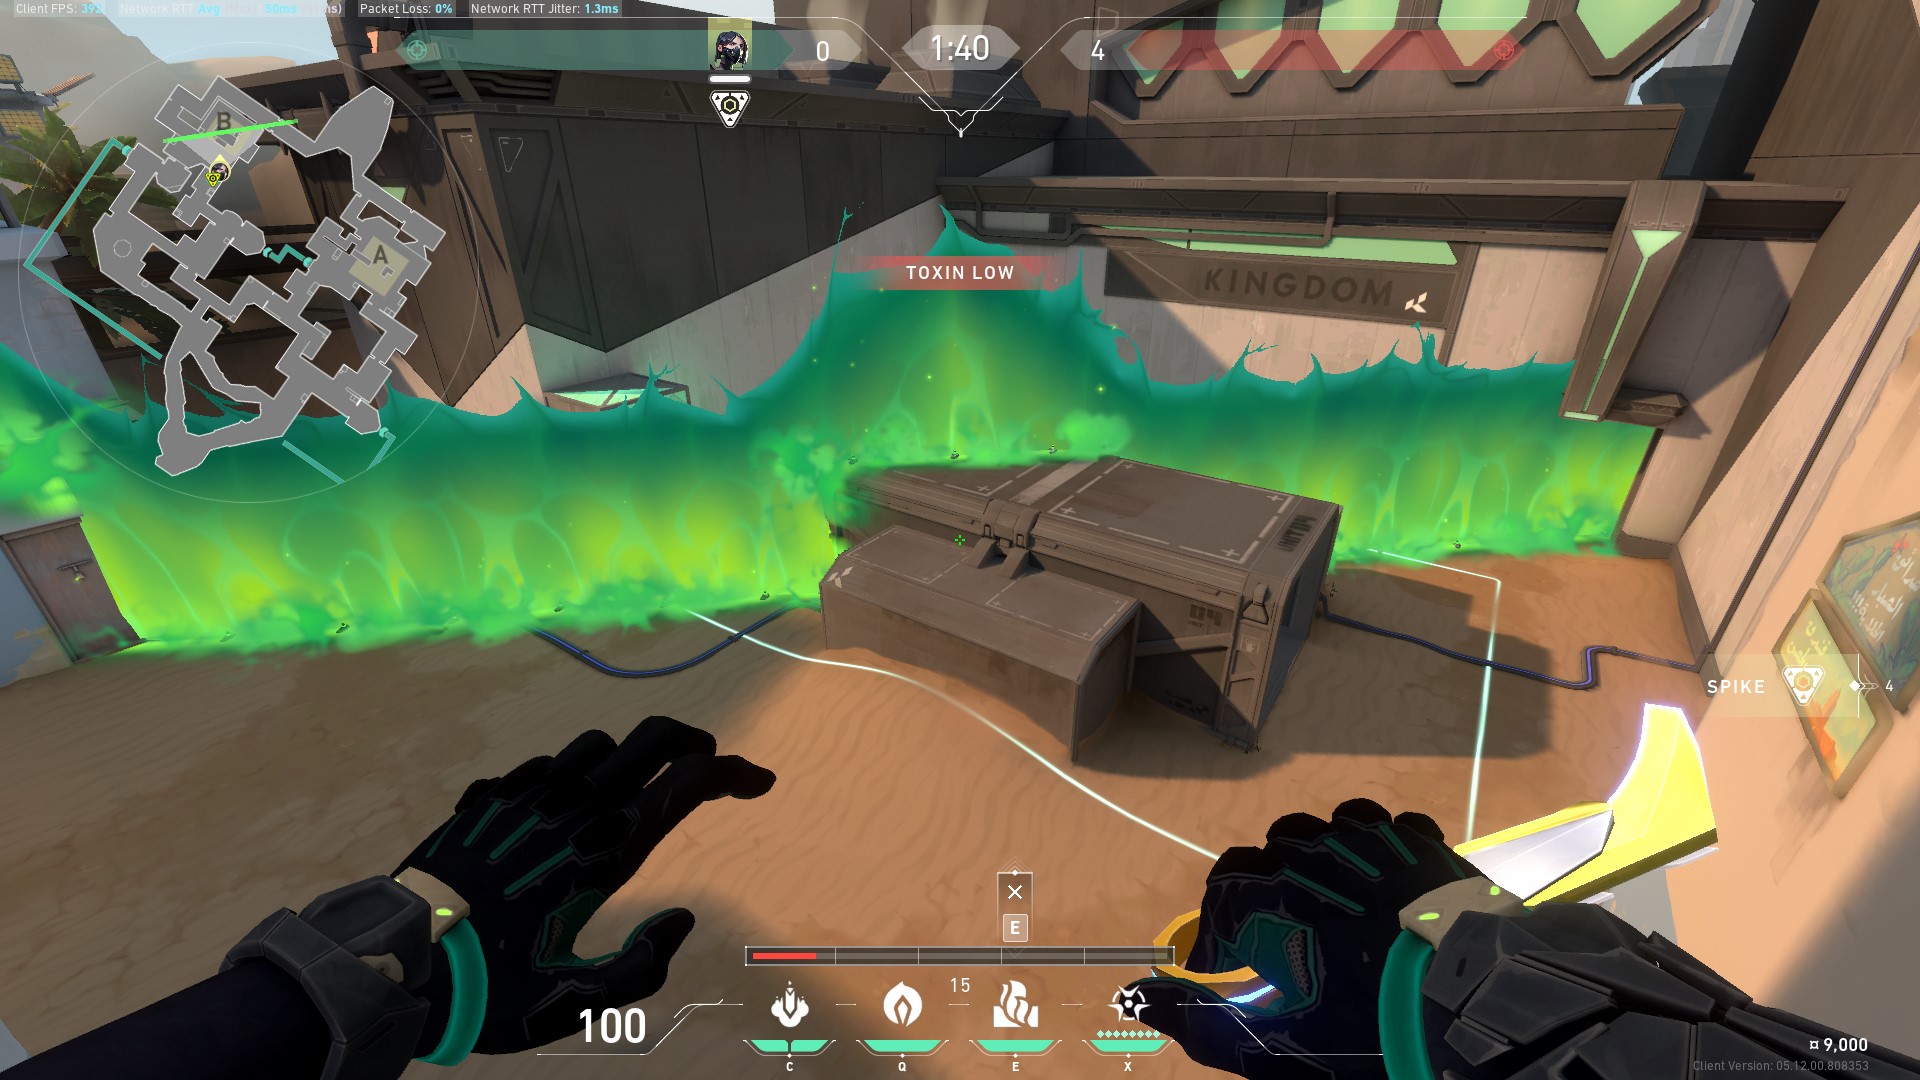
2. Aim high and position Viper’s Wall as shown in the image below:


Bind A-site A-Triple Box Wall (Attacking)
- Stand against this wall in A-Lobby:

2. Aim high and position Viper’s Wall as shown in the image below:


Bind A-site Wall (Defending)
- Stand in this corner outside A-Showers:


3. Make sure you follow the placement as close as possible. The goal is to cover both A-Showers and A-Short, as well as the boxes in A-Short to deny the Attackers’ vision when standing on top of the boxes.

Bind B-site Viper Wall
Viper’s Wall can cover both B-Elbow and B-site Entrance (from Defender Spawn) simultaneously, removing extra angles from the equation and helping your team focus on B-site itself.
On Defense, Viper’s Wall can be set up to cover both Hooka and B-Garden, much like how you can cover A-Short and A-Showers on A-site. The Viper Wall placement we have featured below will completely block the Attacking team’s vision on B-site, deterring them from rushing into B-site.
Bind B-site Default Wall (Attacking)
- Stand in this corner by the B-site Teleporter:

2. Aim high and follow the Viper Wall placement as shown in the image below:


Bind B-site Default Wall (Defending)
- Stand in this corner in B-site:

2. Aim high so Viper’s Wall doesn’t end up short. Follow the image below to get a better idea of the placement.


Bound By Venom
The ability to cover multiple lanes simultaneously without spending credits in the Buy Phase is something only Viper can do, making her a very cost-effective Agent who can Defend bombsites alone or setup site entry on Attack effectively.
Viper is especially strong on Bind, thanks to the map’s relatively small size, allowing Viper to use Toxic Screen’s massive range fully. With that said, try out the Viper Wall setups featured above and communicate with your teammates to make the most of the great coverage it provides.


