Killjoy brings advanced technology and gadgetry to the battlefield as her primary means of attacking and defending in VALORANT. Her skill set allows her to single-handedly hold down bombsites with the help of her trusty robots.
As a Sentinel-class Agent, teammates rely on Killjoy to lock down and hold bombsites completely on her own. With the help of her brilliance and tech, anything is possible for this German Child Prodigy.
Today we take a quick look at some useful Killjoy Nano Swarm setups for Ascent. Ascent is a map where Killjoy and many other Agents can unleash their full potential. For Killjoy, B-site will the where she does the most damage as a Defender thanks to her Nanoswarm, Alarm Bot, and Turret abilities. Let’s go!
Ascending Ascent

Ascent is a beautiful map set in San Marco, Venice, Italy. The map even features landmarks from some iconic sites found in Italy, such as St. Mark’s Campanile and St. Mark’s Basilica.
Ascent is the first-ever map made for VALORANT. Although it was the first map ever to be made, Ascent would, later on, end up as the fourth map to ever be released in-game. The dev team took their sweet time with Ascent, polishing and revising a ton of in-map elements before its official release.
Ascent has a standard two bombsite layout that many Tactical First-person Shooting game enthusiasts have already seen before. The most interesting characteristics about Ascent are the mechanical doors (one for each bombsite) that cut down entryways into the bomb sites.
A quick look at the loading screen for Ascent will have players wondering about the reasons why the whole map is, quite literally, in the air.
According to VALORANT lore, Ascent’s location is a victim of a deliberate Spike Bombing set up by mirror Agents from an alternate Earth, which resulted in the whole city being brought up into the air.
German Efficiency Child Prodigy: Killjoy

Killjoy belongs to the Sentinel class of Agents. As such, her abilities allow her to lock down bombsites completely on her own. Allies can rely on the German Prodigy to stall or even stop an enemy team’s push on her own to buy her teammates enough time to rotate over to her bombsite.
Killjoy uses her superior knowledge and skill to employ robots and gadgets to fight on her behalf. Her skill set consists of nanobots, an alarm bot, and a sentry bot that she can set up to give her the best chance at holding down a bombsite. Her ultimate ability allows her to cover a large enough area to cover entire bombsites, giving Killjoy the ability to detain anyone caught in her ultimate.
In the VALORANT lore, Killjoy is known to have a father-daughter relationship with Brimstone. While both characters are not related, Brimstone sees it fit to act as a guide for Killjoy.
Killjoy is in-charge of almost all of the non-Sentinel VALORANT Agents’ tech. She oversees repairs and tech innovation for every Agent. Taking some of the Agents’ voice lines into context, Killjoy seems to be a natural-born tactician, using data she gathers from engagements as inspiration for her next inventions and strategies.
Killjoy Nanoswarm Setups For Ascent

Killjoy’s Nanoswarm ability is one of the most powerful, controllable molly-type abilities in VALORANT. Killjoy’s Nanoswarm ability deals quick damage-over-time and covers a large area. With Killjoy’s Nanoswarm Ability, Killjoy can cover a ton of space within bombsites to either stop an enemy team push or secure the bomb post-plant.
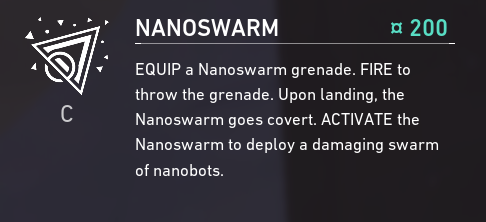
Players can equip up to two of Killjoy’s Nanoswarm charges per round. Each Nanoswarm charge costs just 200 credits each.
But perhaps the most unique characteristic of Killjoy’s Nanoswarm is the ability to activate the swarm grenades from almost anywhere on the map. This ability gives Killjoy the ability to position herself to just about any part of the bomb site and set up her Nanoswarm in ways that would make enemies think twice about setting foot in her bomb site.
Ascent Defending – B-site Lane Nanoswarm Setup
B-site is Killjoy’s playground in Ascent. This side of the map is where our German Sentinel does the most damage to incoming attackers.
B-site’s multiple angles make it difficult for Attackers to enter the site safely. Spawn, Switch, Stairs, Lane, Logs, and Market are just some of the angles that Attackers will have to clear one by one to make sure no Defender is lurking in one of these areas waiting for an easy kill.
Lane, however, is probably the most common area that attackers pass through to get into B-site Default. This is because the boathouse covering “Switch” provides great cover for attackers on their way to B-site Default.
With this in mind, our first Nanoswarm Setup for Ascent is for B-site Lane. Let’s get started:
First Nanoswarm
For the first Nanoswarm placement in Ascent B-site, follow these steps:
- Look for this corner inside of the “Switch” workshop:

2. Stand in the corner and crouch. Left-click the Nanoswarm into this corner while crouching inside the workshop:

When done properly, the Nanoswarm should settle in the corner just like this:

Alarm Bot Placement

Next up is our Alarm Bot Placement on Lane. Our Alarm Bot serves a very important role as it allows you to position yourself out of sight from your trap setup. The Alarm Bot alerts you of any enemies caught in the area and will cue you to activate your Nanoswarm trap.
Place the edge of the Alarm Bot area ring where the wooden wall and the stone bricks meet:


Second Nanoswarm
As for the second Nanoswarm placement in Ascent B-site, follow these simple steps:
- Look for this line gap on the topmost bricks:

2. Align yourself with the gap and hug the wall:

3. Look down and place the Nanoswarm on this stone:


Turret Placement
Moving on to the Turrent placement for Ascent B-site. Place your Turret on top of these stacked Radianite Boxes in B-site.

This Turret will make the Nanoswarm setup even deadlier, as the movement slow that your Turret applies to any enemies that it hits will ensure that the enemies won’t be able to escape our Nanoswarm trap.
When to Activate Killjoy’s Nanoswarm Setup for B-site Lane
When using this setup, all you have to remember is to wait for your Alarm Bot to catch somebody inside Lane. Once the Alarm Bot is pinged, immediately activate the first Nanoswarm Grenade followed by the second Nanoswarm Grenade in successive order.
Ascent Defending – B-site Lane Alternative Nanoswarm Setup

This alternative Nanoswarm setup is a variation of the Ascent B-site Lane Nanoswarm Trap.
In VALORANT, it is important to have variations upon variations of a setup so you remain unpredictable to enemies. The biggest problem with premade setups like these Killjoy Nanoswarm setups is that, eventually, enemies can figure out where and when you use your setups.
Use this variation of the Ascent B-site Lane set up to give your enemies different looks every round to keep them guessing.
First Nano Swarm Placement
- For the first Nanoswarm placement, get close to the wall and throw a Nanoswarm while aiming at the middle of this 2nd tile:


Second Nanoswarm Placement
- As for the second Nanoswarm placement, look for this nib on the wall:

2. Place your crosshair in the middle of this small nib:

3. Drag your crosshair straight down. Look for the middle part of these tiles:

4. Left-click-throw the Nanoswarm:

Turret Placement
Turret placement for this setup is simple and straightforward. Place the Turret with its back against the back wall of Logs:
You can rotate the Turret by pressing right-click on your mouse.


Alarm Bot Placement
- As for the Alarm Bot placement, simply look for these smaller tiles in Lane:

2. Place the edge of the Alarm Bot radius on the bottom line of the second row of the square tiles:


When to Activate Killjoy’s Nanoswarm Setup Alternative for B-site Lane
Like the first set up for B-site Lane, wait for your Alarm Bot to catch somebody inside Lane, then immediately activate the first Nanoswarm Grenade followed by the second Nanoswarm Grenade in successive order.
Enemies caught within these Nanoswarm Traps will have nowhere to run to since the radius of each Nanoswarm is so large.
Oh, and your Turret is still at Logs for good measure.
German Efficiency At Its Finest

When played correctly, Killjoy is a powerful Sentinel Agent capable of locking down bombsites on her own. Her abilities allow her to slow down or even completely stop an enemy team from pushing into her bombsite.
With some creative setups, she can even lure enemy players into her bombsite, thinking that everything is clear for them to enter, only to catch them off-guard and melt them down with her Nanoswarm and Turret.
Killjoy received a lot of nerfs throughout the months, which ultimately made her weaker. However, Killjoy is still a very powerful Sentinel when picked on maps to shine with her skill set.
If you want to try a more laid-back approach to playing VALORANT by focusing more on using traps and abilities, then Killjoy will be one of the more rewarding Agents in this regard. Players can get cheap and easy kills by cleverly setting up Killjoy’s abilities pre-round.