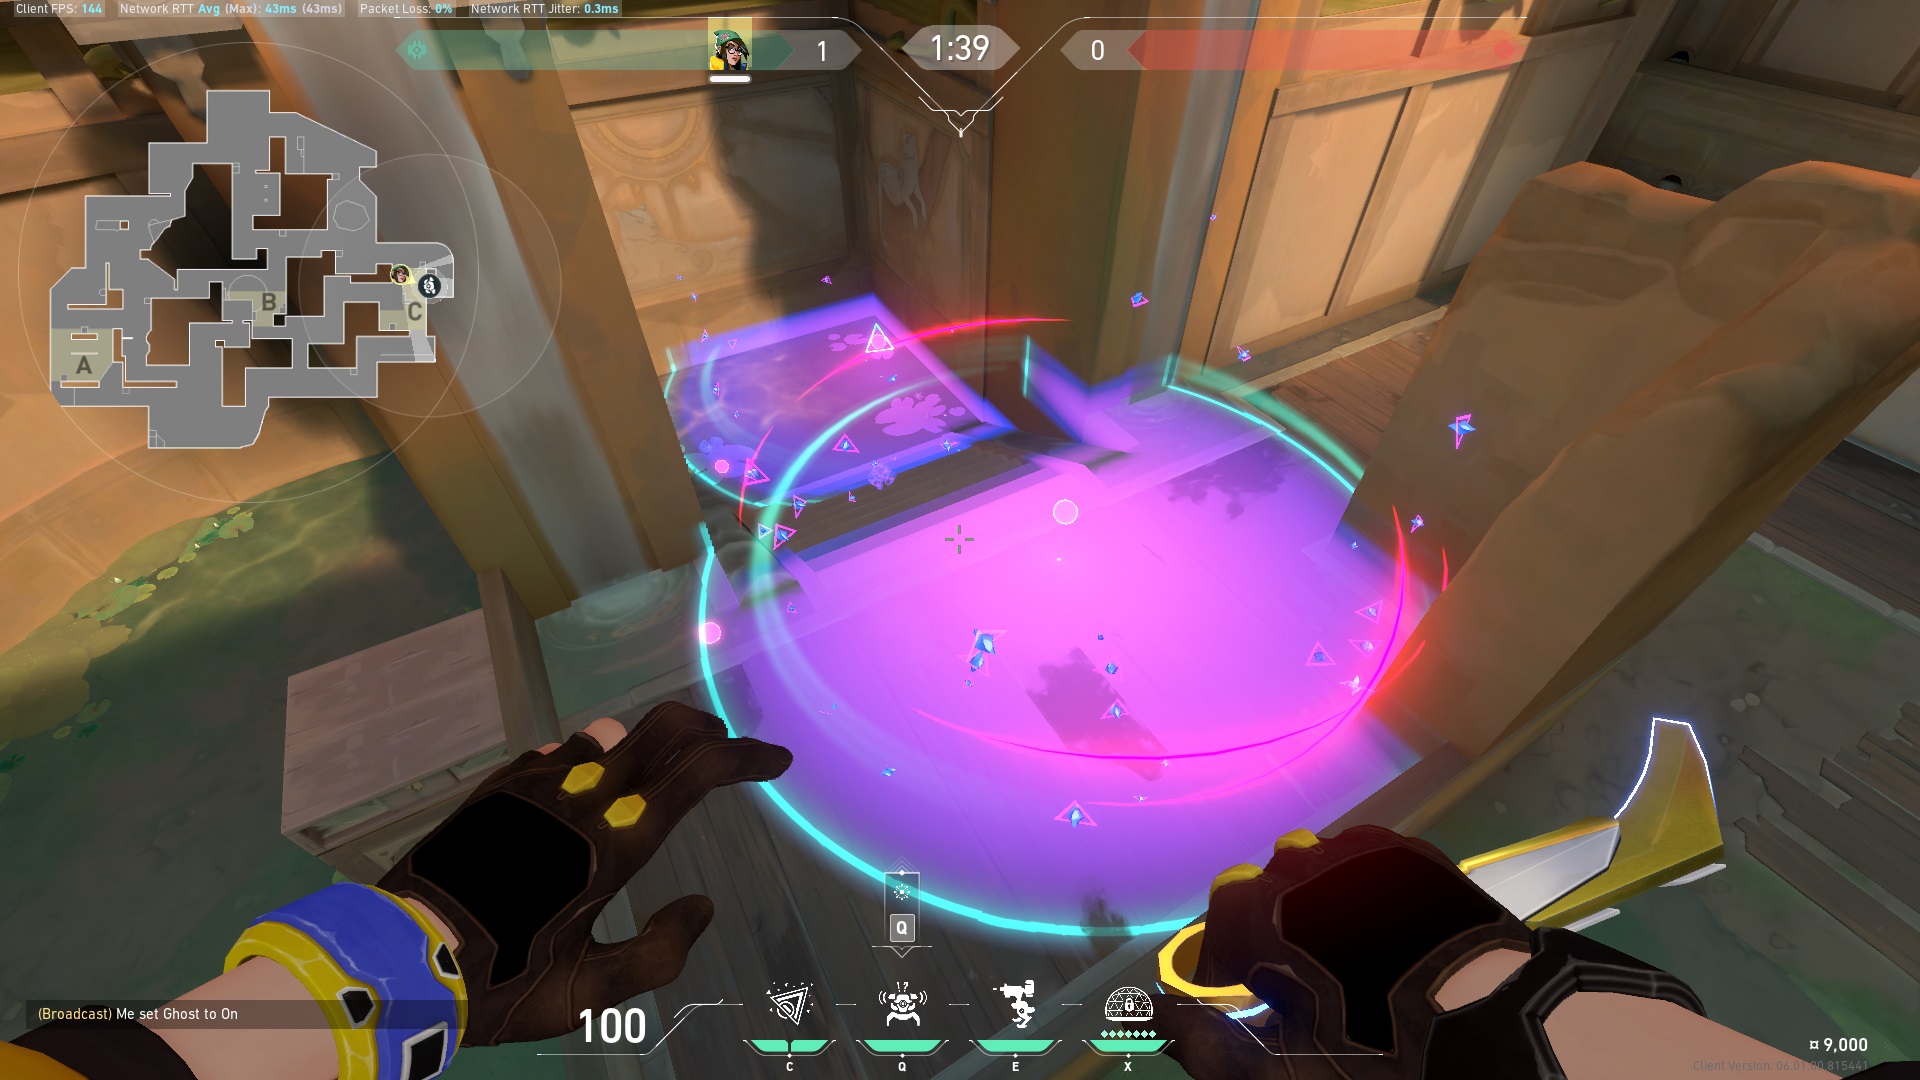
Learn the best Killjoy Setups on Lotus in Valorant!

Riot Games wasn’t actively trying to make Killjoy stronger in the past few updates, only settling for minor bug fixes and quality-of-life updates to her Turret, Nanoswarm, Alarmbot, and Lockdown abilities. Nevertheless.
The German prodigy has since seen an uptick in pick-and-win rates on most maps in VALORANT. And when we say most maps, we mean almost all of them.
Lotus should more or less paint the same picture, thanks to Killjoy’s kit that allows her to cover multiple areas of the map easily, making her an essential pick on a triple bombsite map such as Lotus.
Killjoy Setups for Lotus A-site in Valorant
Lotus A-site is a playground for Killjoy – small ledges found on most walls around Lotus offer just enough space to place and hide Nanoswarm Grenades from plain sight.
The unusual placement should give Killjoy the element of surprise she needs to maximize the effectiveness of her traps on A-site.
Strategy-wise, your team will want to keep the Attacking team from gaining control of A-Main on Lotus or risk giving them additional lanes toward the A-site or B-site through the destructible wall at A-Link and the A-Door, respectively.
Killjoy’s Nanoswarm traps are better suited for passively holding sites and punishing incoming Attackers, so that’s where the A-site setups are focused on in this guide.
That said, we have included two Killjoy Setups for Lotus A-site – an A-site entrance setup that will deter and punish the Attacking team rushing into the A-site and a more passive A-Hut trap set up to stop or delay the Attacker plant.
A-site Passive Setup
- Stand next to the edge of this wall in A-site:
2. Aim for the pointed edge of the wall, then left-click-throw Killjoy’s Nanoswarm Grenade:


3. Place Killjoy’s Alarmbot along the A-site entrance:

4. Place the second Nanoswarm Grenade next to the Alarmbot:

5. Place your Turret at the bottom of the A-Top. A-Top is a common smoke spot for A-site, so placing the Turret next to the rope will ensure the Turret’s vision does not get blocked off.

A-Hut Setup
- Place the Alarmbot in the middle of A-Hut:

2. Place the first Nanoswarm Grenade on the ledge on the other end of A-Hut:

3. Place the second Nanoswarm Grenade on the other end:

Killjoy Setups for Lotus B-site in Valorant
Lotus B-site is a simpler bomb site to attack and defend than A-site because of the short lane connecting Attacker Side Spawn to B-site. The Attacking team will likely take the B-Main route to B-site, as it is the fastest lane towards B-site.
The good news is that the B-site entrance is a fairly small entryway that Killjoy’s Nanoswarm can easily cover. Thus, the Killjoy Setup for B-site below will focus on that area.
B-site Default Setup
- Align yourself with this wall at the B-Main entrance:


2. Aim for the bottom left corner of the small ledge on the wall:

3. Right-click-throw Killjoy’s Nanoswarm Grenade:

4. When done properly, Killjoy’s Nanoswarm Grenade should sit nicely on the ledge.

5. Place Killjoy’s Alarmbot along the center of the B-site Entrance. Move it closer toward the bombsite so it sits centered between the two Nanoswarm Grenades.

6. Place the second Nanoswarm Grenade next to the Alarm Bot:

7. Lastly, place your Turret inside A-Link so it can cover both A-Link and the B-site Entrance:


Killjoy Setups for Lotus C-site
C-site is even more cramped than A-site or B-site on Lotus. There is only one entryway toward the C-site, which is through the C-Mound and C-site Entrance.
Like A-site, you can set up Killjoy’s abilities to cover C-Mound and stop the Attacking team from taking control of C-Door.
However, you might get more value from Killjoy’s setups if you sit back in C-site and set up Nanoswarm traps around C-site Entrance and C-Default to punish the Attackers.
C-site Anti-rush Nanoswarm Setup
- Stand in this corner by the wall at C-site Entrance:


2. Look down and aim your crosshair on this small mark on the wall:


3. At the apex of your jump, make sure your crosshair lands on the ledge, then throw Killjoy’s Nanoswarm Grenade:

4. When done properly, Killjoy’s Nanoswarm Grenade should sit nicely on the ledge.

5. Next, place Killjoy’s Alarmbot along the edge of the C-site entrance:

6. Place the second Nanoswarm Grenade next to the Alarmbot:

7. Finish up the setup by placing your Turret on top of the tall box in C-Backsite:

C-site Plant Spot Nanoswarm Setup
- Place the first Nanoswarm Grenade next to the wall by the stairs:

2. Place Killjoy’s Alarmbot in the middle of the stairs:

3. Place the second Nanoswarm Grenade toward the middle of the C-Platform:

4. Place your Turret on the left edge of the tall box at C-Backsite:


Lotus on Lockdown
Killjoy will be a monster on Lotus, especially on the Defending side, where you can set up Nanoswarm and Alarmbot traps to deter or punish Attacker rushes onto her bombsite.
The Killjoy setups featured in this guide should help you hold any bombsite on Lotus on your own as Killjoy, which will help give your team the flexibility of stacking other bombsites on the map on Defense.


