
Sova’s Signature Ability, Recon Bolt, shines the most in maps with a large open skybox. The open skybox allows Sova’s Recon Bolt to fly freely around the map, which enables a multitude of lineups that can help his team secure spaces around the map safely.
Today we make our way to VALORANT’s cool and calm map, Breeze.
Breeze

Breeze is one of the most recent maps Riot Games has released for VALORANT. Breeze is a breath of fresh air from the often claustrophobic and jump-scare-inducing map layouts that VALORANT is known for.
Breeze features some of the longest sightlines of any map in VALORANT. The only other map with comparatively long sightlines is Icebox.
Gunplay in Breeze challenges mechanical aim, more specifically crosshair micro-adjustment. The sightlines in Breeze are so long that the player models’ heads are often just a few pixels in size. Guns that make the most sense in Breeze will be weapons with a long-range scope, such as the Operator or the Marshall. The long-standing debate between the Phantom and the Vandal takes a quick break here, as the Vandal’s one-shot headshot at any range far outweighs every other benefit that the Phantom has.
Some Agents on Breeze also take a quick backseat because of how enormous the bombsites are. Agents such as Killjoy can certainly still be viable in Breeze. However, her ultimate will not be as powerful as possible due to the limited area on a vast map like Breeze.
Sova Recon Bolt

Sova’s Recon Bolt is arguably one of the top Signature Agent Abilities in all of VALORANT.
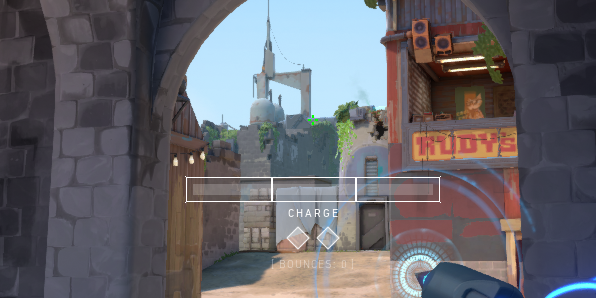
Recon Bolt is a cooldown-based Ability that refreshes every forty (40) seconds. Players can add up to two Bounces to the Recon Bolt Arrow, which opens up a world of possibilities in terms of lineups. His Recon Bolt also features a charge meter so Sova players can alter the total distance the arrow travels before it lands.
When used correctly, Sova’s Recon Bolt is the closest thing players can get to wallhacks without the repercussions associated with hacking. When placed at certain spots within Spike Sites, Recon Bolt can reveal most of, if not everything, inside the Spike Site. This makes it a potent tool when Attacking or Defending bomb sites.
Today we will be focusing on Attacker-side Sova Recon Bolt Lineups for Breeze, which can increase your team’s chances of securing a bomb plant in any of the two bomb sites in VALORANT’s cool and breezy map. Let’s get started!
Breeze A-site – A Backsite Recon Bolt

First up on our Breeze Recon Bolt lineup list is a Breeze A-site Backsite Recon Bolt. This Recon Bolt Lineup clears out and scans for players behind the double pyramids and the double box cubby.
This Recon Bolt lineup is one of the most valuable lineups for A-site because most Defenders hold A-site from behind pyramids and around the bridge area. Defenders will most likely be pushed back to even more defensive positions on A-site.
- Look for this gap between the yellow bouy and rock at A Lobby:

2. Tuck yourself in the corner between the buoy and the rock:

3. Look towards A Halls and look for this corner:

4. Place the left tip of the left HUD line on this corner:

5. No-Bounce + 3-bar Charge:

When done properly, the Recon Bolt should land at A-site Backsite:

And cover most of the A-site Backsite:

Breeze A-site – Bridge/Stairs Recon Bolt

This next A-site Recon Bolt Lineup is for clearing out Operator players from Bridge and Stairs. These two locations are the most common holding spots for players with an Operator as it gives Defenders the best vantage point to snipe out Attackers coming from Cave.
This Recon Bolt lands just beside the wall around the Bridge area and covers most of the Bridge, Stairs, and Triple Boxes area.
- Stand on the same corner as the previous Recon Bolt lineup:

2. Look for these triangle awning frames:

3. Place the tip of the Shock Bolt icon just to the left of the left awning frame gap:

4. No-bounce + 3-bar Charge:

When done properly, the Recon Bolt should land just beside Bridge:

And cover most of the Bridge, Stairs, Switch, and Triple Box area:

Breeze A-site – Double Doors/Left Site Recon Bolt

We added one more A-site lineup to this list to give you more lineup options for various setups in A-site. This next lineup is a more intentional lineup that aims to clear out the left-side part of the A-site.
Defenders will be left confused as to where the Recon Bolt lineup landed, as this Recon Bolt lineup lands on a sheet that’s hidden from plain sight.
This Recon Bolt lineup clears out the left-side box and some of the left pyramid. This Recon Bolt lineup will also ping defenders around the Double Doors area.
- Once again, tuck yourself in the exact corner between the bouy and the rock as the two previous lineups:

2. Look for these closed-out windows:

3. Place the tip of the Shock Bolt icon on the bottom left corner of these windows:

4. No-bounce + 2-bar charge:

When done properly, the Recon Bolt will land on this sheet:

And cover most of the left-side of A-site, some of left-pyramid, and some of Double Doors:

Breeze Middle – Tunnel Early Information

As is the trend with other VALORANT maps with two bomb sites and a middle lane, the middle area will be an essential space to take control of.
With this in mind, our next Recon Bolt Lineup is a quick and easy lineup for early information around the middle area. The Recon Bolt lineup lands just above the Tunnel entrance and ping most players lurking around the Top Middle, Tunnel, and Mid Nest area.
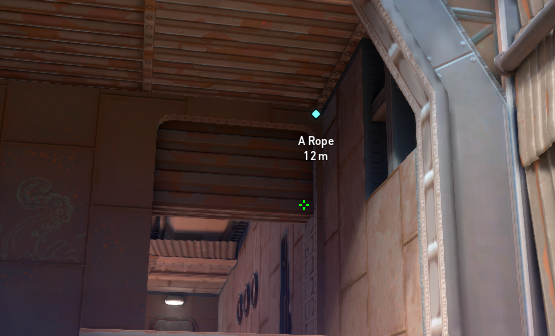
- Look for this corner at Attacker Side Spawn:

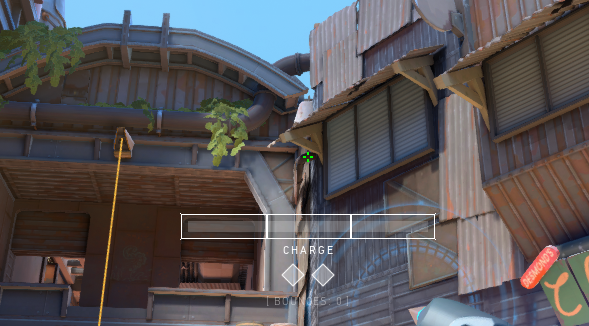
2. Tuck yourself in the corner and look towards these walls:


3. Place the first Charge Bar Indicator where the horizontal and vertical wall intersect:

4. No-bounce + Max Charge:

When done properly, the Recon Bolt should land on top of the Tunnel Entrance:

And reveal players around the Top Middle, Elbow, Tunnel, and Middle Nest:

Breeze B-site – B Backsite/Close Corners

Next up on our Breeze Recon Bolt lineup list is a nifty Recon Bolt lineup that clears out the most common spot for B-site Defenders to hold: B-Backsite.
This next Recon Bolt Lineup is easy to line up and clears out any Defenders lurking around the close left and right spots upon your team’s entry to B-site. This lineup also reduces the number of angles your team has to clear to enter B-site successfully, so you can focus on holding angles towards Tunnel and Defender Spawn.
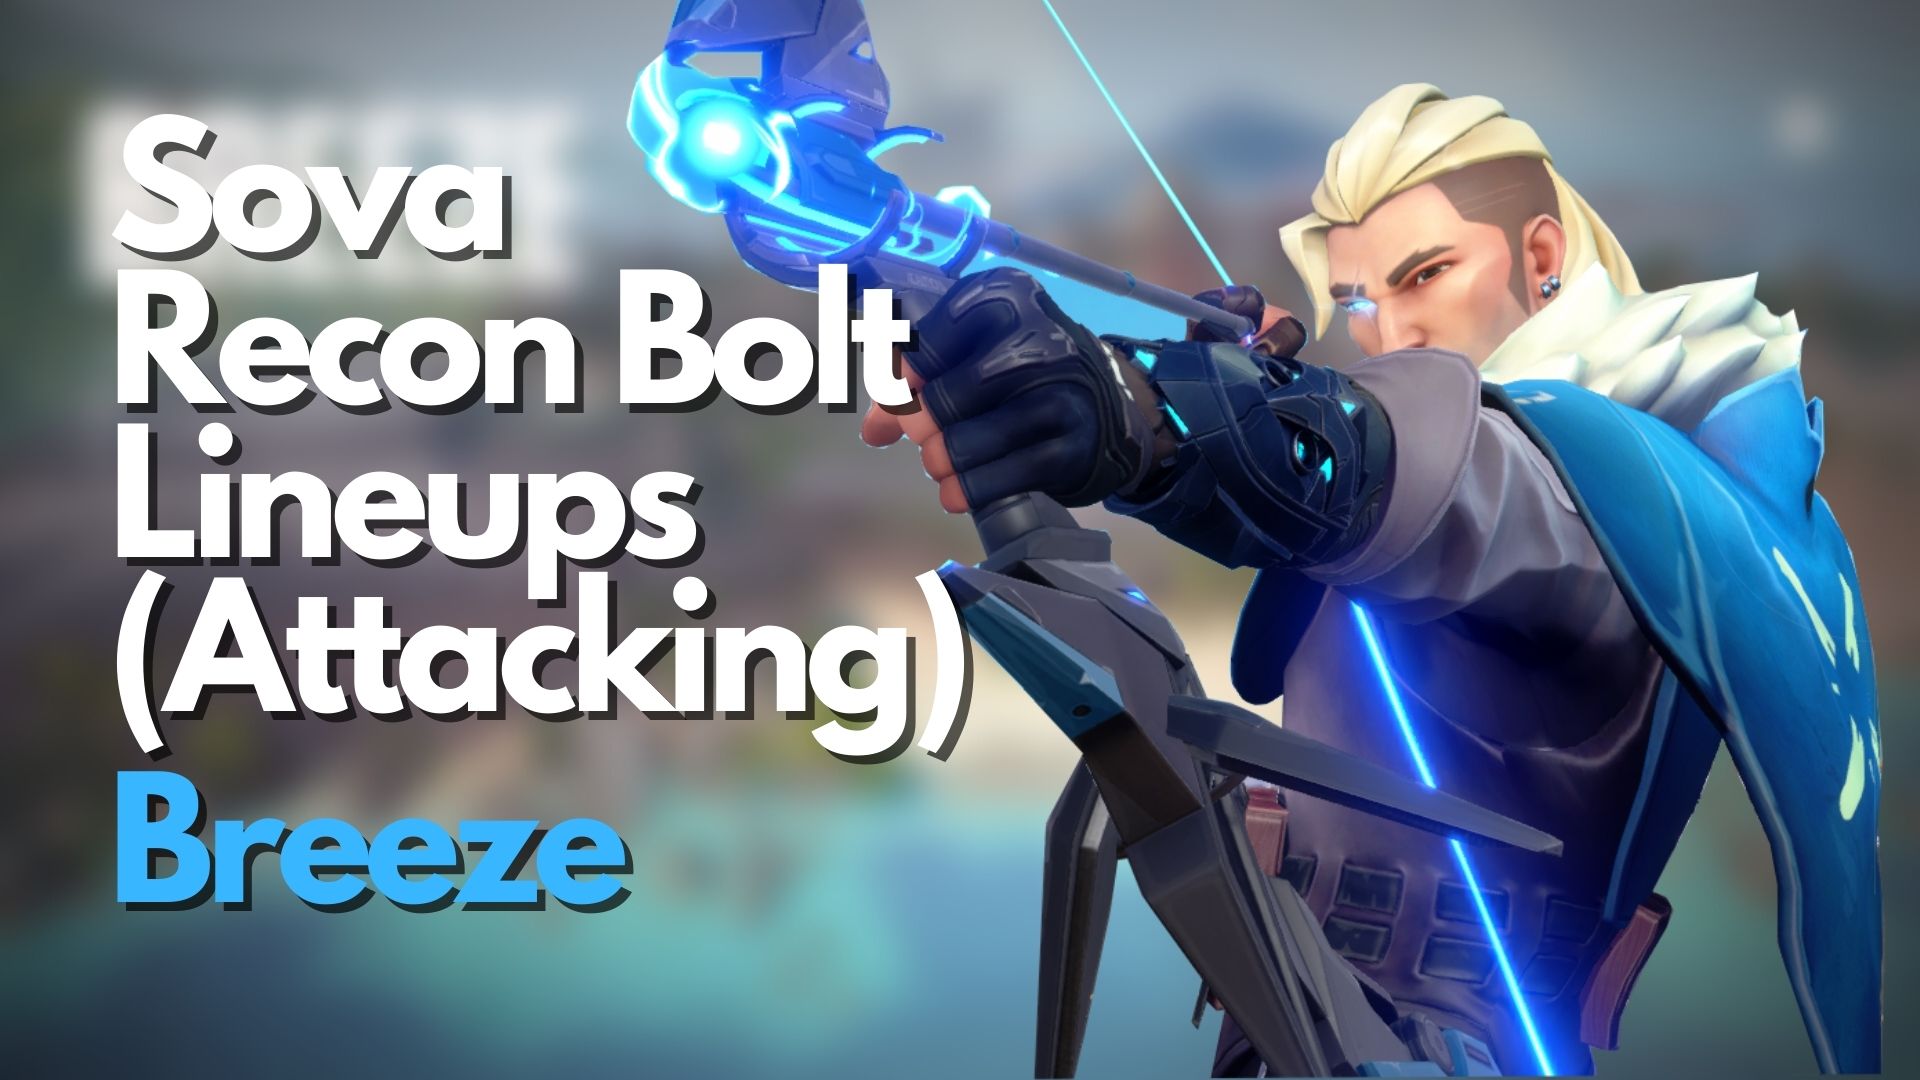
- Look for the old cannon at Mid-cannon area:

2. Tuck yourself in the corner between the wall and the cannon:

3. Turn around and look up towards this cannon:

4. Place the bottom tip of the left diamond Bounce Indicator on the bottom tip of the cannon:

5. No-bounce + 3-bar Charge:

When done properly, the Recon Bolt should land on this wall at B-Backsite:

And reveal players around the close corners of B-site:

Breeze B-site – B Backsite

For our last Recon Bolt lineup on Breeze, B-backsite will be our focus once again. The backsite area is a common spot for Defenders to hold because of the flexibility and the multiple fallback options it gives Defenders.
This Recon Bolt lineup aims to clear out B-backsite and some of the left close corners inside B-site. You can use this and the previous lineup interchangeably depending on how the enemy team plays B-site.
With another teammate pushing the Tunnel area, you can trap Defenders around the Backsite area and score a quick and easy kill with your teammates.
- At the Mid-cannon area, look for this small cage:

2. Tuck yourself in the small corner between the cage and the wall:

3. Look up towards this cannon:

4. Place the “Left-click” HUD’s white dot on this corner beside the cannon:

5. No-bounce + 3-bar Charge:

When done correctly, the Recon Bolt should land on the wall at B-backsite:

And cover most of the B-backsite and Left-side close corners:

Fly Like the Wind
Breeze is another map where Sova’s Recon Bolt can fly freely towards its destination. This opens up a world of possibilities with his lineups on Breeze.
Because of the sheer size of the map and, by extension, the size of the bomb sites, Sova’s Recon Bolt can not cover the entire bomb site as it normally does on maps like Haven or Bind. However, that is a tradeoff we are willing to take to freely lineup as many combinations of Sova’s Recon Bolt as possible.
Executing the same lineup every time will make your next lineup useless as the enemy team will be able to anticipate where the Recon Bolt lineup lands on site. Enemies can shoot the Recon Bolt rendering it useless and unable to ping anyone.
That is about it! We hope that you will find these lineups useful whenever you Attack as Sova on Breeze!


