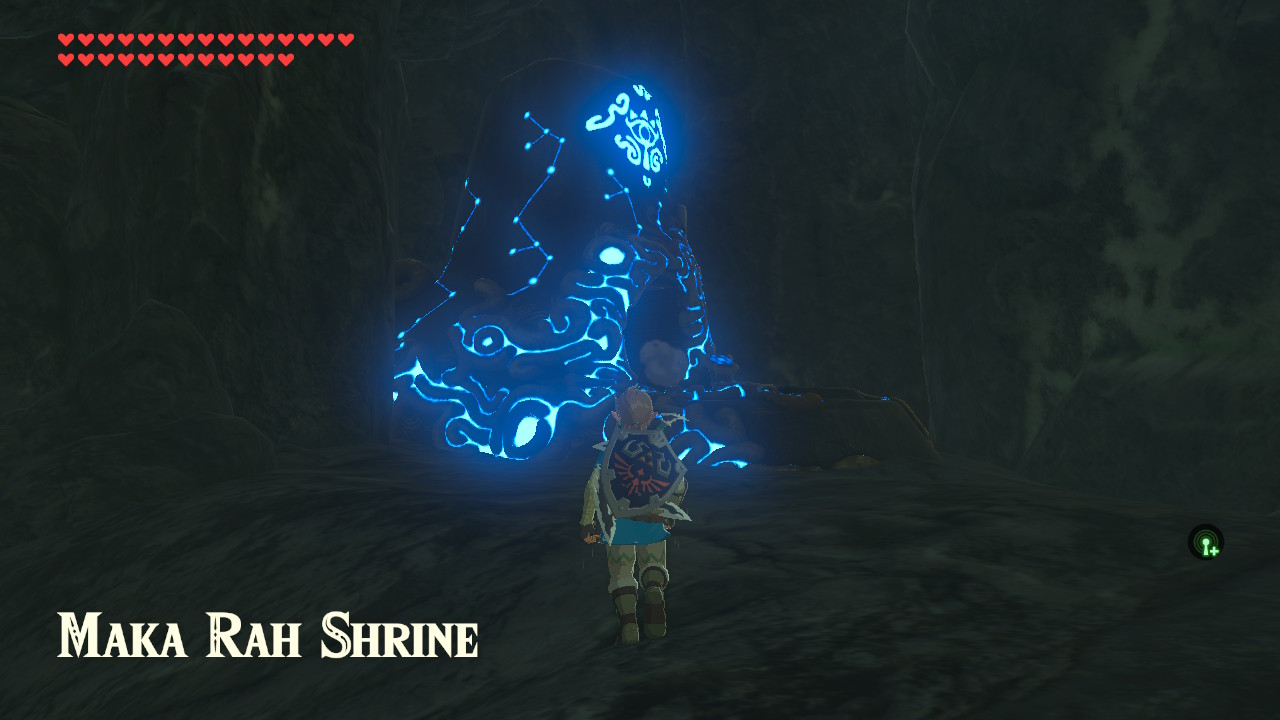
One of the Shrines in The Legend of Zelda: Breath of the Wild is the Maka Rah Shrine or the Steady Thy Heart. This shrine requires Link to overcome various puzzles and obstacles and then defeat a few Guardian Scouts to complete the shrine. This shrine may seem intimidating and confusing, but it is fairly easy to complete. This guide will teach you how to reach and complete the Maka Rah Shrine, get the chests, and claim the Spirit Orb.
Link will be rewarded with Spirit Orbs for completing Shrines. The Spirit Orbs obtained can be exchanged for more Heart Containers or Stamina Vessels. As there are 120 Shrines all over Hyrule, Link can get 120 Spirit Orbs. You can decide whether you want Link to have more Hearts or Stamina.
Location
The Maka Rah Shrine can be found inside a cave south of the Sturnida Secret Hot Spring, south of the Sturnida Basin, west of the Hebra Mountains on the northwestern part of Hyrule (the shrine is west of the Hebra South Summit or southwest of the Biron Snowshelf). The Maka Rah Shrine is one of 13 shrines in the Hebra Tower region.
It is worth mentioning that the climate in the area is very cold, so ensure Link has cold-resistant armor.
To reach the shrine, this is what Link must do:
- Head to the docks in the middle of Lake Kilsie near the Sturnida Secret Hot Spring.
- You will see a breakable rock formation on the top right of the docks. Press the up directional button, select either of the two Remote Bomb Rune abilities, press the L button to conjure one up, go near the breakable rock formation, press the A button to place it down near the rock formation, and walk a little bit away from it to get a little bit of distance, then press the L button again to detonate the Remote Bomb and destroy the rock formation.
- After that, you will see a constant gust of air blowing out of the ground. Jump there to ride the gust of wind and glide towards the right side of Lake Kilsie just across from the direction of the longest part of the dock, and there you will see another breakable rock formation on the shore of the lake. Link can do one of two things: Link can land on the shore and detonate a Remote Bomb on the breakable rock formation to destroy it; or, if Link has Bomb Arrows, shoot the breakable rock formation with a Bomb Arrow to break it (which is cooler to do than the first one).
- Next, another constant gust of air will be blown out of the ground of the now broken rock formation. Jump and glide there to ride the gust of wind, then glide just a little north, and you will see another breakable rock formation on the same side of the lake. Link can land near it and detonate a Remote Bomb on the breakable rock formation to destroy it or shoot another Bomb Arrow on the rock formation to break it.
- After that, another constant gust of air will be blown out of the ground of the newly broken rock formation. Jump and glide to ride the gust of wind, then glide just a little north, and you will see an island in the middle of Lake Kilsie with another breakable rock formation. Link can land near it and detonate a Remote Bomb on the breakable rock formation or shoot another Bomb Arrow on the breakable rock formation to destroy it.
- After doing that, another constant gust of air will be blown out of the ground of the newly broken rock formation. Jump and glide to ride the gust of wind. Let Link face the west, and you will see a wide opening on the side of a cliff near the top. Glide and land on the wide opening on the side of the cliff.
- Inside this opening is a large drop, but another gust of wind is constantly blown from the bottom. Drop down and use Link’s Paraglider to soften the fall.
- At the bottom of the cave, you will see a pool of water. Swim across the water under the low-hanging rock.
- You will finally see the Maka Rah Shrine at the end of the water. Once Link is near the shrine. However, two Ice Chuchus will appear. Defeat the Ice Chuchus to continue.
- Finally, Link can access the Maka Rah Shrine!
Steady Thy Shrine
Upon entering the Maka Rah Shrine, you will see that Link is in a small room and a closed gate just ahead of Link.
To complete this shrine, this is what Link must do:
- First, go near the closed gate, and you will see a lit torch on the right side and an unlit torch on the left side. Link must light the unlit torch to open the gate. This can be done in a couple of ways: Link can shoot a Fire Arrow on the unlit torch, Link can strike the unlit torch with a flame-based weapon, Link can set his torch or any wooden weapon on fire by striking the lit torch, then striking the unlit one to light it, or Link can aim a normal arrow then while aiming let it go near the torch so the arrow will be on fire then shoot it or even just let it touch the unlit torch to light it.
- After doing that, the gate will be opened. Continue to get to the next part of the shrine.
- On this next part of the shrine, there is a part of the path spinning counterclockwise and filled with spikes. Link must cross this path without falling to the lava right under it. Unfortunately, there is no trick to this obstacle, and Link would like to slowly move on the path while it is spinning and avoid the spikes so they will not damage Link.
- After that, you will see a pressure plate at the end of the path. Let Link stand on the pressure plate to reveal the next part of the shrine.
- On this next part of the shrine, you will see four Guardian Scouts in a room with a shallow pool of water. Link must now defeat the four weak Guardian Scouts. After defeating them, they will drop a few Ancient Screws and Springs.
- After that, in the northeastern most of the room, you will see a chest on top of a platform. To reach it, press the up directional button, select the Cryonis Rune Ability, press the L button to aim, press the down directional button to aim under Link’s feet, and let Link stand as close as possible to the platform that will allow for an ice block to be created, press the A button to activate and create an ice block right under Link and go to the platform with the chest. Open the chest to obtain 10 Bomb Arrows.
- Next, on the opposite side of the room (the northwestern side), you will see a pressure plate on top of a similar platform that Link is on. Drop down from the platform with the chest, press the L button to aim, let Link stand as close as possible to the platform with the pressure plate that will allow for an ice block to be created, and press the A button to activate and create an ice block right under Link, go to the platform with the pressure plate, and let Link stand on the pressure plate.
- Then, the next part of the shrine will be revealed, which is another pressure plate and another huge gate. Let Link stand on the pressure plate to open the gate.
- After opening the huge gate, you will see a wall of wooden boxes. Quickly run to the wall on the left or right side of the room as a huge spiked ball will suddenly blast through the wall of wooden boxes.
- After the huge spiked ball bursts through the wall of wooden boxes, the next path will be revealed, which is a ramp. Go up halfway on the ramp, look behind Link, and see three breakable cubes on the ceiling. Destroy it by shooting it with one of the Bomb Arrows you obtained from the chest earlier or by throwing and detonating either of Link’s Remote Bombs at it.
- After destroying the three breakable cubes, you will see another chest. To get to the chest, press the up directional button, select the Magnesis Rune Ability, press the L button to aim, aim at the chest, press the A button to activate the Magnesis Rune on the chest, and pull it towards Link. Open the chest to obtain a Diamond.
- Next, continue up on the ramp, and you will see a corridor that goes to the right, and beyond the corridor is a gap with lava. You will see another chest above the lava on the northeastern end of the room. Get to the edge of the corridor, as close to the chest as possible without falling off the ledge and unto the lava, press the L button to aim the Magnesis Rune ability, aim at the chest, and press the A button to activate the Magnesis Rune on the chest, then pull it towards Link. Open the chest to obtain an Ancient Core.
- Then, continue on the corridor’s path, and you will see another pressure plate and a gate. Behind the gate is a narrow path that goes up a ramp. Let Link stand on the pressure plate to open the gate. However, another huge spiked ball will drop and roll on the ramp. If the spiked ball is too fast for you, quickly run back to the previous corridor to evade the huge spiked ball. The obstacle is not over as more huge spiked balls will roll down one after the other, off the path and into the lava.
- To cross this path, press the L button to be ready and aim the Magnesis Rune ability, wait on the previous corridor just beside the path of the huge spiked ball, and quickly press the A button to activate Magnesis on it once a huge spiked ball rolls down and is almost at the bottom of the ramp, and set it down on the corridor so it will not fall on the lava. No more huge spiked balls will roll down the ramp.
- After that, quickly head up the ramp, and on top, you will see a room with the altar and the monk.
- Finally, go near the altar, talk to the monk, and claim your Spirit Orb!
As mentioned above, the Maka Rah Shrine, or the Steady Thy Heart, is one of 13 shrines in the Hebra Tower region. The other shrines are the Goma Asaagh Shrine or A Major Test of Strength, the Sha Gehma Shrine or the Shift and Lock, the Hia Miu Shrine or A Major Test of Strength, the Mozo Shenno Shrine or A Major Test of Strength, the Rin Oyaa Shrine or the Directing the Wind, the Shada Naw Shrine or the Red Giveaway, the To Quomo Shrine or Quomo’s Blessing, the Rok Uwog Shrine or the Power of Reach, the Lanno Kooh Shrine or Lanno Kooh’s Blessing, the Dunba Taag Shrine or the Build and Release, the Gee Ha’rah Shrine or the Tandem, and the Qaza Tokki Shrine or Qaza Tokki’s Blessing.


