The sheer number of bosses to encounter and, hopefully, defeat in Elden Ring is simply astonishing. And the variety and detail of each boss are a great testament to the care and attention afforded to creating these bosses, be it optional or not.
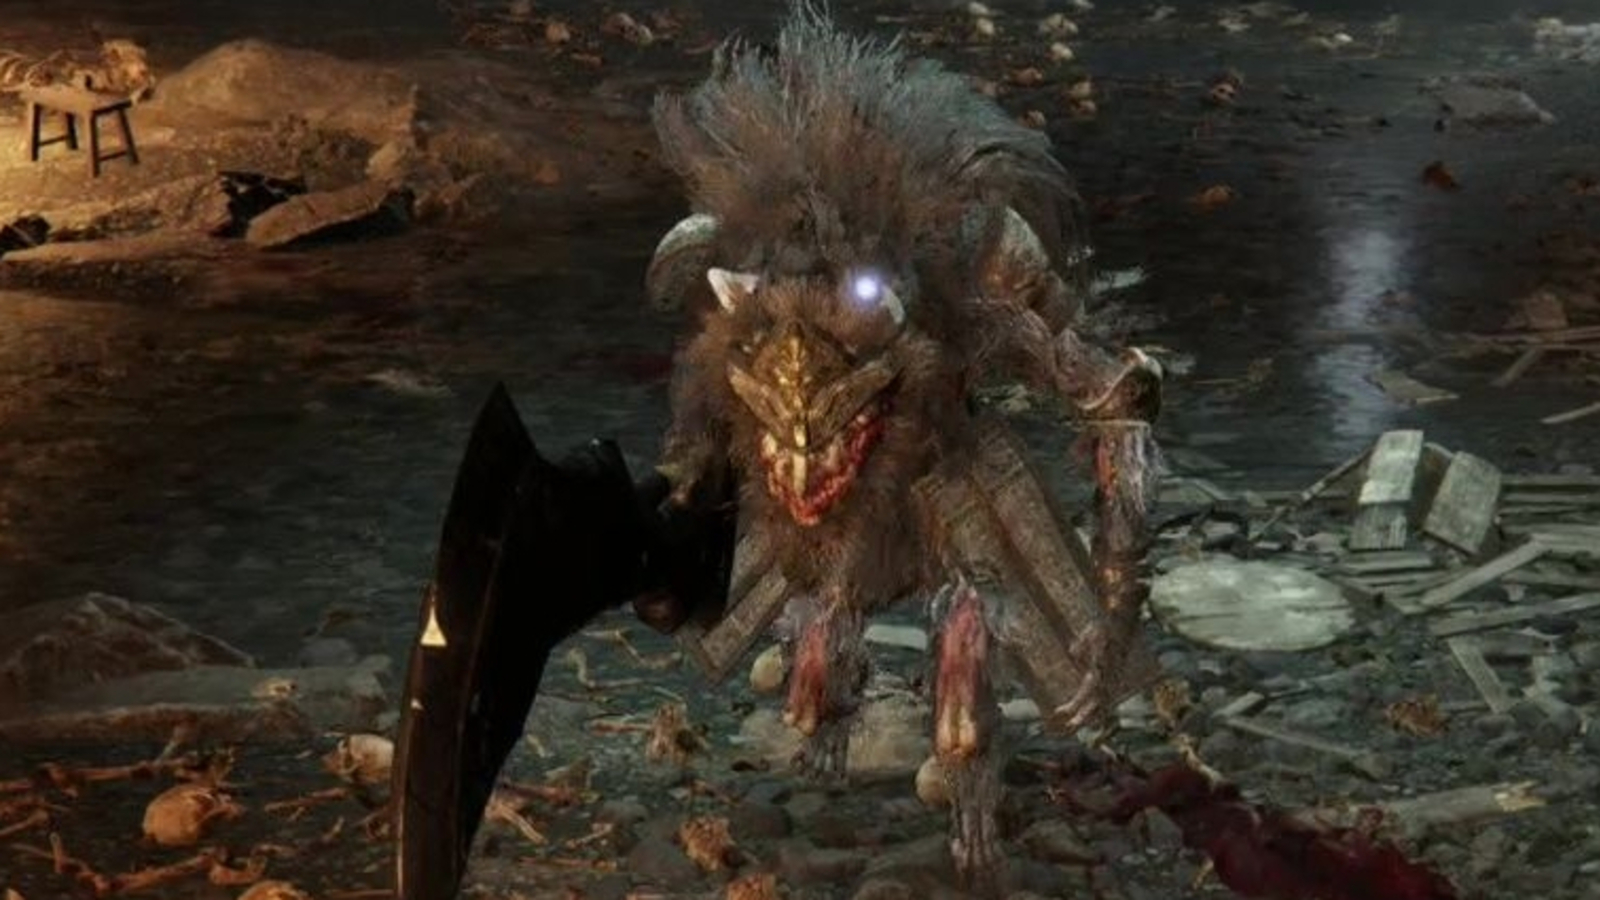
One of the said optional bosses is Beastman of Farum Azula, a boss that was said to have come from a doomed city in the sky, and now resides in a cave in Limgrave. While unremarkable at first glance, defeating the Beastman of Farum Azula comes with worthwhile rewards.
Beastman of Farum Azula can also be encountered lurking in Dragonbarrow Cave. After the myriad of unfairly difficult bosses that you had to beat on your journey to reach the Groveside Cave, you now get to battle a relatively weak boss, making for a welcomed change of pace.
Beastman of Farum Azula Overview

Hit Points:
Beastman of Farum Azula will have 1418 HP on your first playthrough.
Types of Damage:
It’s unclear what types of damage the Beastman deals, because his pool of attacks is quite limited and relatively weak, compared to his counterparts.
Weaknesses:
Beastman of Farum Azula is weak to Slash and Fire damage.
Weapons:
Beastman of Farum Azula wields a great cleaver in his right hand that can deal devastating damage if you’re not careful.
Parrying the boss:
Beastaman of Farum Azula can be parried when he begins to swing his cleaver, leaving him wide open for a counter. All variations of his swing can be parried, and the slow momentum of each of his attacks makes it much easier to time your parry.
Main Attack Pattern:
Beastman of Farum Azula will alternate between two slow yet powerful swings, a two-handed slam, and quick slashes, making him rather predictable.
Combos:
At some point during his attack pattern, Beastman roars, signaling the start of his combo. He makes four quick horizontal swings with his cleaver, followed by an upwards vertical swing, which launches him into the air to set him up for his final overhead attack, where he furiously slams his cleaver on the ground.
Special Attacks:
- 6-Hit Combo: A mix of wild swings, jumping attacks and quick slashes make up the Beastman’s 6-Hit Combo, which is his deadliest and most notorious attack.
- Roar: The Beastman will perform this attack whenever you’re up close and personal. But even if you’re not, he might charge at you and immediately roar, forcing you to react quickly and dodge away from him.
- Retreating Leg Sweep: If you lurk close to the Beastman for a long period, he will try to take you by surprise and slash at your feet whilst retreating backward.
- Cleaver Smash: Beastman of Farum Azula charges toward you and smashes its cleaver down on the ground with both hands, creating a fair-sized Area of Effect that can catch you out if you’re not careful.
Pre-fight Preparation

Remove Any Unnecessary Gear
Being as light as possible allows you to be agile and make effortless evasive maneuvers. You could even remove your shield if you’re confident enough in your ability to consistently dodge the Beastman’s attacks.
Melee Players Should Equip a Double-Handed Weapon
Not only will a double-handed weapon deal more damage, but it will also allow you to perform critical jump attacks that will, hopefully, stunlock the Beastman of Farum Azula.
Take in the Maximum Amount of Flasks of Crimson Tears
Whilst the Beastman’s attacks are relatively easy to dodge, sustaining damage from one of them can prove devastating and sometimes even run-ending. You should be on the side of caution and prep yourself for the worst-case scenario.
Fight Strategy

General Strategy
Keep Your Distance
There’s no reason for you to be up close and personal with the Beastman. The cons of constantly being in striking range of the Beastman’s attacks far outweigh the pros.
Be Patient
Don’t spam your attacks or dive into any risky situations. The right opportunity to strike will present itself in due time. You just have to be patient.
Keep an Eye Out for When He Roars
The Beastman’s roars are typically a sign of the start of his powerful 6-Hit Combo, which you need to avoid at all costs. If you find yourself in the Beastman’s range during his roar, retreat as quick as possible.
Melee Players
Be Aggressive
Using a powerful two-handed weapon will allow you to easily stunlock the Beastman, as long as you’re always on the lookout for striking opportunities and are willing to take risks.
Bait Into Attacks
Beastman of Farum Azula is at his most vulnerable right after an attack. Thus, baiting him into attacking you should set him up perfectly for a critical hit.
Dodge Into Attacks
Because of the Beastman’s quick chain of attacks, you’ll have minimal openings to strike throughout the battle. You should dodge toward the boss to place yourself in a prime position to strike.
Don’t Be Greedy
Once you find yourself in an attacking position, put in a hit or two then retreat as quickly as possible. It’s much safer and more reliable to slowly chip away at the Beastman’s health than to be greedy and risk prematurely ending your run.
Make the Most Out of Your Jump Attack
When wielding a powerful weapon, jump attacks are your most devastating moves. Aiming to perform as many successful jump attacks as possible will prove dividends in your battle with the Beastman of Farum Azula, as it will quickly chip away at his health and possibly stunlock him.
Ranged Players
Stay At Mid to Long Range
It’s best to keep your distance from the Beastman and shoot your projectiles at him from mid to long-range.
Dodge Away from The Beastman’s Attacks
There’s no need for you to be up close and personal with the Beastman at any point during this boss fight. Therefore, you should always dodge away from the Beastman to avoid putting yourself in harm’s way.
Prioritize Quick Attacks Over Powerful Ones
Beastman of Farum Azula is a rather agile boss that can move and charge at you at an alarmingly rapid pace, so it’s best to avoid any attacks that keep you stationary for long periods of time, even if they’re powerful.
Rewards
Depending on where you encounter the Beastman of Farum Azula, you’ll receive a set number of Runes. Defeating the Beastman in Froveside Cave will grant you 1,000 Runes, whilst defeating him in Dragonbarrow Cave will grant you a whopping 65,000 Runes.
To go with the wads of Runes to gain from defeating the Beastman of Farum Azula, you’ll also be the proud new owner of one or two Flamedrake Talismans, depending on where you defeated the Beastman.