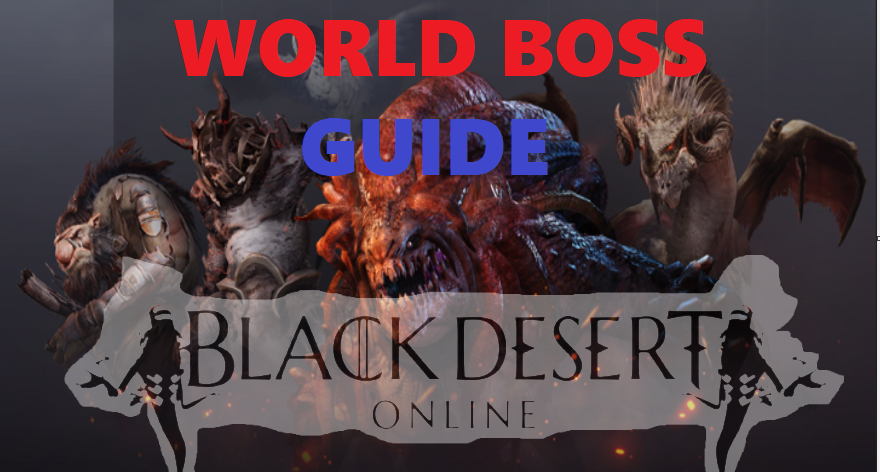
World Bosses are special enemy creatures in the game that any player can hunt solo or with a team for various reasons: farm loot and materials, take on a challenge, or have fun.
Contents
World Boss Requirements
To be able to take on any boss in the world of Balck Desert, there will be a little requirement. You need around 120 AP and 150 DP before doing any world bosses. If you do not get this, you will probably get no loot because you will not do any damage and will get one shot by every ability the world boss throws at you.
You will also need to be level 50 or more because if you are at a lower level, you miss every attack on the boss and eventually obtain no loot.
When facing the said bosses, stack up on health and mana potions; food buffs can greatly aid these. Serendia specials, caffeine specials, and knight combat rations are all great choices, as they are cheap and effective.
World Boss Locations
There are currently nine world bosses in all servers, except for the Olvia Server and Arsha server (Seasonal Servers). Kzarka can be found in Serendia. Karanda, Muraka and Quint in Calpheon. Nouver and Kutum in Valencia. Offin in Kamasylvia. Garmoth in Drieghan and Vell in the Heart of the Ocean.
General Mechanics
Be careful because you may face the death penalty if your character dies while fighting against a world boss.
When a world boss is defeated, many adventurers can choose to pick up loot depending on the amount of damage dealt. World bosses will vanish if you do not defeat them within 30 minutes.
The time respawns of each boss will depend on your region: SEA, NA, or EU.

World Bosses
KZARKA

Kzarka is relatively one of the easier World Bosses to defeat. When you see Kzarka gathering dark clouds or smoke around him, you can either run behind him or, for extra safety, behind one of the pillars around the room. The only ability that you should be concerned about with Kzarka is his fire breath.
Kzarka also becomes untargetable during this time. That is another way to notice he will use his fire breath if you are having issues noticing the smoke. So when you cannot attack him anymore, just run behind one of the pillars or the boss.
Kzarka drops the Kzarka weapon, the best main-hand weapon in the game.
KUTUM

Kutum is a bit more difficult than all other bosses, as he is hard-hitting if you are not well-geared. You will need to watch out for his melee swipe by standing behind or dashing through when he makes the attack. If you are over 230 DP, you can immediately ignore these attacks and pop up again.
Kutum will also randomly burrow and jump up through the chamber’s ground.
Kutum has one main kill ability, his AoE (area of effect) Vacuum. If this ability hits you, it will pull you toward him and damage you. When you see Kutum stop moving and gathering dark clouds by his mouth, you will want to run away from him as far as possible.
Kutum drops the Kutum Offhand, which is an AP and DP item. It has two gem slots and offers 10% ignore resistance, so it is a great pickup for many games’ classes.
NOUVER

Nouver is relatively easy if you know his abilities. His Side Step or Hop ability allows him to jump away from you, and sometimes he may disappear in front of you and reappear behind you, becoming a rather tedious and annoying world boss.
Another mechanic he possesses is his Whirlwind ability. He will spawn multiple whirlwinds slowly moving around the world boss’s location. The whirlwinds do not produce too much damage and are sometimes hard to avoid, especially at night, as they are hard to see. If you get stuck inside a whirlwind, it is difficult to escape from, making you an easy target for Nouver.
One other ability he has is a fire breath attack while flying. He will take off and shoot fire from above. However, they do not produce too much damage. Your best chance is to stand still and try to avoid any fireball aimed at you.
Nouver’s main ability to be careful of is his Frontal Fire Breath. He does this throughout the fight and at random intervals. This is its only one-shot ability and is very simple to avoid. You have to move behind the world boss or to his side. However, he has a tailwhip attack, so it is best to move to his side.
Nouver drops the Nouver Offhand, the highest AP offhand weapon in the game. This weapon is great for some classes.
KARANDA

You can only encounter Karanda in the Karanda Ridge in Calpheon. This World Boss alone is powerful and has a powerful attack pattern. Additionally, the roughness and limited space of the ridge make it even more perilous when facing this boss.
There are two skills to take note of when you are fighting Karanda. First is an AOE attack in which she suddenly flies up into the sky and attacks a large area outside the circle around her. To evade this attack, you must quickly get within her circle.
Her second skill is an attack pattern in which she lands for a short moment and then takes off again. This AOE attack deals damage within the circle around her, so it is important to move outside the circle to avoid it quickly.
Karanda drops a world boss gear, Dandelion.
OFFIN

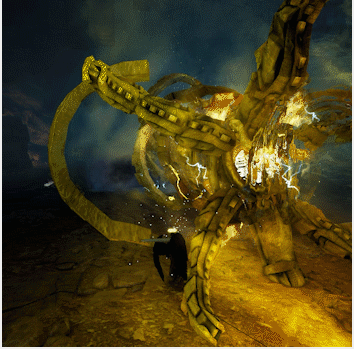
The large tree-like monster is “Offin,” and the one riding it in the middle is “Offin” Tett. Offin is a World boss that repeatedly transforms and combines. It has four legs and a body where Offin Tett is mounted and surrounded by a protective shield.
You can only attack Offin’s legs at the start of the raid. OffinTett will come out for the first time once a certain amount of damage dealt to Offins’s legs is accumulated. Offin stops functioning once Offin Tett comes out, but it does not mean the fight gets any easier.
Offin Tett creates multiple clones and uses powerful skills, so don’t let your guard down. When offin Tett loses a certain amount of HP, it returns to Offin to prepare for the next phase.
When you defeat Offin, you can obtain Offin Tett’s Light-Sealed Weapon Box. If you are lucky, you can get an Oaffin Tett’s Radiant Weapon with lower accuracy but Higher AP than Kzarka Weapon.
GARMOTH
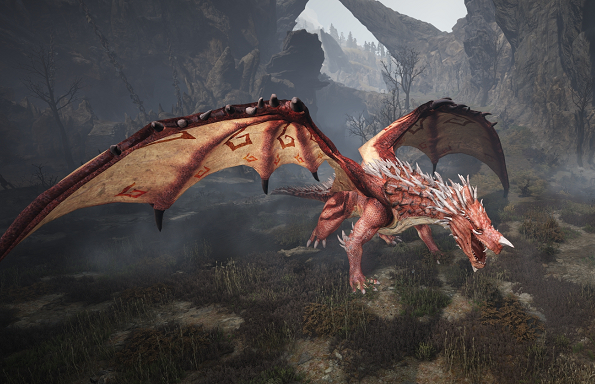
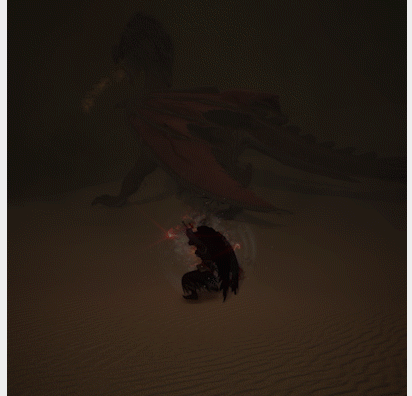
Crimson Dragon Garmoth appears at Garmoth’s Nest in Drieghan. She is much more powerful than the one you defeat as part of the Drieghan main questline, so it is a good idea to be well-prepared before taking on this challenge.
Garmoth is a dragon just like Nouver, but the big difference is that she has a big arsenal of aerial attack skills.
Adventurers also need to watch out for the Kagtum, worshipers of Garmoth, that appear throughout the fight and when she uses her skills that target a large area. Garmoth does not appear at the start of the fight. Instead, statues need to be destroyed before she arrives.
Additionally, it would be best if you watched out for the frequent appearance of the Kattum. Garmoth takes off to the sky when her HP drops below a certain amount, and the Kagtum will appear when one of the remaining statues activates. It would be best if you defeated the Kattum and the activated statue to make Garmoth return to the ground.
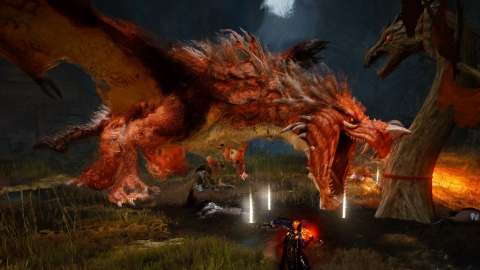
When you defeat Garmoth, you can obtain Garmoth’s Heart if you are lucky. Garmoth’s Heart is used to upgrade Kutum and Nouver sub-weapons. The upgraded sub-weapons will have additional effects.
QUINT

You can see a giant troll statue in Quint Hill in Northern Calpheon. This is “The First Troll,” Quint. When a system message appears, Quint will start jumping all over the place as he escapes his statue form.
During the battle, you will see that your character is attacking Quint’s legs. You cannot damage its HP while he stays on his legs. You can only start dealing damage to his HP when he falls. He will fall after accumulating damage to his legs. You should deal constant damage to the boss’ legs to defeat him as quickly as possible.
Another way to make Quint fall is using a “Vype Stoner Cannon Assembly Set” and “Monster Basher” that you purchase from Vype Stoner, the Serendian Cannon Master. After getting hit with the Monster Basher, Quint collapses, allowing characters to deal damage to the boss.
MURAKA

Muraka appears in the Mansha Forest, where other ogres reside, but is much more powerful than the others. Muraka is slow like Quint and relatively easy to dodge. However, do not underestimate the powerful AoE skills of Muraka, or else you’ll drop flat on the cold forest floor.
Keep in mind that as Muraka’s HP drops, his attack speed and AP increases. Once his HP gets low, your character can be killed instantly when Muraka uses the skill where he strikes the ground with his fist, even if you have a set of TET (IV) defense gear.
Still, you will not lose EXP or have your crystals broken even if your character dies during this raid. So, why don’t you go for the challenge? You can deal damage to make Muraka fall on its knees by continuously attacking its legs since it’s gigantic like Quint.
VELL

Vell appears in Vell’s Realm, north of Lema island. At the start, a whirlpool will form before Vell’s appearance. If you get swept into the whirlpool, you and your ship can take tons of damage. Ensure to approach Vell carefully since she can deal a lot of damage to Adventurers in the area when the fight starts.
Vell uses her fragments, “Lopters,” and tries to destroy ships that fire cannons at her. Vell can only take damage from ship cannon fire. She retaliates from time to time with powerful breath attacks, so be sure to stay on the move. The approaching Lopters, however, can be defeated by firing [Hunting] Matchlocks.
When you fight Vell, every member of the same party or platoon is granted the same amount of Contribution EXP, even when another member uses FocusFire. Everyone should try their best in each position, whether you’re an Adventurer steering the ship, defeating incoming Lopters, repairing the ship, out scouting, or firing cannons.

You will not receive a penalty even if your character dies during your fight against Vell. If you choose to resurrect at the closest town, you’ll resurrect at Lema Island. If you choose to resurrect at a node, you’ll resurrect on the ocean (slightly distance away from the area fighting Vell). When you resurrect at the node, wait for other Adventurers to come to rescue you, as there are buoys nearby.
Once Vell takes a certain amount of damage, she will enrage and begin using powerful attacks. When this happens, every Adventurer on the water’s surface will die from a big sea storm. You can avoid the sea storm by either holding onto the ship firmly or diving into the sea.

You can obtain your reward for defeating Vell through the Black Spirit’s Safe.