Learn how to fix the Cyberpunk 2077 crash that happens sometimes after launching the game.
Cyberpunk 2077, like any game, has its system compatibility issues. This is completely normal, but it does mean that sometimes you won’t get to play until you fix some issues.
Players are reporting that they’re having crashing issues with Cyberpunk 2077. Don’t worry, though, because there are a few ways to fix this, and it doesn’t necessarily mean that your game, or the game in general, is broken.
How to Fix Crash After Launch – Cyberpunk 2077
As with any game-related issue, I always recommend checking your operating system and graphics card first. I suggest checking whether you have the latest update for both, as that can make a difference.
Most gaming enthusiasts will chuckle right now, but it is easily overlooked how many people don’t keep their drivers and OS up-to-date.
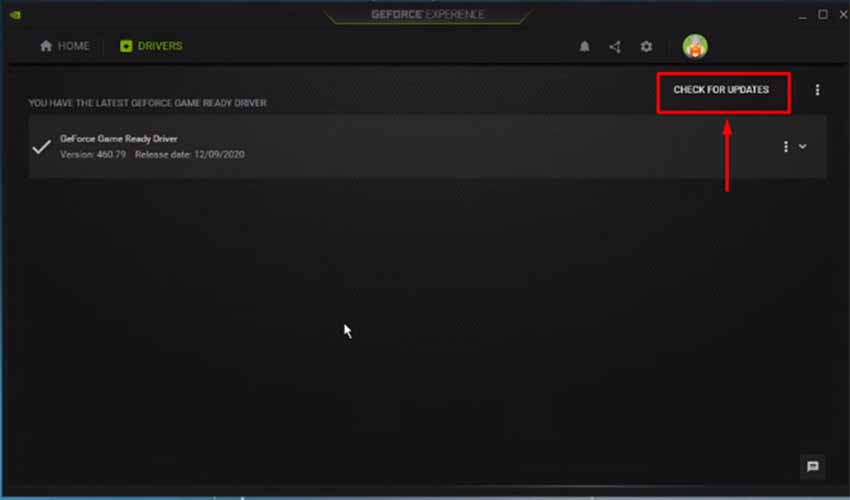
With that out of the way, here are some other ways to fix crashes after the launch of Cyberpunk 2077:
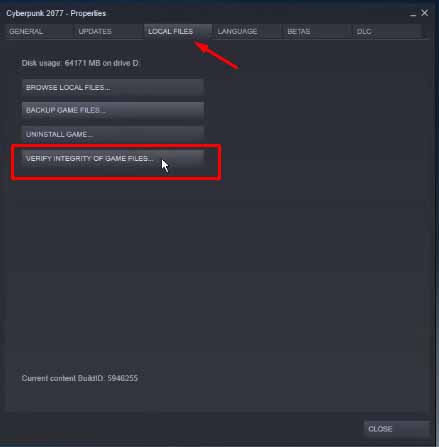
1. Verify Integrity of Game Files
- Launch your Steam application.
- Navigate to your Library and right-click > Properties Cyberpunk 2077.
- Open the Local Files tab.
- Click “Verify integrity of game files…”.
- Wait for it to finish and try Cyberpunk again.
If that didn’t eradicate the issue, try the next method.
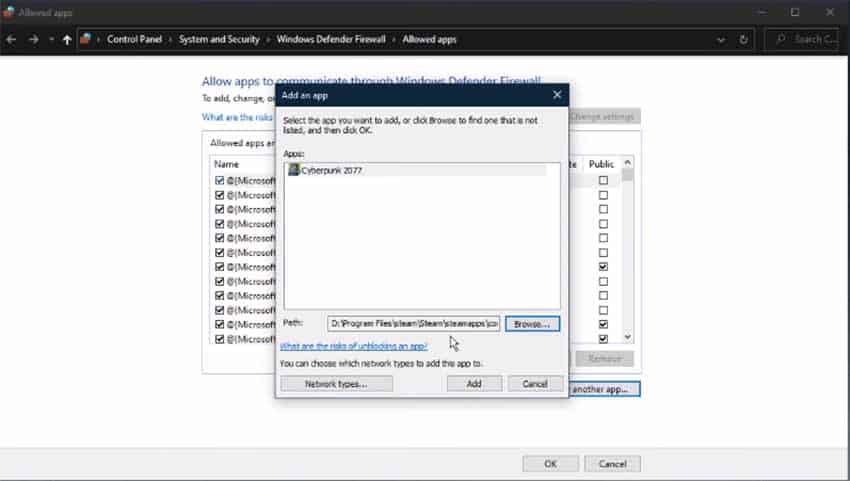
2. Allow Cyberpunk 2077 Through Firewall
- Open your Start menu and type “Firewall.”
- Hit Enter. Click on “Allow an app through firewall.”
- Press “Change Settings” and then “Allow another app.”
- Now, click “Browse” and find and select Cyberpunk 2077 .exe file.
- Then, press “Add” and make sure both Public and Private are checked for Cyberpunk.
3. Disable All Overlays
Sometimes, the methods outlined above won’t work. In that case, try turning off all the overlay applications you have.
If you don’t know what applications have overlays, they’re usually like Steam, Discord, OBS Studio, Nvidia and AMD software, Epic Games, etc.
Also, if disabling them is not an option, simply quit these applications.
4. Disable Fullscreen Optimization and Run as Administrator
- Find your Cyberpunk 2077 executable file. This can also be your shortcut.
- Right-click > Properties.
- Open the Compatibility tab and have “Disable Fullscreen Optimization” and “Run this program as administrator” checked.
- Hit Apply and then OK.
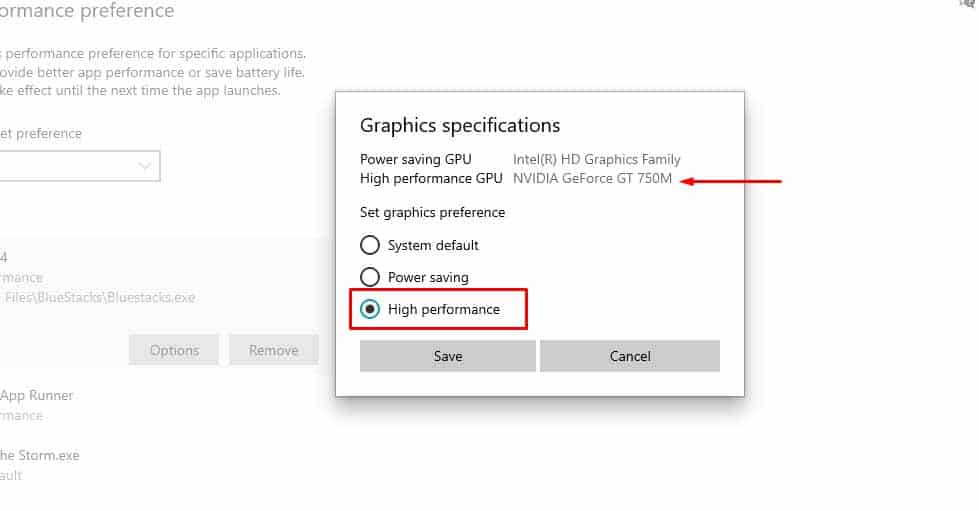
5. Run Cyberpunk 2077 With GPU
- Click on your Start menu and search for “Graphics,” then Enter.
- There should be a button there – “Browse,” click it.
- Find and select Cyberpunk 2077.
- After that, ensure Cyberpunk has a power mode that utilizes your GPU!
6. Reinstall
Unfortunately, if none of the above mentioned methods work, it is probably time to pull the trigger on a reinstall.
In theory, this shouldn’t make a difference since you already verified the integrity of your files, but that feature tends not to work as smoothly sometimes!
Related: Can You Remove Weapon Mods in Cyberpunk 2077? – Answered


