Learn the best optimization settings to increase your performance and FPS in Cyberpunk 2077!
It’s no secret that a game like Cyberpunk 2077 requires a beast of a machine to run smoothly. But did you know that you can increase your system’s performance?
Additionally, it’s important to note this optimization guide will cover only the PC players. As for consoles, there isn’t much to tweak so you can get better performance.
Don’t get me wrong, there are some things you can do, but there aren’t any big performance boosts like you can get on PC!
Optimization Guide: Increase Performance and FPS – Cyberpunk 2077
Before getting into the in-game settings, we need to optimize your system. Most overlook this part, but it is relatively important.
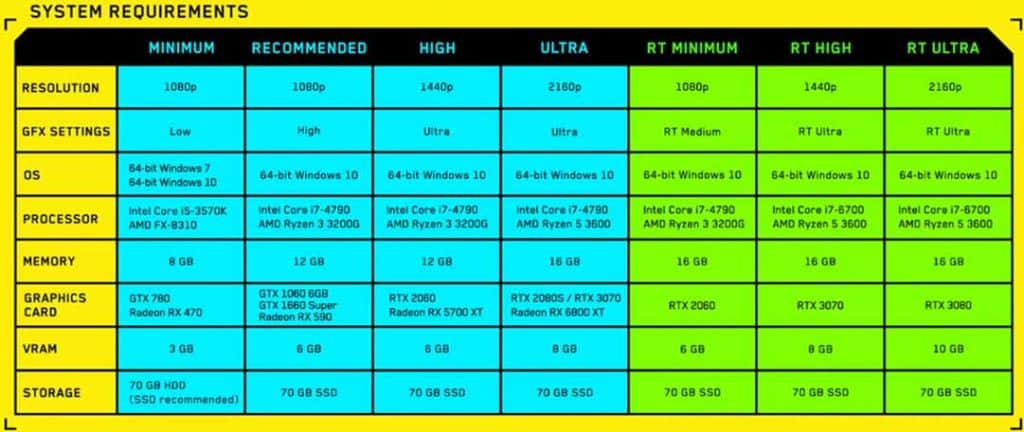
Ensure you also have the minimum or recommended system requirements for Cyberpunk 2077.
Try to do most of these methods to get the most out of your system:
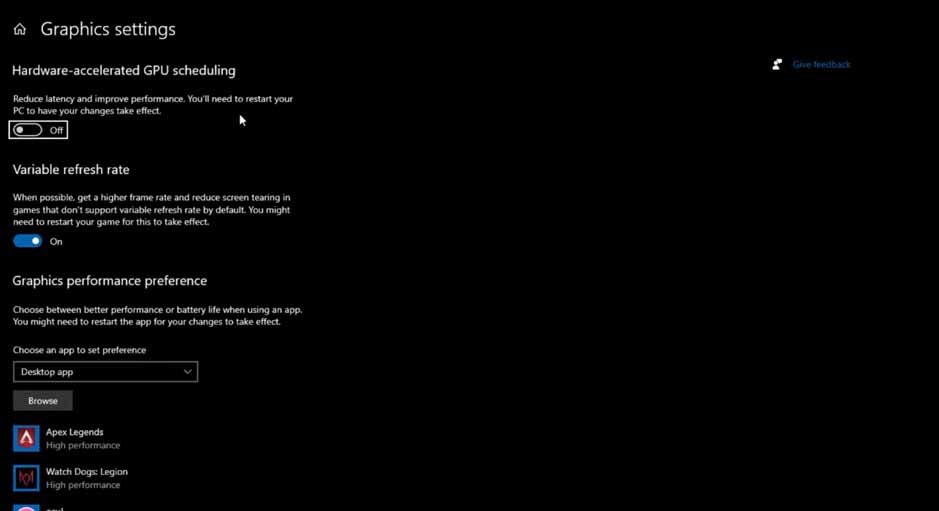
1. Activate Hardware-Accelerated GPU Scheduling
- Go to your graphics settings through your Start menu.
- On the top, there should be something called “Hardware-Accelerated GPU Scheduling.”
- Flip the switch from OFF to ON.
2. Disable All Overlays, Game Mode, and Capture & Game Bar
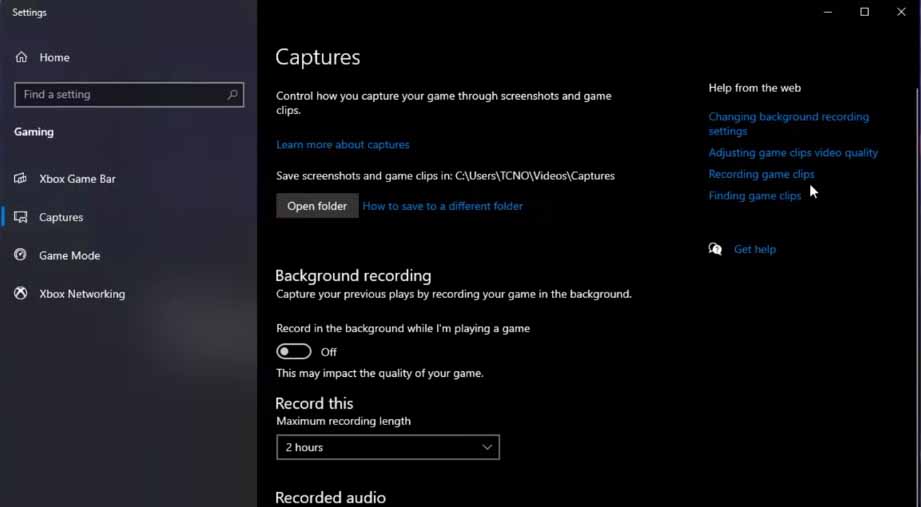
- In your Start menu, type in “Game Mode Settings”. After that, hit Enter.
- Turn off Game Mode.
- Click on Captures and turn everything off there.
- The top left should be “Xbox Game Bar”; click it.
- Disable it!
After that, disable or quit applications with overlays, like Discord, Nvidia, AMD, FPS counters, etc. Don’t quit Steam; instead, disable the overlay through settings.
3. Enable High-Performance Mode for Cyberpunk 2077
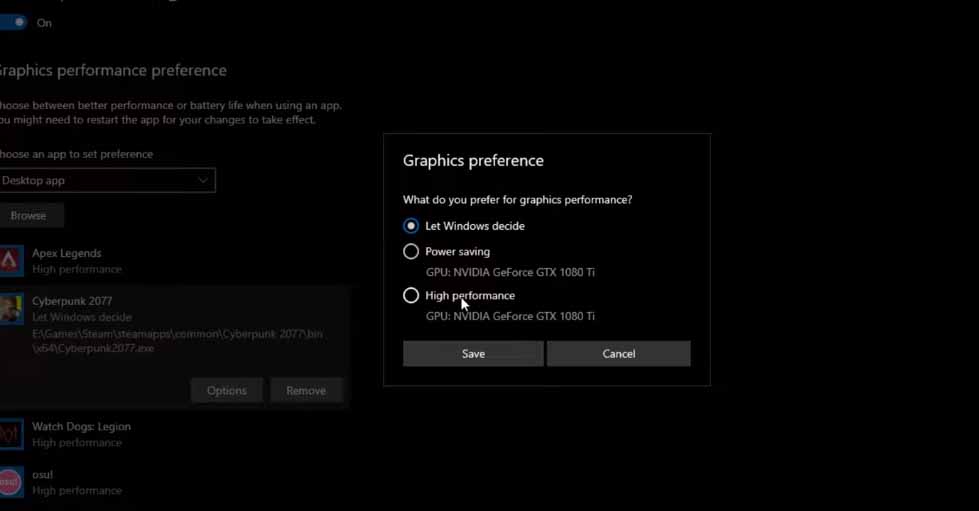
- Go to your Star menu and search for “Graphics Settings.”
- Open it, and click Browse.
- Find and select your Cyberpunk 2077 executable file.
- Select “High-Performance Mode” instead of “Let Windows Decide”!
Before we get into the in-game settings, we should clear the air up a bit. Depending on your system, you should manage your expectations accordingly.
The methods in this guide won’t turn your computer into the most powerful gaming machine on the planet just by tweaking a few settings.
In addition, check whether you have the latest version of your operating system and the latest drivers for your graphics card. The latter can be done through Nvidia’s or AMD’s application on your PC.
4. In-Game Settings
First, you should select a quick preset. This will tweak your settings for the best experience according to your system’s hardware.
Check out the graph below, and choose a quick preset that roughly matches the hardware there:
Now, follow the list below and tweak your settings accordingly:
- Field of View – Keep it as low as possible without destroying your gameplay experience.
- Motion Blur – I recommend turning this off since it isn’t that big of an issue. Plus, it doesn’t look that good.
- Anisotropy – Put this at four or one if you don’t have an issue with how it hurts graphics.
- Shadows – I recommend putting them low or completely off for all the shadow settings.
- Ambient Occlusion – As low as possible.
- Reflections – Medium.
- Mirror Quality – Not a huge impact on graphics, but rather on performance. Put it to low or medium.
- All Settings Below Ray-Tracing – If you don’t have one of the 20 or 30 series GPUs in your system, turn ray-tracing and all other settings below to OFF.
- V-Sync & Maximum FPS – Turn OFF both.
- Windowed Mode – Make sure to make this Fullscreen.
- Resolution – Select your monitor’s native resolution and nothing more.
As mentioned above, you should expect a performance boost with these tweaks. However, your hardware is still limited, so don’t expect to see huge bumps in FPS!


