Learn how to farm Deralium in Lords of the Fallen!
Despite having the same title, the new Lords of the Fallen takes place 1,000 years after the first. Hexworks and CI Games’ soulslike role-playing game offers the player a journey through an enormous, interlinked world, crossing both the Axiom and the Umbral parallel worlds. In this game, infamous for being challenging, the player’s skills will not be enough as the player progresses.
The right upgrades could be the key to victory in a world of difficult challenges and enemies. Here, we will discuss the materials necessary for upgrades in the game Deralium. In this guide, we will teach you how to farm the different kinds of Deralium in Lords of the Fallen. This guide will offer comprehensive insights and strategies for farming Deralium. This will empower the player to forge their path to victory in the unforgiving landscapes of Lords of the Fallen.
Deralium
In Lords of the Fallen, the player needs Deralium, aside from Vigor, to upgrade their Weapons, Shields, and Catalysts.
The boss weapons players can get in Lords of the Fallen do not require special upgrade material. They all also need some Deralium pieces. However, the player can only upgrade boss weapons to +5.
When upgrading a shield, it increases its defensive capabilities from all types of damage. However, it is important to remember that each shield has different base values. An example is upgrading shields with lighter weight. Even if they have lower defensive capabilities than other heavier shields, they can have good or better defensive capabilities when upgraded while still retaining their lighter weight.
When upgrading Weapons, Shields, and Catalysts, the amount they are upgraded depends on the type of Deralium used. The following are the types of Deralium that the player can find in the game:
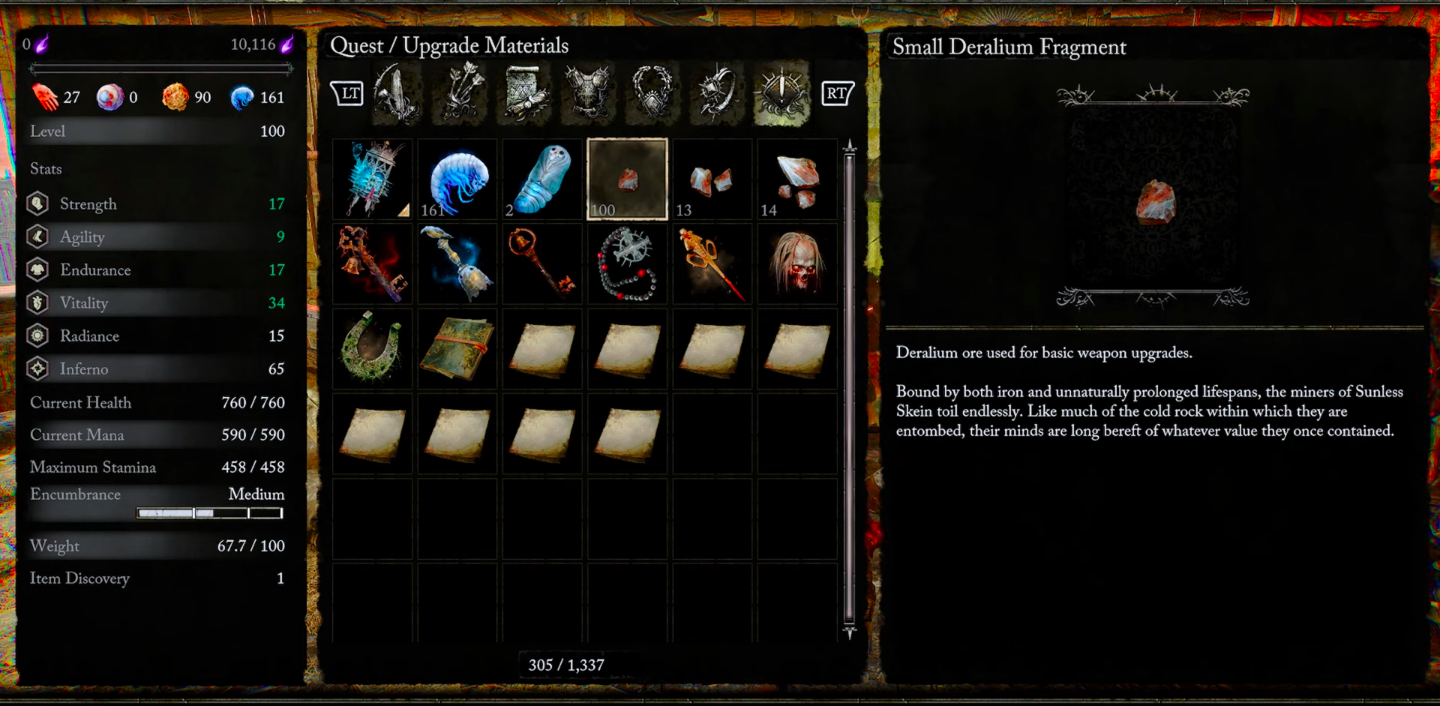
- Small Deralium Fragments
The Small Deralium Fragments are the most basic type of Deralium the player can find in the game. The player can use this type of Deralium to upgrade up to +2 on the player’s Weapons, Shields, and Catalysts.
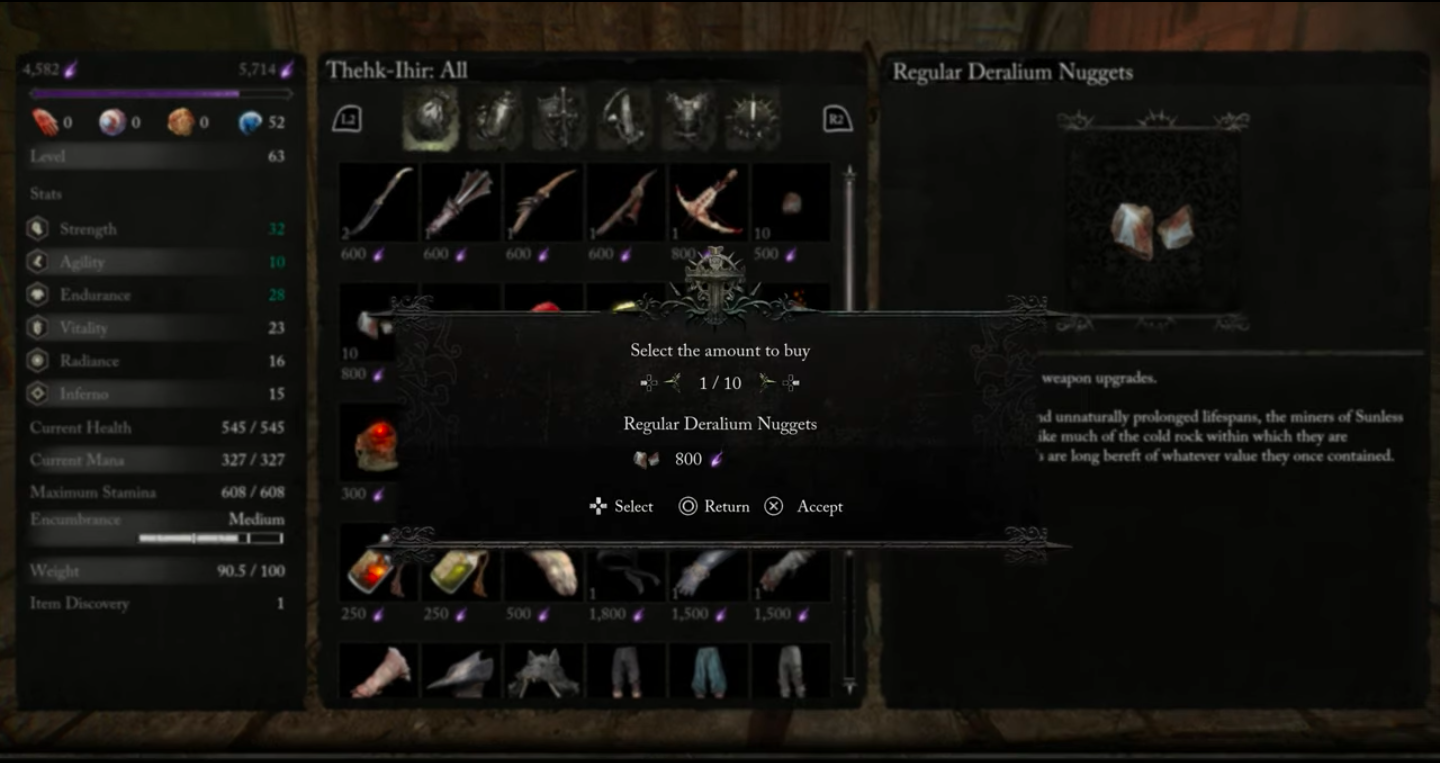
- Regular Deralium Nuggets
Up next is the Regular Deralium Nuggets. This type of Deralium is a tier higher than the Small Deralium Fragments. The Regular Deralium Nuggets allow players to upgrade their Weapons, Shields, and Catalysts with an additional of from +2 up to +5.
- Large Deralium Shards
The next tier above the Regular Deralium Nuggets is the Large Deralium Shards. The player can use this type of Deralium to upgrade the player’s Weapons, Shields, and Catalysts for an extra of from +5 up to +9.
- Deralium Chunks
The next and last type of Deralium is the Deralium Chunk. With this type of Deralium, the player can upgrade their Weapons, Shields, and Catalysts with an additional of from +9 up to +10. The player will only be able to find a few Deralium Chunks in the game.
How to Farm Deralium
There are several ways to get some Deralium: defeating enemies, purchasing them, and finding them all over the areas of Mournstead.
1. Defeat Enemies
One of the main ways to obtain Deraliums is by getting them as a drop for defeating enemies. The player will be able to farm different kinds of Deraliums from different kinds of enemies. The following are the types of Deraliums and the enemies that can drop them upon defeat:
Small Deralium Fragments
The following are the enemies that can drop the Small Deralium Fragments:
- Pilgrims (Locations: Defiled Sepulchre, Abandoned Redcopse, Skyrest Bridge, Pilgrim’s Perch, Forsaken Fen, Manse of the Hallowed Brothers, and Abbey of the Hallowed Sisters)
- Raw Manglers (Locations: Abandoned Redcopse, Skyrest Bridge, Fitzroy’s Gorge, Lower Calrath, Sunless Skein, Cistern, Upper Calrath, Fief of the Chill Curse, and Bramis Castle)
- Shuja Warriors (Location: Forsaken Fen)
- Shuja Striders (Location: Forsaken Fen)
- Trappers (Locations: Fitzroy’s Gorge, Lower Calrath, Upper Calrath B, Sunless Skein, and Bramis Castle)
- Pureblades (Locations: in the Belled Rise area of Pilgrim’s Perch, Manse of the Hallowed Brothers, Abbey of the Hallowed Sisters, and Path of Devotion)
- Receiver of Sacred Resonance (Locations: Revelation Depths, Manse of the Hallowed Brothers, Abbey of the Hallowed Sisters, Tower of Penance, and Pilgrim’s Perch B)
- Ardent Penitent (Locations: Pilgrim’s Perch, Abbey of the Hallowed Sisters, and Tower of Penance)
- Carrion Knights (Locations: The Empyrean and Tower of Penance)
Regular Deralium Nuggets
The enemies that can drop Regular Deralium Nuggets are as follows:
- Proselyte (Locations: Abandoned Redcopse, Skyrest Bridge, Fitzroy’s Gorge, Lower Calrath, Upper Calrath, Sunless Skein, Cistern, Bramis Castle, and Defiled Sepulchre)
- Marksman (Locations: Pilgrim’s Perch, Forsaken Fen, Fitzroy’s Gorge, Revelation Depths, in the Belled Rise area of Pilgrim’s Perch, Manse of the Hallowed Brothers, Path of Devotion, Skyrest Bridge, and Tower of Penance)
- Avowed (Locations: Skyrest Bridge, Forsaken Fen, Fitzroy’s Gorge, Revelation Depths, Pilgrim’s Perch, Manse of the Hallowed Brothers, Path of Devotion, and Tower of Penance)
- Bringer of Stillness (emerges in different places when the player has built up a significant level of fear in the Umbral Realm: Upper Calrath, Revelation Depths, Manse of the Hallowed Brothers, Fitzroy’s Gorge, Path of Devotion, Bramis Castle, Sunless Skein, Abbey of the Hallowed Sisters, Fief of the Chill Curse, Lower Calrath, and Pilgrim’s Perch B)
- Deep Sparrow (Locations: in some areas while in the Umbral Realm and Revelation Depths)
- Infernal Enchantress (Locations: Upper Calrath, Bramis Castle, and Lower Calrath)
- Sin-Piercer (Locations: Manse of the Hallowed Brothers, Abbey of the Hallowed Sisters, Upper Calrath B, Path of Devotion, Forsaken Fen, Tower of Penance, Fief of the Chill Curse, Pilgrim’s Perch A)
- Crimson Rector (Locations: in the Belled Rise area of Pilgrim’s Perch, Manse of the Hallowed Brothers, Upper Calrath B, Path of Devotion, Skyrest Bridge, Fitzroy’s Gorge)
- Scourged Sister (Locations: Abbey of the Hallowed Sisters and Pilgrim’s Perch A)
- Abbess (Location: Abbey of the Hallowed Sisters and The Empyrean)
- Kinrangr Guardian (Location: Fief of the Chill Curse)
- Kinrangr Hunter (Location: Fief of the Chill Curse)
- Mendacious Visage (Locations: Fitzroy’s Gorge, Lower Calrath, Sunless Skein, Revelation Depths, Manse of the Hallowed Brothers, Bramis Castle, and Fief of the Chill Curse)
- Shrouded Sparrow (Found in different areas while in the Umbral Realm: Upper Calrath B, Manse of the Hallowed Brothers, Fitzroy’s Gorge, Bramis Castle, Sunless Skein, Abbey of the Hallowed Sisters, Forsaken Fen, Lower Calrath, Fief of the Chill Curse, Pilgrim’s Perch A, Revelation Depths, and Tower of Penance)
- Skinstealer (Locations: Upper Calrath B, Bramis Castle, Lower Calrath, and Sunless Skein)
- Womb of Despair (Found in various areas while in the Umbral Realm: Upper Calrath, Fitzroy’s Gorge, Manse of the Hallowed Brothers, Abbey of the Hallowed Sisters, Forsaken Fen, Bramis Castle, Lower Calrath, Skyrest Bridge, Tower of Penance, The Empyrean, Fief of the Chill Curse, Pilgrim’s Perch, Sunless Skein, and Revelation Depths).
Large Deralium Shards
The following are the enemies that may drop Large Deralium Shards:
- Ruiner (Locations: Fitzroy’s Gorge, Lower Calrath, Upper Calrath, and Bramis Castle)
- Conflagrant Seer (Location: Bramis Castle)
- Holy Bulwark (Locations: Forsaken Fen, Revelation Depths, Manse of the Hallowed Brothers, Path of Devotion, Fief of the Chill Curse, Defiled Sepulchre, and Abandoned Redcopse)
- Abiding Defender (Locations: The Empyrean and Manse of the Hallowed Brothers)
- Sanctified Huntress (Locations: The Empyrean, Abbey of the Hallowed Sisters, and Forsaken Fen)
Deralium Chunks
The Holy Bulwark enemy is the only enemy that can drop a Deralium Chunk. However, the chances of this enemy dropping this type of Deralium are rare. The player can find Holy Bulwark enemies in Forsaken Fen, Revelation Depths, Manse of the Hallowed Brothers, Path of Devotion, Fief of the Chill Curse, Defiled Sepulchre, and Abandoned Redcopse.
Quick Farming Method
As the player can get Deraliums from defeating enemies, a couple of players have quickly shared their ways of farming for them. A player named Its Shatter on YouTube shared their method wherein the player can farm Dealium in the early parts of the game. This will allow the player to upgrade weapons up to +9 before reaching the first beacon. Another player named Siahz on Reddit and YouTube tweaked this method to farm more Regular Deralium Nuggets and Large Deralium Nuggets and be even more efficient.
Requirement
For this, the only requirement is that the player has opened the shortcut back to the Vestige of Valade in the Forsaken Fen area. For this, the player must do the following:
- First, from the Vestige of Valade, the player must head for the wooden path through a wooden arch in front of the Vestige. This route will lead the player up a short slope.
- Next, the player will then finally come upon a thin wooden plank bridge. There will be an enemy near this. Proceed beyond the small wooden plank bridge and through the wooden archway. The player will come across another enemy after making it through. Follow the trail until it ends, and then go left into the next path. This area will present the player with a couple of enemies. On this road, the player must take the next left lane and pass through another wooden arch.
- Following that, the player is going to face a few enemies. The player will eventually stumble upon a large tree trunk above a pond if they proceed straight past the arch. The player must climb up and cross this tree trunk to reach a wooden platform. The player will encounter an enemy in the center of the tree trunk. Once that is done, the player has to take the way on the right and cross a wooden bridge.
- Then, once across, the player must head inside the tunnel on the left. At the end of this path, the player will find a door. Interact with the door to open it. Once through, the player has returned the shortcut to the Vestige of Valade!
Method
Now that the requirement is fulfilled, the player can begin with Its Shatter and Siahz’s early Deralium quick farming method! With this method, the player will encounter the following enemies that have a chance of dropping Deralium: Shuja Warriors (Small Deralium Fragments), Holy Bulwark (Large Deralium Shards and Deralium Chunks), Avowed (Regular Deralium Nuggets), and Marksman (Regular Deralium Nuggets). The main objective of this method is to keep defeating these enemies to pick up the Deraliums they may drop.
To start this method, the player must perform the following and defeat the enemies along the way:
- To start, the player can begin from the Vestige of Valade. Right from here, the player can now cross to the Umbral Realm as it is needed to continue anyway. From the Vestige, proceed through the tunnel on the right. At the end of the path, pass through the doorway.
- After that, once through, the player must keep following the path where the player will face a Shuja Warrior enemy. At the end of the path, climb up the bone ladder and continue on the path. Eventually, the player will encounter another Shuja Warrior enemy.
- Then, once that is done, the player must keep following the path and then take the next path on the left. While on this path, the player will find a Holy Bulwark enemy behind a wooden barricade. After dealing with this enemy, head slightly forward to encounter an avowed enemy.
- Next, once that enemy is defeated, the player must continue on the path to reach a wooden bridge. The player can cross this bridge thanks to being in the Umbral Realm. The player will encounter a Marksman enemy in the middle of the bridge.
- The player must keep following the path and up the slope to reach a divided path. Here, take the path on the left. While on this path, the player will encounter two Marksman enemies and one Avowed enemy.
- Afterward, the player must keep following the path down, and the player will find an Umbral Flowerbed. The player must plant a Vestige Seedling here as this will be the actual start when looping back on the farming process. Rest on this Vestige Seedling to exit the Umbral Realm.
- After that, the player must head back up the slope from the Umbral Flowerbed. Once on top, the player will face the two Marksman enemies and one Avowed enemy again. Here, take the path on the left, which was the other path on the divided path from earlier. Follow the next path on the left, where the player will encounter another Marksman enemy.
- Then, from where the enemy was found, the player must continue on the path on the right to keep heading up the slope. While on this path, pass through a wooden platform. Just after that, the player will take on a Holy Bulwark enemy.
- Next, after dealing with this enemy, the player can restart the farming process. With Siahz’s method, the player can return to the previous Vestige Seedling and rest. Doing so will result in the enemies the player just defeated respawning (back to the sixth step in this method). With Its Shatter’s method, the player can head back to the Vestige of Valade and rest there (back to the first step in this method)
Boost Chances
The player can utilize a way to improve the discovery rates of items. For this, the player must use Lucky Paws. To get some, the player can purchase some from Thehk-Ihir. This merchant will sell Lucky Paws after the player finds him in the Forsaken Fen area. After that, the player can continue to buy Lucky Paws from him wherever the player finds him. The player can purchase a Lucky Paw from Thehk-Ihir for 500 Vigor.
Alternatively, the player can also purchase Lucky Paws from Winterberry. However, the player will be able to find this NPC later on in the Revelation Depths area. Lucky Paws are in Winterberry’s default inventory, so the player can buy this immediately after meeting her. To purchase it, the player must also exchange 500 Vigor for Winterberry.
2. Purchase Them
Aside from obtaining them as drops from enemies, the player can also buy different types of Deraliums. For this endeavor, the player must find Thehk-Ihir. This merchant will sell different types of Deraliums once the player reaches certain areas in the game.
To buy Small Deralium Fragments, the player can purchase from Thehk-Ihir once the player has found and talked to him on the lookout of the Forsaken Fen area. The player can purchase Small Deralium Fragments from Thehl-Ihir for 500 Vigor.
Thehk-Ihir will start selling Regular Deralium Nuggets once the player has found and talked to him near the Vestige of Rosamund in the Abbey of the Hallowed Sisters area. Additionally, the player can purchase Regular Deralium Nuggets from Thehk-Ihir once the player finds and talks to him near the Vestige of Ethryg in the Skyrest Bridge area. Thehk-Ihir sells a Regular Deralium Nugget for 800 Vigor.
Thehk-Ihir will add Large Deralium Shards of Deralium to his wares once the player finds and talks to him near the Vestige of Dieter in the Path of Devotion area. This merchant will also sell Large Deralium Shards to the player once they find and talk to him near the Vestige of Rosamund in the Abbey of the Hallowed Sisters area. The player can purchase Large Deralium Shards from Thehk-Ihir for 1,500 Vigor.
The player cannot purchase Deralium Chunks from Thehk-Ihir or any merchant in Lords of the Fallen.
Related: How To Get All New Spells in Lords of the Fallen
3. All Over Mournstead
Aside from defeating enemies or purchasing them, the player can head to the following areas all around Mournstead to farm the different kinds of Deralium:
Location 1: Skyrest Bridge
The Skyrest Bridge area has two places where players can find some Deralium. The following are the Deraliums that the player can find in the Skyrest Bridge area:
#1: Near the Dead Avowed
To farm for this Deralium, the player must do the following:
- First, the player must start from the Vestige of Chabui in the Pilgrim’s Perch area. From the Vestige, the player must head out the large arch on the right after a flight of stairs to reach the outside. Head down the stairs here, and the player encounters many enemies.
- Next, the player must break the obstacles on the right and follow the path. At the end of the path, the player must climb or slide down a wooden ladder. At the bottom, the player must climb or slide down another wooden ladder ahead.
- After that, at the bottom, when facing the wooden ladder, the player must head for the path on the right. On this path, the player will head down a set of wooden stairs and find a lot of wooden barrels. At the end of the path, the player will find a couple of narrow wooden planks. Here, an enemy is waiting for the player.
- The player must carefully cross the narrow planks and jump towards the hanging and spinning wooden platform. From here, the player must jump towards the next platform on the left. Here, follow the path on the right.
- Then, at the end of this path, the player will find another couple of narrow wooden planks. Here, another enemy is waiting for the player. Carefully cross the narrow wooden planks and jump towards another hanging and spinning wooden platform.
- Afterward, on the spinning wooden platform, the player will find a wooden ramp across the gap on the left. Jump towards this wooden ramp, where the player will find a glowing item beside the corpse of an Avowed.
- Finally, approach and interact with the glowing item. The player has now obtained four pieces of Small Deralium Fragments!
#2: Near the Shrine of Orius
Lords of the Fallen’s v.1.1.292 gives the player a lot of Deralium. This is one of the ways the developers rectified the player community’s problems with boss weapon levels, and the spell nerfs. However, the player will only be able to get this for the first ten days of the patch. As the patch was released on the 4th of November 2023, the player can only get these Deraliums until the 14th of November 2023. If the player ever gets a hold of these items, it is worth mentioning that each player’s characters can get them if they meet the requirements.
To farm the Deraliums from the v.1.1.292 patch, the player must do the following:
- The player must start from the Vestige of Ethryg in the Skyrest Bridge area. From the Vestige, the player must head towards the path on the right. The player must take the next arch on the left on this path.
- The player will then pass through another arch and take the path on the left. Here, the player must head down a flight of stairs and another set of stairs on the right.
- After that, the player must head forward and down another flight of stairs. The player will then reach the Shrine of Orius.
- Next, from the shrine, the player must head towards the opening on the left. Here, the player will find a couple of hammocks, one of which has a glowing item.
- Lastly, the player must approach and interact with the glowing item. Once that is done, the player will get 40 pieces of Large Deralium Shards and two Deralium Chunks. The player will also get 15 pieces of Replete Vigor Skulls and the Deraliums.
Location 2: Pilgrim’s Perch
The player can head to six locations in the Pilgrim’s Perch area to farm different types of Deraliums. The following are the places the player can go to to get these upgrade materials:
#1: Near a Flight of Stairs
The player can get this Deralium past the arena, where the player faces the Scourged Sister Delyth boss. To farm this Deralium, the player must perform the following:
- First, the player must start from the Vestige of Chabui in the Pilgrim’s Perch area. From here, The player must turn left and climb a small set of stairs before reaching a wooden ladder. Climb the wooden ladder and then the next wooden ladder on the right.
- After that, the player must proceed straight through the narrow path on top of the ladder. Near the end of the path, on the right, there is a very narrow wooden bridge. The player has to cross this wooden bridge and, on the other side, take the path on the left.
- Following that, at the end of the path, the player will come across a hole in the ground with a wooden ladder. The player has to climb down the wooden ladder and then follow the path on the right at the bottom. The player will come to another hole in the ground with a wooden ladder at the end of the path. Climb down the following wooden ladder.
- Then the player must then pass through the arch right in front of the ladder. The player will encounter two enemies here.
- Afterward, from here, the player must go to the right and down a flight of stairs. Here, the player will have to face the Scourged Sister Delyth boss.
- After that, once the Scourged Sister Delyth boss is defeated, the player must pass through the narrow arch ahead. Inside, the player must follow the narrow path that leads up some stairs and, eventually, the outside. The player will find an enemy in this area. From here, the player must climb the wooden ladder on the right.
- Next, at the top, the player must follow the path inside the tunnel ahead. Eventually, the player will find an Umbral Flowerbed. The player can plant a seed here to rest.
- Following that, once the player is done resting, the player must continue through the tunnel to head outside. From here, the player must take the wooden path on the right, where they will face several enemies. Head up the set of wooden stairs, and near the top, the player must go towards the wooden platform on the right. Here, the player will find a glowing item.
- Lastly, the player must approach and interact with the glowing item. Finally, the player obtained four pieces of small deralium fragments.
#2: Near the Thorned Crimson Rector Sword
For this, the player can find some Deraliums near where the player can obtain the Thorned Crimson Rector Sword. The player must execute the following to farm these Deraliums:
- First, the player must start from where they obtained the previous Small Deralium Fragments. From here, the player must continue heading up the wooden stairs, facing several enemies. Near the end of the path, climb up the wooden ladder on the right.
- Following that, at the top, the player must head to the left and cross to the Umbral Realm. Once that is done, the player will find a platform across the gap. Use the Umbral Lamp to pull the platform and head towards it. On the platform, the player must use the Umbral Lamp again to pull the platform back to its original spot. Once across, continue on the path and climb up the wooden platform.
- Next, once at the top, the player must continue straight ahead and cross the gap using the narrow wooden planks. After crossing, the player will face a few enemies. Once the enemies are dealt with, the player will find an Emergence Effigy near a wooden ladder. The player can use the Emergence Effigy to cross back to the Axiom. Once that is done, the player must climb up the wooden ladder.
- Then, at the top, the player must head to the left and face an enemy. The player must jump towards the hanging wooden platform across the gap from here. From the hanging platform, the player has to then jump towards the next wooden platform on the left. From here, jump towards the next wooden platform on the left, then approach the wall on the right. The player must then climb a wooden ladder at the top, head straight, and climb the wooden ladder on the left.
- After that, once at the top, the player must head up the small ramp on the right. Continue on the path, and the player will face an enemy. At the end of the path, drop down the large wooden platform below, where the player will encounter more enemies. Here, the player must cross to the Umbral Realm to continue.
- Then, once in the Umbral Realm, the player will find some platforms on the left. Follow this path where the player will face a couple of enemies. At the end of this path, the player has to use the Umbral Lamp to pull the bone bridge from the opposite side of the gap. Jump towards the bone bridge and continue on the path.
- Afterward, the player must head up the ramp on the right. At the end of the path, the player must use the Umbral Lamp to pull the platform across the gap. Embark the moving platform and use the Umbral Lamp again to move the platform back to the middle. Once that is done, the player must use the Umbral Lamp again to move the platform to the opposite side of the gap.
- Next, the player has to head up the bone ramp on the right. On top, the player must cross the narrow wood planks on the right. After crossing, the player will face an enemy here. Head towards the large hand on the right, where there is a glowing item. Interact with the glowing item to get the Thorned Crimson Rector Sword.
- Then, after claiming the sword, the player must head slightly back but, this time, cross the narrow plank of wood on the right to continue. Here, the player will reach a large wooden platform where an enemy will charge at the player. From this platform, the player must climb the wooden ladder ahead. At the top, continue ahead, where the player will encounter another enemy.
- Lastly, the player must head towards the opposite end of the wooden platform. The player will find a glowing item near the corner near the wall on the left. Approach and interact with the glowing item to finally farm four pieces of Small Deralium Fragments!
#3: Gerlinde’s Jail Cell
The player can find more Deraliums after liberating Gerlinde from her prison cell. After doing so, the player must do the following to get these Deraliums:
- First, the player must warp to the Vestige of Ethryg from any Vestige in the Skyrest Bridge area.
- Then, from the Vestige of Ethryg, the player must warp back to the Vestige of Blind Agatha in the Pilgrim’s Perch area.
- After that, from this Vestige, the player must enter the lift directly in front of the Vestige. Ride the lift down.
- Next, once the lift stops, exit the lift and follow the path on the left. While on this path, the player will find a wooden ladder that leads down to the left. Climb or slide down this wooden ladder.
- When facing the ladder, the player must head to the left to find Gerlinde’s previous jail cell. Here, the player will find a glowing item near the fireplace.
- Lastly, the player must approach the glowing item and interact with it. Finally, the player will get four pieces of Small Deralium Fragments.
#4: Near the Umbral Eye of Iorelo, the Cursed Knight
The player will find more Deraliums near where the player obtained the Umbral Eye of Iorelo the Cursed Knight. The player must have obtained the Pilgrim’s Perch Key to reach this area. The player is supposed to explore this area after exploring the Revelation Depths area. To farm the Deraliums in this area, the player must execute the following:
- First, the player must start from the Vestige of Blind Agatha in the Pilgrim’s Perch area. From the Vestige, the player must head towards the large door on the left. The player can open this door using the Pilgrim’s Perch Key.
- Then, after opening the door, the player must head inside. Instead of following the path, enter through the next opening on the right wall. Keep following this path down a ramp; the player will eventually reach a large area.
- After that, from the narrow path, keep heading straight to reach a wooden platform with an enemy. Here, the player must follow the wooden path on the right, some of which will break. From here, the player must carefully cross the narrow wood plank on the left. After crossing, cross the next narrow wooden plank on the right.
- Next, across the wooden plank, the player will encounter an enemy. Continue on the path, then take the next path on the right. At the end of the path, the player must drop down the ledge, where they will encounter a couple of enemies.
- Following that, the player must follow the path of the opening on the left. Here, the player has to follow the next path on the right. While on this path, the player must head for the next tunnel on the left. Head straight and pass through a doorway to reach the outside, where there is an enemy.
- Afterward, the player must head towards the path on the left and cross the wooden planks. At the end of the path, the player must cross to the Umbral Realm to find a bone ramp ahead. Go up the bone ramp to reach a platform with an enemy. If the player continues to follow the wooden platform, they will reach the area where they can get the Umbral Eye of Iorelo the Cursed Knight.
- Then, from the bone ramp, the player must head for the doorway on the left. Continue through the tunnel ahead, and the player will find an Umbral Flowerbed. The player must destroy all the wooden barrels and crates behind the ladder. Near the corner, the player will also find a glowing item.
- Lastly, the player must approach the glowing item and interact with it. Finally, the player will obtain two pieces of Large Deralium Shards!
#5: Near The Sacred Resonance of Tenacity
The player will be able to farm some Deralium near where the player will face The Sacred Resonance of Tenacity boss. To get these Deraliums, the player must perform the following:
- First, the player must climb up the wooden ladder from where the player found the previous Large Deralium Shards. At the top, head inside the tunnel ahead and follow the path. Eventually, the player will encounter a few enemies.
- Next, near the end of the path, the player must head down the flight of stairs on the left and then follow the path. The player will reach a large area to face The Sacred Resonance of Tenacity boss and other enemies. The player must defeat The Sacred Resonance of Tenacity boss to continue.
- Once the boss is defeated, the player must pass through the large opening that leads outside. Once outside, the player must follow the wooden path on the left. The player will find a glowing item at the end of the path near the wall.
- Finally, approach and interact with the glowing item to farm two pieces of Large Deralium Shards.
#6: In the Chest Near an Umbral Flowerbed
The player will be able to find a lot of Deraliums inside a chest a little ways from the previous Large Deralium Shards. The player must do the following to farm these Deraliums:
- First, the player must start from where the player obtained the two pieces of Large Deralium Shards. From here, the player must follow the wooden path on the opposite side. At the end of the path, the player will find a gap.
- Then, the player must shine the Umbral Lamp on the gap to find a bone bridge. Cross the bone bridge while shining the Umbral Lamp on it. After crossing the bridge, the player must continue on the wooden path past the wooden ladder on the right. The player will encounter an enemy behind the wooden ladder.
- After that, the player will find another gap at the end of the path. Shine the Umbral Lamp on the gap again to find a bone bridge that leads to the wooden platform above. The player must cross the bone bridge while shining the Umbral Lamp.
- Then, once on the next wooden platform, the player must pass through the doorway on the right. Immediately after entering, the player will find an Umbral Flowerbed on the left and a chest on the right.
- Lastly, the player must approach the chest and interact with it. Finally, the player will get four pieces of Small Deralium Fragments, three pieces of Regular Deralium Nuggets, and two pieces of Large Deralium Shards.
Location 3: Forsaken Fen
In the Forsaken Fen area, the player can head to four places to farm some Deralium. To get these upgrade materials, the player can head to the following locations:
#1: Behind Crates
The player can find some Deralium behind some crates near the earlier parts of the Forsaken Fen area. To get these Deraliums, the player must perform the following:
- First, the player can start from the Vestige of Valade in the Forsaken Fen area. From the Vestige, the player must follow the wooden path through a wooden arch directly in front of the Vestige. This path will lead the player up a small hill.
- Then, eventually, the player will find a bridge of narrow wooden planks. Before this, the player will also face an enemy. Cross the bridge of narrow wooden planks and pass through the wooden arch ahead. Once through, the player will encounter an enemy. Continue on the path then the player must follow the next path on the left. The player will face a couple of enemies here. While on this path, the player must take the next path on the left and pass through another wooden arch.
- Following that, once through, the player will encounter more enemies. While following this path, the player must stick to the wall on the left. Immediately after a turn, the player will find some wooden crates. Head to the back of the wooden crates, and the player will find a glowing item.
- Finally, the player must approach and interact with the glowing item. With that, the player will get two pieces of Small Deralium Fragments!
#2: Near the Cursewyrm Ring and Exemplar
Near where the player can find the Cursewyrm Ring and Exemplar, the player will be able to find a Regular Deralium Nugget. To get this upgrade material, the player must execute the following:
- The player may begin at the Vestige of Valade in the Forsaken Fen area to get started. The player has to follow the wooden path through a wooden arch immediately in front of the Vestige. This path will take the player upward a small hill.
- After that, the player will eventually come across a bridge made of narrow wooden planks. Near this, the player will encounter an enemy. Cross the narrow wooden plank bridge and proceed through the wooden arch ahead. After passing through, the player will come across another enemy. Continue along the path, then take the next path on the left. The player will encounter a few enemies here. The player has to follow the next path on the left and go through another wooden arch while on this path.
- Next, once through, the player will face more enemies. Head straight from the arch, the player will eventually find a large tree trunk above a pond. The player must head up this tree trunk and cross it to reach a wooden platform. The player will face an enemy in the middle of the tree trunk. Upon reaching the next platform, the player must follow the path on the right. Here, the player will cross a wooden bridge.
- Following that, if the player follows the next path on the left, then drops down and climbs down the ladder, the player will obtain the Cursewyrm Ring and Exemplar. To find the Regular Deralium Nugget, the player must first cross to the Umbral Realm. After doing so, the player will find a bone ladder on the wall on the right of the wooden bridge.
- Then, the player must climb up the bone ladder. Upon reaching the top, the player must immediately go towards the wooden barrel on the right, where there is a glowing item.
- Lastly, the player must approach and interact with the glowing item. Finally, the player will farm one Regular Deralium Nugget!
#3: Inside the Huts
The player can find more Small Deralium Fragments inside a hut near a bonfire. For this, the player must execute the following to get these Deraliums:
- First, the player can form the Umbral Flowerbed in the middle of the swamp in the Forsaken Fen area. From here, the player must approach the large body of water before the Umbral Flowerbed. To continue, the player must cross to the Umbral Realm.
- Following that, once in the Umbral Realm, the body of water will disappear, allowing the player to traverse. Head down where the water was and follow the path on the right. Here, the player will find a bone path. Head up the bone path, and, at the end, the player must use the Umbral Lamp to pull the next path down. Once done, continue on the path and soulflay the target above on the right. Doing so will weaken an Umbral Tumor. This is a requirement to further progress in the area.
- Then, once that is done, the player must head back down the bone path and head towards the opposite side of the area. Here, the player will pass through a narrow corridor. Head towards the next path on the right, then pass through under the wooden bridge on the left.
- After that, while on this path, the player must follow the path on the right. Continue on this path, then up the hill on the right. Here, the player will find a large bonfire and a couple of enemies. The player must head around the bonfire, where the player will find a wooden arch.
- Next, the player will find a doorway to a hut on the right of the wooden arch. Enter the hut, and inside, the player will find a glowing item near the corner on the right.
- Finally, the player has to approach and interact with the glowing item. With that, the player will get four pieces of Small Deralium Fragments.
#4: Near the Vestige of the Pale Butcher
The player can find the last few Deraliums in the Forsaken Fen area near the Vestige of the Pale Butcher. To farm for these Small Deralium Fragments, the player must do the following:
- First, the player can start at the Vestige of the Pale Butcher in the Forsaken Fen area. From here, the player must follow the wooden path on the left of the Vestige. At the end of the path, the player will find a raised bridge and a body of water.
- After that, the player must cross to the Umbral Realm to continue. Once that is done, the body of water will disappear. The player must now drop down the wooden path to where the body of water was. Head to the left, and then the player must head up the next path on the right.
- Then, the player must climb up the wooden ladder ahead. On top, the player will face an enemy. Continue on this wooden path, where the player will face another enemy.
- Following that, the player will find a space on the right near where the player encountered an enemy. In this area, the player will find a glowing item on the ground near some ruins.
- Lastly, the player must approach and interact with the glowing item. Finally, the player will obtain four pieces of Small Deralium Fragments!
Location 4: Fitzroy’s Gorge
In Fitzroy’s Gorge, the player can go to eight areas to farm some Deraliums. For these upgrade materials, the player can head to the following areas:
#1: Near the Calrath Sign
The player can farm a few Deraliums near a sign that mentions Calrath. To find these Deraliums, the player must perform the following:
- First, the player must begin at the Vestige of the Pale Butcher in the Forsaken Fen area. The player must now follow the wooden path to the left of the Vestige. The player will come to a raised bridge and a pond at the end of the path.
- Then, the player has to cross to the Umbral Realm to continue. After doing so, the body of water will vanish. The player must now drop down below from the wooden platform. Go to the left; the player must ascend the next path on the right.
- The player must head to the right and follow the wooden path to a tunnel. Follow the path inside the cavern, where the player eventually finds a gate. If the player is in the Axiom, the player must use the Umbral Lamp and shine it on the gate to cross it. If the player is in the Umbral Realm, the player can simply pass through the gate. It is important to mention that an enemy may attack the player from above after passing through the gate.
- After that, the player must continue on the path to reach the outside. Keep following the narrow path where the player encounters a couple of enemies. If the player picks up the Piercing Light spell just before the divided path, the player will then have to battle a wave of enemies.
- Next, on the divided path, the player must take on the path on the right. At the beginning of the path, the player will find a sign on the left that says ‘Calrath.’ Keep following this path until the player reaches the Fitzroy’s Gorge area.
- Afterward, once the area’s name appears on the screen, the player must face back to the left. Here, the player will find another path that leads up a hill. Approach this path and head towards the corner on the left at the beginning of the path. The player will find a glowing item near a broken chair and a bell.
- Finally, the player has to approach and interact with the glowing item. With that, the player will get four pieces of Small Deralium Fragments!
#2: Near the Crimson Rector Percival 1
The player will also be able to find some more Deralium near where the player faced the Crimson Rector Percival Boss. To farm these Deralium, the player must execute the following:
- First, the player must start from where the player found the previous Small Deralium Fragments after just reaching Fitzroy’s Gorge. From here, the player must head slightly up the path to find an Umbral Flowerbed. The player can then plant a seed here.
- Next, from the Umbral Flowerbed, the player must continue up the path where several enemies exist. Take the next path up the hill on the right. While on this path, the player will encounter some more enemies.
- Following that, the player must pass through a large doorway at the end of the path. Upon entering, the player will face the Crimson Rector Percival boss. The player must defeat this boss to continue.
- Then, after defeating the Crimson Rector Percival boss, the player must continue straight ahead from where the player entered the area. Eventually, the player will find a wooden balcony on the right with a chest. Just after the balcony, the player will find a glowing item.
- Lastly, the player must approach the glowing item and interact with it. Finally, the player will get two pieces of Regular Deralium Nuggets!
#3: Near the Crimson Rector Percival 2
Aside from the previous Regular Deralium Nuggets, the player can find more Deraliums. For these upgrade materials, the player must do the following:
- First, from where the player found the previous Regular Deralium Nuggets, the player must head back to where the Crimson Rector Percival boss first appeared. Once near the entrance to the area, the player must look to the right to find a set of stairs leading to a tower’s entrance.
- Next, the player must head inside this open arch and ride the lift upwards. Ride the lift, bringing the player back to the Skyrest Bridge area.
- After that, once the lift stops, the player must exit on the left, and before the gate to the outside, the player must look at the ground on the right. Here, the player will find a glowing item near some debris.
- Finally, the player has to approach and interact with the glowing item. After that, the player will get two more Regular Deralium Nuggets.
#4: Near Andreas of Ebb 1
The player can find more Deraliums near a Stigma with Andreas of Ebb. To farm these Deraliums, the player must perform the following:
- First, the player can start from the previous Umbral Flowerbed near the entrance to Fitzroy’s Gorge area. From here, instead of going up the path to the Crimson Rector Percival boss, the player must head the opposite way.
- Then, while on this path, the player will pass through a path near the cliff’s edge. The player will find wooden barrels, barricades, and a couple of enemies on this path. Eventually, the player will find a stigma with moths just slightly past the edge on the left. The player can cross to the Umbral Realm here and soulflay the stigma. With that, the player will see a scene with Andreas of Ebb kicking another person off the cliff.
- Following that, the player must continue on the cliffside path. While on this path, the player will eventually find an enemy on an elevated ground on the left. The player will find a corpse on the left near the cliff’s edge, just a small distance from that elevated ground. By the corpse, there is a glowing item.
- Lastly, the player must approach the glowing item and interact with it. Finally, the player will obtain four pieces of Small Deralium Fragments.
#5 Near Andreas of Ebb 2
Near the previous Small Deralium Fragments, the player can find some more Deraliums. The player must execute the following to find these upgrade materials:
- First, the player can start where they found the previous Small Deralium Fragments. From here, the player must approach the opening of the tunnel. Here, the player will find a gate.
- After that, to pass through the gate, if the player is in the Axiom, the player must shine the Umbral Lamp on it and then slowly pass through. If the player is in the Umbral Realm, the player can simply pass through.
- Next, the player must keep following the path inside the tunnel past the gate. Eventually, the player will find a glowing item on the ground on the right before reaching another gate. It is worth mentioning that the player may find an enemy from above near the glowing item.
- Finally, the player must approach and interact with the glowing item. With that, the player can farm two pieces of Regular Deralium Nuggets!
#6: Near an Emergence Effigy 1
The player can find more deraliums near an emergency figure a small distance from the previous regular deralium nuggets. To farm these Deraliums, the player must do the following:
- First, the player can again begin where they found the previous Regular Deralium Nuggets. From here, the player must continue on the path to find another gate. The player must cross the gate while shining an Umbral Lamp to pass through it. The player will have no problem passing through the gate if the player is in the Umbral Realm.
- After that, the player will encounter a couple more enemies just after the gate. Keep following this path, leading to a large cavern, then up to the right. While following this path, the player will eventually find an Emergence Effigy on the left and the Ring of Radiant Preeminence on the right. Continue on the path, and the player will encounter several enemies. The player will also get Fitzroy’s Sword impaled on a corpse in this area.
- Then, at the end of this path, the player will find a broken wooden bridge. If the player is in the Axiom, the player can cross the gap through slowly crossing while shining the Umbral Lamp on the floor. However, the player can simply cross the bone bridge in the Umbral Realm.
- Afterward, once the player is across, the player will encounter a few enemies. Follow the path on the left, and the player will face more enemies. Here, the player will find a path forward and a tunnel with a red light on the right. Keep on following the path straight ahead, where there are wooden barrels and barriers.
- Following that, the player must drop down the ledge on the left side of the wooden barriers. Upon dropping, the player will find another Emergence Effigy. Before the end of the platform, the player will find a glowing item on a corpse.
- Lastly, the player must approach the glowing item and interact with it. Finally, the player will acquire four more Small Deralium Fragments!
#7: Near the Emergence Effigy 2
Near the previous Small Deralium Fragments, the player can find some more Deraliums. For these, the player must perform the following to find them:
- First, the player can start near where they found the previous Small Deralium Fragments. From here, the player must drop down the wooden ledge ahead, where the player will face a couple of enemies.
- Next, upon dropping, the player must go towards the wooden platform. Here, the player must climb or slide down the wooden ladder. Once on the bottom, the player will find another wooden ladder on the left. Climb or slide down this next wooden ladder.
- After that, at the bottom, the player will find a narrow, dark path just behind the wooden ladder. Head towards this dark and narrow path, where the player will eventually find a glowing item.
- Finally, the player must approach and interact with the glowing item. Once that is done, the player will get two more Regular Deralium Nuggets!
#8: Shortly After the Ruiner boss
A bit further from the previous Regular Deralium Nuggets, the player can pick up some more Deraliums a short distance from where the Ruiner boss is defeated. To farm these Deralium, the player can execute the following:
- To begin, the player can start from where the player found the previous Regular Deralium Nuggets. From here, the player must continue on the path of the cavern, where they will face more enemies.
- Afterward, while on this path, the player will eventually exit the tunnel and reach the outside. Keep following the path leading the player down to a large bridge. The player must now cross the large bridge where the Ruiner boss will charge at the player and face them in battle. The player must defeat the Ruiner boss to continue.
- Following that, after successfully eliminating the Ruiner boss, the player will find an Umbral Flowerbed in the middle of the bridge. The player can plant a Vestige Seedling here. Once that is done, the player must cross to the Umbral Realm and continue crossing the bridge. Just after passing through the arch at the end of the bridge, the player must look back at the arch and soulflay the target above on the right. Doing so will remove the Umbral Tumor on the bridge.
- Next, the player must return to the large doorway in the middle of the bridge. With the Umbral Tumor gone, the player can pass through the doorway. Drop down the platform below past the doorway, then jump towards the next couple of platforms ahead. On the third platform, the player will face an enemy.
- After that, at the end of the third platform, the player must soulflay the target on the platform across the gap. Doing so will result in the platform to move towards the player. Stand on the new platform then soulflay the target on the next platform to move the platform that the player is on towards it.
- Then, the player must continue on the next platform, where the player will find a bunch of Umbral Eggs. Face towards the pillar on the right and soulflay the target to remove the Umbral Tumor blocking the way to continue. Just to the left of that, the player must soulflay the target on the opposite side of the gap to release the bone bridge.
- Afterward, the player must cross the bone bridge to reach the next platform. Here, the player will face a couple more enemies. Head towards the wooden ladder on the left, then climb up. Once on top, the player must go to the right and head up the wooden stairs.
- The player must continue on the wooden path and head down another set of stairs. At the bottom, the player will find an Emergence Effigy. Follow the next path on the right, and while on this path, the player will eventually find a corpse with a glowing item on the right.
- Lastly, the player must approach the glowing item and interact with it. Finally, the player will get two more Regular Deralium Nuggets!
Location 5: Lower Calrath
The player can head to eight places in the Lower Calrath area to find some Deraliums. To farm these upgrade materials, the player must head to the following areas:
#1: On a Sat Up Corpse
Near the early parts of Lower Calrath, the player can find a few Deraliums on a corpse. To find these Deraliums, the player must do the following:
- First, the player can start from the Vestige of Sebastian in the Lower Calrath area. From here, the player must follow the path on the left and then take the next path on the right. Continue on this path, then take the next path on the right.
- Next, the player will face the Infernal Enchantress boss while following this path. The player must eliminate this boss to continue.
- Once the Infernal Enchantress boss is defeated, the player must head toward where the boss first spawned, then head to the left of the huge pyre. Here, the player will find a set of stairs. Head up the stairs, and the player will pass through an arch at the top.
- Afterward, the player must take the path on the right. While on this path, the player will head up and around a hill. Near the end of this path, the player will face a couple of enemies. At the end of the path, the player must continue up the hill through the path on the left.
- Then, while on this path, the player will encounter an enemy before an arch. Pass through the arch and head to the left to find an Umbral Flowerbed. The player can plant a seed here. Once done, head down the wooden set of stairs on the right and down another set on the right again. The player can keep following this wooden path, but to continue, the player must cross to the Umbral Realm.
- After that, once that is done, the player must follow the next path on the left. The player must soulflay the target to move the platform towards them. Stand on the platform, then soulflay the target across the gap again to move the platform back to its original place.
- Next, the player must continue on the next platform, where the player will encounter a couple of enemies. The player must drop down the ledge on the left from this platform. Head up the path ahead, where the player will face an enemy at the top. Also, the player will find an Emergence Effigy here.
- The player has to head up the wooden ramp on the right. Once at the top, head to the wooden path where the player will encounter an enemy. Here, the player must continue on the wooden path on the right and then head down the roof to find an enemy. To continue, the player must cross to the Umbral Realm and soulflay the target on the platform above on the left.
- Afterward, the player must head back up on the roof and follow the Umbral path on the right. At the end of the platform, soulflay the target across the gap to move the player’s platform to the other side. Once across, continue to find an Emergence Effigy and return to the Axiom.
- Then, once that is done, the player must head up the wooden ramp on the left. Continue on the narrow wooden bridge; the player will face several enemies once across. Head down the wooden stairs on the right, where the player will find more enemies. The player must go towards the end of this platform to find a corpse that is sat up with a glowing item.
- Finally, the player has to approach and interact with the glowing item. Once that is done, the player will get four pieces of Regular Deralium Nuggets!
#2: On a Hidden Corpse
Just a short distance from the previous Regular Deralium Nuggets, the player can find some more upgrade materials. The player must perform the following to farm these Deraliums:
- To begin, from the previous Regular Deralium Nuggets, the player must head up the previous wooden set of stairs. Here, continue on the wooden path to head up another wooden set of stairs. The player will find a wooden ladder on the left at the end of the wooden path. Interact with the wooden ladder to push it down, then climb or slide down the wooden ladder.
- After that, at the bottom, the player will encounter some enemies on the right. From here, the player must cross the concrete bridge in front of the ladder. Near the end of the bridge, jump over the broken barrier on the right. The player will face a couple of enemies here.
- Following that, the player must follow the path on the left. While on this path, the player will eventually find a corpse on the right with a glowing item.
- Lastly, the player must approach the glowing item and interact with it. Finally, the player will obtain two more pieces of Regular Deralium Nuggets!
#3: Across a Narrow Wooden Bridge
Just another distance from the previous Regular Deralium Nuggets, the player can farm some more Deraliums. To locate them, the player must execute the following:
- First, from the previous Regular Deralium Nuggets, the player has to head back up the path and jump over the barrier to get on the concrete bridge again. Continue down the path where the player will encounter a few enemies.
- Next, the player must head down the tall flight of stairs. At the bottom, the player will face another enemy. Here, head towards the wooden path on the right. The player will encounter another enemy here. Follow the path on the left, where the player will go up another flight of wooden stairs.
- Following that, the player will face another enemy. After dealing with this enemy, the player must head to the path on the left, where the player will find a narrow wooden bridge. Cross the wooden bridge, and then, at the end, the player will find a glowing item in the corner on the right.
- Finally, the player has to approach and pick up the glowing item. The player will farm four pieces of Small Deralium Fragments upon doing so!
#4: Near an Umbral Flowerbed
The player can farm some more Deraliums near two Umbral Flowerbeds in the Lower Calrath area. To obtain these upgrade materials, the player must do the following:
- First, the player can begin at the Vestige of Lydia the Numb Witch in the Lower Calrath area. From here, head towards the wooden path on the right. Here, the player must go to the end of the platform and drop down to the platform below.
- Next, the player has to move forward to go down a set of stairs. Go to the right, and the player will find an opening on the wall. Pass through the opening, and the player will drop down to an alley below. The player must then carefully follow the path to the right, as there are a bunch of mines on the ground. Once out of the alley, the player has to continue following this direction. Eventually, the player will face a few enemies and pass through an arch.
- Then, the player must break the wooden barrier on the path after the arch and head towards the next path on the right. Go down a set of stairs, and the player will arrive in an open area filled with a burning tree. Here, the player will face a bunch of enemies. From the entrance to the area, the player must keep heading straight until they find a set of stairs on the left.
- Following that, the player has to go up these stairs to find an Umbral Flowerbed. Once at the top, follow the wooden path on the left, then up two more stairs. At the end of the path, the player will find an Emergence Effigy. From here, head up the wooden ramp on the left.
- After that, the player must go towards the roof on the right. Here, the player must follow the rooftop on the right. On this path, the player will eventually find a doorway on the corner at the end of the path. Enter the doorway, and the player will find another Umbral Flowerbed. The player will find a glowing item near a barrel in the left corner.
- Lastly, the player must approach the glowing item and pick it up. Finally, the player will get two pieces of Regular Deralium Nuggets.
#5: On a Corpse in the Umbral Realm
Just a short way from the previous Regular Deralium Nuggets, the player can pick up a few more Regular Deralium Nuggets. These are inside a room that the player can only access when in the Umbral Realm. The player must do the following to get these upgrade materials:
- The player can start from where the previous Regular Deralium Nuggets are located. From here, the player must exit the room and return to the previous path on the roof. While on this path, the player must head towards the next path on the right.
- After that, the player must follow the wooden path on the left and then cross the narrow concrete bridge. Once the player is across, follow the path on top of the roof to the right to find a wooden ladder that leads down. The player must slide or climb down this wooden ladder.
- Then, at the bottom, the player must take the path on the right and then head up the wooden set of stairs on the immediate right. Once on top, the player must continue to the Umbral Realm.
- Next, after doing so, the player can find a bone ladder on the wall ahead. Climb the bone ladder, and once on top, the player will reach a wooden balcony and face a couple of enemies.
- After dealing with the enemies, head slightly forward, then go up another small flight of wooden stairs on the right. Here, the player has to enter through the doorway on the left. Immediately after entering the room, the player will find a corpse on the right with a glowing item.
- Finally, the player must go near and pick up the glowing item. With that, the player will get two more Regular Deralium Nuggets!
#6: In the New Area of Lower Calrath 1
The player can find more upgrade materials in the area where the Sunless Skein Key is needed to access. To farm these Deraliums, the player must perform the following:
- First, the player can start from the Vestige of Hooded Antuli in the Sunless Skein area. From here, the player must follow the path on the left to reach a locked door. Open the door using the Sunless Skein Skein Key; on the other side, the player will head back to the Lower Calrath area.
- Following that, the player must head forward and then continue on the wooden path on the right. Here, the player will find a wooden ladder that leads down. Climb or slide down the wooden ladder; the player will face several enemies at the bottom.
- Next, from the ladder, the player must follow the path on the right. At the end of the path, the player will find a glowing item near a bunch of wooden barrels.
- Lastly, the player must approach the glowing item and pick it up. Finally, the player will acquire two pieces of Regular Deralium Nuggets!
#7: In the New Area of Lower Calrath 2
The player can locate two more just a short distance from the previous Regular Deralium Nuggets. To find these upgrade materials, the player must execute the following:
- The player can start from the previous two Regular Deralium Nuggets. From there, the player can head back to the path on the opposite side. Take the next path on the right to find winding stairs.
- After that, the player must head down the stairs but take the next small flight on the left. Following this path, the player will find a glowing item near several barrels and crates.
- Finally, the player can go near and interact with the glowing item. With that, the player will obtain two more Regular Deralium Nuggets!
#8: Near the Large Ropes
The player will be able to find a lot of different types of Deraliums inside a structure with large ropes. For these Deraliums, the player must do the following:
- The player may start from the Vestige of Hooded Antuli in the Sunless Skein area. From the vestige, the player has to head towards the path on the left to find a locked door. Interact with the door to open it using the Sunless Skein Skein Key. Once on the other side, the player will return to the Lower Calrath area.
- Then, the player has to go slightly forward and follow the wooden path on the right. At the end of this path, the player will discover a wooden ladder that leads down. Slide or climb down the wooden ladder, and upon reaching the bottom, the player will encounter several enemies.
- Following that, the player must head towards the path in front of the ladder and follow the path with the train tracks. While on this path, the player will face a couple more enemies and pass through an arch. Continue on the path, then follow the next path on the right. Here, the player will find a wooden ladder.
- Next, the player must now climb up this wooden ladder. Once at the top, the player will find another wooden ladder on the left. Climb up this next wooden ladder and, at the top, proceed on the path forward. The player will face a few more enemies here.
- After that, the player must take the path on the left and then the next path on the right. Here, the player will find large ropes. Head inside the structure on the right, then face immediately to the right to find a glowing item.
- Lastly, the player must approach and pick up the glowing item. Finally, the player will farm four pieces of Small Deralium Fragments, three pieces of Regular Deralium Nuggets, and one piece of Large Deralium Shard.
Location 6: Upper Calrath A
In the player’s first exploration of Upper Calrath, the player can head to two places in the area to find some Deraliums. The following are the places where the player can farm the Deraliums:
#1: In a Tent
Shortly after reaching the Upper Calrath, the player can locate some Deraliums hidden inside a tent. The player must perform the following to find these upgrade materials:
- First, the player can start from the Vestige of Doln in the Upper Calrath Mining District. From here, the player must pass through the open gate on the right of the Vestige. Exit through, get on the other side, and continue down the path. The player will fight some enemies here.
- Then, the player must pass through the arch on the left and up the next small stairs on the left. Follow the next path on the right, where the player will face several enemies. At the end of the path, the player must take the path on the right where there are enemies. Pass through another arch, then take the next path on the left. The player will encounter more enemies here.
- Following that, at the end of the path, the player has to head down the flight of stairs. Here, the player will find an Umbral Flowerbed. Continue heading down the flight of stairs and keep following the path. Eventually, the player will cross a concrete bridge with some enemies on the opposite side.
- Next, after dealing with the enemies, the player must head down the concrete ramp at the end of the path. Here, the player will encounter a bunch more enemies. From the ramp, head up the stairs on the left, just slightly ahead.
- Afterward, on top, the player must follow the path up on the left. At the end of this path, the player will find a tent on the left. Head inside the tent, and the player will find a glowing item.
- Finally, the player must go near the glowing item and interact with it. After doing so, the player will obtain three pieces of Regular Deralium Nuggets!
#2: Behind Breakable Boxes
The player can find more upgrade materials from the previous Regular Deralium Nuggets in a few ways. The player must execute the following to farm these Deraliums:
- To begin, the player can start from the previous Regular Deralium Nuggets. From there, the player must head up the ramp before the tent. At the top, drop down the opening on the right to find an Umbral Flowerbed. The player can plant a Vestige Seedling here.
- Next, once that is done, the player must approach the brown door and interact with it to open it. On the other side, follow the path on the left, then head down the stairs on the right. Here, the player will face a bunch of enemies.
- After that, from the stairs, the player must head to the right and pass through the doorway. Once through, the player can find an Emergence Effigy on the left. Follow the path on the right, then pass through another doorway.
- Then, once through, the player must head down the narrow wooden flight of stairs on the left. Once at the bottom, pass through the narrow arch ahead, then follow the path on the left. Once through, the player must head towards the wooden platform on the left. Here, the player will find some wooden crates and boxes. Break the crates and boxes, and the player will find a glowing item near the platform’s edge.
- Lastly, the player must go near and pick up the glowing item. Finally, the player will farm four more pieces of Small Deralium Fragments!
Location 7: Sunless Skein
Once in the Sunless Skein area, the player can go to five locations to farm some Deralium. For these upgrade materials, the player can head to the following places:
#1: Near a Locked Gate
On the initial parts of the area, the player can find some Deralium near a locked gate. To find these Deraliums, the player must do the following:
- First, the player can start from the Vestige of Hooded Antuli in the Sunless Skein area. From the Vestige, the player has to follow the path on the right to enter a tunnel. Once through, the player will reach the mines.
- Afterward, the player must keep following the train tracks. While on this path, the player must go through wooden crates, barrels, and enemies.
- Following that, the player will eventually reach a closed and locked gate. Upon reaching this gate, the player has to head towards the area on the right. Here, the player will find a glowing item near a flame-lit corner.
- Finally, the player must approach the glowing item and pick it up. After doing so, the player will get four pieces of Small Deralium Fragments.
#2: In a Hidden Space
The player can locate more Deraliums just a small distance from the previous Small Deralium Fragments. To pick up these upgrade materials, the player has to perform the following:
- The player may begin from where the previous Small Deralium Fragments are located. From here, the player must go to the path on the left of the locked gate.
- After that, the player must follow the path and head up the wooden stairs. Once on top, enter the tunnel on the right.
- Then, just a few steps inside the tunnel, a couple of enemies will attack the player. One of these enemies will ambush the player behind wooden crates and barrels on the left. After dealing with the enemies, the player must go to the hidden space where one of the enemies was ambushed. Here, the player can find a glowing item near the left corner.
- Lastly, the player must go near and interact with the glowing item. Once that is done, the player will acquire four more Small Deralium Fragments!
#3: Near a Miner’s Stigma
Besides a miner’s Stigma in the Sunless Skein area, the player can get more upgrade materials. The player must execute the following to farm these Deraliums:
- First, the player can start from the previous Small Deralium Fragments. From here, the player must proceed on the tunnel; on the other side, the player will face an enemy. The player must head to the right to find a closed metal gate. To pass through, the player must slowly walk through it while shining the Umbral Lamp.
- Then, once through, the player must follow the narrow path on the left and the next on the right. On this path, the player will face an enemy who will roll a large wooden barrel down on the player. Near the end of the path, the player will encounter another enemy. Use long-range attacks to eliminate this enemy. Just before where the enemy is located, the wooden floor will break and let the player fall down a pit.
- After that, the player will face many enemies once at the bottom of the pit. Once all the enemies are dealt with, pass through the tunnel ahead. While on this path, the player will encounter a couple more enemies.
- Following that, at the end of the path, the player will find a large gap. To cross, the player has to shine the Umbral Lamp on the left side of the gap to find a path. Carefully follow this path while shining the Umbral Lamp on it. The player will face many enemies and mines on the wall on this path. Once on the platform below, the player will encounter another enemy,
- Afterwards, from here, the player has to keep following the tunnel ahead. Once through, head up the wooden flight of stairs. While going up, the player must cross a narrow wood plank to continue. After that, keep following the wooden path upwards.
- Next, on top, the player must head forward and pass through another tunnel. On this path, the player will face a couple of enemies. Break the wooden barrier at the end of the path, then continue through the tunnel on the left.
- Then, at the end of this path, the player will find a lever and a wooden ladder. Interact with the lever to open the first locked gate in the area and interact with the wooden ladder to push it down. After interacting with the lever, enemies will ambush the player from behind. The player has to climb or slide down the wooden ladder and then follow the path on the right. Here, the player will find the newly-opened gate.
- After that, the player must head inside the newly-opened tunnel. Inside, the player will have to eliminate a couple of enemies. At the end of the path, the player must follow the path on the right of the locked gate. Here, take the next path on the left, where the player will go down a set of stairs and find some metal bars. To cross it, the player must pass through the bars while shining the Umbral Lamp. Continue on the path and break the wooden obstacles to find more metal bars. Pass through the bars again while shining the Umbral Lamp on it.
- Following that, once through, the player will find another large pit. Before dropping down, the player must first cross to the Umbral Realm. Once that is done, drop down the pit, where the player will face many enemies. After dropping and dealing with the enemies, the player has to soulflay the blocked path on the right. After doing so, the player will find the Mining Stigma and a glowing item near it.
- Finally, the player must approach and interact with the glowing item. The player will obtain two Regular Deralium Nuggets and two Enervated Vigor Skulls.
#4: Near the Locked Gate 1
The player will be able to find some more Deraliums near the other side of the previously locked gate a short distance from the previous Regular Deralium Nuggets. To locate these upgrade materials, the player has to do the following:
- The player can start from where they found the Regular Deralium Nuggets and the Mining Stigma. From here, the player must keep following the path and then take the next path on the right.
- After that, the player must take the next path on the right and then on the right again. Here, the player will face a bunch of enemies. Enter through the tunnel ahead, and upon exiting on the other side, the player will encounter a bunch more enemies,
- Next, after dealing with the enemies, the player must continue on the path ahead. At the end of the path, head up the wooden ramp on the right where an enemy is. The player must then head to the left to find an Emergence Effigy.
- Afterward, the player must climb the wooden stairs on the left. Once on top, follow the wooden path to the left. While on this path, the player will face a couple of enemies. At the end, go up another flight of wooden stairs, then follow the path on the right to enter a tunnel.
- Then, while in this tunnel, the player will find that the path will divide into two. Here, the player must follow the path on the right and cross a wooden bridge. After exiting on the other side of the tunnel, the player will reach a large area. Upon exiting the tunnel, the player must follow the path of the train tracks to the left. While on this path, the player will face a few enemies. The player will find wooden crates and barrels near one of the enemies on the left wall. Beside these is a glowing item.
- Lastly, the player must go near and pick up the glowing item. Finally, the player will farm four pieces of Small Deralium Fragments upon doing so!
#5: Near the Locked Gate 2
The player can pick up more upgrade materials just a few steps ahead of the previous Small Deralium Fragments. For these, the player must perform the following:
- The player can start from where the previous Small Deralium Fragments are found. From here, the player must follow the path of the train tracks ahead to a tunnel.
- Following that, at the end of the path, the player will find themself on the other side of the locked gate that was found earlier. The player will find a glowing item near a broken wooden barrel on the right side of the closed gate.
- Finally, the player has to go near the glowing item and pick it up. After doing that, the player can get four more Small Deralium Fragments!
Location 8: Cistern
The player can go to only one place in the Cistern area to farm some Deralium. The following is the location in question:
#1: On a Cage
On top of a cage and a wooden platform in the Cistern area, the player can locate some upgrade materials. To pick up these Deraliums, the player must execute the following:
- First, the player can start from the Umbral Flowerbed near where they can face the Skinstealer boss. From here, the player must head down the set of stairs. Continue descending the stairs until the player finds wooden crates and boxes.
- After that, on this platform, the player must cross to the Umbral Realm. Upon doing so, the player will find some Umbral platforms near the right corner of the platform. Jump towards this Umbral platform, then drop down and jump towards the succeeding Umbral platforms to reach the middle of the area. At the end, the player can soulflay the target on the right to get the Nohuta Polearm.
- Next, once the player is ready, they can drop down the large platform below. Here, the player will face three mini-bosses: the Bringer of Stillness boss, the Bringer of Nullity boss, and the Bringer of Silence boss. Each of these bosses will spawn at a certain point, and the player may face two or three simultaneously. The Bringer of Nullity boss will only appear once the player brings the Bringer of Stillness boss’ health down to 50%. After a short time of the Bringer of Nullity boss’s appearance, the Bringer of Silence boss will appear.
- Then, after dealing with all those bosses, the player must now soulflay the target across the gap. Doing so will release a bone bridge. Cross the bone bridge, then, on the other side, the player will encounter an enemy. Go up the flight of stairs on the left, and the player will find a metal door at the top. Interact with the metal door to open it.
- Following that, the player must pass through the door and head towards the corner of the platform on the left. Here, the player must drop down the cages below. Keep following the path on top of the cages forward. Eventually, the player will reach a wooden platform with a corpse and a glowing item in the corner.
- Lastly, the player must approach and pick up the glowing item. With that, the player will get three pieces of Regular Deralium Nuggets!
Location 9: Upper Calrath B
In the Upper Calrath B, the player can head to only one area to get more Deraliums. The following is the area in question:
#1: Hiding in a Broken Barrel
The player will be able to find some Deraliums inside a broken barrel near the marketplace in Upper Calrath. To find these Deraliums, the player must do the following:
- The player can begin from the Vestige of the Forgotten Guardian in the Upper Calrath area. From the Vestige, the player must head to the right and interact with the door to open it.
- Following that, the player must head outside and follow the right path. While on this path, the player will encounter a bunch of enemies. At the end of the path, the player will find a closed gate on the right. To continue, pass through the closed gate while shining the Umbral Lamp.
- Next, once through, the player must head straight ahead and go through the arch on the left. The player will then encounter a few enemies in a large open area. Head towards the arch on the opposite side of the area.
- After that, the player must head up the flight of stairs on the right. Once on top, drop down the gap and go up the ramp on the left. The player will face some more enemies in this area. To continue, the player must cross to the Umbral Realm. Once that is done, follow the path on the right to go down a small set of stairs, then drop down the next gap on the right to land on an Umbral platform.
- Then, from here, the player must climb or slide down the ladder ahead. Follow the path before the ladder, and the player will face more enemies. The player will also find an Emergence Effigy here. Near the end of the path, pass through the arch on the right to find an Umbral Flowerbed. The player will then be able to plant a Bestige Seedling here.
- Afterward, from the Umbral Flowerbed, the player must be in the Umbral Realm again to continue. Go up the small flight of stairs on the right and follow the path where there are a few more enemies. Take the next path on the left, then on the left again, where the player will encounter another enemy.
- Following that, the player can pass through a closed gate on the right, thanks to being in the Umbral Realm. Once through, take the next path on the left, where a couple of enemies exist. The player must go straight on this path and then, at the end, follow the path on the right to reach the outside. An enemy is waiting on the right for the player.
- Next, once outside, the player must take on the path on the left. While on this path, the player will face some more enemies. Once the player reaches the open area, the player must head to the left to find some barrels. Break the barrels, and the player will find a glowing item.
- Finally, the player must go near the glowing item and interact with it. Once that is done, the player will get two pieces of Large Deralium Shards!
Location 10: Fief of the Chill Curse
The player can head to six places in the Fief of the Chill Curse area to farm some Deraliums. To find these upgrade materials, the player has to go to the following places:
#1: Inside a Chest 1
Just a short distance from where the player encountered the Griefbound Rowena boss, the player can find a chest with many Deraliums. To obtain these upgrade materials, the player must do the following:
- First, the player can start from the Vestige of Svornil in the Fief of the Chill Curse area. From the Vestige, the player must go to the path in front of the Vestige. Here, the player will find a wooden ladder on the left. Climb up the wooden ladder and, at the top, head to the right to find another wooden ladder. Go up this next wooden ladder, then follow the path behind it at the top.
- Next, this path will lead the player around the area. Conversely, keep following the wooden path up a ramp where the player will eventually face an enemy. Continue following the path through some trees, and the player will encounter many enemies at the end of the path.
- Then, after dealing with the enemies, the player must follow the wall on the left at the end of the path. Eventually, the player will find a wooden ladder. Climb up the wooden ladder and continue down the path at the top. At the end of the wooden path, climb or slide down the ladder on the right. At the bottom, drop down the wooden platform to find an Umbral Flowerbed. The player will be able to plant a Vestige Seedling here. There is also an Emergence Effigy on the right.
- After that, from the Umbral Flowerbed, the player must follow the path on the left. This path will lead the player up and to the right. While on this path, the player must cross some wooden planks and eventually reach a wooden bridge on the left.
- The player must cross the wooden bridge and face the enemies on the other side. After successfully crossing, the player now has to follow the path up on the right. Shortly, the player will find an Emergence Effigy on the right and a few enemies ahead.
- Afterward, the player must continue down this path, and the player will find another wooden bridge to the right, an entrance to a building on the left, and a path straight ahead. The player will face the Griefbound Rowena boss inside the building on the left. To find the Deralium, the player must keep following the path ahead. While on this path, the player must break wooden barriers and many enemies.
- Next, at the end of the path, the player will find a wooden platform on the right. Here, the player must cross to the Umbral Realm to continue. After doing so, the player will find a platform below. Drop down towards it, then soulflay the target across the gap. After doing so, the platform that the player is on will move towards the next platform. Here, the player will find a chest on the left.
- Lastly, the player has to approach and open the chest. Finally, the player will receive four pieces of Small Deralium Fragments, two Regular Deralium Fragments, and a Shield of Thunder!
#2: On a Wooden Beam
Above a ravine, the player can find more upgrade materials placed on a wooden beam. To farm these Deraliums, the player must perform the following:
- The player can start from where the previous Deraliums were located. From here, the player must head back towards the previously moved platform. Here, the player has to now drop down towards the platform below.
- Then, upon landing, the player must proceed through the narrow path ahead. Once through, the player will return to the area with the Vestige of Svornil. Here, interact with the lever on the right to open the large gate in front of the Vestige.
- Next, once that is done, the player must approach the wooden ladder ahead and interact with it. Doing so will push the wooden ladder down. Climb or slide down the wooden ladder, then, at the bottom, head down the other wooden ladder on the left.
- Once at the bottom, the player will find the newly opened gate on the left and the Vestige of Svornil on the right. Head towards the new gate on the left and follow the path to the end. On the way, the player will encounter a bunch of enemies.
- After that, once the player is at the wooden platform at the end of the path, the player must cross to the Umbral Realm to continue. Once that is done, the player must drop down from the wooden platform. In this area, the player will face a bunch more enemies.
- Afterward, upon dropping, the player has to follow the white path on the right. This path will lead the player up a hill. At the top, the player will find an Emergence Effigy. Continue heading up the hill by taking the path on the right.
- Then, at the end of this path, the player will reach a wooden platform with a wooden pole in the corner. The player will find a glowing item near the top of this wooden pole. The player must now shoot at the glowing item using a spell or a ranged weapon to let it fall to the ground.
- Finally, the player must go near the glowing item and pick it up. After doing so, the player will farm three pieces of Regular Deralium Nuggets!
#3: Inside some Ruins
Hidden behind a broken wall in a ruined area, the player can locate some more upgrade materials. The player must execute the following to farm these Deraliums:
- First, the player may begin from where they obtained the previous Regular Deralium Nuggets. From here, the player must take on the path on the left. While on this path, the player will pass through a house on the right. Keep following the path to reach the entrance of an icy tunnel on the left.
- Following that, the player must follow the path inside the tunnel. Here, the player will face an enemy. While taking the path inside the tunnel, some Icicle deposits will eventually drop down from the ceiling. The player will die if the player gets caught up or is close enough to the fallen icicle deposits. This might prove useful anyway, as the player has to cross the Umbral Realm to continue.
- Next, after crossing the Umbral Realm, the player must head up the icicle ramp on the left to reach a bone platform. Here, the player must follow the path of the bone platform to the right. Drop down the bone platform at the end and continue following the path. While on this path, the player will face a bunch of enemies.
- After that, the player can find an Umbral Flowerbed upon exiting the icy tunnel. The player can plant a Vestige Seedling here. From here, the player must follow the path on the right. The player will encounter several enemies between broken wooden carriages and wagons.
- Then, at the end of the path, the player will find a broken but closed gate on the left. To get to the other side, the player must pass through the gate while shining the Umbral Lamp. Here, the player can find Drustan in a house on the right.
- Afterward, the player must head toward the wooden platform from the gate. Here, the player must go down a few wooden flights of stairs. At the bottom, the player must drop down the wooden ledge to the left and face a few enemies.
- Following that, the player has to follow the path on the right to find an Emergence Effigy. Head down the stairs before the Emergence Effigy to reach the ruins area. Pass through the arch on the left, then head towards the left again to reach an open area.
- Next, in this area, the player must head towards the next opening on the left and then on the right. After doing so, face towards the floor immediately behind the broken wall on the left. Here, the player will find a glowing item.
- Lastly, the player must approach and pick up the glowing item. Finally, the player will get two more Regular Deralium Nuggets!
#4: Near a Statue
The player can find some more Deraliums in an alley near a statue. To acquire these upgrade materials, the player must do the following:
- The player can begin from where the two pieces of Regular Deralium Nuggets are found. From here, the player must head towards the opening on the right to reach the open area again. Here, the player must follow the path to the right and pass through the large arch.
- Next, once through, the player has to follow the path ahead to go down a hill, then go to the left and around the structure. While on this path, the player will face a few enemies. Eventually, the player will reach a large ruined castle.
- Afterward, the player must pass through the large arch to head inside. Here, the player will face a few more enemies. Once all the enemies are dealt with, proceed forward and towards the opening on the wall on the left. This is on the left of the iron gate.
- Following that, the player must follow the path up to reach the roof of a house. Drop down the ledge on the right to continue. Here, continue forward, and after the broken gate on the right, the player can find an Umbral Flowerbed. The player can plant a Vestige Seedling here.
- Then, from the Umbral Flowerbed, the player must exit from the gate again and then follow the path on the right. On this path, the player will face a couple of enemies. Eventually, the player will reach a flooded town. To continue, the player must cross to the Umbral Realm.
- Afterward, the flood water will completely disappear once in the Umbral Realm. Follow the concrete path down to the previously flooded streets. On the divided path, the player must follow the path on the left. Here, the player will reach a large statue. The player will also encounter a bunch of enemies around the area.
- Next, once near the statue, the player must head to the path on the left. Here, the player will find an alley that leads to the left. Head inside the alley, and the player will find a glowing item at the corner.
- Finally, the player has to go near the glowing item and interact with it to pick it up. With that, the player will obtain two pieces of Large Deralium Shards!
#5: Inside a Chest 2
Just a short distance from the previous Large Deralium Shards, the player will find a chest that contains a lot more Deraliums. The player must perform the following to farm these Deraliums:
- First, the player can begin at the same place where they found the previous two Large Deralium Shards. From here, the player must head out of the alley and follow the wall on the left. Here, the player will find some wooden planks set up as a ramp.
- Next, head up the wooden ramp to the left to go up another wooden ramp. The player will encounter an enemy in this area. Go up the next wooden ramp on the left and continue on the wooden platform to reach the roof of a house. On the way, the player will face an enemy.
- After that, once on the roof, the player must go through the opening on the wall on the right. Once inside, go forward; the player will find a chest on the left just after the opening.
- Lastly, the player must approach and interact with the chest to open it. Upon doing so, the player will get four pieces of Small Deralium Fragments, three Regular Deralium Nuggets, the Bow of the Mutilated, and three Ammunition Satchel.
#6: Inside a Chest 3
Near a beacon in the Fief of the Chill Curse area, the player can open another chest that contains many more Deraliums. To find these upgrade materials, the player must execute the following:
- First, the player can begin from the Vestige of Loash in the middle of the Fief of the Chill Curse area. From the Vestige, the player must head inside the wooden tunnel on the right.
- Once through the tunnel, the player will reach a large open area and face The Hollow Crow boss. The player has to defeat this boss to continue.
- Then, after eliminating The Hollow Crow boss, the player must pass through the next doorway on the opposite side of the entrance to the area. Inside, the player will find a wooden ladder that leads down to the left. Climb or slide down the wooden ladder, then exit through the arch on the left.
- Afterward, once outside, the player must take the narrow path on the left. The player will enter a building through this path and must exit through the arch on the other side. Keep on following the path and enter the arch at the end of the path.
- After that, inside the building, the player must go up the wooden stairs on the right. On top, go up the next wooden stairs on the left, then follow the wooden path to the left. Here, the player will find a wooden ladder.
- Next, the player must climb up the wooden ladder. At the top, the player will find the beacon in the area. Just ahead of the beacon, the player will find a chest.
- Finally, the player must go near and open the chest. Once that is done, the player can farm four pieces of Small Deralium Fragments, three pieces of Regular Deralium Nuggets, two pieces of Large Deralium Shards, and one piece of Deralium Chunk!
Location 11: Revelation Depths
In the Revelation Depths area, the player can go to 12 places to farm some Deralium. The following are the locations in question:
#1: Near a Ladder
Near the initial parts of the area, the player can find some Deralium near a ladder. To find these Deraliums, the player must do the following:
- To begin, the player can start from where they fought the Bringer of Stillness boss, the Bringer of Nullity boss, and the Bringer of Silence boss. From here, the player has to soulflay the target across the gap to release a bone bridge. Cross the bone bridge, and the player will face an enemy on the other side. Head up the stairs on the left, where there is a metal door.
- Then, the player must open the door and go to the corner of the platform on the left. Drop down the cages below, then turn around and follow the path with the wooden platform. Head towards the narrow path on the left and keep following the path down.
- After that, the player will reach a metal platform at the end of the path. Here, the player must drop down the ledge on the right. From here, keep following the wooden path forward. Eventually, the player will find a wooden platform. Climb or slide down the wooden ladder and continue following the path.
- Following that, near the end of the path, the player will find a wooden bridge on the left. Cross this wooden bridge and, once on the other side, follow the path on the left. Here, the player must head down the next wooden flight of stairs and follow the path to the right.
- Next, the player will find another wooden ladder at the end of this path. Climb or slide down the wooden ladder, then head for the wooden platform behind it. Here, the player will encounter an enemy and find a glowing item near the corner.
- Lastly, the player must approach the glowing item and interact with it. After doing so, the player will acquire three pieces of Regular Deralium Nuggets!
#2: Near some Pilgrims
The player will find some more Deraliums just a couple of steps from the previous Regular Deralium Nuggets. These Deraliums, however, are surrounded by a couple of Pilgrims. The player must perform the following to farm these Deraliums:
- First, the player must start from the previous Regular Deralium Nuggets. From here, the player must keep heading forward on the wooden platform.
- After that, the player will encounter a couple of Pilgrim enemies at the end of the path. Once these enemies are dealt with, the player will also find a glowing item on the corner near the doorway on the right.
- Finally, the player must go near and pick up the glowing item. With that, the player will get two pieces of Large Deralium Shards!
#3: Inside a Barricaded Tunnel
The player will be able to find some Deralium inside a tunnel that has some wooden barricades. To farm these Deraliums, the player must execute the following:
- To start, the player can begin from the previous Large Deralium Shards. From here, the player has to pass through the doorway on the right. Continue heading forward on the dark tunnel, and, at the end, the player must follow the wooden path to the right.
- Next, near the end of the path, watch out for the breakable floors. They are easy to spot as they have a different color than the normal wooden platform. Here, the player must cross to the Umbral Realm to continue. After doing so, the player will find a platform below on the left.
- Following that, the player must jump down towards the platform below. Upon landing, continue forward, and the player will reach a slightly large area with a few enemies. From the wooden platform near where the player landed, turn right to find an Emergence Effigy and a tunnel.
- After that, the player must approach the tunnel and destroy the wooden barricade near the entrance. Head inside the tunnel, where the player will face several enemies. The player will find a glowing item near the wall on the left.
- Lastly, the player must go near and interact with the glowing item. Finally, the player will farm two more pieces of Large Deralium Shards!
#4: Inside Another Tunnel
Just a short distance from the previous Large Deralium Shards, the player can find some more Deraliums. The player must do the following to find these upgrade materials:
- First, the player can start from where the previous two pieces of Large Deralium Shards are found. From here, the player must exit the tunnel and follow the right path.
- After that, keep following the wall on the right to enter another dead-end tunnel. In the corner, the player will discover a glowing item.
- Finally, the player must approach and pick up the glowing item. Once that is done, the player will obtain three pieces of Regular Deralium Nuggets!
#5: Near Some Scaffolding
The player will be able to find some Deraliums before some scaffolding in the area. To find these Deraliums, the player must perform the following:
- The player may start where they found the previous three pieces of Regular Deralium Nuggets. From here, the player must head back, exit the tunnel, then follow the path on the right.
- Following that, at the end of the path, the player can find a wooden ladder. Interact with the wooden ladder to push it down, then climb or slide down it. At the bottom, the player must follow the narrow path on the right.
- Next, the player has to break the wooden barricades inside this tunnel to reach the exit. Once through, follow the path on the left, where there are a few enemies. Eventually, while on this path, the player will pass through another doorway with a wooden platform. The player will find an Umbral Flowerbed to plant a seed on this platform.
- After that, from the Umbral Flowerbed, the player must follow the path on the left. Here, the player will go down a wooden ramp. At the end of the path, the player has to go down a flight of wooden stairs on the left.
- Then, at the bottom, the player will encounter several enemies. After dealing with the enemies, head towards the wall on the right to find a glowing item.
- Lastly, the player has to approach the glowing item and interact with it to pick it up. Finally, the player will acquire two more pieces of Large Deralium Shards.
#6: Near Some Umbral Platforms
Deeper down the Revelation Depths area, the player can find more upgrade materials. For this, the player can find a few near some bone platforms in the Umbral Realm. The player must execute the following to farm these Deraliums:
- First, the player can start from the Vestige of Catrin in the Sunless Skein area if the player has unlocked the lift to the Revelation Depths area. Alternatively, the player can also start from where the previous Large Deralium Shards as these are near the lift.
- Next, from the Vestige, the player must head up the small stairs on the left. Here, the player must pass through the doorway on the left and then head towards the next path on the left. From here, the player must enter the lift and ride it down.
- Following that, at the bottom, the player must exit the lift where there are a few enemies on the left. Here, the player must go down two flights of wooden stairs. At the bottom, keep following the path ahead. At the end of the path, the player will face a couple of enemies.
- After that, the player must follow the next path on the right. At the end, go down the wooden set of stairs. The player must then head forward towards the broken wooden bridge. To continue, the player has to now cross to the Umbral Realm.
- Then, once in the Umbral Realm, the player must drop down the long Umbral platform below. Here, continue forwards then, at the end of the platform, soulflay the target across the gap to release a bridge.
- Afterward, the player must cross the bridge and head down the bone ramp on the left. At the bottom, the player has to go toward the path on the left to find a glowing item in the corner.
- Finally, the player must go near and pick up the glowing item. After doing so, the player will get two more pieces of Regular Deralium Nuggets.
#7: After a Wooden Bridge
The player can find more upgrade materials after the previous Regular Deralium Nuggets. To farm these Deralium, the player must do the following:
- The player can start from where the previous Regular Deralium Nuggets are located. From here, the player has to follow the bone ramp on the left.
- Then, once on top, the player must keep heading forward. Drop down the platform below at the end of the path, where the player will face several enemies. The player will also find an Emergence Effigy in this area. Here, the player must cross the wooden bridge.
- Then, once on the other side, the player has to keep heading forward on the wooden path. In this area, the player will encounter some enemies. At the end of the path, go down a wooden flight of stairs to find another Emergence Effigy.
- Next, from here, the player must cross the next wooden bridge on the left. Upon reaching the other side, the player will face another enemy. Head down the wooden ramp and follow the path near the rock wall. In this area, the player will encounter some more enemies. Also, the player can find a glowing item on the right near the rock wall.
- Lastly, the player must approach the glowing item and pick it up to receive three pieces of Regular Deralium Nuggets!
#8: Near an Umbral Flowerbed
The player can locate some Deralium inside a tunnel near an Umbral Flowerbed. For this, the player must perform the following:
- First, the player can begin from the location of the previous Regular Deralium Nuggets. From here, the player must continue on the path to reach a wooden platform. The player will find a wooden ladder on the left edge of this platform. Climb or slide down the wooden ladder.
- After that, at the bottom, the player must follow the path on the left. Head down the wooden ramp to find an Emergence Effigy on the right. The player will face a couple of enemies here. Continue on the wooden path and take the next tunnel on the right.
- Next, the player must follow the path inside the tunnel to reach a large area with many enemies. Drop down the next wooden ledge on the left, then head up the concrete ramp on the right. On top, the player must follow the next path on the left.
- Afterward, the player has to go up a set of wooden stairs on the right. On top, head up the wooden ramp on the right again. From here, the player must head straight and cross the next wooden bridge on the left.
- Following that, the player must keep following the path where they will reach a broken wooden platform. From here, the player has to run and jump towards the platform below. Upon landing, follow the path on the left to find an Umbral Flowerbed.
- Then, the player now has to cross to the Umbral Realm. From the Umbral Flowerbed, the player must head inside the tunnel on the right. While on this path, the player will encounter a bunch of enemies.
- After that, in the middle of the path, soulflay the target to remove the obstruction and continue. In this next part, the player will face some more enemies. At the end of the path, there is an Emergence Effigy on the right to return to the Axiom.
- Next, back in the Axiom, the player must drop down the ledge and continue inside the tunnel on the right. After a few steps in this path, the player will find a glowing item near the rock wall on the left. Near this, the player will also encounter an enemy.
- Finally, the player must go near and interact with the glowing item. After doing that, the player will farm three pieces of Regular Deralium Nuggets!
#9: Near a Miner
The player can pick up some upgrade materials just a short distance from the three Regular Deralium Nuggets. To farm these Deraliums, the player must execute the following:
- To start, the player can begin at the location of the previous Regular Deralium Nuggets. From here, the player has to head back to the opposite direction to continue following the tunnel path.
- Then, upon exiting the tunnel, the player will face a couple of enemies. Follow the path on the right to find a wooden platform, then enter the next tunnel on the right. The player must keep following the straight path inside the tunnel.
- The player will pass through an Umbral Flowerbed while on this path. The player can plant a Vestige Seedling here. Keep following the path, and the player will encounter a Miner enemy. Near this enemy, the player can find a glowing item on the ground. This is near some wooden barrels on the rock wall on the left.
- Lastly, the player must approach and interact with the glowing item. Finally, the player will acquire four pieces of Small Deralium Fragments!
#10: Near Some More Miners
The player can farm some Deraliums in a cave near a couple of Miners. For these upgrade materials, the player must do the following:
- First, the player may begin where they found the previous four pieces of Small Deralium Fragments. From here, the player must continue the path and climb small wooden stairs. Follow the path on the left and right to exit the tunnel.
- Next, from here, the player must follow the path on the right to reach the wooden platform. Once the path splits, the player must follow the path on the right instead of the wooden bridge.
- After that, the player will reach a big cavern on this path. Head towards the next opening on the right to face a few enemies. Once all the enemies are dealt with, the player will find a glowing item near the rock wall.
- Finally, the player must go near and pick up the glowing item. With that, the player will obtain three pieces of Regular Deralium Nuggets!
#11: Near Some Rocks in the Middle
The player will find a major upgrade material just a few steps from the previous Regular Deralium Nuggets. To farm this Deralium, the player must perform the following:
- To begin, the player can start from the location of the previous Regular Deralium Nuggets.
- Following that, the player has to simply turn around to find a bunch of sharp, cone-shaped rocks near the middle of the area. Go around these rocks to find a glowing item near several wooden barrels.
- Lastly, the player must approach and interact with the glowing item. Upon doing so, the player will get one piece of Deralium Chunk!
#12: Near a Chest
The player can find the last possible set of Deraliums that they can find lying around in the Revelation Depths area near a chest. To farm these Deraliums, the player must execute the following:
- First, the player can begin from where they found the Deralium Chunk. From here, the player must head back and exit the cavern. The player must now cross the wooden bridge, where the player will face a bunch of enemies.
- Next, after dealing with the enemies, the player must continue crossing the wooden bridge. On the other side, take the next path on the left. Here, the player will face a few enemies.
- After that, at the end of the path, the player has to go to the opening on the left. Here, the player will find a wooden ladder on the ledge. Climb or slide down the wooden ladder, then proceed to the path on the left. Here, the player will be able to find an Umbral Flowerbed and can plant a Vestige Seedling.
- Following that, from the Umbral Flowerbed, the player must keep following the path ahead, which is littered with wooden barricades. Eventually, the player will encounter a lot of different enemies.
- Then, once the enemies are dealt with, the player can find a wooden ladder that leads down to the left. Climb or slide down the wooden ladder, and the player will face more enemies. From the wooden ladder, head down the wooden ramp in front of it and head to the right.
- Afterward, in this area, the player will encounter an enemy. In the corner, the player will also find a glowing item.
- Finally, the player must go near and pick up the glowing item. After doing that, the player will receive four more pieces of Small Deralium Fragments!
Location 12: Path of Devotion
The player can only head to one area in the Path of Devotion area to find some Deraliums. To find them, the player must go to the following:
#1: Near the Vestige
The player can find some Deraliums just a short distance from the Vestige in the Path of Devotion area. To farm these Deraliums, the player must perform the following:
- The player can start from the Vestige of Dieter in the Path of Devotion Memorial area.
- After that, the player must follow the path on the right of the Vestige. While on this path, the player will find a glowing item near a dead body on the left. This is slightly ahead in front of the tunnel’s entrance on the right.
- Lastly, the player has to approach the glowing item and pick it up. Upon doing so, the player will get two pieces of Large Deralium Shards.
Location 13: Manse of the Hallowed Brothers
In the Manse of the Hallowed Brothers area, the player can go to four places to pick up some Deraliums. The player has to head to the following areas to find the Deraliums in question:
#1: Under a Set of Wooden Stairs
Early in the Manse of the Hallowed Brothers area, the player can find some Deraliums under wooden stairs. To find these upgrade materials, the player must do the following:
- First, the player can start from the Vestige of Ferrers the Charred in the Manse Supply Pathway area. From the Vestige, the player must follow the path on the right.
- Next, at the end of the path, the player must drop down the ledge to land on the ground below. Here, the player will encounter a couple of enemies. Upon landing, follow the path up on the right.
- Following that, at the end of the path, the player will find a closed iron gate. From here, go up the wooden flight of stairs on the left. Once on the wooden platform, the player must cross to the Umbral Realm to continue.
- After that, once in the Umbral realm, the player will find a bone path. Continue on the bone bridge, where the player will encounter a few enemies. At the end of the path, go up another flight of wooden stairs. Here, the player will face some more enemies.
- Then, at the top of the stairs, the player must follow the path on the right. Here, the player will find an Emergence Effigy near a ramp. Head up the ramp and, at the top, drop down the ledge where there is another enemy. From here, the player can head to the right and interact with the lever to open the iron gate from earlier.
- Afterward, the player must head to the path in the opposite direction. Go up the small stairs at the end of the path and pass through the arch to reach the outside. Here, the player will encounter a couple of enemies. From the arch, the player must head to the left to find another flight of wooden stairs.
- Next, the player will find wooden barrels and crates on the left of the wooden stairs. The player must destroy the barrels and crates, and near the wall, the player will find a glowing item at the end.
- Finally, the player must go near and interact with the glowing item. With that, the player will acquire three pieces of Regular Deralium Nuggets!
#2: Near an Emergence Effigy
On a balcony, the player can pick up more Deraliums near an Emergence Effigy. To farm these Deraliums, the player must perform the following:
- To start, the player can begin from the Umbral Flowerbed near where the player faces the Abiding Defenders bosses. From here, the player must follow the path on the left and then pass through the arch at the end of the path. On the right of the arch, the player will face an enemy.
- Next, just after the arch, the player must cross to the Umbral Realm to continue. Through that, the player will find an Umbral platform on the gap ahead. Proceed on the platform to find a bone ladder on the right.
- Following that, the player has to climb up the bone ladder. At the top, follow the path around and exit through the next arch. Once outside, proceed on the path where the player will encounter a couple of enemies.
- After that, the player must continue on the path and head up a spiral stairs. At the top, the player will face an enemy. Continue on the narrow path and cross the next wooden platform. Here, the player will encounter an enemy.
- Then, after dealing with the enemy, the player has to head up the wooden set of stairs on the right. At the top, destroy the wooden crates and barrels on the left. Here, the player will face another enemy. Continue on the path and down the flight of wooden stairs on the right. At the bottom, enter the arch on the left.
- Afterward, inside the structure, the player must follow the wooden path to the right and traverse through the narrow wooden beam to the left. In the middle, drop down the next wooden beam just below the wooden beam that the player is on.
- Next, the player must walk slightly forward on this wooden beam and drop below the wooden platform. From here, continue straight on the wooden platform and continue on the wooden beam at the end.
- Following that, the player must follow the wooden beam to the very end. Once there, the player has to drop down the balcony below them. Near the wall on the right, the player will find an Emergence Effigy. Near the balcony rails, the player can find a glowing item on the ground.
- Lastly, the player can now approach the glowing item and pick it up. Finally, the player will obtain three pieces of Regular Deralium Nuggets!
#3: On a Wooden Platform
Just a short distance from the previous Regular Deralium Nuggets, the player can claim some more upgrade materials. The player has to do the following to farm these Deraliums:
- First, the player can start from the previous three pieces of Regular Deralium Nuggets. From here, the player must pass through the arch in front of where the previous Deraliums were found.
- After that, the player must head to the left and up small wooden stairs once outside. Here, the player will find a wooden ladder.
- Next, the player has to climb up the wooden ladder. At the top, follow the wooden platform to the right and pass through the arch on the left.
- After that, inside, the player must follow the wooden platform forward. At the end of the platform, the player can find a dead body with a glowing item in the corner.
- Finally, the player has to approach and interact with the glowing item. Once that is done, the player will acquire two pieces of Large Deralium Shards!
#4: In a Locked and Barricaded Room
Not far from the two previous sets of Deraliums, the player can pick up the last set in the Manse of the Hollowed Brothers area. To get these Deraliums, the player must do the following:
- To begin, the player may start from the location of the previous Large Deralium Shards. From here, the player must head back, exit the room, and climb the wooden ladder on the right.
- After that, the player has to follow the path on the left and head back through the arch on the right. Inside, the player must head straight to the balcony to find the broken side of the concrete rails. From here, drop down from the ledge, where, upon landing, the player will face a couple of enemies.
- Then, from here, the player must pass through the arch on the left. On the right, on the other side, the player will encounter a few enemies. Once the enemies are dealt with, head to the left to find some wooden barricades.
- Following that, the player has to break the wooden obstructions. After doing so, the player can find a doorway with a closed gate. To pass through, the player must shine the Umbral Lamp on it and then walk through the gate. On the other side, the player will find a glowing item on a table near the left wall.
- Lastly, the player must go near the glowing item and pick it up. After that, the player will farm the last two pieces of Large Deralium Shards in the Manse of the Hollowed Brothers area!
Location 14: Tower of Penance
The player can head to two places in the Tower of Penance area to pick up some Deraliums. To find them, the player must head to the following locations:
#1: Inside a Chest
For the first of two Deraliums in the Tower of Penance area, the player can get it from a chest. To find this chest and farm the Deralium, the player has to do the following:
- First, the player can start from an Umbral Flowerbed just ahead of where the player faces the Blessed Carrion Knight Sanisho boss. From the Umbral Flowerbed, the player must head forward and take the path around the tower on the right.
- Next, the player can find a wooden lift on the opposite side of the tower. Enter the wooden lift and ride it up. Once on top, the player must exit the lift, proceed on the wooden platform, and pass through the arch. Here, the player will be able to find another Umbral Flowerbed.
- After that, from that Umbral Flowerbed, the player must continue on another arch ahead to reach a wooden platform. To continue, the player must now cross to the Umbral Realm. Once that is done, cross the narrow wooden bridge and soulflay the target across the gap. Doing so will result in a platform to come down.
- Then, from here, the player must jump towards the newly-released platform and follow the wooden path on the left. At the end of this platform, the player will find a wooden ladder that leads down. Climb or slide down the wooden ladder, then follow the wooden path in front of it.
- Following that, at the end of the wooden platform, the player must drop down to the next wooden platform below. Here, the player will encounter an enemy. On this platform, the player must continue on the wooden path and then follow the next Umbral platform on the left that leads to the middle.
- Afterwards, from here, the player must soulflay the platform that the player landed on across the gap. After doing so, the platform will move to the right. The player now has to jump toward the recently moved platform.
- Next, instead of continuing on the wooden ladder on the right, the player must drop down the wooden platform below in front of the ladder. Upon landing, the player must head inside the open jail cell to find a chest in the left corner.
- Finally, the player can approach and interact with the chest to open it. Upon doing so, the player will obtain one piece of Deralium Chunk!
#2: On a Table
The player can find the second and last set of Deraliums in the Tower of Penance area on a table just a short distance from the previous Deralium Chunk. To farm these Deraliums, the player must perform the following:
- As it is near, the player can start from the chest’s location with the Deralium Chunk. From the chest, the player must exit the jail cell and head to the end of the platform on the left. From here, the player must now drop down the wooden platform below. This is the platform that the previous wooden ladder would have led the player to.
- After that, upon landing, the player must head straight slightly on the path in front of the ladder and follow the next Umbral platform on the left. At the end of the platform, the player must now soulflay the target across the gap on the right. Doing so will result in an Umbral platform emerging.
- Next, once that is done, the player must jump toward the newly-released platform and enter the open jail cell at the end of the path. Here, the player will encounter a couple of enemies. In the right corner of the jail cell, the player will find a small table on the right with a glowing item on top.
- Lastly, the player must approach the glowing item and pick it up from the table. Once done, the player will get the last two pieces of Large Deralium Shards in the Tower of Penance area!
Location 15: Abbey of the Hallowed Sisters
In the Abbey of the Hallowed Sisters area, the player can go to three places to pick up some Deraliums. The player must go to the following places to get the upgrade materials:
#1: Near the Vestige
The player can farm the first set of Deraliums in the area just a few steps from a Vestige. The player has to execute the following to pick up these Deraliums:
- First, as it is in this Vestige’s vicinity, the player can start from the Vestige of Rosamund in the Abbey of the Hallowed Sisters area. From the Vestige, the player must head to the right. Here, the player will find a wall in the middle.
- Following that, the player has to go behind this wall to find some wooden barrels and crates. The player must break these wooden objects and go to the corner of the wall. Here, the player will find a glowing item near a dead body.
- Finally, the player can go near and interact with the glowing item to pick it up. The player can acquire two pieces of Large Deralium Shards in doing so!
#2: In a Crate
The player can find more Deraliums inside a crate in the middle of the Abbey of the Hallowed Sisters area. For this, the player must do the following:
- To start, the player can also begin from the Vestige of Rosamund. From the Vestige, the player must head towards the path in front of the Vestige. At the end, the player must head inside an arch where an enemy will ambush the player from the left.
- Next, once the enemy is dealt with, the player must follow the path on the right and go up the flight of stairs. Once on top, the player will encounter a couple of enemies. After dealing with the enemies, proceed through the slanted arch ahead and cross to the Umbral Realm.
- After that, once in the Umbral Realm, the player has to soulflay the target ahead to reveal a path. Once that is done, the player must now pass through the newly-opened arch and follow the tunnel all the way through. While in this tunnel, the player will face a lot of enemies.
- Then, at the end of the path, the player must head out through the opening on the right. Once outside, the player will encounter a couple more enemies. Head up the wide set of stairs ahead, and, on top, the player will face a couple of enemies on the left.
- Afterward, the player must follow the path on the left to head up more stairs. Once on top, the player will again encounter more enemies. Here, the player must go up the narrow flight of stairs on the right where another enemy is. Go up another small set of stairs on the right to reach a balcony with another enemy.
- Following that, from the stairs, the player must follow the path on the left, then the next on the right. Head up another flight of stairs where an enemy will charge at the player. After dealing with the enemy, continue on the path and up another set of stairs. The player must then take the next arch on the left to head down a flight of stairs. Midway down the stairs, the player can find an Umbral Flowerbed. The player can plant a Vestige Seedling here.
- Next, at the bottom of the stairs, the player must head down the next stairs on the right. With that, the player will reach a large courtyard with a large tree and many enemies. Once all the enemies are dealt with, go under the shade on the opposite side of the stairs. Go straight on this path to head up another flight of stairs. The player can find another Umbral Flowerbed on the right atop these stairs.
- After that, on top of the stairs, the player has to head out using the arch ahead. Once outside, climb up the stairs on the left, then up the next flight on the left. Once on top, the player must follow the path on the right to face a couple more enemies. Head towards the next path on the left to go up another flight of winding stairs.
- Then, once on top, the player must continue to find a closed gate. From here, the player must shine the Umbral Lamp on the gap on the right to find a platform. Follow this platform while shining the Umbral Lamp to reach the next platform.
- Afterward, on this platform, the player must go up the set of stairs ahead on the left. On top, go to the left, where the player will encounter another enemy. Head up another small flight of stairs, then the next small set of stairs on the right. Here, the player will face a couple more enemies.
- From here, the player must head out of the structure through the opening on the right. Here, the player will encounter more enemies. Head to the opposite side of the platform to find another small flight of stairs. Head up the stairs, follow the path on the left, and go up another small set of stairs. Once on top, the player will face an enemy.
- Next, once the enemy is dealt with, the player must continue on the path and pass through the arch. Once through, go up the flight of stairs on the right to head inside a building. Here, the player will encounter an enemy on the balcony on the right. From the stars, the player must head to the left to find some wooden crates in the corner. Break the wooden crates to reveal a glowing item.
- Lastly, the player must now approach the glowing item and interact with it. Once that is done, the player will farm two more pieces of Large Deralium Shards!
#3: Near a Dead Body
The player can find the last set of Deraliums of the Abbey of the Hallowed Sisters area near a dead body in the latter parts of the area. To farm these Deraliums, the player must perform the following:
- First, the player may begin from where the previous Large Deralium Shards are found. From here, the player must follow the hallway on the left. Midway through, the player will face an enemy.
- At the end of the path, the player must pass through the arch and follow the next path on the right. After a small set of stairs, the player can find an Umbral Flowerbed. The player can plant a Vestige Seedling here.
- Then, once that is done, the player must head back slightly and head to the next path on the left. Here, the player will find a lot of lit candles and a large door on top of a small flight of stairs. Approach and open the large door, head inside, and descend another set of stairs.
- Next, after doing so, the player will reach a large hall. Head straight towards the altar ahead and interact with the Rune of Adyr. Once that is done, the player will face the Rapturous Huntress of the Dusk boss. The player must now eliminate this boss to continue.
- Afterward, once the Rapturous Huntress of the Dusk boss is dealt with, the player must head to the left side of the room and pass through the arch. Here, go up the stairs to the top, then enter the arch on the right. Once through, follow the path on the right to go around the room and, on the other side, pass through the arch to continue.
- After that, the player must head straight and go up another flight of stairs. Once on top, the player will encounter a couple of enemies. Head up another set of stairs on the left, then, on top, follow the next path on the left. Here, the player must pass through the arch on the right and then the next arch on the left.
- Following that, the player will then reach the outside. Also, the player will face a couple of enemies in the area. Follow the next path on the right to head down some stairs, and then, at the bottom, continue heading straight. At the end of the path, the player will see a dead body near the wall with a glowing item.
- Finally, the player must go near and pick up the glowing item. After doing so, the player can obtain two pieces of Large Deralium Shards!
Location 16: The Empyrean
The player can go to only one place in The Empyrean area to find a Deralium. To get this upgrade material, the player must go to the following area:
#1: Near a Large Statue
The player can pick up some Deraliums close to a huge statue in the first few rooms of The Empyrean area. To find them, the player has to execute the following:
- The player can start from the Vestige of Iorelo the Cursed Knight in The Empyrean area. From the Vestige, the player has to head to the left and interact with the door to open it.
- After that, the player must pass through the doorway and proceed straight on the path. The player must go up a wide set of stairs to find a large statue. Approach the large statue, which has a lot of wooden crates and barrels. The player will find a glowing item at the end of the wooden objects.
- Lastly, the player can now approach the glowing item and pick it up. Finally, the player will get one piece of Large Deralium Shard!
Location 17: Bramis Castle
The player can head to three places to farm some Deraliums in the last location in the game, the Bramis Castle area. For these, the player has to head to the following places in question:
#1: Inside a Chest
The player will be able to farm a lot of Deraliums inside a chest in the middle of the area. To find these upgrade materials, the player must do the following:
- First, the player can begin from the Vestige of the Bloody Pilgrim in the middle of Bramis Castle. From the Vestige, the player must head to the path in front of the Vestige. Here, the player must head up the small flight of stairs on the right.
- The player must go up another small set of stairs on the left. Once on top, head up the two flights of stairs on the left and, on top, continue heading straight to go up another set of stairs. After doing so, the player will encounter a couple of enemies.
- Next, here, the player will find two openings ahead. Head through the arch on the left and follow the path inside to go up a small flight of stairs. The player can find an Umbral Flowerbed to plant a Vestige Seedling through the next arch on the left.
- After that, from the Umbral Flowerbed, the player must head to the narrow path on the left. At the end of this path, drop down the ledge and, upon landing, continue heading up the stairs. At the top, break the wooden barricade, and the player will face an enemy.
- Afterward, from the top of the stairs, the player has to take the next arch on the left. From here, follow the next path on the right, where the player will encounter several enemies midway. Go towards the next opening on the left and up several small flights of stairs. Near the corner on the right, the player will find a chest.
- Finally, the player must go near and interact with the chest to open it. Once that is done, the player will pick up eight pieces of Small Deralium Fragments, three pieces of Regular Deralium Nuggets, and two pieces of Large Deralium Shards.
#2: Near Some Ruiners
The player can get another upgrade material a little bit later than the previous Large Deralium Shards. The player has to perform the following to get this Deralium:
- The player can begin from where the previous two pieces of Large Deralium Shards were found. From here, the player must head back to the hallway and continue on the path. At the end of the path, follow the path on the right, where the player will face a lot of enemies.
- Then, after dealing with the enemies, the player must approach the lever on the right and interact with it. Once that is done, drop down from the ledge and, upon landing, head down the small set of stairs ahead. Go around the hole in the ground, head up the small flight of stairs on the other side, then go up another set of stairs on the left or right.
- After that, once on top, the player must go around the structure to head up the spiral flight of stairs. Here, pass through the next arch on the left and follow the path on the hallway on the left. While on this path, the player will face a couple of enemies. At the end of the path, the player must cross the bridge on the left, where there are more enemies.
- Following that, on the other side, the player must approach the bookshelf on the right. Here, interact with the glowing item to get the Royal Key. With this item, the player must head back, cross the bridge again, and follow the path on the right. At the end of the path, pass through the arch on the right and continue going up the stairs.
- Next, at the top, the player must approach and interact with the door on the left to open it using the Royal Key. Go through the door and follow the path on the left. While on this path, the player will go up several small stairs. Follow the path on the left once through the arch at the end.
- Afterward, while on this path, the player has to go up another wooden flight of stairs on the left. At the top, keep following the path, and the player will encounter several enemies. Head outside through the next opening on the left and go down the wooden stairs.
- Then, at the bottom, the player must follow the path on the right. At the end of the path, drop down from the ledge and land on the broken scaffolding to break the fall and lessen the damage. Continue on the path where the player will face two Ruiner enemies. After dealing with the enemies, approach the corner before the next path on the left. Here, the player will find a glowing item.
- Lastly, the player can now approach and interact with the glowing item to pick it up. Finally, the player will acquire one piece of Large Deralium Shard afterward.
#3: On a Lone Platform
The player can farm the last Deralium that the player can pick up on a small platform a little farther than the last Large Deralium Shard. To acquire this final Deralium, the player must execute the following:
- First, the player can start from the location of the previous Large Deralium Shard. From here, the player must continue following the path and break the wooden obstructions to pass through a doorway. Inside, head down the small flight of stairs, then head down the next ramp on the right.
- Next, after doing so, the player will reach the king’s bedroom. From the ramp, the player must go to the large doorway on the right to reach a balcony that overlooks the previous large hall.
- After that, the player must cross to the Umbral Realm to continue. Once done, the player will find a platform below on the left shaped like a hand. Jump towards down this platform and soulflay the target just ahead of it to release another platform. Jump toward the newly-released platform and take the path on the right to get to another platform shaped like a hand. Here, the player must head down using the top of the crystal to find a path with an opening.
- The player must keep following this path, leading to a narrow path that leads down. In the middle of the path, the path will divide into two. If the player takes the path on the right, the player will find an Umbral Flowerbed to plant a Vestige Seedling. However, to continue, the player must take the path on the left.
- Then, at the end of the path, the player will get the area outside. Upon exiting, the player must head slightly forward to find a tall set of stairs on the left with an enemy on top. On the right, the player will find a short flight of stairs with a broken floor where there is another enemy.
- Afterward, after all the enemies are dealt with, the player must head towards the short set of stairs with the broken platform. On the edge of this platform, look down to find a small concrete platform with a glowing item on top.
- Finally, the player must jump and drop towards this small platform, go near, and pick up the glowing item. Once that is done, the player will get the final one piece of Deralium Chunk!
Conclusion
Embarking on the journey through Lords of the Fallen’s challenging world requires more than just skill; it demands strategic upgrades to overcome the formidable adversaries that lie ahead. In the quest for victory, the importance of Deralium cannot be overstated. In a world where upgrading is synonymous with survival, farming for Deralium is indispensable.
With this guide, players know where and how to obtain Deralium and the strategic insights necessary to forge a path to victory in the unforgiving landscapes of Lords of the Fallen. May your journey be marked by upgraded weapons, shields, and catalysts as you face the challenges that await all over Mournstead.