Learn how to fix the Return 6: Scratch – Come Up With a New Plan bug in Alan Wake 2!
One of the gaming world’s most-awaited sequels is finally here! Remedy Entertainment’s Alan Wake 2 is a survival-horror game released in digital stores on October 27, 2023, for the PlayStation 5, Xbox Series X and S, and PC. Even with beloved games, bugs on fresh releases are not uncommon.
One reported bug in Alan Wake 2 is in Return 6: Scratch. This is the sixth chapter of the story of Saga Anderson in the game. Several players have reported that they get stuck during this chapter.
This guide will discuss how to fix the bugs in Return 6: Scratch in Alan Wake 2. We will look at the possible causes and fixes for the common bugs in this part of the game. So, get ready to reach the end parts of the beloved game Alan Wake 2!
Return 6: Scratch Bug Fix #1
Some players have reported a certain method that bypasses this bug. It is important to mention that even though many players reported that this method works for them, some also said it did not. So, set your expectations. The player must perform the following to try out this method:
- First, the player must load the game after the fight against Scratch. From here, the player must head straight to Ilmo and talk to him. The player must go through all of the dialogue with Ilmo. At this point, the player mustn’t try to access the Mind Place and the Case Board after speaking with Ilmo.
- Then, after speaking with Ilmo, the player must head to the sheriff’s room. Here, the player must talk to Casey and Estevez. The player must go through all of the dialogue with Casey and Estevez. Again, after speaking with Casey and Estevez, the player should not attempt to access the Mind Place and the Case Board.
- Following that, the player must get the prison cell key from Estevez. With the prison cell key, the player must head to the cell with papers and collect all the clues inside. Here, the player will collect three clues.
- Next, once the player has obtained the three clues, the player can now access the Mind Place and Case Board. The player should see the “Wake Attacked” clue. This is when the bug should occur. This should open a new case file called ‘Wake and the Clicker.’ However, the bug will not create the new case file.
- After that, the player must place the “Wake Attacked” clue on the board alongside the other clues related to this case. The player mustn’t change the current case to a different case. Changing the current case will make it disappear, which is something we do not want to happen.
- Then, after the player has placed all the relevant clues, the player will unlock the option to profile Tor. The player must then switch to the Profiling tab and profile Tor. Again, the player must not alter the current case. After profiling Tor, the player will receive another clue. The player should now place the newly unlocked clue on the case board. Once that is done, a new objective called “Ask Estavez about the Clicker” will appear. The player must now speak with Estavez. After doing so, the player will receive another clue.
- Afterward, the player must now place the new clue on the board. After doing so, the player will unlock another Profiling option for Tor. The player will receive the final clue after profiling Tor.
- Next, the player must place the final clue on the case board. Once that is done, the player will receive the next objective, “Share the plan with Casey and Estevez.”
- Finally, the player can talk to Casey and Estevez and proceed to the next chapter!
Return 6: Scratch Bug Fix #2
If the method above doesn’t work, all hope is not lost. The player can try another method. For this, the player must execute the following:
- First, the player must travel to the Cauldron Lake area.
- After that, the player should travel back to the Bright Falls area.
- Then, once that is done, the player must rewatch the profiling with Tor.
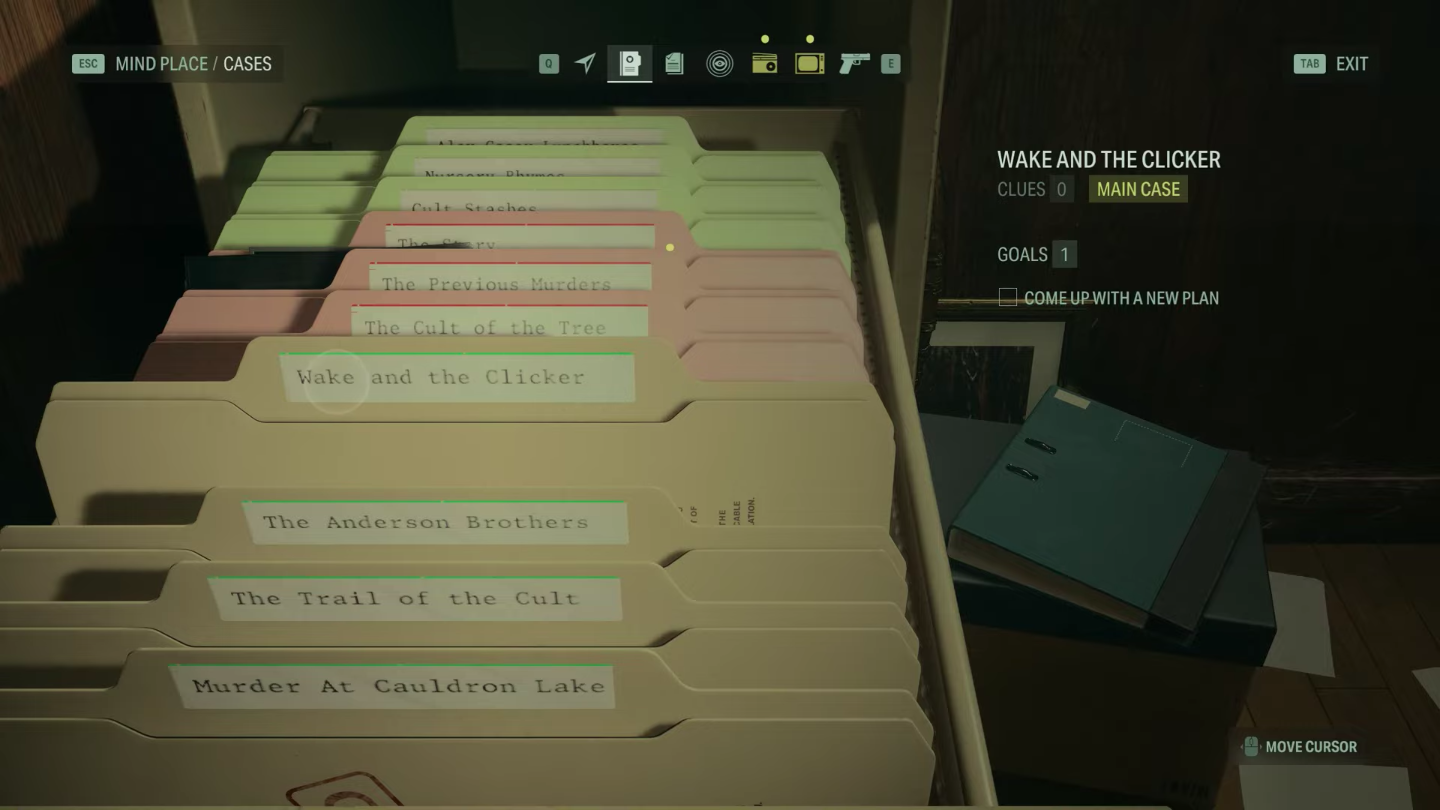
- Following that, the player must check the cases folder in the Mind Place. The player will then find a new item to add in a case called “Wake and the Clicker.” This will happen even though there is no indication of anything new.
- After doing so, the player can now talk to Estevez and continue the mission!
Related: How To Get Into Room 108 in Alan Wake 2
Return 6: Scratch Bug Fix #3
If all else fails, there is one more method that the player can do. For this last method, the player can update Alan Wake 2 on the player’s selected platform. Out of all the bug fixes mentioned, updating Alan Wake 2 is the most surefire way of getting rid of the Return 6: Scratch – Come Up With a New Plan bug. In Alan Wake 2’s tenth update, the game’s developers have fixed the progression blocking in the Scratch (A New Plan) mission and more than a hundred other fixes. The developers released this update last November 9, 2023.
Alan Wake 2 is available on Windows PC, PlayStation 5, and Xbox Series X or S. The player must do the following on their chosen platform to update Alan Wake 2 to its most recent version:
PC
Players can only buy and play Alan Wake 2 from the Epic Games launcher. Because of that, the player can only update the game from the Epic Games launcher. However, there is no way for the player to update Alan Wake 2 or any other game manually. The player can only turn on auto-update for the games to update them once a new update is released. To turn the auto-update for Alan Wake 2, the player must do the following:
- First, the player must open the Epic Games launcher.
- Then, once it is open, the player must press the ‘Library’ tab on the upper left side of the window. This tab is below the ‘Store’ tab and the Epic Games logo.
- Next, once that is done, the player must press the three dots next to the title of Alan Wake 2. This is on the bottom right of the Alan Wake 2 game cover.
- After that, the player must select the ‘Manage’ option on the prompt that appears. This is below the ‘Add To Collection’ or ‘Uninstall’ options.
- Following that, on the window that pops up, the player will find ‘Auto-Update’ below ‘Verify Files.’ The player must now toggle the switch of the ‘Auto-Update’ feature on the right side of the window.
- Finally, once the ‘Auto-Update’ function is one, the player’s copy of Alan Wake 2 will start updating if it is not already the most recent version!
PS5
The player can automatically or manually update their games on the PlayStation 5. Here is how to do both of them:
Manual Update
To manually the player’s games, like Alan Wake 2, the player must do the following:
- First, the player must turn on their PlayStation 5.
- Once the Sony console is up and running, the player must ensure the PlayStation 5 is connected to the internet. For this, the player must select the settings icon near the upper right corner of the screen. This is just beside the time and the player’s icon. In the settings menu, navigate to ‘Network’ and press the appropriate button to open it. In this screen, the player will see if the console is connected to a network, if the network is connected to the internet, and if the console is signed in the PlayStation Network. Below it, the player can also select ‘Test Internet Connection’ to check the upload and download speeds, NAT type, and other network information.
- Then, once the console is connected to the internet, the player must head back to the home screen. In the games library, players must manually navigate to Alan Wake 2 or any game they want to update.
- After that, while the selector is on the icon for Alan Wake 2 or any other game the player wants to update manually, the player must press the ‘Options’ button on the PlayStation 5 controller.
- Next, after doing so, a drop-down menu will appear. The player must select this menu’s ‘Check for Update’ option. This is the very first item on the drop-down menu.
- Afterwards, the console will check for Alan Wake 2’s update online. Once it finds the update, the player must select the ‘Go to Downloads/Uploads’ option. Doing so will bring the player to the ‘Downloads/Uploads’ screen.
- Following that, the player will see that the PlayStation 5 will start downloading the update for Alan Wake 2 or any other game selected. It is important to note that this may not start downloading if the player does not have enough storage on the console.
- Lastly, once the download is done, the PlayStation 5 will install the update for Alan Wake 2 or the other selected game. Finally, once the installation is complete, the player can play the updated version of Alan Wake 2. Now, the player can progress through a bug-free ‘Return 6: Scratch – Come Up With a Plan’.
Automatic Update
With the Automatic Update feature turned on, the player’s PlayStation 5 will regularly check the internet to see if the player’s games have an available update. If they do, the player’s console will automatically download and install the updates for the player.
The player must do the following to turn on the Auto-Update feature in the PlayStation 5:
- First, the player must turn on their PlayStation 5.
- After that, once the PS5 is up and running, the player must navigate to the settings icon near the upper right corner of the screen and press the appropriate button to open the settings menu. This is located right next to the time and the player’s icon.
- Following that, in the settings menu, the player must navigate to the ‘Saved Data and Game/App Settings’ option. The player may have to scroll down a bit to find this option. This is below the ‘Accessories’ option and the ‘Voice Command (Preview) option. Once highlighted, the player must press the appropriate button to select it.
- Next, on this menu, the player must scroll down to the ‘Automatic Updates’ tab on the right. This tab is below the ‘Game Presets’ tab and above the ‘Spoiler Warnings’ tab.
- Then, while on this screen, the player must turn on the ‘Auto-Download’ feature. With this feature, the player’s PlayStation 5 will automatically download the updates of all the player’s games if they become available. Also, the player must turn on the ‘Auto-Install in Rest Mode’ feature on this tab.
- With this feature, the player’s PlayStation 5 will install all downloaded updates while the console is in rest mode. However, it is important to remember that this function will close the game if the game about to be updated is currently open and in use while in rest mode. Because of that, save your game before putting the PlayStation 5 on rest mode.
- Afterward, the player must head back to the main screen of the settings menu. For this, the player must press the appropriate back button two times.
- Following that, once back in the settings menu, the player must navigate to the ‘System’ option and press the appropriate button to select it. This is below the ‘Family and Parental Controls’ and ‘Storage’ options.
- Next, in the ‘System’ menu, the player must navigate to the ‘Power Saving’ option on the left. This option is below the ‘Remote Play’ and ‘Web Browser’ options.
- Then, while on this menu, the player must navigate to the ‘Features Available in Rest Mode’ option and press the appropriate button to select it. This is the middle option below the ‘Set Time Until PS5 Enters Rest Mode’ option.
- Afterward, on this screen, the player can choose the features they want to work on when the PlayStation 5 is in rest mode. However, it is important to note that the more features the player enables when in rest mode, the more power the console will use up while in rest mode. The player must turn on the ‘Stay Connected to the Internet’ function on this screen. Enabling this function will allow the player to continue downloading update files and content while the PlayStation 5 is in rest mode.
- Finally, the player’s PlayStation 5 will automatically download and install updates!
Xbox Series X or S
Like on PlayStation 5, players can update their games on the Xbox Series X or S manually or automatically. For these, the player must perform the following:
Manual Update
To update Alan Wake 2 or any other game manually, the player must do the following on their Xbox Series X or S:
- First, the player must turn on their Xbox Series X or S.
- Then, once the console is up and running, the player must ensure that the Xbox Series X or S is connected to the internet. To check, the player must head to the console’s settings menu. To do that, the player has to navigate to the cog icon in the Xbox Series X or S’s home screen. Once highlighted, the player has to press the appropriate button to open it.
- Alternatively, the player can press the illuminating Xbox button on the player’s controller. A pop-up window will then appear on the left. The player can scroll down to the ‘Settings’ option from here. This is right below the ‘My games & apps’ option and above the ‘Game Pass’ option. To open it, the player must press the appropriate button.
- After that, in the settings menu, the player must be in the ‘General’ tab and select the ‘Network settings’ option. This is the first option in this tab on the left of the ‘Personalization’ option and above the ‘TV & display options.’ In the ‘Network settings’ screen, the player can navigate to the ‘Test network connection’ option.
- This is the second option on the screen below the ‘Set up wireless network’ option and above the ‘Test remote play option. Once the option is highlighted, the player has to press the appropriate button to open it. Upon doing so, the player’s Xbox Series X or S will test the network connection and show various information.
- Next, the player must return to the console’s home screen and the ‘My games & apps’ section. For this, the player can navigate to this option on the lower left side of the player’s home screen. Once highlighted, the player must press the appropriate button to open it. Alternatively, if the ‘My games & apps’ option is not on the player’s home screen for some reason, the player can press the Xbox button on the player’s controller. After doing so, a pop-up window will slide in from the left. The player can select the ‘My games & apps’ option on this window. This is right below the ‘Home’ and Settings’ options.
- Following that, once in the ‘My games & apps’ menu, the player has to scroll down to the ‘Manage’ option on the tab on the left. This is at the bottom of the options below the ‘Full Library’ option.
- Afterwards, while in the ‘Manage’ tab, the player must navigate to the ‘Updates’ option. This option is on the right of the ‘Queue’ option and above the ‘Free up space’ option. Once highlighted, the player must press the appropriate button to open it.
- Then, in the ‘Updates’ screen, the player’s Xbox Series X or S will start scanning the internet to see if updates for the player’s games are available. Once the scanning is completed, the player can select ‘Alan Wake 2’ or any other game they want to update.
- After that, the console will start downloading the updates, and once that is done, the updates will install. Finally, the player can play a bug-free ‘Return 6: Scratch – Come Up With a Plan’ in Alan Wake 2!
Automatic Update
The player can also turn on an automatic update feature in their Xbox Series X or S. With this function; they will not have to go through the steps mentioned above to update Alan Wake 2 or any of the player’s other games. To turn on the automatic updates feature in the Xbox Series X or S, the player must execute the following:
- First, the player must turn their Xbox Series X or S on.
- Following that, once the Xbox is up and running, the player must go to the console’s settings menu. To do so, the player must navigate to the cog icon on the home screen of the Xbox Series X or S. To open it; the player must first highlight it and then press the appropriate button. Again, the player can press the Xbox button on the controller as an alternative.
- On the left, a pop-up window will appear. The player can now scroll down to the ‘Settings’ option. This is below the ‘My games & apps’ option and above the ‘Game Pass’ option. The player has to hit the appropriate button to open it.
- Then, in the settings menu, the player must scroll down to the ‘System’ tab on the left. This tab is below the ‘Account’ tab and above the ‘Devices & connections’ tab. In the ‘System’ tab, the player must navigate to the ‘Updates’ option. This option is below the ‘Console info’ and ‘Language & location’ options. Once the ‘Updates’ option is highlighted, the player must press the appropriate button to select it.
- Afterward, in the ‘Updates’ screen, the player must scroll down to the ‘Keep my games & apps up to date’ function. This function is at the bottom of the list below the ‘Keep my console up to date’ function. Once the ‘Keep my games & apps up to date’ feature is highlighted, the player must press the appropriate button to turn it on. With this feature, the player’s Xbox Series X or S will automatically download and install updates for games and apps in the background.
- Next, the player must press the appropriate button to return to the settings menu’s main screen. From here, the player must navigate to the ‘General’ tab on the left. This tab is on the list above the ‘Account’ option. In the ‘General’ tab, the player must navigate to the ‘Power options’ option. This option is below the ‘Online safety & family’ option and on the right of the ‘Volume & audio output’ option. Once highlighted, the player must press the appropriate button to open it.
- After that, in the ‘Power options’ screen, the player must navigate to the ‘Customize power options’ option. This option is right above the ‘Turn off console’ options. Once highlighted, the player must press the appropriate button to open it.
- Following that, in the ‘Customize power options’ screen, the player has to navigate to the ‘When the console is off, turn off storage’ feature. Here, the player must ensure this feature does not have a checkmark. Otherwise, with this feature on, the player’s Xbox Series X or S will not download and install updates while the console is turned off.
- Finally, the player’s Xbox Series X or S will automatically download and install updates for Alan Wake 2 and all of the player’s other games!
Conclusion
In wrapping up this guide on fixing the “Return 6: Scratch – Come Up With a New Plan” bug in Alan Wake 2, remember that troubleshooting game issues often demands patience and persistence. While encountering bugs can be frustrating, exploring various troubleshooting steps, such as verifying game files, checking for updates, or contacting the game’s support team, can often lead to a resolution.
Embracing these solutions and remaining vigilant for patches or community-developed fixes can help overcome this obstacle. This will ensure a smoother and more enjoyable experience within the enigmatic world of Alan Wake 2.