Learn how to find the Stag Station in the Queen’s Gardens in Hollow Knight!
Hollow Knight, a Metroidvania action-adventure game from Team Cherry, recounts the adventures of an unnamed warrior known as the Knight as they move through Hallownest. The kingdom is now in ruins due to a mysterious infection.
The Knight can acquire new items, abilities, spells, and charms as the Knight progresses through Hallownest, aiding the Knight in navigating the various sections and taking down foes.
In the game, the Knight can fast travel to different areas in Hallownest with the help of the Last Stag and Stag Stations.
Stags were once employed to move products and bugs around the country via the Stagways, a network of tunnels throughout Hallownest that used Stag Stations to connect various locations during the height of the kingdom of Hallownest.
Travel through the Stagways disappeared after Hallownest fell, and most Stag Stations were shut down. At present, The Last Stag, a huge stag beetle, is the last of his kind in Hallownest.
There is a Stag Station in almost every area in Hallownest, and most Stag Stations require turning on a toll booth using Geo.
A nearby bell must be struck with the Nail to call the Last Stag once a Stag Station has been unlocked. Additionally, this must be done at any time at any Stag Station other than the recently used one.
In this guide, we will discuss finding the Stag Station in the Queen’s Gardens in Hollow Knight!
Queen’s Gardens Stag Station in Hollow Knight

The Stag Station in the Queen’s Gardens can be found on the left side near the middle of the Queen’s Gardens area map.
Getting to this Stag Station may look easy, based on the map, but the Knight would have to go around the northern part and then towards the western part of the map as the main entrance to the Stag Station is closed.
The Knight will run into various foes in the Queen’s Gardens. On the route to the Stag Station, the Knight will run into Oomas, Uomas, Spiny Husks, Fool Eaters, Mossflies, Mantis Petras, Mantis Traitors, and Loodles.
Before the Knight can head to the Queen’s Gardens and find the Stag Station, it is required that the Knight has the Isma’s Tear ability, which allows the Knight to swim in pools of acid, the Mantis Claw ability, which allows the Knight to cling to walls and jump off of them, the Mothwing Cloak ability, which allows the Knight to perform a horizontal dash forward, and the Monarch Wings ability, which allows the Knight to perform a secondary jump in mid-air. With these abilities, reaching the Queen’s Gardens area and finding the Stag Station will be a piece of cake.
To find the Stag Station in the Queen’s Gardens in Hollow Knight, this is what the Knight must do (assuming this is the Knight’s first time in the area):
- Starting from the Bench in the Queen’s Station Stag Station, take the exit on the right, jump up the platforms, head to the top, and then take the exit on the left.
- The Knight has now arrived in Fog Canyon. Head upwards by jumping on the platforms, sticking to the left side of the room while heading up, and taking the next exit on the left, which is in the middle of the room. In this room, the Knight will encounter a lot of Uomas and Oomas.
- Next, head to the left, where there is a pool of acid and a wall of thorns. Drop down on the pool of acid, swim to the left with the help of Isma’s Tear ability, pass through a narrow opening below the wall of thorns, and jump towards the next platform where there is a gate, and the room will now be filled with greenery. Continue heading to the left, jump up the platforms, and take the exit on the left.
- Then, the Knight is now in the Queen’s Gardens! Head to the left, where the Knight will encounter a Spiny Husk, drop down a few platforms where the Knight will encounter a Mossfly, and continue heading to the left, where the Knight will encounter two Mossflies, a Spiny Husk, and another separate Spiny Husk.
- As the Knight continues heading to the left, you will see that part of the floor is vines filled with thorns. Jump over the thorns with the help of the Monarch Wings ability or the Mothwing Cloak ability, head to the left, then take the exit on the left.
- After that, continue heading to the left, where the Knight will encounter a Mantis Petra, drop down on the gap on the left, then head downwards using the small dropping platforms (be careful not to fall to the bottom of the room where there are thorny vines) where the Knight will encounter another Mantis Petra and another two Mossflies, then head for the exit on the bottom right of the room next to the thorny vines.
- Next, head to the right, where there are several stable and dropping platforms with vines filled with thorns on the bottom. Here, the Knight will have to defeat three Mantis Petras. Upon getting to the middle of this part of the room, the path back and to continue will be closed, and the Knight must defeat the enemies in the room to open them.
- After defeating all the Mantis Petras, head to the right where the path is now opened, drop down the gap, head to the right, drop down another gap with a closed exit on the right, drop down the gap on the left towards a dropping platform, jump towards the next dropping platform on the left but be careful not to hit the thorns on the ceiling and below on the floor, and dash towards the safe ground on the left where the Knight will encounter a Fool Eater.
- Then, dash towards the next dropping platform on the left, jump and dash towards the safe platform on the left where the Knight will encounter another Fool Eater, and jump towards the shaft on the left where the Knight will encounter another Fool Eater at the bottom.
- Next, jump and dash towards the dropping platform on the right, jump and dash towards the safe ground on the right where the Knight will encounter a Mantis Petra, jump and dash towards the dropping platform on the right, jump and dash towards the platform on the right with a lever, and strike the lever to open the path to the exit above.
- After that, jump and dash towards the platform on the right, jump up the wall on the right, head up the shaft with the help of the Mantis Claw ability where at the top on the left, wooden barriers are holding up the wall, strike the wooden barrier several times to break it and reveal a path, jump up towards the platform above, and take the exit on the right.
- Then, drop down the shaft on the right, at the bottom head to the right, jump across the thorny vines towards the slightly elevated platform on the right where the Knight will encounter a Mossfly, drop down another shaft on the right but make sure to avoid the thorny vines on the bottom of the left wall of the shaft, drop down towards the dropping platform, drop down the platform below, drop down the next shaft on the left while sticking to the left wall, land on a ledge where the Knight will run into another Mossfly, head to the left, then take the exit.
- The next room is filled with dropping platforms and thorny vines at the bottom. Head to the left and jump towards the dropping platform on the left. There, the Knight will find a Mossfly. Drop down the dropping platform below and jump towards the smaller dropping platform on the left.
- There, the Knight will encounter another Mossfly, jump towards the dropping platform above on the left, where the Knight will run into another Mossfly, and jump towards the safe platform above on the right, where the Knight will encounter a Mantis Petra.
- After that, jump towards the small dropping platform on the left, drop down the small dropping platform below, and jump towards the safe platform on the left where the Knight will encounter a Mossfly.
- Then, jump towards the small dropping platform on the left where the Knight will encounter a Mantis Petra above, jump towards the safe platform on the left where the Knight will find another Mantis Petra the left, jump towards the next small dropping platform on the left, jump towards another small dropping platform on the left, then jump towards the safe platform above on the left.
- Next, jump towards another small dropping on the left where the Knight will find another Mantis Petra, jump towards the next small dropping platform below on the left, jump towards the safe platform on the left, head to the left, head up the wall on the left just above the exit with the help of the Mantis Claw ability, and take the exit above.
- After that, jump up the small dropping platform above, jump up the platform above on the right, head to the right, jump, and dash, or perform a secondary jump across the thorny vines with the help of the Mothwing Cloak ability or the Monarch Wings ability towards the platform on the right.
- Head to the right, where the Knight will be locked in an open area and must defeat many enemies to continue. Here, the Knight must defeat a Mantis Traitor, a Mantis Petra and two Spiny Husks, a Mantis Petra and a Mantis Traitor, another Mantis Petra, a Mantis Traitor, and two Spiny Husks, then another Mantis Petra to continue.
- After defeating the enemies, head to the right, jump across the thorny vines towards the platform on the right, jump up the ledge on the right where the Knight will encounter a Mossfly, jump up the ledge on the left where the Knight will run into another Mossfly.
- Jump up the ledge on the right, jump up the ledge above on the left where the Knight will find another Mossfly, jump up the ledge above on the right, jump up the ledge above on the left, head to the left, jump and dash towards the small dropping platform on the left while avoiding the thorny vines on the floor and on the ceiling.
- Jump and dash towards the safe part of the floor on the left. Head to the left, jump up another small dropping platform above some thorny vines, and jump up the exit above.
- Then, head to the right, jump up the small dropping platform above on the right, jump up another dropping platform above where the Knight will encounter another Mossfly, and jump up the ledge above on the right where there is another Mossfly above.
- Jump and perform a secondary jump to reach the small platform above the left, jump towards the wall of the platform on the left, and head up with the help of the Mantis Claw ability, where there is another Mossfly above.
- Jump towards the platform on the right, jump up the platform above on the right where the Knight will find another Mossfly, jump up the small platform above on the left where there is another Mossfly on the left, and jump up the small dropping platform above on the right.
- Then, jump up the platform above on the left, where there is a Mossfly, and head to the left to take the exit. It is worth mentioning, however, that there is a lever that opens a shortcut near the first few rooms of the area through the exit on the top right before exiting on the left.
- Next, head to the left, where the Knight will encounter a lot of Loodles, continue to the left, up and down the slightly elevated platforms, and take the exit on the leftmost part of the room.
- After that, head to the left, where the Knight will find many more Loodles, jump up the slightly elevated platform, drop down and continue to the left, pass through a very narrow path, drop down the gap, head to the left, and drop down another gap.
- Head to the right, drop down the shaft, take the path on the right near the bottom of the shaft, jump up the slightly elevated platform where the Knight will find two Mossflies, head to the right through another narrow path, drop down the gap where the Knight runs into four Loodles in an open area, at the bottom of the area take the very narrow path on the left, and take the next exit downwards.
- Then, drop down the platform below on the right, drop down the platform below, drop down the platform below on the right where the Knight will encounter a Mantis Petra, drop down on the right, head to the right, jump up the platform above on the right, head to the right where the Knight will pass through Marmu’s, who is a warrior dream boss, totem, jump up another slightly elevated platform where the Knight will find two more Mossflies, jump and a dash or perform a secondary jump across the gap and towards the platform on the right, continue to the right towards the wall at the end of the path.
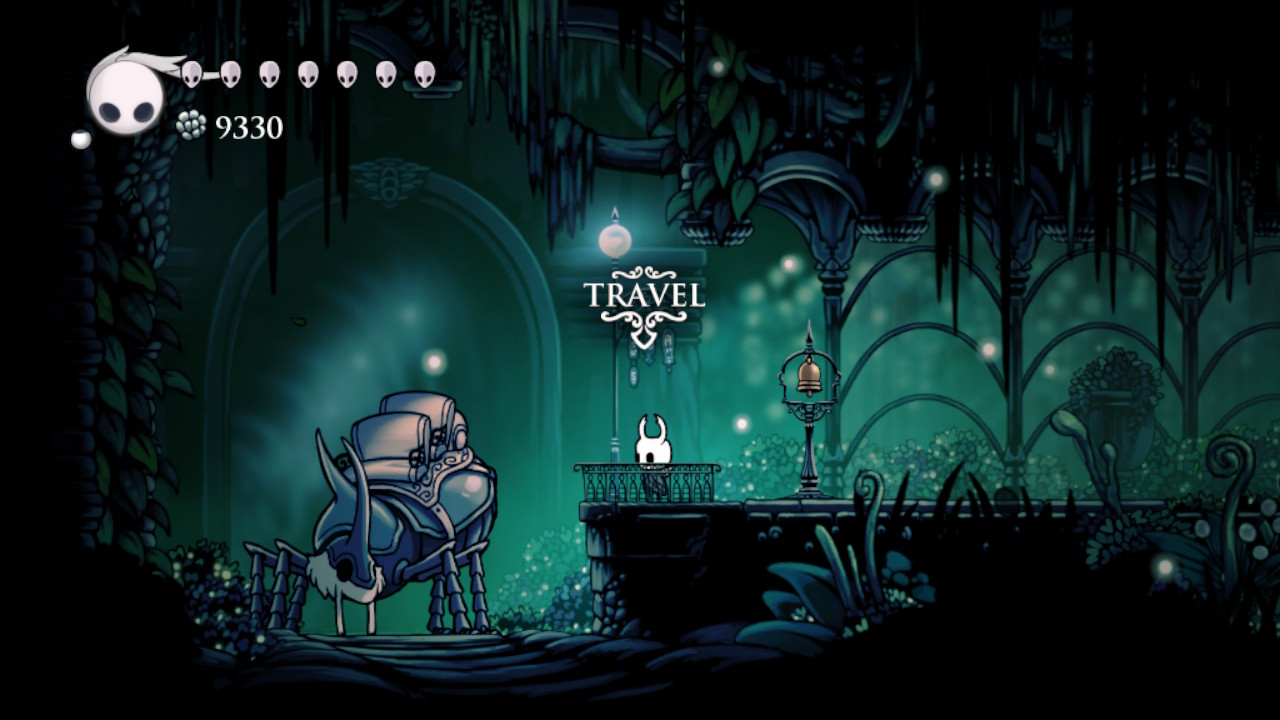
- Finally, strike the wall on the right several times to break it and pass through the newly-opened path. The Knight is now in the Stag Station in the Queen’s Gardens!
At the Queen’s Gardens Stag Station, the Knight can pay 200 Geo at the toll booth to activate the bell that can call the Last Stag.
Related: How To Leave City of Tears in Hollow Knight
Additionally, hit the switch on the right side of the Bench to open the main entrance to the Stag Station.
Now that the Knight has found the Queen’s Gardens Stag Station in Hollow Knight, the Knight is one step closer to easily traveling all across Hallownest and finding the Stag Nest, which can be done after finding every Stag Station in Hallownest!