Learn how to open the Door in the Abyss in Hollow Knight and receive a special reward.

Exploring the wonderful world of Hollow Knight is a thrilling experience. This game follows the journey of an unnamed warrior called the Knight across Hallownest. This kingdom has been devastated because of a terrible infection. In the game, exploring the Abyss can be mysterious and exciting.
One of the intriguing challenges the Knight will face is opening a door hidden within the Abyss. To open this door and access the room inside, the Knight must first have a special requirement. This guide will discuss opening the special door in the Abyss in Hollow Knight!
This door holds something special for the Knight. Here, we will explore that. Let’s delve into how to navigate this task step by step, making your adventure in Hollow Knight even more thrilling!
The Abyss
Hollownest’s lowest point is the Abyss, which lies below the Ancient Basin. The Abyss has a vast chasm populated with the shells of rejected Vessels birthed in the area. This area is the source of the Void, a substance found at the area’s lowest bottom.
According to in-game lore, an old civilization worshiped the Void from or near the Abyss. This occurred before the Hallownest kingdom’s existence. Once the Pale King arrived in Hallownest, he discovered the existence of the Abyss and the Void.
He used the Void to turn his children into Vessels once the Infection began. They are now entities born in the Abyss, each with a Void-filled shell. The Pale King sealed the Abyss after deciding on the Hollow Knight as his Vessel. The Siblings, the shades of deceased Vessels, still roam the Abyss.
There is only one way into the Abyss. However, the Knight requires one crucial artifact to enter the area: the King’s Brand. This item performs a single purpose in the game: to open the path to the Abyss. The Knight can obtain the King’s Brand from the Cast-Off Shell in Kingdom’s Edge’s easternmost region.
The Knight will only encounter a couple of enemies here. In particular, the Knight will encounter Shadow Creepers, Siblings, and Void Tendrils in the Abyss.
What is Behind the Door?
Midway down the large chasm of the Abyss, the Knight will find a door with a blue glow. Without the special requirement, the Knight cannot enter through this door. Behind this door is a challenging platforming segment filled with small platforms and spiky walls. Through the platforming segment, the Knight will be able to find an Arcane Egg and, most importantly, the Lifeblood Core Charm at the end.
Lifeblood Core Charm
The Lifeblood Core Charm gives the Knight four Lifeblood Masks– extra temporary health when sitting on a Bench. This contrasts with the Lifeblood Masks from cocoons that are permanently lost after the Knight loses them for taking damage.
So, if the Knight loses some or all of the Lifeblood Masks from the effect of this Charm, the Knight can simply sit on a Bench to get them back instead of healing. This Charm is similar to the Lifeblood Heart Charm, but the Lifeblood Core gives four instead of two Lifeblood Masks.
Like the Lifeblood Heart Charm, this Charm is advantageous if the Knight prioritizes Spells. This is because it allows the Knight to focus more of their Soul on casting Spells instead of healing. This Charm is, however, harder to acquire than the Lifeblood Heart Charm.
To equip it, the Lifeblood Core Charm requires three unused Charm Notches.
How to Open the Door in the Abyss
There is a clue about how to open this door: the blue glow and the small circles near it. The blue glow refers to Lifeblood Masks, and the small circles refer to the number of Lifeblood Masks. With that in mind, the Knight must have at least 15 Lifeblood Masks to open the door.
So, how can the Knight get a whopping 15 Lifeblood Masks? The Knight can look for Lifeblood Cocoons around the kingdom of Hallownest. An easier way, however, is doing the following:
1. Acquire the Lifeblood Heart Charm
As mentioned, the Lifeblood Heart charm increases the Knight’s health by adding two Lifeblood Masks. This Charm requires and takes up two Charm Notches.
Location
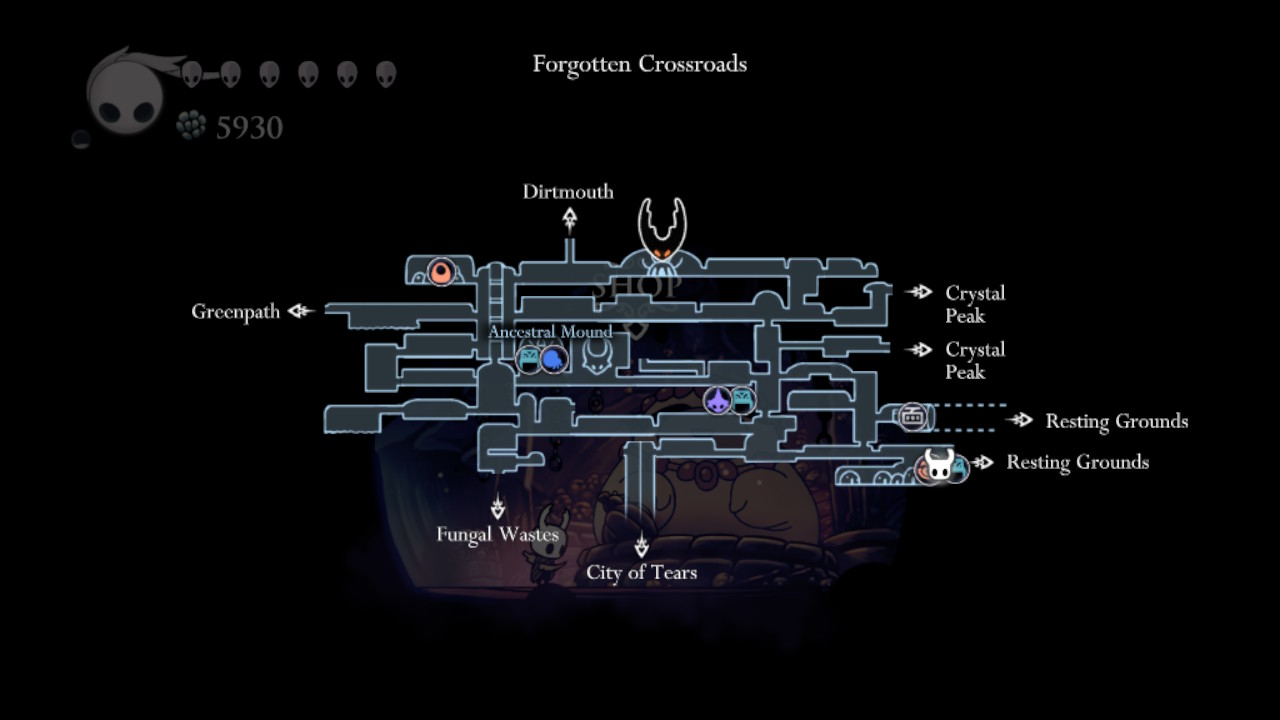
The Knight can purchase the Lifeblood Heart charm for 250 Geo from Charm Lover Salubra. The Knight can find her at the bottom right of the Forgotten Crossroads.
Requirements
There is an ability that the Knight needs to acquire first to reach Charm Lover Salubra. This required ability is the Mothwing Cloak ability. This enables the Knight to execute a horizontal dash forward. The Knight can also use the Mantis Claw ability as an alternative to the Mothwing Cloak ability. This enables the Knight to stick to walls and jump off of them.
Any of the abilities above are required because Charm Lover Salubra’s home is perched on a tall platform. Getting to Charm Lover Salubra’s home is technically feasible with none of these abilities. It would be tough, however, as the Knight must perform a Nail-bounce from an enemy in its immediate vicinity.
Enemies
The Knight must battle the Gruz Mother to find Charm Lover Salubra. This is a mini-boss encountered as the Knight heads for this journey. Apart from the Gruz Mother, the Knight will confront various opponents in the Forgotten Crossroads.
While heading to Charm Lover Salubra, the Knight will encounter the following enemies: Tiktiks, Crawlids, Gruzzers, Aspid Hunters, Goams, Vengeflies, Leaping Husks, Wandering Husks, and Husk Hornheads.
Path to Charm Lover Salubra
The Knight must complete the following to locate Charm Lover Salubra at the Forgotten Crossroads:
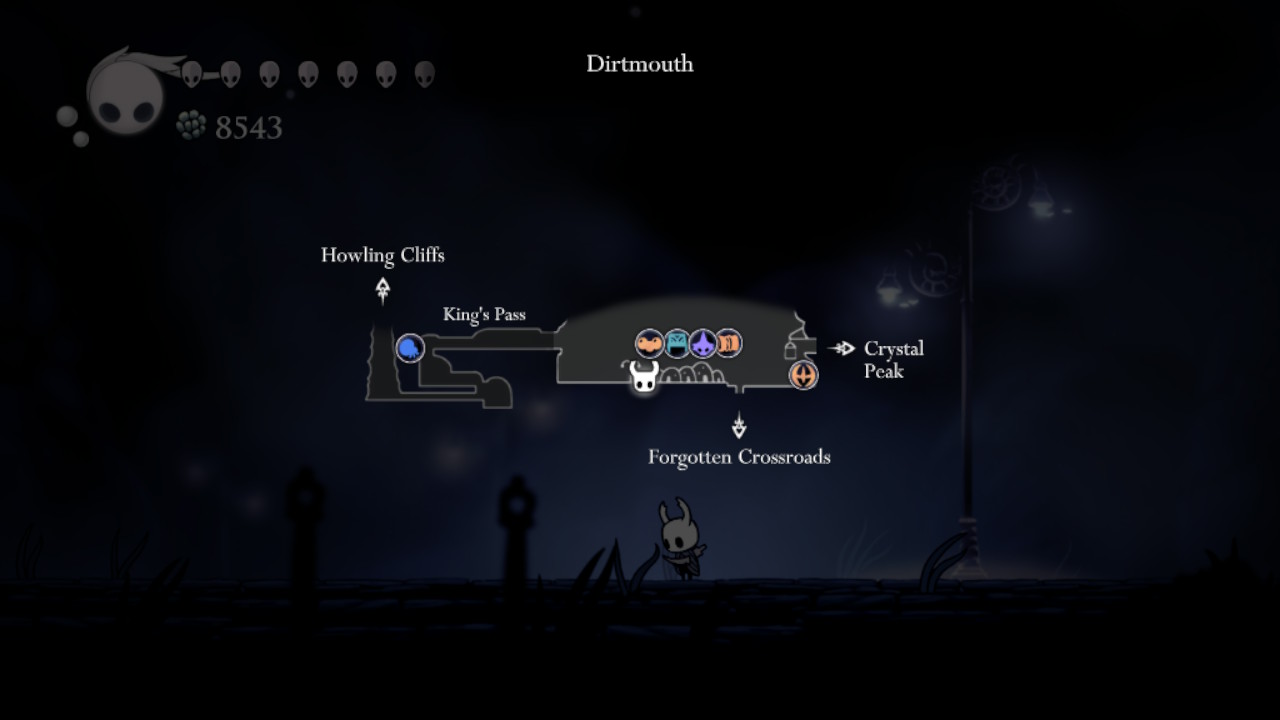
- Begin at the Bench in Dirtmouth, then turn right and descend on the well to reach the Forgotten Crossroads.
- Next, proceed to the left, where the Knight will encounter a Tiktik and a Crawlid. Exit the room on the left.
- The Knight is then in a vast room with many Gruzzers and Tiktiks. Go to the bottom of the room and exit through the path in the middle.
- Afterward, proceed to the bottom of the room and exit next to the spikes.
- Then, proceed to the right, where the Knight will encounter an Aspid Hunter. Exit the room through the bottom right corner.
- The Knight must next go to the right, passing through three Goams that continually block the road: a Vengefly and another Goam. Take the right exit out of the room.
- Keep going to the right, where the Knight will encounter additional Vengeflies and Goams. The Knight can go straight ahead on the right or slightly up the platforms. The Knight, however, doesn’t have to dodge Goams when ascending the platforms. Exit through the door on the extreme right side of the room.
- When you enter this room, jump down from the platform to encounter another Aspid Hunter. Proceed to the bottom of the room and turn right, where the Knight will come across a Leaping Husk. Take the right exit out of the room. It’s worth mentioning that a Soul Totem sits atop a platform above the Leaping Husk.
- Then, proceed to the right, where the Knight will be stuck and must defeat the Gruz Mother to proceed. To begin the battle, attack the sleeping Gruz Mother. The paths back and forth will be available after eliminating the Gruz Mother and her Gruzzers. To proceed, take the newly opened pathway on the right.
- After that, jump down the gap to find two Wandering Husks and a Husk Hornhead. Continue to the right until you reach a tall platform. A Bench and a house are located at the platform’s top.
- Lastly, jump and use the Mothwing Cloak or Mantis Claw ability to climb the wall to the platform’s top. The Knight can heal and save your progress by sitting on the Bench. The Knight will meet Charm Lover Salubra inside the house close to the Bench!
She will present herself and her Charm business when the Knight talks to Charm Lover Salubra. Then, she will ask whether those who live outside have invited the Knight to drop by and see her. She would remark that the village outside is lovely, pleasant, and vibrant.
This means that Charm Lover Salubra is oblivious that everything outside her house is in disarray. After that, Charm Lover Salubra will say that she has noticed the Knight starting their own Charm collection, and she will exhibit some of her own that the Knight can buy if they so desire.
Following the encounter with Charm Lover Salubra, the Knight can now buy the Lifeblood Heart charm for 250 Geo!
2. Acquire the Joni’s Blessing Charm
The Joni’s Blessing charm converts all Knight’s Masks into Lifeblood Masks and raises the total amount by 40%. It should be noted that the rise in Masks is dependent on the Knight’s basic Masks and the Masks added by the Fragile Heart charm or the Unbreakable Heart charm.
It does not include Masks from other charms, such as the Lifeblood Heart charm. This charm is beneficial when the player struggles to survive or when Soul is needed more to cast spells rather than heal.
These are the total number of Lifeblood Masks that this Charm gives based on the Knight’s base Masks:
| Base Masks | Total Lifeblood Masks |
|---|---|
| 5 | 7 |
| 6 | 9 |
| 7 | 10 |
| 8 | 12 |
| 9 | 13 |
| 10 | 14 |
| 11 | 16 |
The Joni’s Blessing Charm requires a whopping four Charm Notches.
Location

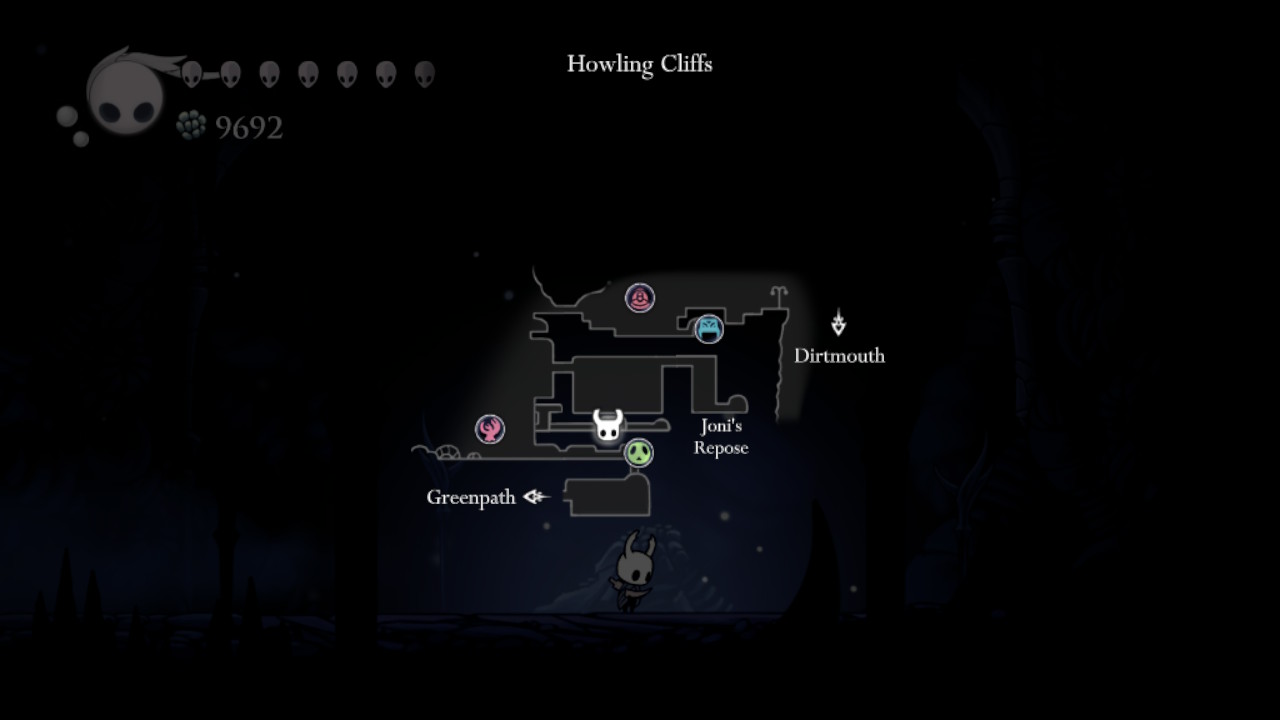
The Knight can get Joni’s Blessing charm inside Joni’s Repose on the corpse of Blue Child Joni. This area is on the eastern side of Howling Cliffs. However, the entrance to access the area is on the western side of Howling Cliffs.
Requirements
Before the Knight can head to Howling Cliffs and Joni’s Blessing charm, the Knight must have specific abilities. The first is the Mantis Claw ability, which allows the Knight to cling to walls and jump off them. The next requirement is either the Mothwing Cloak or Monarch Wings ability.
The Mothwing Cloak ability enables the Knight to perform a horizontal dash forward. Meanwhile, the Monarch Wings ability allows the Knight to perform another jump in mid-air.
The Knight must also buy the Lumafly Lantern from Sly in Dirtmouth to light up dark rooms.
Enemies
The Knight will face a variety of enemies in the Howling Cliffs. However, on the route to finding Joni’s Blessing charm, the Knight will meet the following enemies: Crawlids, Tiktiks, Vengeflies, Leaping Husks, a Husk Hornhead, and a Husk Bully.
Path to Joni’s Blessing Charm
To find the Joni’s Blessing charm in Howling Cliffs, this is what the Knight must do:
- Head to the left from the Bench in the center of Dirtmouth. When you reach the wall, use the Mantis Claw ability to jump and climb it. At the top of the wall, use the Mothwing Cloak ability to dash toward the platform or the Monarch Wings ability to conduct a secondary jump towards the next platform. Take the exit on the left.
- The Knight has returned to the game’s first area, the King’s Pass. Jump down on the next gap to the left, then go to the right. Head down the gap, go to the platforms below on the left, and to the bottom on the right of the spikes.
- After that, continue to the right of what appears to be a wall, and the Knight will be on a hidden path. Continue to the right and jump over the spikes through double jumping or dash over. Head down on the gap where the Knight will start using the Lumafly Lantern to light up the area. Go to the left, where there is a Geo Chest. This will give off the Fury of the Fallen charm rather than Geo.
- After that, proceed to the left and fall on the narrow gap. Keep going to the left, where the Knight will run into a Crawlid. Continue to the left, where the Knight will come across another Crawlid, jump over the gap, and go to the left until the Knight reaches a large area.
- Proceed to the left of what appears to be the end of the path, and the Knight will be in a hidden pathway with a Geo Deposit. Climb up the narrow shaft and exit the room at the top.
- Then, use the Mantis Claw ability to cling to the wall on the right and jump up to the next platform above. Go to the left to find a wooden structure holding up a wall. Attack the wooden structure several times to tear it down and open the path.
- Next, go to the left and up the platforms until the Knight encounters another Crawlid. Here, the Knight has arrived in Howling Cliffs! Continue on the left past Gorb the Great Mind’s tomb and pass through the gap by jumping on the small platforms, where the Knight will also encounter a Tiktik, a Vengefly, and another Crawlid. Exit the room on the left.
- Then, proceed to the left and fall on the gap where the Knight will fight another Vengefly, Tiktik, and Crawlids. Head down while remaining on the right side of the room until you reach the platform where Cornifer may be located. Exit the room on the right.
- This room requires caution because it contains little platforms with spikes underneath. Upon entering, head to the right. Jump towards the next small platform over the spikes, where the Knight will encounter a Vengefly. Keep jumping to the platforms and going to the right. Here, the Knight will come across two more Vengeflies. Head down on the gap on the right (as there are spikes on the left).
- Next, head down the gap again and proceed a bit to the right while falling to land on a small platform rather than the spikes. Here, the Knight will run into two additional Vengeflies. Keep jumping on the platforms and move to the left, where the Knight will face two more Vengeflies. Go on to the left, then jump and drop down the small platforms to go down. Here, the Knight will come across two more Vengeflies.
- After that, keep jumping on the platforms to the right, where the Knight will come across a Leaping Husk. Keep heading to the right, where the Knight will face two more Vengeflies and another Leaping Husk before reaching a narrow path with a Husk Hornhead.
- Following that, proceed to the end of the path on the right. Head up to the next platform, where the Knight will encounter a Husk Bully and a Vengefly. Get up the small platforms and continue to go up, where the Knight will run into three more Vengeflies. Keep heading up, where the Knight will come across another Leaping Husk. Exit the room on the right. It’s worth noting that the Knight can find a Soul Totem and another Vengefly on the opposite side of the exit.
- Next, proceed to the right and descend the gap, where many blue butterflies will flutter on the screen. Go to the bottom of the shaft, proceed to the right, and you will notice something shining on top of a corpse.
- Finally, inspect the glowing object, and the Knight receives Joni’s Blessing Charm!
To leave this location, return up the shaft and exit the area on the left. Proceed to the left and jump up the platform with the Soul Totem and the Vengefly on the left. The ground on the left side of the Soul Totem is breakable. Cast the Desolate Dive or Descending Dark spell to smash the ground, then head to the left to return to the first portion of the room. The Knight can then exit on the left.
3. Acquire Additional Charm Notches
To equip the Lifeblood Heart Charm and Joni’s Blessing Charm, the Knight must have six unused Charm Notches. If the Knight already has that, then great, the Knight can now equip both Charms. If not, then the Knight must get more Charm Notches.
The Knight will have three Charm Notches at the start of the game. However, the Knight will be able to gain eight more Notches as they explore Hallownest. This means that the Knight in Hollow Knight can have 11 Notches.
The Knight can find all 8 Notches in the following locations:
Notch 1-4: Charm Lover Salubra
Aside from the Lifeblood Heart Charm and other Charms, the Knight can purchase four Charm Notches from Charm Lover Salubra.
The Knight, however, cannot immediately buy Charm Notches from Charm Lover Salubra. To do that, the Knight must first have a total number of Charms and pay her some Geo. The following are the requirements and cost for the Knight to unlock each of Charm Lover Salubra’s Charm Notches:
| Requirement | Cost | |
|---|---|---|
| Charm Notch #1 | Collect a total of five Charms | 120 Geo |
| Charm Notch #2 | Collect a total of 10 Charms | 500 Geo |
| Charm Notch #3 | Collect a total of 18 Charms | 900 Geo |
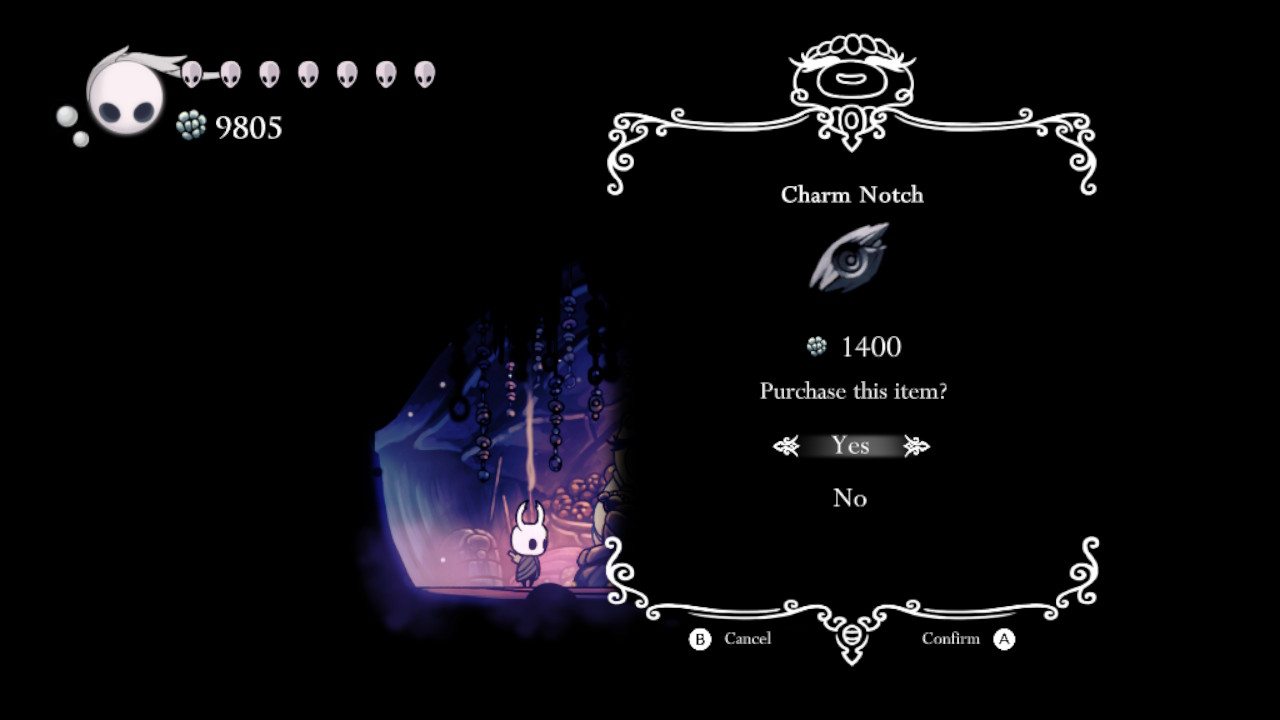
| Charm Notch #4 | Collect a total of 25 Charms | 1400 Geo |
As mentioned, the Knight can find Charm Lover Salubra in the southeasternmost part of the Forgotten Crossroads.
Notch 5: Fungal Wastes
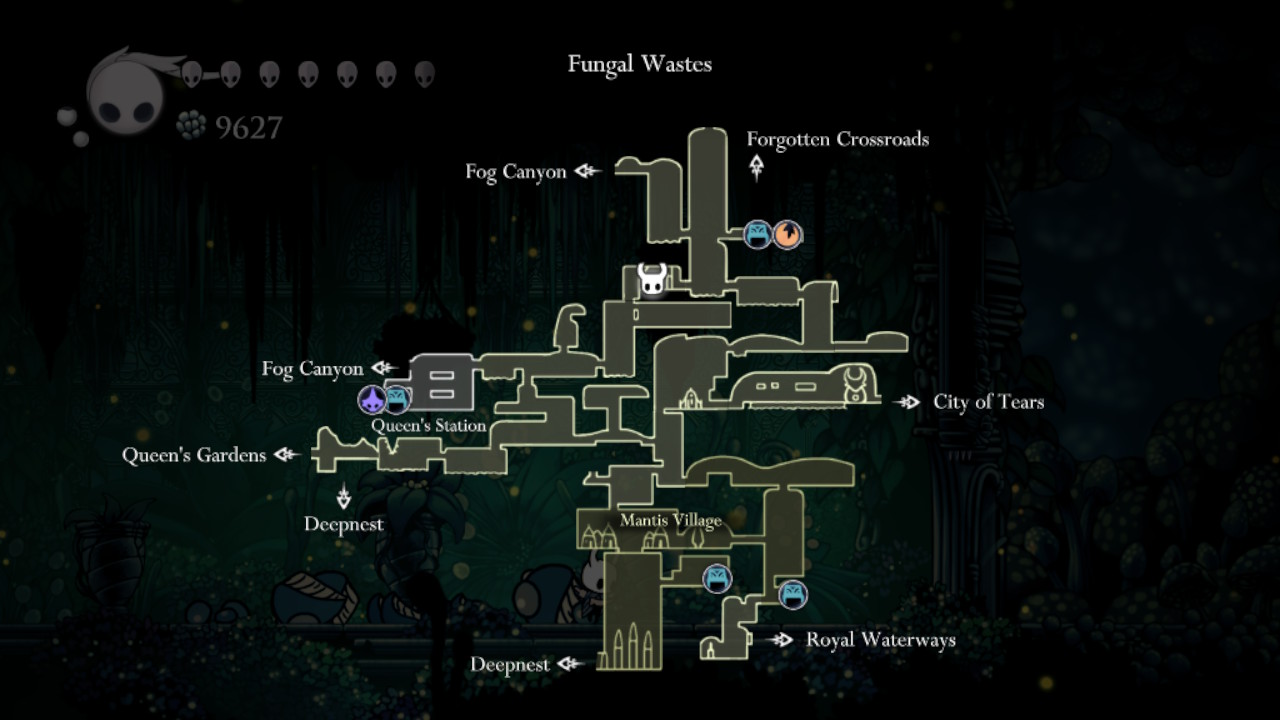
In the northern half of the Fungal Wastes area, the Knight will also locate one Charm Notch inside a room with two Shrumal Ogres.
Requirements
To find this Charm Notch, the Knight only requires one ability. This is the Mothwing Cloak ability, which allows the Knight to dash forward horizontally. Alternatively, the Knight may also use the Monarch Wings ability, allowing them to jump again mid-air.
Enemies
As previously stated, the Knight must eliminate two Shrumal Ogres to obtain this Charm Notch. Aside from that, the Knight will come across a few Shrumelings.
Notch 6: Fog Canyon
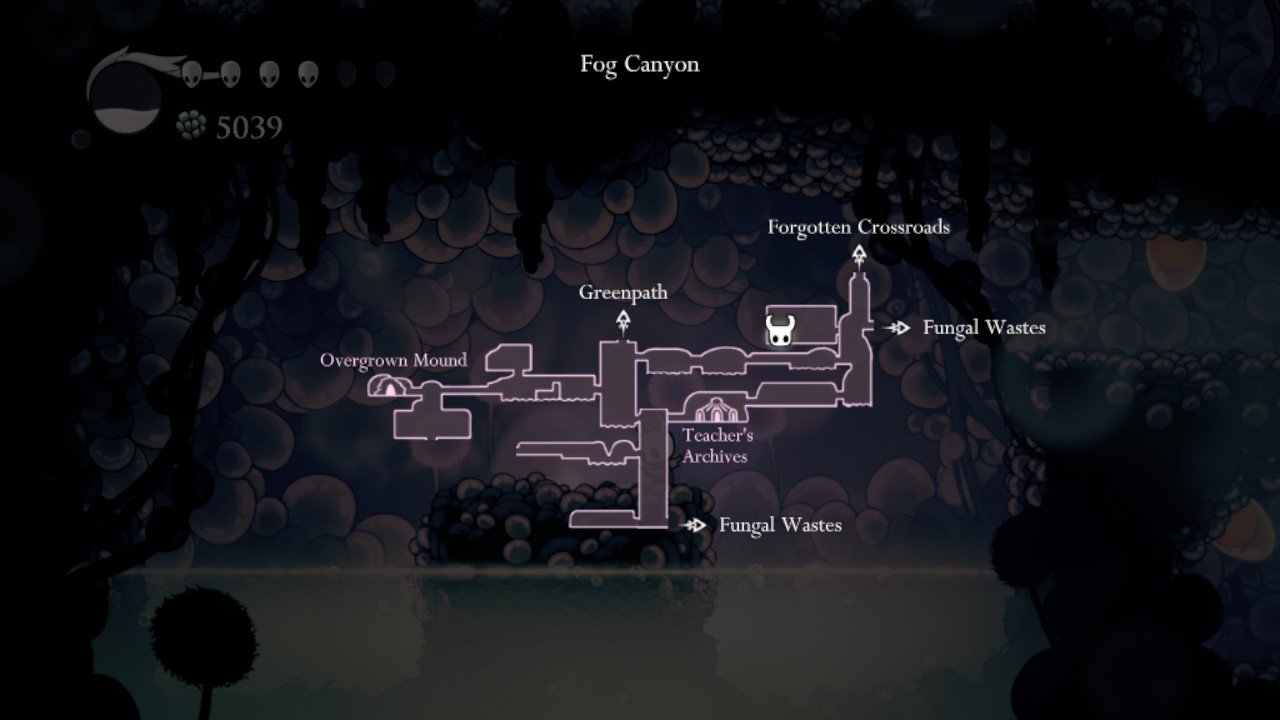
In Fog Canyon, the Knight can find another Charm Notch. This Notch is in the northeast of the area inside a hidden area. The room has a lot of Oomas, Uomas, and exploding orange bubbles on the left side.
Requirements
The Knight requires a few abilities to find this Charm Notch. The Shade Cloak ability is one of them. This allows the Knight to dash through opponents, their attacks, and Shade Gates. Another essential ability is the Monarch Wings ability, which allows the Knight to do an additional jump in mid-air.
The Mantis Claw ability, which allows the Knight to hold on to walls and jump off them, is also necessary. The Isma’s Tear ability is the final ability required for the Knight to obtain the Charm Notch. This ability enables the Knight to swim in acid pools without receiving damage.
Enemies
This Notch does not require the Knight to fight a boss. In the Fog Canyon, however, the Knight will encounter enemies such as Uomas, Oomas, and Charged Lumaflies.
Notch 7: Colosseum of Fools
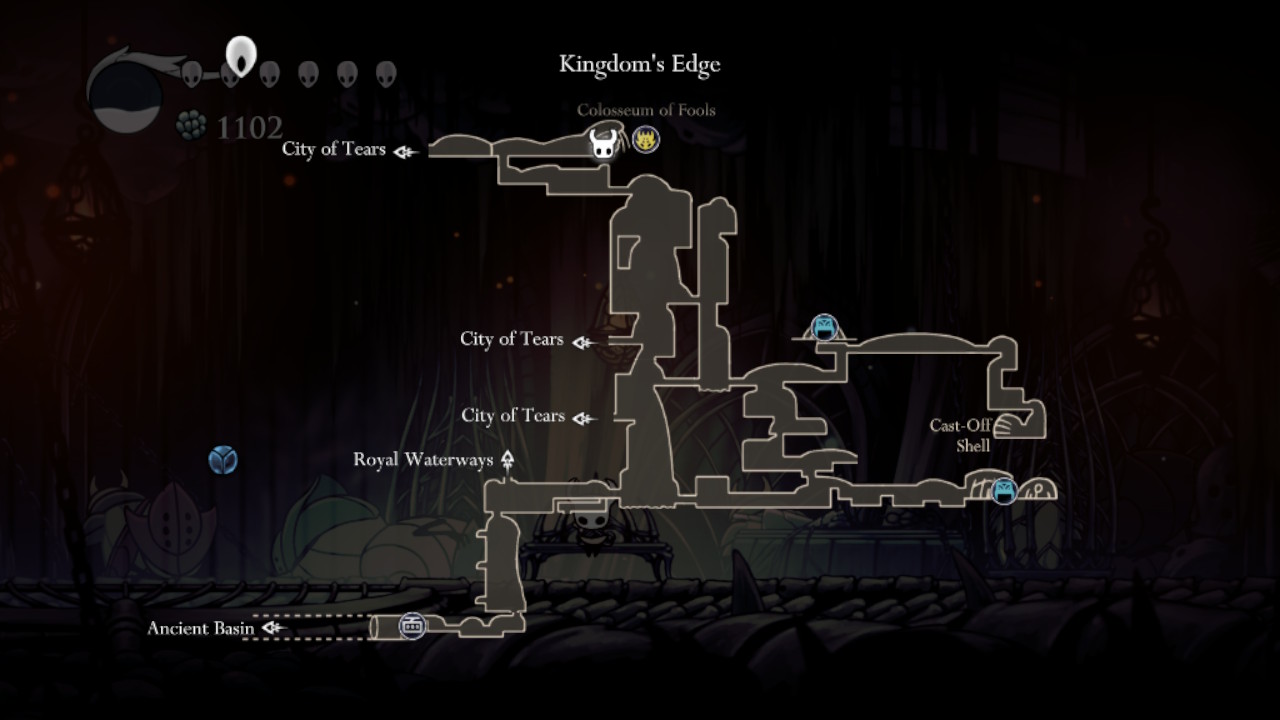
After finishing the Trial of the Warrior in the Colosseum of Fools, the Knght can obtain one Charm Notch. This location is accessed from the top of Kingdom’s Edge.
The Colosseum of Fools is where daring explorers can participate in difficult Trials. During the Trails, Warriors can put their combat talents to the test against unending waves of opponents. The Trials can be accessed through the head of this massive shell, where Little Fool handles the admittance fee. Upon entering, battles occur in the huge arena to the right of the trial boards.
Requirements
The Knight should possess the Isma’s Tear ability to reach the Colosseum of Fools. This ability enables the Knight to move around in acid pools without being damaged. Although not essential, the Monarch Wings ability can aid your journey to the Colosseum. This ability permits the Knight to jump again in mid-air.
Enemies
On the way to the Colosseum of Fools, the Knight won’t come across any bosses. During this journey, the Knight will fight the following enemies: Booflies, Primal Aspids, Belflies, and Hoppers.
Notch 8: Troupe Master Grimm
After beating Troupe Master Grimm inside the tent in Dirtmouth, the Knight can obtain a Charm Notch.
Before attempting to obtain this Notch, it is vital to understand that he can only be accessed through The Grimm Troupe DLC. The player must first download and install this free content pack to obtain this final Charm Notch.
Once that is installed, the Knight must summon the Grimm Troupe to find Grimm. To accomplish this, the Knight must light the Nightmare Lantern in the lower portion of Howling Cliffs.
Nightmare Lantern Requirement
A few abilities are required for the Knight to reach this location. The Mantis Claw ability is one of them. This ability allows the Knight to cling to and jump off vertical surfaces. The Dream Nail ability is the next requirement. The Knight can use this ability to acquire Essence and enter Dreams.
Another requirement is the Mothwing Cloak or Monarch Wings ability. The Mothwing Cloak ability enables the Knight to execute a horizontal dash. In contrast, the Monarch Wings ability allows the Knight to jump again in mid-air.
To light up, particularly dark rooms, the Knight must additionally purchase the Lumafly Lantern from Sly in Dirtmouth.
Fighting Troupe Master Grimm
To confront Troupe Master Grimm in battle, the Knight must first acquire two sets of three Nightmare Flames. After donning the Grimmchild Charm, the Knight can locate each of these Flames. Troupe Maste Grimm will bestow this Charm on the Knight. If the Grimmchild Charm is equipped, the Knight may see the precise positions of the first set of three Flames on the map. A flame icon represents their whereabouts on the map.
Grimmkins are carrying every one of these Flames. These Grimmkins are ferocious spirits who will laugh, emit flames, and fly around the Knight. The Knight must defeat them to recover the Flames that they carry.
The Knight must eliminate the Grimmkin Novices to obtain the first Flames set. These foes can be encountered in the following areas:
- On the lower left, towards the center of the Greenpath map.
- In the northwest of the City of Tears, somewhat west of the City Storerooms Stag Station.
- In the western part of Crystal Peak, near the Dirtmouth exit.
Return to Troupe Master Grimm in Dirtmouth after beating all three Grimmkin Novices. Grimm will then improve the Grimmchild and instruct the Knight to acquire three additional Flames.
The Knight must battle Grimmkin Masters to obtain the second set of Flames. They are found in the following places:
- In the center of King’s Pass.
- In the center of the Resting Grounds.
- In the lowest section of Kingdom’s Edge’s central cliff.
The Knight can now face Troupe Master Grimm after fighting all three Grimmkin Masters and gathering the Flames! To do that, simply return to their tent in Dirtmouth.
3. Acquiring More Lifeblood Masks
Once the Knight can equip both the Lifeblood Heart Charm and Joni’s Blessing Charm, this will help the Knight get a lot of Lifeblood Masks. However, there are cases when these Charms still won’t give the Knight at least 15 Lifeblood Masks.
This is because the Lifeblood Heart Charm only gives two Lifeblood Masks, and the Lifeblood Masks from Joni’s Blessing Charm depend on the Knight’s regular Health Masks. If the Knight has at least 15 Lifeblood Masks from both Charms, then great, you can proceed to the next step.
To get at least 15 Lifeblood Masks from these Charms, the Knight must have at least eight regular Health Masks. If the Knight doesn’t have enough, you have two choices: get more Health Masks or Lifeblood Masks.
Getting additional regular Masks takes too much effort compared to simply looking for obtainable Lifeblood Masks. So, only take this action if the Knight severely lacks regular Health Masks. Because of that, looking for Lifeblood Cocoons is recommended.
Getting More Lifeblood Masks
Lifeblood Cocoons are gigantic sacs that contain Lifeblood that may be found all across Hallownest. It produces 2 to 3 Lifeseeds when hit. Killing Lifeseed results in the absorption of 1 Lifeblood Mask, added to the Knight’s existing set of Masks. Which Cocoon is destroyed determines how many Lifeseeds are generated.
Upon entering any Dream or taking a seat on any Bench, all Lifeblood Masks from Cocoons are destroyed. The destroyed Lifeblood Cocoons will regenerate whenever the Knight rests on a Bench.
The unique blue plants that resemble butterflies imply that there is a concealed Lifeblood Cocoon nearby. Sometimes, the Cocoon may make hushed chirping noises to indicate it is there.
Locations
There are eight areas in Hallownest where the Knight can find Lifeblood Cocoons. The Knight can head to the following areas to find Lifeblood Cocoons and get Lifeblood Masks:
| Location | Number of Lifeblood Masks |
|---|---|
| Northwest of the tutorial area for Focus in King’s Pass | 2 |
| Northwest of the Elder Baldur inside the Ancestral Mound in the Forgotten Crossroads | 2 |
| Inside a hidden room through a breakable wall in the upper half of Greenpath. This is near where the Knight first finds the Moss Knight. | 2 |
| In the bottom of the Mantis Village in the Fungal Wastes area. This is behind a breakable wall in the upper left corner of the arena where the Mantis Lords are fought. | 2 |
| Inside a hidden part of the room in the Failed Tramway. This is north of Deepnest. | 2 |
| At the end of a hidden path near Bardoon near the upper right of Kingdom’s Edge. | 3 |
| Northwest of Fog Canyon. This is above a room with a lot of Charged Lumaflies | 3 |
| At the end of a hidden path near Bardoon near the upper right part of Kingdom’s Edge. | 3 |
4. Opening the Door in the Abyss
With the help of the Lifeblood Heart Charm, the Joni’s Blessing Charm, and the Lifeblood Cocoon locations above, the Knight can get at least 15 Lifeblood Masks! With that, the Knight can finally open the door to the Abyss!
Requirements
Before heading and attempting to open the door in the Abyss, it is important to mention that the Knight must not receive damage on the way. This is especially crucial if the Knight only has the minimum acceptable amount of 15 Lifeblood Masks.
If the Knight does take damage on the way, the Knight may have to return to a Bench to restore the Lifeblood Masks from the Charms, or the Knight may have to return to the Lifeblood Cocoons to get the Lifeblood Masks back. If the Knight has more than 15 Lifeblood Masks ready, then the Knight can have one or a few Lifeblood Masks to lose.
Enemies
On the way to the door in the Abyss, the Knight will only encounter a bunch of Shadow Creepers.
Path to the Door in the Abyss
With at least 15 Lifeblood Masks, the Knight must do the following to find and open the door in the Abyss:
- Start from the Tram in Deepnest or Kingdom’s Edge. To start moving inside the Tram, interact with the glowing button in the leftmost (or in the rightmost if from Deepnest) part. The Tram will then go to the Ancient Basin as a result.
- Next, exit the Tram and make your way to the exit on the floor to the left of the Tram.
- Following that, descend from the little platform and move to the left. Descend the gap or shaft to the left. Here, the Knight will come across a Shadow Creeper. Then, the Knight will touch down on a little platform. Drop down another gap on the left to come across another Shadow Creeper.
- Turn to the right and descend the shaft while sliding down the right wall. Here, the Knight will encounter a Shadow Creeper. Continue moving to the right after the Knight has fallen from the wall so they will land on a platform rather than spikes. To leave the room, descend the shaft on the right.
- After that, go a little bit to the left and drop down. Here, the Knight will run into a Shadow Creeper. Head to the right and drop down another gap to encounter another Shadow Creeper. At the bottom, head to the left, and the Knight will find a massive door. If this door is not opened yet, it has the mark of the King’s Brand. When the Knight approaches the large door, it will light up and open. Use this to exit the room.
- The Knight is now in The Abyss! Head to the right and drop down the gap to land on a small platform. Drop down another small platform below on the left and another on the right. Here, the Knight will find a Shadow Creeper on a wall on the right and below on the left. Drop down the small platform below on the right, then another below on the right.
- Drop down the gap on the right to land on a platform with another Shadow Creeper on the left. Jump and drop down the small platform below on the left. Jump towards another platform on the left. From here, the Knight can find a Shadow Creeper on the platform below. Jump towards the platform below on the left.
- Then, jump towards the left and, while falling, keep moving to the left. Doing so will result in the Knight landing on a large ledge with small light blue butterflies.
- After landing, just stand here, and a blue glow will appear. Smaller blue circles will also light up thanks to the Knight’s Lifeblood Masks. The Knight can enter the left doorway once all the small circles are lit blue. The door in the Abyss is finally open!
Now that the Knight has opened the door in the Abyss, the Knight can get the Lifeblood Core Charm! It is important to note that the Knight should acquire anything possible inside this door. The door will permanently close once the Knight obtains the Lifeblood Core Charm and leaves the room. After that, there is no way to get the other obtainable items inside the area.
The Lifeblood Core Charm
The Lifeblood Core Charm gives the Knight four Lifeblood Masks every time the Knight sits on a Bench. This Charm requires the Knight to have three unused Charm Notches.
Requirements
Aside from having at least 15 Lifeblood Masks, the Knight must also have a few abilities: the Mantis Claw ability, the Mothwing Cloak ability, and the Monarch Wings ability. The Knight will also need the Lumafly Lantern from Sly in Dirtmouth.
Enemies
The Knight won’t encounter any enemy inside the door in the Abyss on the way to the Lifeblood Core Charm. The area is a platforming segment filled with small platforms and spiked surfaces.
Path to the Lifeblood Core Charm
To find the Lifeblood Core Charm inside the door in the Abyss, the Knight must do the following:
- After entering the door in the Abyss, the Knight will use the Lumafly Lantern to light up the area. Head to the left, jump and dash across the gap, continue to the left, and then drop down the gap. The Knight will land on a slightly smaller platform.
- Next, slightly jump and drop to the right to land on a smaller platform. Jump and dash (Mothwing Cloak ability) or double jump (Monarch Wings ability) towards the thin platform on the left. Jump towards the platform on the left, where a blue plant is shaped like a butterfly.
- Following that, go to the left. At the end of the platform, jump and dash to the left to dash in between the spiky ceiling and a small platform. The Knight should completely dash over the small platform to drop down on a platform below it on the left. From here, double jump to reach the thin platform’s right wall above and climb it using the Mantis Claw ability.
- At the top, jump towards the platform above on the left. From here, slightly jump and dash to the left to reach a platform between the spikes. Then, dash to the left and jump while in mid-air to reach a ledge with more blue butterfly plants.
- After that, jump slightly to the right to drop down to pass through a narrow shaft with spikes for walls. This may take a few tries to get the right distance right. The Knight will then land on a small platform. Drop down on the left to reach a bigger platform. Drop down again on the left to land on a smaller platform. Drop once more on the left to land on a platform with a blue butterfly plant.
- Next, drop down while moving to the right to reach a platform. Drop down the gap on the left to land on a thin platform. Here, the Knight has two choices: drop on the left to find an Arcane Egg or drop on the right to continue. It is important to reiterate, however, that the Knight will not be able to enter the room again once the Knight gets the Lifeblood Core Charm and leaves.
- Then, drop down the spiky shaft on the right to land on a ledge. Drop down the platform below on the right. Drop down the gap on the left, then quickly dash to the right to land on a small platform between spikes. From here, jump slightly, then dash again to the right to reach a larger platform after the spikes. Here, the Knight will find a couple of blue butterfly plants.
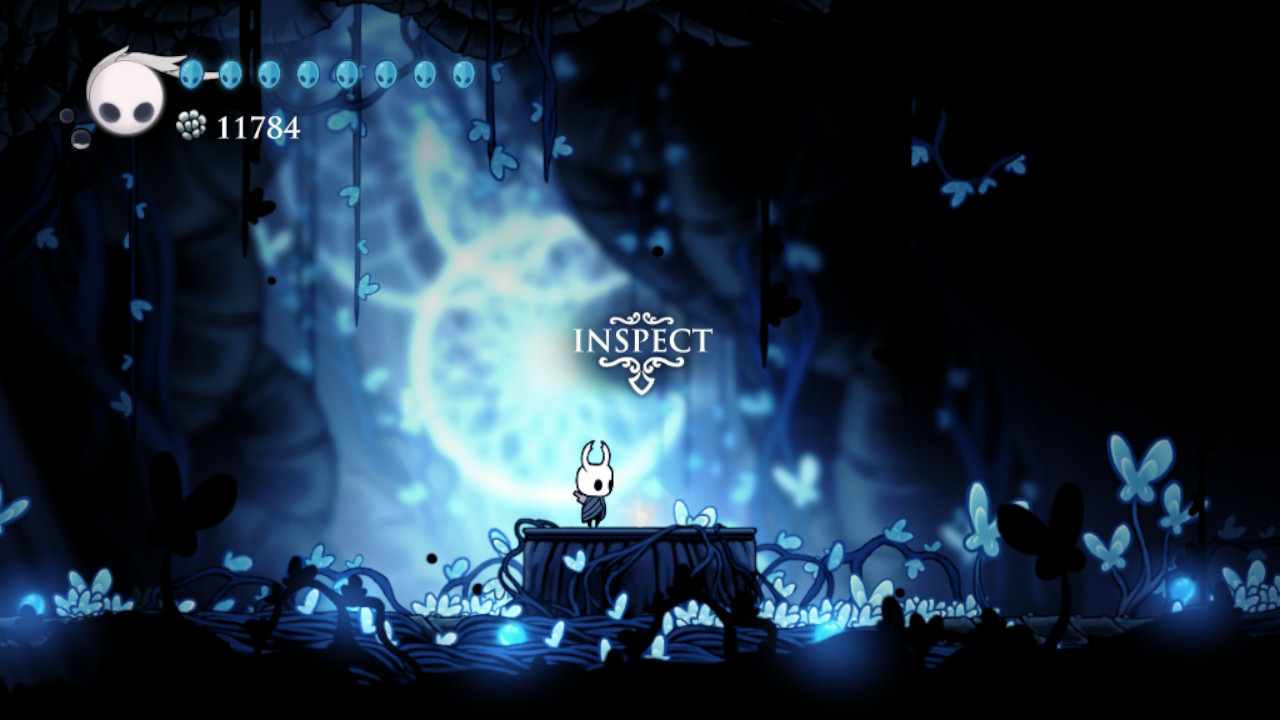
- Lastly, jump up, then jump again at the peak of the jump to reach the ledge’s wall above. Climb up the wall to find more blue butterflies. Follow the path on the right, and the Knight will find many more blue butterfly plants. The Knight will eventually find a glowing item on top of a dais.
Inspect the glowing item, and the Knight will get the Lifeblood Core Charm! After that, the screen will turn white, and once it loads back, the Knight will wake up outside the door in the Abyss.
Conclusion
By following these steps, you will successfully open the enigmatic door in the Abyss of Hollow Knight. The journey to unlock this door adds to the game’s intrigue and showcases your determination and problem-solving skills. So, delve into the Abyss, conquer its challenges, and reveal the mysteries that await beyond the door. Enjoy your exploration in the hauntingly beautiful world of Hollow Knight!