In the vast and mysterious underground kingdom of Hallownest, a kingdom teeming with ancient wonders and hidden secrets, one of the most sought-after treasures is the elusive Pale Ores. These shimmering minerals are significant to the skilled adventurers and ardent explorers of Hollow Knight.
As the key to unlocking powerful upgrades, Pale Ores is a testament to the deep lore and intricate gameplay that captivate players in this atmospheric Metroidvania-like adventure.
In this guide, we will delve into the depths of Hallownest, heading to each of these Pale Ores’ locations and uncovering the true power they hold within the enchanting world of Hollow Knight.
Pale Ore
Pale Ores in Hollow Knight are rare and precious minerals with great value within the game’s lore and mechanics. These items have a pale appearance that gives off an icy chill.
According to the in-game lore, Pale Ores are said to have been used to forge powerful weapons and artifacts. As players progress through the game, the Knight will discover the scattered remains of these Pale Ores, hidden away in treacherous corners of the underground kingdom.
The significance of Pale Ores lies in their application as a vital resource for weapon upgrades. Players can strengthen their Nail- the protagonist’s primary weapon- by collecting and delivering Pale Ores to a certain skilled Nailsmith within Hallownest.
Each Pale Ore used in the upgrading process refines the nail’s edge, making it sharper, deadlier, and capable of inflicting more damage upon the diverse array of enemies throughout the game. So, pursuing Pale Ores becomes an important aspect of progression, empowering players to conquer formidable foes and uncover the secrets that lie ahead in the hauntingly beautiful kingdom of Hallownest.
Nailsmith
The Nailsmith of Hallownest is a resilient survivor, having endured the fall of Hallownest and the changing world without losing focus on his craft. With unwavering dedication, the Nailsmith hones his skills day and night, driven by a singular ambition—to forge his ultimate masterpiece, a Pure Nail. Surrounding his humble abode, numerous nails testify to his expertise and the countless hours he has poured into perfecting his craft.
Located in an isolated hut on the southwestern corner of the City of Tears, the Nailsmith welcomes weary adventurers in search of greater strength. Initially, he offers his services to the Knight to refine the Old Nail into the Sharpened Nail for a modest sum of Geo.
However, as players seek to enhance their weapons further, the Nailsmith’s requirements become more demanding. Each subsequent upgrade demands both Pale Ore and an increasing amount of Geo, reflecting the increasing significance of these rare minerals and the growing mastery needed to unlock the true potential of the Nail.
Upgrading the Nail
The Nailsmith will be able to upgrade the Knight’s Nail for a total of four times. The following are the Nail upgrades that the Knight may receive, the base damage of these upgrades, and the number of Geos and Pale Ores needed for the Nailsmith to start the process:
| Nail | Base Damage | Geos Needed | Pale Ores Needed |
|---|---|---|---|
| Old Nail (the base Nail) | 5 | n/a | n/a |
| Sharpened Nail | 9 | 250 Geos | n/a |
| Channeled Nail | 13 | 800 Geos | 1 Pale Ore |
| Coiled Nail | 17 | 2000 Geos | 2 Pale Ores |
| Pure Nail | 21 | 4000 Geos | 3 Pale Ores |
Pale Ore Locations
Now that the player knows what Pale Ores are and what they are used for, it is time to find these rare items. There are a total of six Pale Ores scattered throughout Hallownest. Here are thorough steps and strategies to overcome anything standing in the way of the Knight and the Pale Ores:
Hollow Knight Pale Ore Location #1

The Knight can find a Pale Ore west of the Tram Station and the main entrance to the Ancient Basin in the northwestern part of the Ancient Basin.
There are no required spells to find this Pale Ore. However, the Knight must first have the basic abilities to reach Pale Ore, like the Mantis Claw ability, which allows the Knight to cling to walls and jump off them.
On the way to this Pale Ore, the Knight will only face a few Shadow Creepers and fewer Mawleks.
This is what the Knight must do to acquire this Pale Ore:
- Starting from the Bench in the Hidden Station Stag Station in the Ancient Basin, head to the left to exit the room. Then, head to the left, passing through the Palace Grounds, to exit the room.
- Next, go to the left, drop down the shaft, head to the left, and climb up the shaft using the Mantis Claw ability, where there is a Shadow Creeper. Head to the left and climb up the platform across the gap on the left, where the Knight will encounter another Shadow Creeper.
- Go to the left and jump across the gap towards the platform above on the left. Jump up the small platform, climb up the shaft above, go to the right where there is another Shadow Creeper, and climb up the next shaft above where there is another Shadow Creeper. Head to the right, jump across the gap, up the next small platform, and take the exit above.
- Then, head to the left and drop down the gap after the edge of the metal platform. Continue heading to the left and drop down to the next exit.
- Afterward, go to the left, where the Knight will face a Lesser Mawlek. Jump across the next shaft, continue to the left, and jump up the slightly elevated platform. Climb the wall on the left to reach the platform above, where there is another Lesser Mawlek on the right.
- Next, go to the left, drop down the platforms on the left, and drop down another gap. Here, the Knight will encounter another Lesser Mawlek.
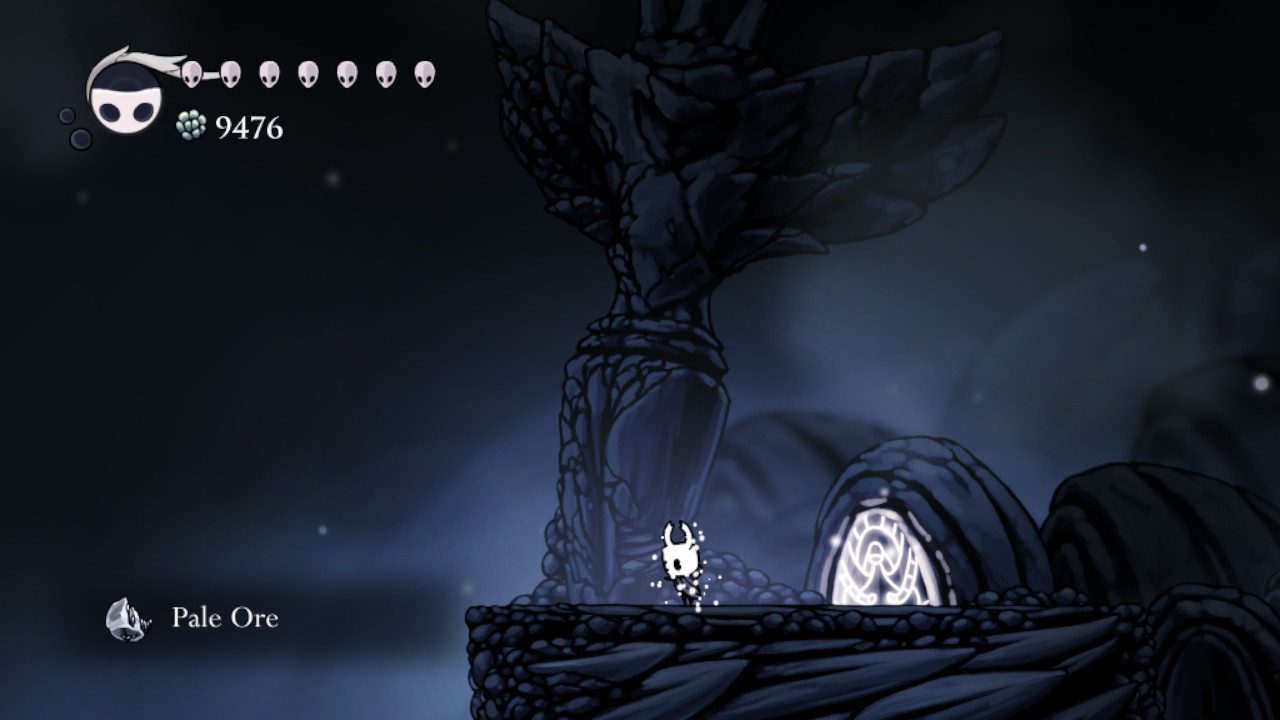
- Finally, head to the left, and the Knight will find something glowing. Inspect the glowing item, and the Knight will acquire a Pale Ore!
Hollow Knight Pale Ore Location #2

Another Pale Ore can be found in Hallownest’s Crown, the topmost part of Crystal Peak. The Pale Ore can be found on the pedestal of the statue of the Radiance.
To get to this Pale Ore, the Knight must use some abilities. One is the Mantis Claw ability, which allows the Knight to cling to walls and jump off them. Another is Monarch Wings ability, which allows the Knight to perform a secondary jump in mid-air.
Lastly, the Knight must also have the Crystal Heart ability, which enables the Knight to continuously dash until the Knight hits a surface, takes damage, or if the ability is intentionally canceled. Aside from that, the Knight must also have purchased the Lumafly Lantern, which helps light up dark rooms.
The Knight will not face any boss to reach this Pale Ore. However, the Knight will encounter the following enemies: a Husk Miner, Crystallized Husks, Crystal Hunters, Shardmites, and a Glimback.
To find this Pale Ore, this is what the Knight must do:
- Start from the Bench in the upper middle part of Crystal Peak. Go to the right and exit the room. Head to the right, jump and cling towards the conveyor belt on the wall on the right, and continue going up the shaft at the top of the conveyor belt using the Mantis Claw ability.
- Go to the right at the top of the shaft, where the Knight will face a Husk Miner. Jump up towards the platform above on the right using the Monarch Wings ability and take the exit.
- After that, go to the right, drop down the platform, jump up towards the wall of the platform above on the right using the Monarch Wings ability, climb up, and go to the right up the platform where there is a Crystallised Husk.
- Continue heading to the right, where the Knight will face another Crystallised Husk. Jump across the gap towards a slightly big platform on the right, where the Knight will find a Crystal Hunter, and jump across another gap to get to the next platform on the right.
- Next, go to the right, jump towards the next small platform on the right, jump towards the next small platform on the right, jump and dash or double jump across the gap towards a large platform where the Knight will face another Crystallized Husk, jump and dash or double jump across another gap towards the large platform on the right, and take the exit at the end of the path.
- Then, head to the right, where there is a Crystallized Husk, and climb up the shaft where the Knight will find a Shardmite. Jump and dash or double jump towards the wall on the left above the crystals and climb up the wall where the Knight will find another Shardmite.
- At the top, head to the right, where there is another Crystal Hunter and another Crystallized Husk. Climb up another shaft, and at the top, head to the left where there is another Crystallized Husk and Crystal Hunter. Climb up the shaft at the end of the path where there is another Shardmite.
- Afterward, head up the platforms on the right, where the Knight will encounter another Crystal Hunter. Jump and dash or double jump towards the platform above on the left, double jump up the next shaft, and take the exit above.
- Next, go to the left, where there is a Shardmite, and jump up the next platform level above with the help of the Mantis Claw or Monarch Wings ability. Here, many platforms’ surfaces are filled with crystals that deal with contact damage.
- Head to the right, where the Knight will find another Shardmite. Jump a tiny bit, dash towards the wall on the left above the crystals, and climb up the wall with a Shardmite and a Crystal Hunter on top of the platform.
- Then, jump up the platform above on the right and, from here, use the Crystal Heart ability super dash to the left. Across the crystals is a safe platform where the Knight will encounter a Glimback. Climb up the left wall of the next shaft, where there is another Shardmite.
- Near the top of the left wall, use the Crystal Heart ability to super dash to the right, hit a wall, and land on a safe platform. Double jump or climb up the wall to reach the platform above.
- Finally, the Knight will reach Hallownest’s Crown. Head to the platform’s edge on the left, jumping up the platforms. There, the Knight will find a statue of the Radiance with something glowing on its pedestal. Inspect the glowing item, and the Knight will obtain a Pale Ore!
Hollow Knight Pale Ore Location #3

A Pale Ore can be discovered behind a breakable wall next to a hot spring after a series of hidden rooms in the southeastern part of Deepnest. However, before the Knight can get this Pale Ore, the Knight must first defeat Nosk in the area.
Before the Knight can find Nosk and obtain Pale Ore, it is required that the Knight has a few abilities. The first one is the Mantis Claw ability, which, again, gives the Knight the ability to cling to walls and jump off them.
Another is the Mothwing Cloak ability, which allows the Knight the ability to dash horizontally forwards. Finally, the Knight must also have the Monarch Wings ability, which gives the Knight the ability to jump again in mid-air. As for items, the Knight must also have the Lumafly Lantern, which can be purchased from Sly in Dirtmouth. This item will help brighten dark rooms.
To face Nosk and get Pale Ore, this is what the Knight must do:
- Start from the Bench inside the Tram in the southeast of Deepnest. Exit the Tram, go to the left, and exit the room.
- After that, the Knight is now in Deepnest. This room looks like a maze filled with Garpedes. Go slightly to the left, wait for the Garpede above to pass through, quickly jump to the platform above, run to the right, and jump to the platform above. Then, go to the left and stand by while the Garpede above passes through.
- After that, quickly jump up the platform above, run to the left, and drop down on the next gap. Go slightly to the left, wait for the Garpede below to pass, drop down, run to the right, and drop down on the next gap. Then, go to the left, jump and dash or double jump across the spikes using the Monarch Wings or Mothwing Cloak ability, and take the exit.
- Then, go to the left, where there is a Bench next to a hot spring. The Knight can sit on the Bench to heal, save your progress, and stand in the hot spring to gain Soul. After that, continue going to the left and exit the room.
- Next, go to the left and jump up the platform, where the Knight will find a Wandering Husk. Jump across the spikes towards the small platform, jump across the spikes towards the next small platform on the left, and jump across the spikes towards the small ledge above on the left using the Monarch Wings ability. Strike the wall on the left a few times to break it and reveal a hidden exit, then exit the room.
- After that, go to the left, drop down the gap, then go to the small ledge on the left above a Grub. Strike the breakable wall on the left several times to reveal a hidden path.
- Enter the newly-revealed path, jump across the next gap, and head up the next tall platform. Continue heading to the left, where something below looks exactly like the Knight. Continue heading to the left, jump over a tall platform, drop down the gap on the left, head to the right, jump across a gap, and continue to the right. This is where the other Knight was previously seen.
- At the end of this path, drop down the shaft, continue to the right, drop down the gap, and drop down another gap on the left. It is worth mentioning that there is a shell that has Geo after breaking it across that gap. Continue heading down the path, go to the left, and drop down the gap where another shell will release Geo once it is broken.
- After that, approach the wall on the left, which is a breakable wall. Hit the wall a few times to reveal another hidden path.
- Then, enter the newly-revealed path where, at the end of the path, the other Knight can be seen on the other side of the wall. Climb the path using the Mantis Claw ability, go to the left, and drop down the next gap. Go to the right and head down by dropping down the platforms.
- Next, at the bottom, go to the right, jump over a narrow gap, and head up the tall platform. Continue heading to the right, where the other Knight can be seen below running in the opposite direction. Drop down the next gap, enter the narrow path on the left, and drop down the next gap. Go to the right, drop down the platform, continue heading to the right, and take the exit.
- Afterward, go to the right, where the path behind will be closed down multiple times and trap the Knight inside. Continue heading to the right, and the Knight will reach a big area with many dead bugs hanging from the ceiling.
- Just above a platform, the other Knight can be seemingly waiting. Approach the other Knight; then it will scream, transform into its original form, and reveal Nosk. After that, the battle against Nosk will begin!
- Finally, after defeating Nosk, head to the right to find a glowing item. Inspect the glowing item, and the Knight will get a Pale Ore!
To exit, the Knight can return to where they entered on the left, jump up the next platform, and jump up the platform above. Go to the right, head up the platforms at the end of the path, and climb up the narrow shaft. On the left is a wooden barrier holding up a wall. Hit the wooden barrier a few times to open a shortcut back to the first hidden area where a Grub was found.
Nosk

Nosk is a sinister and enigmatic hidden boss in the game. It presents itself as a shape-shifting spider-like creature, capable of assuming the form of loved ones or familiar faces to lure unsuspecting prey. The origins of Nosk remain in mystery, with the creature residing deep within the dank bowels of the Deepnest. Encountering Nosk in Hollow Knight is a chilling and formidable experience, testing the bravery and resourcefulness of the player.
Moves
Nosk will perform these attacks:
- Leap – Nosk will jump to move around the arena, occasionally jumping and landing on the Knight’s location.
- Charge – The spider-like hidden boss will shriek, then sprint at the Knight and across the arena. Nosk will not stop even if it hits the Knight.
- Eruption – Nosk will rush to the center of the arena and spit out two blobs of Infection at its feet, eight blobs of Infection on its right, and eight additional blobs on its left. The Infection blobs are all thrown in arcs with short gaps in between. Each Infection blob will remain on the ground for over two seconds. Nosk will always do the Charge attack after the Eruption attack. This attack is added to Nosk’s move set in the Hidden Dreams content pack.
- Rain – This boss will leap to the arena’s ceiling and vanish for nearly two seconds. Then rain down blobs of Infection on the Knight every half second after the first blob. Each Infection blob will remain on the ground for over two seconds. Nosk will then return to the location where the last blob of Infection fell. This is a one-time move for Nosk. This attack is also introduced to Nosk’s move set in the Hidden Dreams content pack.
Strategy
Nosk will always shriek before executing the Charge attack, which can be an excellent auditory cue if Nosk is on the opposite side of the arena and is not visible on screen.
When Nosk unleashes the Eruption attack, running toward the gaps between the Infection blobs is recommended.
Regarding the Rain attack, it’s best to keep moving to avoid the Infection blobs that Nosk will direct toward the Knight.
The center of the arena floor is raised a bit higher than the Knight’s height. This elevated platform’s left and right corners are safe zones for the Charge attack. On the left edge, the Knight is safe from Nosk’s Charge attack to the left, and on the right edge, the Knight is safe from Nosk’s Charge attack to the right.
With the proper timing, the Knight can damage Nosk just as he passes above the safe spots mentioned. Here, the Knight can also use Focus to heal. However, these spots are unsafe when Nosk uses the Rain attack.
In terms of spells, the Desolate Dive spell or the Descending Dark spell (the Desolate Dive spell’s upgrade) would be handy because they are rapid spells that deliver massive damage. When used against Nosk while the Knight is on the safe spots stated or when Nosk is in the ceiling when conducting the Rain attack, the Howling Wraiths spell or the Abyss Shriek spell (the upgrade to the Howling Wraiths spell) can be quite powerful.
It is recommended to have the Shade Cloak ability (the upgrade to the Mothwing Cloak ability), which gives the Knight the ability to dash through enemies. The Knight can use this ability to dash through Nosk’s Charge attack.
This ability, paired with the Sharp Shadow Charm, would be a great pairing. The Sharp Shadow charm will allow the Knight to deal damage when dashing through enemies using the Shade Cloak ability.
Aside from the Sharp Shadow Charm, more Charms can help with the battle against Nosk:
| Charms | Effect |
|---|---|
| Quick Focus Charm | helps the Knight heal faster. |
| Mark of Pride Charm and/or Longnail Charm | increases the length of the Knight’s Nail. |
| Shaman Stone Charm | increases the size and damage of Spells. |
| Soul Catcher Charm and/or Soul Eater Charm | increases the amount of Soul that the Knight will gain when hitting enemies. |
| Kingsoul Charm | regenerates Soul every two seconds. |
| Grubsong Charm | the Knight gains soul every time the Knight takes damage. |
| Spell Twister Charm | reduces the amount of Soul needed to cast Spells. |
| Stalwart Shell Charm | increases the invincibility time and decreases the recoil every time the Knight takes damage |
| Fragile Strength Charm or the Unbreakable Strength Charm | increases the damage output of the Knight’s Nail by 50% |
You mustn’t become greedy when hitting Nosk since this will result in the Knight incurring damage due to Nosk’s size and quick speed. Learn when to strike, when not to attack, and when to evade, and you’ll be able to defeat Nosk in no time.
Hollow Knight Pale Ore Location #4
Another Pale Ore can be obtained after completing the Trial of the Conqueror in the Colosseum of Fools at the topmost part of Kingdom’s Edge.
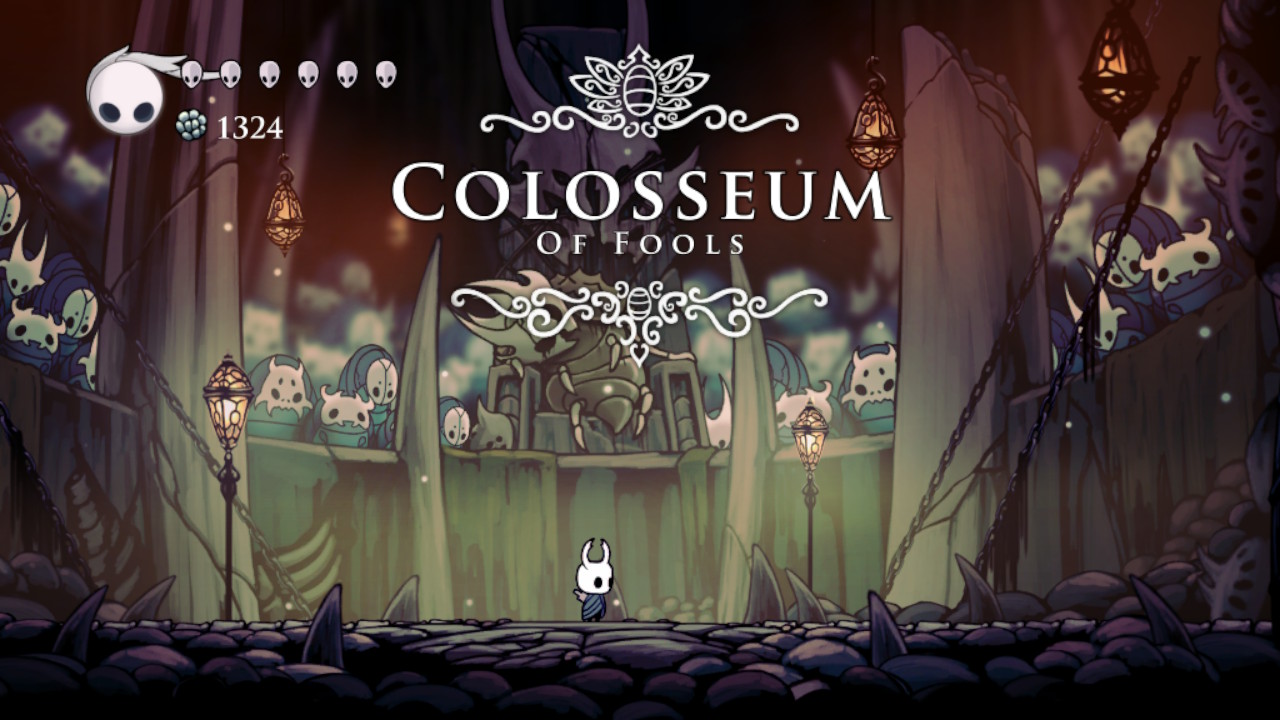
Colosseum of Fools
Located at the pinnacle of Kingdom’s Edge, the Colosseum of Fools is where courageous adventurers can engage in grueling Trials. The Colosseum itself is made of the hollowed-out remains of a large bug, its massive shell held aloft by sturdy chains.
During the Trails, warriors can test their combat prowess against relentless waves of enemies. The Trials can be accessed through the head of this large shell, where the overseer named Little Fool handles the entry fee. Once inside, the battles unfold in the sprawling arena east of the trial boards, offering an unforgettable and exhilarating experience for those facing the Colosseum’s formidable challenges.
Where to Find the Colosseum of Fools

As previously mentioned, the Colosseum of Fools is the topmost part of the Kingdom’s Edge.
Isma’s Tear ability, which allows the Knight to swim in pools of acid without taking damage, is a requirement to reach the Colosseum of Fools. The Monarch Wings ability, which gives the Knight the ability to jump again mid-air, can also greatly help traverse the Colosseum.
The Knight will not face any boss to reach the area. However, the Knight will face the following enemies on the way: Booflies, Primal Aspids, Belflies, and Hoppers.
To reach the Colosseum of Fools, this is what the Knight must do:
- Starting in Kingdom’s Edge’s central cliff, go to the right, where a Boofly is floating above. Head up the large room using the small platforms in the middle. Upon reaching the last of the small platforms, jump towards the large platform on the right, and take the exit.
- Next, drop down the pool of acid thanks to Isma’s Tear ability. Swim to the right, jump up the small platform, then head up this room. On the way up, the Knight will face Primal Aspids and Booflies. At the top, take the exit on the left.
- Then, the Knight is in the upper half of the Kingdom’s Edge’s central cliff. Head to the left, where there is a Hopper and a Boofly, then head up the room. The Monarch Wings ability is useful in heading up this room. On the way up, the Knight will encounter Primal Aspids, Belflies, Hoppers, and Booflies. At the top, take the exit in the top left corner of the room.
- After that, head for the top left exit of this room. On the way, there are several hoppers and Belflies.
- Next, head to the left, then jump up the platform above. Here, there is a wall held up by a wooden scaffolding. Strike the wood several times to break it and reveal a shortcut to the area. Through this newly-opened path, the Knight can reach this area from the elevator shaft of the City of Tears that goes up to the Resting Grounds.
- Then, go to the right, where the Knight will find four more Belflies. On the way, crowds and battling sounds can now be heard. Enter the shell at the end of the path.
- Finally, the Knight has arrived at the Colosseum of Fools trial boards!
Talk to Little Fool, who is chained above the ground, and he will introduce the Knight to the Trials. Pay him a few Geos to begin the first Trial. Inspect the board directly behind him and enter the arena on the right to begin the Trial.
If you do not want to start the Trial yet, the Knight can enter a hole in the floor just after the three trial boards. There, the Knight will find a warriors’ pit with several sleeping and non-violent Fools and a bench for the Knight to rest in.
Previous characters the Knight has encountered may also be found in this area: Tiso will be on the Bench if he was spoken to at any previous point the Knight has encountered him, and Zote will be in the area if he was saved in Deepnest.
Every time the Knight is defeated in the Trial, the Knight’s Shade can be found in the far left area of the warrior’s pit. On the far left area of the warrior’s pit, on the other hand, is a breakable wall. Beyond this breakable wall is a hot spring where the Knight can generate Soul. A Sturdy Fool can also be found relaxing in this hot spring.
Trial of the Conqueror

The Trial of the Conqueror is the second Trial in the Colosseum of Fools. This Trial is harder than the previous one, the Trial of the Warrior. There will be no ground mechanics in this Trial, such as wall-jumping or mid-air battles without healing.
Aside from a Pale Ore, completing the Trial of the Warrior for the first time rewards the Knight with 2000 to 2020 Geo and the Conqueror achievement. The Knight will be rewarded 2000 to 2020 Geo for the subsequent wins.
Before the Knight can attempt this Trial, the Knight must complete the Warrior Trial. Once that is done, the Knight must pay Little Fool 450 Geo to participate in the Trial of the Conqueror. Next, inspect the middle trial board to start the Trial and proceed to the arena on the right.
Remember to always heal at least one mask between waves when taking the Trial. The Quick Focus Charm is ideal for this. Furthermore, Nail Arts are useful in the Trials in the Colosseum of Fools. They can be used to defeat enemies in the floorless waves of this Trial.
Before starting this Trial, it is important to mention that the Mantis Claw ability, which will help the Knight cling to walls, is required in certain parts of the trial. Also, the Shade Cloak ability, which will help the Knight dash through enemies and attacks, can help the Knight dodge enemies.
The Knight’s foes in the Trial of the Warrior will attack in waves. These are what will happen in each of the waves:
- Wave 1 – First, one Heavy Fool will appear. Kill it, and then two Winged Fools will appear on both sides of the arena. Defeat both, then one Winged Fool and one Heavy Fool will appear in the middle of the arena.
- Wave 2 – After surviving the previous wave, three platforms will come up on different heights on both sides of the arena. Then, an Armoured Squit will appear. Defeat it to continue.
- Wave 3 – Next, spikes will sprout up and cover the whole floor. Then, two Armoured Squits will appear. Kill them to continue.
- Wave 4 – After that, two platforms will disappear and leave the middle platform. One Winged Fool will then appear. Defeat the Winged Fool; then an Armoured Squit will appear. Defeat the enemy to continue.
- Wave 5 – For this wave, six platforms will come up with differing heights (a total of seven platforms). A Primal Aspid and an Armoured Squit will then appear. Defeat one of them, then another Primal Aspid and Armoured Squit will appear. Kill two of them; then three Volatile Guzzers will appear. Defeat two remaining enemies; two more Volatile Guzzers will enter the arena. Defeat all the enemies to continue.
- Wave 6 – Three connected platforms will appear in the arena, and every other will disappear. Then, a Heavy Fool will appear. This can easily be defeated by attacking it to let it fall on the spikes. Defeat it, and three Belflies will appear one at a time. Evade the dive-bombing Belflies to continue.
- Wave 7 – The connected platforms will shorten, leaving one platform in the middle. Another Belfy will then appear above. Evade the Belfly to continue.
- Wave 8 – After that, the arena will return to its original state. Four Hoppers will then appear one at a time. Defeat two Hoppers, and four more Hoppers will appear similarly. Kill all the Hoppers; then, a Great Hopper will appear. Eliminate the Great Hopper to continue.
- Wave 9 – The walls will close towards the middle and leave about 25% of the original floor space for this wave. Another Great Hopper will then appear. Defeat the Great Hopper to continue.
- Wave 10 – Next, the arena’s walls will return to their original state, but the ceiling will drop, leaving only about 50% of the arena. A Grub Mimic will then appear. The Grub Mimic won’t attack the Knight until they “free” the “Grub.” This downtime can be a terrific opportunity to heal. To proceed, defeat the Grub Mimic.
- Wave 11 – The ceiling will return to its original state, and a single platform will appear in the middle. Two Shielded Fools and a Winged Fool will then appear. Defeat them, the platform will disappear, and another Winged Fool will appear. Defeat the enemy, then a Heavy Fool and an Armoured Squit appear. After defeating one, another Armoured Squit will appear. Defeat all the enemies to continue.
- Wave 12 – After that, the walls will close in and leave about 50% of the original area. A Heavy Fool will then appear. Defeat it; then a Winged Fool will appear. Kill them to continue.
- Wave 13 – This next wave might be the hardest of all. Spikes will cover the whole floor, and the Knight must repeatedly cling to the walls to defeat the enemies. First is an Armoured Squit. Defeat it, and then a Winged Fool will appear. Defeat it, and then two Armoured Squits will enter. Kill them to proceed.
- Wave 14 – The walls will return to their original state, and the spikes will disappear. This is temporary, as the spikes will return after three platforms appear. Two Winged Fools will then appear on both sides of the arena. Kill them, then another Winged Fool and two Armoured Squits will appear.
- Wave 15 – After defeating the previous enemies, the arena will return to its original state. Four platforms will appear, two at the same height and higher than the others. Four Battle Obbles will then appear. Defeat two, and then two more Battle Obbles will appear. Kill two more, then spikes will cover the floor, and three more Battle Obbles will appear. Defeat all of them to continue.
- Wave 16 – Next, the spikes and platforms will disappear then the ceiling will drop down and leave about 50% of the arena. Four more Battle Obbles will then appear. Defeat them to continue to the final wave.
- Wave 17 – The ceiling will come up slightly for the final wave and leave about 75% of the arena. Two Oblobbles will then appear. Oblobbles are bosses similar to Battle Obbles, but they fire more projectiles and move more quickly. The following are the Oblobbles attacks:
- Acid Cannonade – The Obobbles will spew four huge projectiles in six different patterns that will travel in all directions. Each group of four projectiles is 90 degrees apart. The next set of projectiles is shot 30 to 45 degrees from the previous.
- Fly – This boss moves around the arena diagonally and bounces off walls. If the Knight hits one from behind, it will turn around and continue in that direction.
- Frenzy – After defeating one of the Obobbles, the other will regain health and get enraged. This will cause it to move faster. This will also speed up how it performs the Acid Cannonade attack and the projectiles. The Acid Cannonade now shoots four missiles in eight patterns instead of six during the Frenzy. The Obobble will be in a frenzy until the Knight defeats it.
Nail Arts like the Dash Slash and Great Slash can damage Obobbles. As for Spells, the Vengeful Spirit spell and the Abyss Shriek spell are also great at inflicting huge damage. These can be especially helpful when the remaining Obobble is in a Frenzy, as small openings exist between its Acid Cannonade.
It would be ideal for spreading damage between Obobbles so that the last Obobble that would go into a Frenzy has the least amount of health possible.
As for Charms, the Shape of Unn Charm can be great for dodging the Acid Cannonade projectiles and giving windows for the Knight to heal. This Charm can be especially helpful if paired with the Quick Focus Charm.
Hollow Knight Pale Ore Location #5

The Grubfather will reward the Knight with a Pale Ore after the Knight successfully frees 31 Grubs from glass jars all over Hallownest.
Grubs
The Knight will come across little green creatures confined inside glass jars called Grubs all over Hallownest. The Collector is the one who captures these Grubs. The Collector is a Void creature who enjoys collecting dead and alive bugs from all across Hallownest. This Void creature likes to preserve them in glass jars.
The Knight will hear high-pitched wailing whenever a Grub is in the Knight’s approximate vicinity. This cry can be a good audio cue that a Grub is somewhere around the Knight, even if it cannot be seen on screen.
Once found, the Knight can strike the glass jar with the Nail to break it and release the Grub. Whenever the Knight frees a Grub, it lets out a high-pitched joyous cry and burrows into the ground to rejoin its colony with the Grubfather.
Grubfather
The Grubfather is the leader of the colony of Grubs that can be found in the Forgotten Crossroads. However, because of the Grubs’ disappearance, the Grubfather is found lamenting over the loss of his beloved children.
The Knight can find a total of 46 Grubs all over Hallownest. The Grubfather will reward the Knight with items for freeing a specific number of Grubs. These rewards are Geos, a Mask Shard, the Grubsong Charm, a Rancid Egg, a Hallownest Seal, a Pale Ore, a King’s Idol, and the Grubberfly’s Elegy Charm.
As previously stated, to claim the Pale Ore reward, the Knight must free 31 Grubs from all over Hallownest.
Where to find the Grubfather

The Grubfather can be found in the Grubhome in the northwesternmost part of the Forgotten Crossroads. This room will be full of small Grub dens.
There are no required abilities and spells to reach the Grubhome. On the way, the Knight will encounter enemies like Crawlids, a Tiktiik, and Gruzzers.
To reach the Grubhome, this is what the Knight must do:
- From the Bench in Dirtmouth, go through the entrance to the Forgotten Crossroads through the well on the right.
- After that, head to the left, where the Knight will encounter a Crawlid and a Tiktik. Take the exit at the end of the room.
- Then, continue heading to the left and jump across the gap, where the Knight will find several Gruzzers and Crawlids. Jump across the gap on the left, and take the exit.
- Finally, the Knight is in the Grubhome!
In the Grubhome, the Grubfather will drop the appropriate reward for the number of Grubs freed. Once the Knight has freed 31 Grubs, the Grubfather will drop a Pale Ore!
Hollow Knight Pale Ore Location #6

The Seer will reward the Knight a Pale Ore once the Knight has accumulated 300 Essence using the Dream Nail.
Seer and the Dream Nail
At some point later in the game, the Dreamers will trap the Knight in the Dream Realm. This is where the Knight will meet the Seer, the last surviving member of the Moth Tribe. After bringing the Knight back to her house, once they escape the Dream Realm, the Seer will give the Knight the Dream Nail ability.
According to in-game lore, the Dream Nail is a revered weapon that allows the wielder to pierce the boundary between the realm of wakefulness and dreams. Its origins are believed to be tied to the Moth Tribe, who crafted this sacred weapon. With the Dream Nail, one can peer into the innermost thoughts of beings and even objects and venture into distinct realms within the Dream Realm.
To use the Dream Nail, the player must hold the assigned Dream Nail button to charge it, then release the button to strike using the Dream Nail. These are the default buttons for the Dream Nail in each of the available platforms:
| PC | D key |
| Xbox One | Y button |
| PlayStation 4 | Triangle button |
| Nintendo Switch | X button |
Essence
One of the purposes of the Dream Nail is to collect Essence. This is the energy gained from a lot of different sources. The Knight can collect Essence from Spirits, and Whispering Roots, defeating Warrior Dreams and defeating Dream Bosses.
Regular enemies also have a chance to give out Essence. The quickest way to collect Essence is by defeating Warrior Dreams and Dream Bosses. This is because defeating a Warrior Dream will give the Knight at least 100 Essence (depending on the specific Warrior Dream as some will give 150, 200, and 250 Essence), and defeating a Dream Boss will give the Knight 300 Essence (except for Lost Kin which gives 400 Essence after it is defeated).
The Knight can accumulate 3208 Essence by exploring and defeating Bosses. However, the Seer only needs 2400 to reward the Knight. Among these rewards for accumulating a certain number of Essence is a Hallownest Seal, a Spirits’ Glade is opened, a Pale Ore, the Dream Wielder Charm, a Vessel Fragment, the Dreamgate, an Arcane Egg, a Mask Shard, the Dream Nail is awoken, the Awakening achievement, and the Ascension Achievement.
As mentioned, to obtain Pale Ore from Seer, the Knight must accumulate 300 Essence from all over Hallownest.
Where to Find Seer

The Seer is located in the northeastern part of the Resting Grounds. To find the Seer, this is what the Knight must do:
- Start from the Bench on the Resting Grounds Stag Station. Head to the left to exit the room.
- Next, head up to this room using the platforms in the middle. At the top, head for the exit on the left.
- Then, go to the left, and, just like that, the Knight will find the Seer!
Conclusion
Acquiring Pale Ore in Hollow Knight is a rewarding and crucial endeavor for any dedicated adventurer. These rare and precious materials are the key to enhancing the Nail, the Knight’s primary weapon. With each Pale Ore obtained (and with enough Geo), the Nailsmith can upgrade the Knight’s Nail and create his masterpiece– the Pure Nail!