Learn how to play Sangonomiya Kokomi in Genshin Impact!
Sangonimiya Kokomi is a young lady known as The Divine Priestess of Watatsumi Island. All of the island’s affairs are at her fingertips, as the will to protect the region lives on in the bloodline of the Sangonomiya Clan, and the current heir to this bloodline is none other than Kokomi.
Contents
- Character Background
- How to Get Sangonomiya Kokomi
- Team Role and Play Style
- Talents
- Constellation: Dracaena Somnolenta
- How to Build Sangonomiya Kokomi
- Sangonomiya Kokomi’s Character Ascension
- Sangonomiya Kokomi’s Talent Level-Up Materials
Character Background
Due to her overly young appearance in people’s eyes, strange expressions of surprise, suspicion, and confusion were met the day Sangonomiya Kokomi ascended to the role of the Diving Priestess. However, the way she was fair in distributing rewards and punishments, the fact that she appreciated the contributions of the people, and how she was militarily skilled, above all other abilities, won the hearts of most of the people.

Kokomi respects the people’s will and wishes they can each find their way. Just as the vast ocean can accommodate countless souls and their desires, so does Kokomi, who wishes her rule could be. When the Vision Hunt Decree came about, the people’s resentment turned into cries of revolt, so Kokomi led them in raising the banner of resistance. Once the war was over, the people’s hearts turned towards peace and stability, and so did Kokomi, directing her energies toward governance and economics.

As the Diving Priestess, Kokomi naturally has her Vision. And ever since the day she looked out at the sea outside Sangonomiya Shrine, her wish has never changed: to protect all of Watatsumi Island and allow its people to lead happy lives.
How to Get Sangonomiya Kokomi
Sangonomiya Kokomi is a 5-star character introduced along with the release of the Electro nation Inazuma. She can only be obtained by making wishes on a time-limited Character Wish Banner. This banner will only feature a special 5-star character if that character is involved in the game’s current contents, like story quests and events.

If Sangonomiya Kokomi is currently featured on the Character Wish Banner, you can do a test run of the character and see if you like her play style.
Please see our guide on the topic to learn more about acquiring characters in Genshin Impact by clicking this link.
Team Role and Play Style
Hybrid: Healer and Damager
Sangonomiya Kokomi is a character that can heal her team while providing damage, meaning she is both an offensive and defensive support class. Her elemental skill can deal damage to nearby opponents while healing her allies. When her elemental burst is used, you should constantly throw normal and/or charge attacks to opponents to help dish out the enemies’ HP and continuously heal the team.

The Bake-Kurage she can call forth can be summoned in a safe area when the team can rest, or it can be on the battlefield to keep the team’s HP safe while attacking.
Talents

Combat Talents
Normal Attack: The Shape of Water
This talent allows Sangonomiya Kokomi to perform up to 3 consecutive attacks that take the form of swimming fish. This attack deals Hydro Damage to opponents.


When the button for this talent is held down, Sangonomiya Kokomi will perform a charged attack that deals AOE Hydro Damage. However, this attack has a short casting time and will consume a certain amount of Stamina.

This talent can also be used at a certain distance from the ground. When this is done, Kokomi will gather the might of Hydro and plunge toward the ground from mid-air. This will damage all opponents in her path and deal AOE Hydro Damage upon impact with the ground.
Elemental Skill: Kurage’s Oath
Using this talent will have Sangonomiya Kokomi summon a “Bake-Kurage” created from water that can heal her allies.


The Bake-Kurage deals Hydro Damage to nearby opponents and will heal nearby active characters at fixed intervals. The amount of HP healed is based on Sangonomiya Kokomi’s Max HP.
However, when this skill is used, it will apply the Wet status to Kokomi.
Elemental Burst: Nereid’s Ascension
With this talent, Sangonomiya Kokomi will summon the might of Watatsumi and deal Hydro Damage to surrounding opponents. She will then be robed in a Ceremonial Garment made from the flowing waters of Sangonomiya.


When the Ceremonial Garment is present, Sangonomiya will be granted the following:
- The damage of her normal attack, a charged attack, and the Bake-Kurage are increased based on Kokomi’s Max HP.
- When Sangononmiya Kokomi’s normal and charged attacks hit opponents, she will restore HP for all nearby party members, and the amount of HP restored is based on her Max HP.
- Sangonomiya Kokomi’s resistance to interruption increases, and she can walk on the water’s surface.

The said effects will be cleared once Sangonomiya Kokomi leaves the field.
Passive Talents
Tamanooya’s Casket
Unlocking this passive talent will enhance Sangonimya Kokomi’s healing ability because it will refresh the duration of the Bake-Kurage if the one she summons already exists on the field when she uses her elemental burst Nereid’s Ascension.
To maximize the effect of this passive talent, you should use Sangonomiya Kokomi’s elemental burst right before Bake-Kurage’s duration ends.
Song of Pearls
This passive talent will enhance Sangonomiya Kokomi’s damage-dealing capabilities. With this, while she is donning the Ceremonial Garment created by her elemental burst Nereid’s Ascension, the bonus to the damage of Kokomi’s normal and charged attacks will receive a further increase based on 15% of her Healing Bonus.
Both passive talents, Tamanooya’s Casket and Song of Pearls, make Sangononimya Kokomi a good hybrid of healer and damage dealer. These make her one of the best support characters in the game.
Utility Passive: Flawless Strategy
This passive utility is one of those that help the team explore the vast world of Teyvat. With Sangonomiya Kokomi present on the team, the swimming Stamina consumption for your party members will be decreased by 20%. However, this cannot be stacked with Passive Talents that provide the same effects.
Constellation: Dracaena Somnolenta

Constellation Level 1: At Water’s Edge
The first level of Sangonomiya Kokomi’s constellation will boost her damage-dealing capabilities. With this unlocked, while Sangonomiya Kokomi dons the Ceremonial Garment created by Nereid’s Ascension, the final normal attack in her combo will unleash a swimming fish to damage the opponent.
The damage of the swimming fish is 30% of Kokomi’s Max HP as Hydro damage. This said damage is not considered Normal Attack Damage.
Constellation Level 2: The Clouds Like Waves Rippling
The second level of the Dracaena Somnolenta constellation will enhance Sangonomiya Kokomi’s elemental skill and burst talents, particularly to characters in her team with 50% or less HP remaining.
With this constellation level unlocked, Kokomi gains the following Healing Bonuses concerning characters with 50% or less HP via the following methods:
- Kurage’s Oath will have Bake-Kurage give more healing, equivalent to 4.5% of Sangonomiya Kokomi’s Max HP.
- Nereid’s Ascension will increase Sangonomiya Kokomi’s normal and charged attacks by 0.6% of Kokomi’s Max HP.
Constellation Level 3: The Moon, A Ship O’er the Seas
Unlocking the third level of Sangonomiya Kokomi’s constellation will increase the level of her elemental burst, Nereid’s Ascension, by three and upgrade its maximum level to 15.
Constellation Level 4: The Moon Overlooks the Waters
This fourth level of the Dracaena Somnolenta constellation will further enhance the ability of Sangonomiya Kokomi’s elemental burst. With this unlocked, while Kokomi dons the Ceremonial Garment created by Nereid’s Ascension, her normal attack speed is increased by 10%. Aside from that, normal attacks that hit opponents will restore 0.8 Energy for her.
The said effect can occur once every 0.2 seconds.
More and faster normal attack hits mean more damage to the opponents and more HP healing ticks to the Kokomi’s team.
Constellation Level 5: All Streams Flow to the Sea
Unlocking the fifth level of Sangonomiya Kokomi’s constellation will increase her elemental skill, Kurage’s Oath, by three and upgrade its maximum level to 15.
Constellation Level 6: Sango Isshin
The final level of Sangonomiya Kokomi’s constellation grants more effects when she dons the Ceremonial Garment created by her elemental burst. With this, Kokomi will further gain a 40% Hydro Damage Bonus for 4 seconds when her normal and charged attacks heal or would heal any party member with 80% or more HP.
How to Build Sangonomiya Kokomi

HP and Healing Bonus
The amount of HP that Sangonomiya Kokomi heals her team is based on her Max HP; it is easily understandable that increasing her HP will also increase her healing amount. The damage bonus she will get from her elemental burst will also be based on the same stat; thus, HP is the priority stat for her.
By default, the Healing Bonus will increase the amount of healing a character can provide the team, but with Kokomi’s passive talent, Song of Pearls, this stat will also increase the damage of her normal and charged attacks.
You can choose either of these stats to increase for Sangonomiya Kokomi, and she will still be a good support character.
Weapon: Catalyst
Catalyst is Sangonomiya Kokomi’s weapon, and the ones you need to equip her with are ideally the ones with HP or Healing Bonus as their secondary stat. However, all other catalysts will increase her overall damage and are decent enough for her.
5-Star Catalysts
Everlasting Moonglow
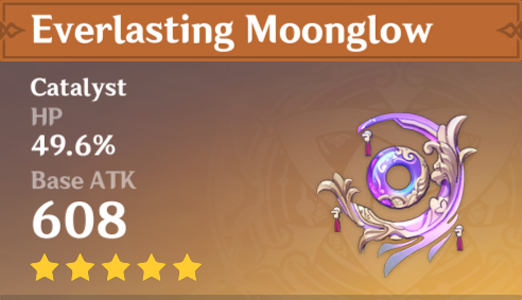
The Everlasting Moonglow is an event-exclusive 5-star weapon, which means it can only be obtained by wishes on a weapon banner where it is featured. It is designed as the best-in-slot (BIS) weapon for Sangonmiya Kokomi and works well, especially if you want a little increase in damage when playing in coop mode.
This catalyst gives a maximum HP bonus of 49.6% at level 90. This is the highest HP bonus among the three weapons on this list.
Since it is a 5-star weapon, the Everlasting Moonglow has a high base ATK of up to 608. Its passive effect increases the weapon wielder’s healing bonus and normal attack damage by a percentage of their maximum HP.
Based on the features of the weapons above, the Everlasting Moonglow is the best weapon for Barbara to maximize her healing capabilities. That is if you have the Primogems to wish for it and if you are lucky enough to get it.
4-Star Catalysts
Prototype Amber
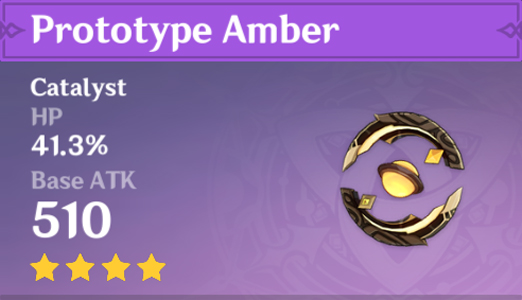
The 4-star catalyst Prototype Amber is a healer-designed weapon with a passive effect that regenerates all party members’ HP for some time after the wielder of this weapon uses an elemental burst.
This effect will boost Sangonomiya Kokomi’s healing capabilities and is very helpful when her elemental burst is not enough to fully recover a character’s HP. During this HP recovery period, the wielder of this weapon will also regenerate a certain amount of energy at a fixed interval.
At level 90, Prototype Amber also gives a bonus of 41.3% HP, which is higher than the bonus given by the Thrilling Tales of Dragon Slayers.
3-Star Catalysts
Thrilling Tales of Dragon Slayers
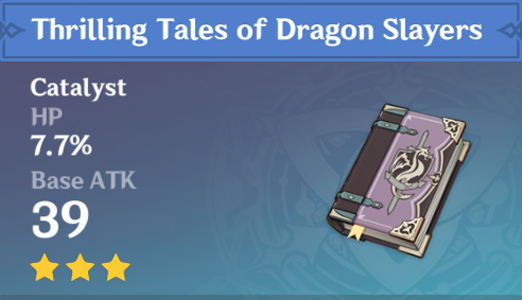
This weapon is a 3-star and perhaps the easiest to obtain. Although it can only be obtained from wish banners, being a 3-star gives it a higher drop rate than the other weapons in this list.
Despite giving the lowest HP bonus, some players prefer this 3-star catalyst over the other two due to its passive effect.
When switching characters, this catalyst gives at least a 24% increase in ATK to the new character taking the field. However, this effect can only be triggered in solo play or in a co-op party where you control two characters with Sangonomiya Kokomi as one of them.
Artifacts
Several artifact sets and set combinations can be used for Sangonomiya Kokomi, and two artifact sets are designed mainly for healers like her. The said artifacts are the Maiden Beloved and the Ocean-Hued Clam.
4-Piece Sets
Ocean-Hued Clam
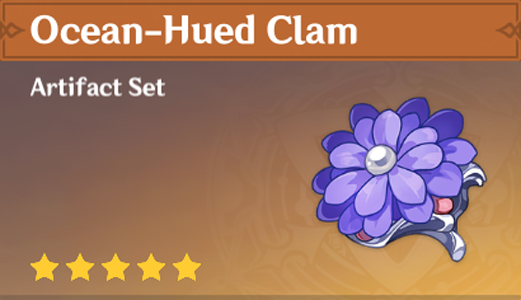
For Sangonomiya Kokomi to provide good heals and decent support damage to the team, a 4-piece Ocean-Hued Clam is the artifact for you.
Its 2-piece set bonus is similar to the 2-piece Maiden Beloved’s. The 4-piece set will create a “Sea-Dyed Foam” whenever the wielder heals. This “foam” is a bubble that will last 3 seconds before exploding to damage surrounding opponents physically. The damage of this bubble scales off the accumulated healing within the 3-second time frame that the Sea-Dyed Foam is active.
This means that with this set, Sangonomiya Kokomi can focus on more HP stat to increase healing while providing additional the team can make. Kokomi is also one of the characters that can fully utilize this set because she can do so much within the 3-second accumulation time.
Having the 4-Piece Ocean-Hued Clam will somehow make up for the damage loss of having one party slot to a healer rather than a full 4-man damage team.
Maiden Beloved
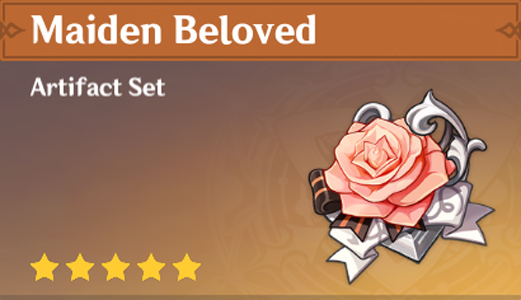
Maiden Beloved is for a pure healer build.
Its 2-piece set offers an additional 15% character healing effectiveness. Its 4-piece set increases the healing received by all party members by 20% for 10 seconds whenever the artifact wearer uses an elemental skill or burst.
Noblesse Oblige
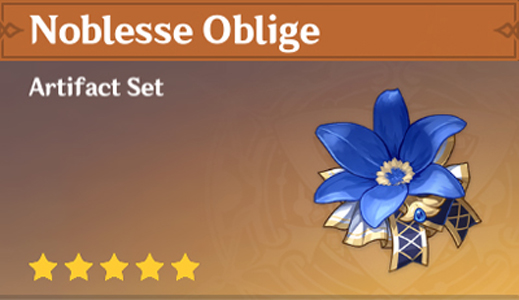
The 2-piece Noblesse Oblige artifact set grants a 20% increase to the character’s elemental burst damage, and the 4-piece set can also increase the team’s ATK temporarily.
This works fine with Sangonomiya Kokomi because her role is to deal damage and heal the entire team.
2-Piece Sets Combination
A temporary artifact set you can equip Sangonomiya Kokomi with combines 2-Piece Maiden Beloved and Ocean-Hued Clam for a 30% character healing effectiveness bonus.
You can also have a 2-piece of either Maiden Beloved or Ocean-Hued Clam paired with a 2-piece Tenacity of Millelith. The latter gives a 20% HP increase bonus, adding to the healing Barbara can provide to the team.
For the Circlet of Logos, also known as the headpiece, it would be nice if you are lucky enough to get one with Healing Bonus as its main stats and HP for the sub-stats.
You do not need to have all five artifacts from the same set. You can always have one as an offset if you have 4 of the same set to get the 4-piece set effects.
Artifact Parts’ Main Stat
For the Circlet of Logos, also known as the headpiece, it would be nice if you are lucky enough to get one with Healing Bonus as its main stats and HP for the sub stats, but one with HP as its main stat is still good for Sangonomiya Kokomi.
Make sure to have an HP for the Goblet of Eonothem and Sands of Eon to further increase the amount of HP recovered from Kokomi’s healing skills and damage.
Sangonomiya Kokomi’s Character Ascension
What is Character Ascension in Genshin Impact
Each character has a certain level cap depending on their current ascension phase, and a character can be ascended to 6 phases to reach the maximum character level of 90. Passive talents and special ascension stats will also be unlocked when a character is ascended to certain phases.
Ascension Materials
Ascending a character will need several items to be used as ascension materials, and for Sangonomiya Kokomi, the materials and the amount needed for each ascension phase are listed below.
Mora: 420,000
Mora is Genshin Impact’s main currency unit. It is accepted in all the nations of Teyvat and is used to upgrade weapons, artifacts, talents, and character levels.
Dew of Repudiation: 46
A strange water droplet with rejection properties forms the basis of one of the Hydro Hypostasis attack patterns. The collapse of the creature of pure Hydro Energy leaves it behind. They say that water contains memories and willpower, which can grow when bodies of water meld together. However, the waves conjured by the Hydro Hypostasis are incompatible with the currents that flow above and below ground. Even if it were to flow into the surpassingly pure waters of Petrichor, this drop of water would likely resist assimilation as strongly as mercury.
You can get a few of these water droplets when you defeat the Hydro Hypostasis in its underwater cave on Watatsumi Island.
Varunada Lazurite


These mineral crystals can be obtained from boss enemies manipulating the Hydro element. Boss enemies include the Hydro Hypostasis, Oceanid, Tartaglia, aka Childe, and Azhdaha. You can also get these from quest and commission rewards by crafting them using the ones with lower rarity levels.
The amounts needed for each are as follows: Varunada Lazurite Sliver: 1; Varunada Lazurite Fragments: 9; Varunada Lazurite Chunks: 9; Varunada Lazurite Gemstones: 6.
Sango Pearl: 168
A Sango Pearl gives off a cool sheen like that of the moonlight. This precious pearl only grows in the coral of Watatsumi and is considered a local specialty of Inazuma, particularly on Watatsumi Island.
Spectral Core


These are energy cores of the Specters that contain elemental energy, which allows the said life forms to float and move around. You can collect some of these by defeating Specters of all elemental types. The Heart and the Nucleus ones can be crafted via the crafting bench in the city.
The amount needed for each is as follows: Spectral Husk: 18; Spectral Heart: 30; Spectral Nucleus: 36.
Ascension Phases
Ascension Phase 1
This first ascension will be done after the character reaches level 20, and they cannot proceed to the next level without ascending to the next phase. The character level cap will be increased to 40, and Sangonomiya Kokomi’s first passive talent, Tamanooya’s Casket, will be unlocked.
Materials:
- Mora – 20,000
- Varunada Lazurite Sliver – 1
- Sango Pearl – 3
- Spectral Husk – 3
Unlocked Talent: Tamanooya’s Casket (1st Passive Talent)
Ascension Phase 2
Ascension Phase 2 can be reached at character level 40 and will increase the character level cap to 50. After this ascension, the character’s talents can be upgraded or leveled up. Sangonomiya Kokomi will also unlock a special ascension stat on this phase: the Hydro Damage Bonus of 7.2%.
Materials:
- Mora – 40,000
- Varunada Lazurite Fragments – 3
- Sango Pearl – 10
- Spectral Husk – 15
- Dew of Repudiation – 2
Unlocked Special Stat: 7.2% Hydro Damage Bonus
Unlocked Feature: Allows leveling combat talents from 1 to 2
Ascension Phase 3
After reaching level 50, Sangonomiya Kokomi can ascend to ascension phase 3, increasing her character level cap to 60. The 3rd ascension phase will double the Hydro Damage Bonus special stat from 7.2% to 14.4%. Additionally, Sangonomiya Kokomi’s combat talents can be increased to level 4.
Materials:
- Mora – 60,000
- Varunada Lazurite Fragments – 6
- Sango Pearl – 20
- Spectral Heart – 12
- Dew of Repudiation – 4
Unlocked Stat: Hydro Damage Bonus increased from 7.2% to 14.4%
Unlocked Feature: Allows leveling combat talents from 2 to 4
Ascension Phase 4
At level 60, you can ascend Sangonomiya Kokomi to ascension phase 4 and upgrade her character level cap to 70. After ascending, you will unlock her second Passive Talent called Song of Pearls, and all her Combat Talents can then be leveled up to 6.
Materials:
- Mora – 80,000
- Varunada Lazurite Chunks – 3
- Sango Pearl – 30
- Spectral Heart – 18
- Dew of Repudiation – 8
Unlocked Feature: Allows leveling combat talents from 4 to 6
Unlocked Talent: Song of Pearls (2nd Passive Talent)
Ascension Phase 5
The 5th ascension phase can be reached when Sangonomiya Kokomi is at level 70, and ascending will increase her character level cap to 80. Her special ascension stat, Hydro Damage Bonus, will be increased to 21.6% at this phase. Sangonomiya Kokomi’s combat talents will upgrade their level cap from 6 to 8.
Materials:
- Mora – 100,000
- Varunada Lazurite Chunks – 6
- Sango Pearl – 45
- Spectral Nucleus – 12
- Dew of Repudiation – 12
Unlocked Stat: Hydro Damage Bonus increased from 14.4% to 21.6%
Unlocked Feature: Allows leveling combat talents from 6 to 8
Ascension Phase 6
Sangonomiya Kokomi’s final ascension phase is at level 80, and it will increase her character level cap to 90. Her special ascension stat, the Hydro Damage Bonus, will be increased to 28.8%, and her Combat Talents can now be upgraded to the maximum level of 10.
Materials:
- Mora – 120,000
- Varunada Lazurite Gemstones – 6
- Sango Pearl – 60
- Spectral Nucleus – 24
- Dew of Repudiation – 20
Unlocked Stat: Hydro Damage Bonus increased from 21.6% to 28.8%
Unlocked Feature: Allows leveling combat talents from 8 to 10
Sangonomiya Kokomi’s Talent Level-Up Materials
What are the Talent Level-Up Materials for Sangonomiya Kokomi
Aside from Mora and Spectral Cores, you will need a few Hellfire Butterflies to increase Sangonomiya Kokomi’s combat talents.
Hellfire Butterfly
This material is a warped shard that houses great might, an original power that Crimson Witch of Flames then unleashed.
The seal of ice was broken under duress, and as her former will surged forth from its pale white prison and she remembered her old name once more, the undying butterfly danced amidst burning flesh and blood. And she remembered her past, wandering the land, spreading the flame, burning away all evil — and recalled the face of the person she could never meet again.
You can get a few of this material after defeating Signora in the Tenshukaku Memories: Duel to the Fiery Death Domain in Narukami Island, Inazuma.
Talent Level Book: Transience


The talent scrolls you will need for Thoma to master her combat capabilities are the ones of the “Transience” series, which you can obtain from the Violet Court Domain of Mastery: Reign of Violet in Narukami Island, Inazuma.
These scrolls include the Teachings of Transience, Guide to Transience, and the Philosophies of Transience. The last two can be crafted using the crafting bench in the town.
Crown of Insight
Leveling a combat talent up from level 9 to 10 will need a Crown of Insight, a special item that can only be obtained as a reward from the game’s events.
- Mora: 1,652,500
- Spectral Husk: 6
- Spectral Heart: 22
- Spectral Nucleus: 31
- Teachings of Transience: 3
- Guide to Transience: 21
- Philosophies of Transience: 38
- Hellfire Butterfly: 6
- Crown of Insight: 1