Learn how to reset your attribute points in Cyberpunk 2077!

The Cyberpunk 2077 circa patch 2.0 completely changed the game as a whole. The update reworked many things, including combat, skills, and equipment, to the point where the game was almost like a brand-new game. Any stat and perk builds you previously had become useless after the patch.
Although you can always choose to start a new game, it is easier to respec your character. The modified respec system of Cyberpunk 2077’s 2.0 update made things a lot easier for players to go from being a knife-wielding stealth assassin to a shotgun-wielding warrior.
How to Respec Attribute Points in Cyberpunk 2077?
In video games, respeccing means reallocating the distribution of your current skill points. There are two kinds of respec that you can do to your character in Cyberpunk 2077: an attribute and a perk respec.
Respeccing your perks allows you to reset your allotted points to obtain new bonuses and abilities. On the other hand, respeccing your attributes resets your core stats and allows you to redistribute the points to your desired attributes.
In-game Respec
Although resetting your attribute points is much easier than resetting your perks, it is also very limited, as you can only respec your attribute points once per playthrough. Without using any mods in the game, you only have one chance to reset them, so make sure not to waste it.
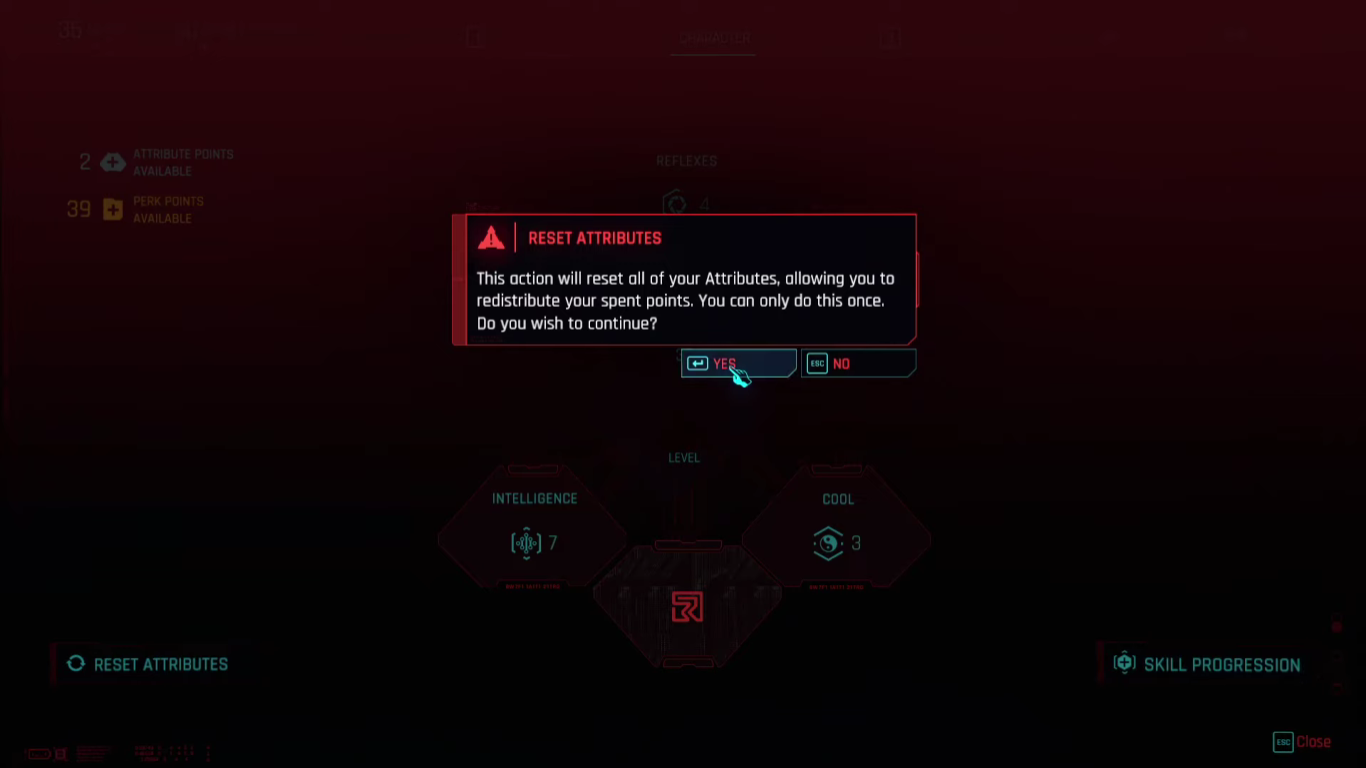
Unlike respeccing perks, resetting your attribute points reimburses all your spent points in one fell swoop so you can redistribute them. If you want to reset your current attribute points in Cyberpunk 2077, follow the steps below:
- Open the Game Menu interface from your inventory by pressing the ‘I’ key on your keyboard.
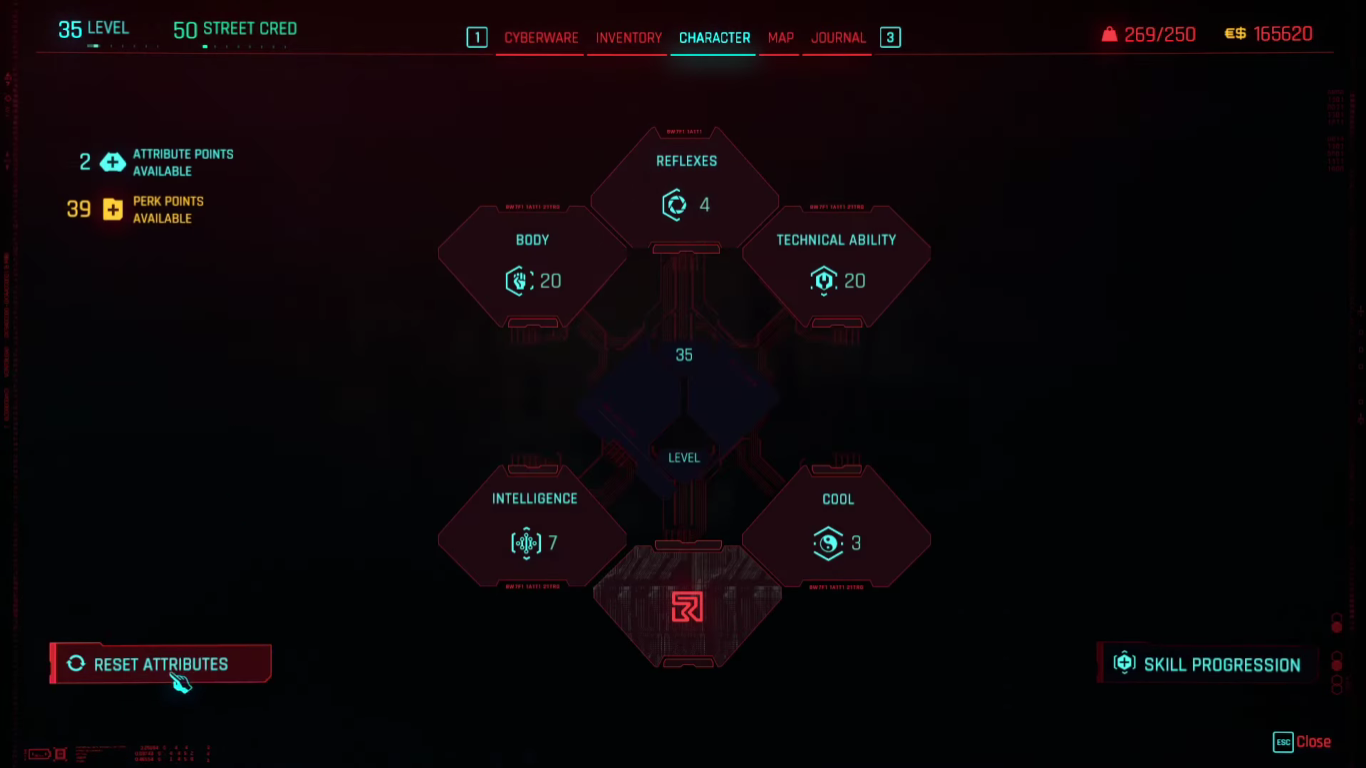
- In the game menu, locate and click on the Character tab on the upper portion of the screen, right next to the Inventory tab.
- Click on the Reset Attributes button at the bottom-left portion of the screen.
- A pop-up warning message will notify you that you can only redistribute your spent attribute points once per game. Pressing Yes will reset the spent points, allowing you to reallocate them to your desired attribute. Choosing No will stop you from respeccing your current attribute points and save the do-over for another time.
Once you respec your attributes, you can only respec them again by using the Infinite Attribute Reset mod, which allows you to reset an unlimited number of times.
You should also note that your abilities are now tied to your attributes due to the Cyberpunk 2077 perk system circa update 2.0. This means you can obtain stronger and better Perks with more points you allot into a stat. The strongest abilities can be obtained once you max out a single attribute.
Infinite Attribute Reset Mod
The Infinite Attribute Reset mod from Nexus Mods allows players to reset their attributes anytime. Once deployed, this mod will make it so that the reset attribute button, which disappears after being used once, will remain available at all times, allowing players to respec their character’s attributes unlimitedly. On a side note, this mod is also compatible with the Cyberpunk 2077 2.0 update.
To install the Infinite Attribute Reset mod, simply follow the following steps:
- First, you have to install REDmod. This DLC for Cyberpunk 2077 will allow you to install and load mods into the game. You must choose and download the DLC relevant to your current game version: Steam, GOG, or from the official website.
- Next, Go to Nexus Mods and download the Infinite Attribute Reset mod to your computer.
- Once downloaded, extract the mod to the game folder, Cyberpunk 2077/mods. The entire folder structure should be Cyberpunk 2077/mods/InfiniteResetAttributes/info.json.
- Open the main directory, then locate and run the REDprelauncher.exe application.
- Ensure the Mods Enabled option is active by clicking the gear icon next to the Play button.
- If the gear icon is not visible, do the following steps:
- Go to the folder directory: Cyberpunk 2077/r6/cache
- Create an empty folder and rename it to modded.
- Run the application again.
- If the gear icon is gray, this will change it to yellow, and the deployment window for mods will pop up. Wait for a few seconds and run the game again.
- If the gear icon is green, this will change it to gray. Simply wait for a few seconds and click the icon again. This should immediately turn the icon green again.
- If the gear icon is not visible, do the following steps:
- Press Play, and the mods deployment screen should show up and automatically start the game.
Take note that you must redeploy the mod every time you download the updated version to use the updated REDmod mod. Otherwise, the update will not take effect, and the old files will continue to be used by the game even when they’ve already been replaced.
See also: How To Fix the Corrupted or Missing Script Files Error in Cyberpunk 2077


