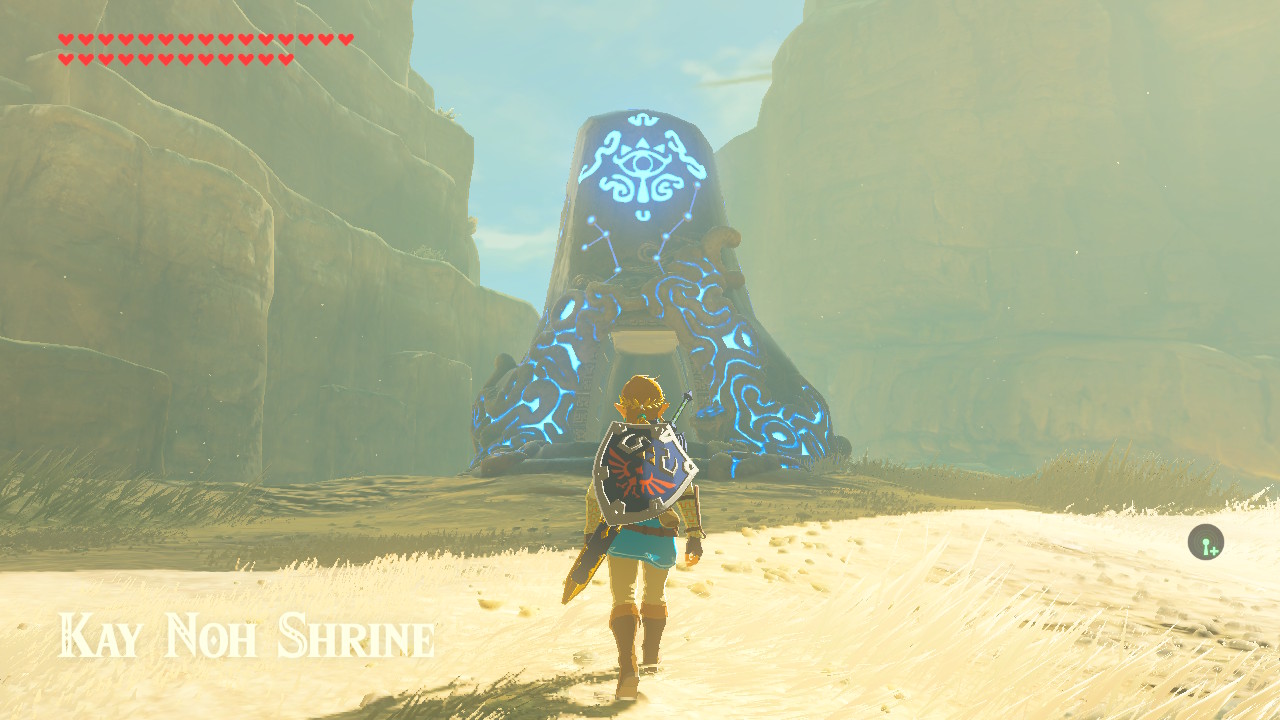
One of the Shrines in The Legend of Zelda: Breath of the Wild is the Kay Noh Shrine or the Power of Electricity. This Shrine requires Link to conduct electricity for various machines inside the shrine to work. This shrine is easy to complete, and in this guide, you will learn how to complete the Kay Noh Shrine, obtain the chest inside, and claim the Spirit Orb.
Link will be rewarded with Spirit Orbs for completing Shrines. The Spirit Orbs obtained can be exchanged for more Heart Containers or Stamina Vessels. As there are 120 Shrines all over Hyrule, Link can get 120 Spirit Orbs. You can decide whether you want Link to have more Hearts or Stamina.
Location
The Kay Noh Shrine can be found at the top of the cliff just across from the Gerudo Canyon Stable, near the Gerudo Desert Gateway west of the Wasteland Tower and Gerudo Canyon (the shrine is northeast of the Kara Kara Bazaar or south of Taafei Hill). The Kay Noh Shrine is one of 12 shrines in the Wasteland Tower region.
Power of Electricity
Before descending on the shrine, make sure that Link has a few weapons, bows, and arrows on hand, as Link would have to defeat a few enemies and use weapons to solve puzzles in the shrine.
Upon entering the Kay Noh Shrine, you will see a metal sphere with green electricity inside. Just ahead of that are two low and circular platforms connected to a lamp near the wall. The lamp connected to it is glowing blue, and in the middle of the two lamps is a closed entryway. Another metal sphere with green electricity is on top of the low and circular platform on the left, which is also glowing green because of the electricity.
To complete the Kay Noh Shrine, this is what Link must do:
- First, press the up directional button, select the Magnesis Rune ability, press the L button to aim, aim at the metal sphere with green electricity in front of Link, press the A button to activate the Magnesis Rune ability on it, then bring the metal sphere with green electricity to the circular platform on the right.
- After that, the circular platform will turn green, the lamp connected to it will turn blue, and the entryway will be opened. Go through the entryway to continue on the path.
- Next, let Link go up a flight of stairs. Head to the left side of the room. You will see that Link will be in a big room with a closed entryway just ahead of the stairs, two more circular platforms on the left side of the room, just ahead of the circular platform is a big gap with a large treadmill in the middle, on top of the treadmill is a large concrete cube, on top of one of the circular platform is another metal sphere with green electricity powering up the right side of the treadmill, and a descending flight of stairs on the left side of the room.
- On this part of the shrine, Link will encounter a Guardian Scout guarding another metal sphere with green electricity hanging from the ceiling. The Guardian Scout is not armed with anything and will only fire blasts at Link, so it would be very easy to defeat this Guardian Scout. After defeating it, the Guardian Scout will drop a few Ancient Springs and Screws. Defeat the Guardian Scout to continue.
- After that, hold the ZR button to aim Link’s Bow and arrow, aim towards the rope that is attached to the metal sphere with green electricity, then let go of the ZR button to shoot the arrow, detach the metal sphere with green electricity, and drop it on the ground.
- Next, press the L button to aim Link’s Magnesis Rune ability, aim at the metal sphere with green electricity, then press the A button to activate the Magnesis Rune ability on it.
- Then, using the Magnesis Rune ability, bring the metal sphere with green electricity to the other side of the room on the circular platform on the left side near the treadmill.
- After that, the circular platform will turn green, the lamp connected to it will turn blue, and the treadmill will start to move, which will cause the huge concrete cube to fall in front of the treadmill and reveal a chest on top of a flight of stairs just ahead of the gap with the huge concrete cube and treadmill. Let Link cross the gap by running on the treadmill, jump towards the huge concrete cube, which is now on the same level as the treadmill, and jump towards the next platform. From there, head up the flight of stairs and go towards the chest. Open the chest to obtain a Small Key.
- After that, head back down the flight of stairs, drop down on the gap (as it would be a waste of time to try and run against the treadmill’s movement), climb up the ladder, and go towards the closed entryway. Here, press the A button to open it using the Small Key you obtained earlier.
- Next, you will see another flight of stairs with another Guardian Scout. Defeat the Guardian Scout to continue. The Guardian Scout will only be armed with a sword, so it would be very easy to defeat this Guardian Scout. After defeating it, the Guardian Scout will drop its Guardian Sword along with a few Ancient Springs or Screws for the taking.
- After that, continue on the entryway, and you will see two pools of water on both the left and right sides of the room. On the edge of each of the pools is a green power source with a chain attached to it, and the other end of the chain is dipped in the pool. In both the pools, there are two small metal cubes each. Near the northern edge of each of the pools, there is a lamp also with a chain attached to it, and the other end of it is dipped in the pool, another closed entryway on top of a small flight of stairs just ahead of Link, and behind the closed entryway is the altar and the monk.
- Additionally, in the pool on the left, the electricity from the power source is being conducted from the immediate surroundings of the end of the chain to the metal cubes in the middle of the pool to the end of the lamp’s chain. To solve this puzzle, Link must power the lamp near the pool on the right side. To do that, press the L button to aim the Magnesis Rune ability, aim at the small metal cube closest to the power source, press the A button to activate, and bring that small metal cube as close as possible to the other small metal cube while maintaining the electricity.
- Once the electricity is successfully brought from the power source to the lamp on the pool on the right side of the room, the gears on both sides of the entryway will start spinning, and the entryway will be opened, and Link can now access the altar. Before proceeding to the altar, head up the small flight of stairs, look back on the previous entryway, and above it, you will see a chest. Get a little bit closer to it, press the L button to aim the Magnesis Rune ability, aim at the chest, press the A button to activate the Magnesis Rune ability on it, and pull the chest towards Link. Open the chest to obtain a Moonlight Scimitar.
- Finally, go to the altar, talk to the monk, and claim your Spirit Orb!
As mentioned above, the Kay Noh Shrine, or the Power of Electricity, is one of 12 shrines in the Wasteland Tower region. The other shrines are the Daqo Chisay Shrine or The Whole Picture, the Jee Noh Shrine or the On the Move, the Dako Tah Shrine or the Electric Path, the Tho Kayu Shrine or Tho Kayu’s Blessing, the Hawa Koth Shrine or The Current Solution, the Dila Maag Shrine or Dila Maag’s Blessing, the Raqa Zunzo Shrine or Raqa Zunzo’s Blessing, the Kema Zoos Shrine or the A Delayed Puzzle, the Suma Sahma Shrine or Suma Sahma’s Blessing, the Korsh O’hu Shrine or Korsh O’hu’s Blessing, and the Misae Suma Shrine or Misae Suma’s Blessing.


