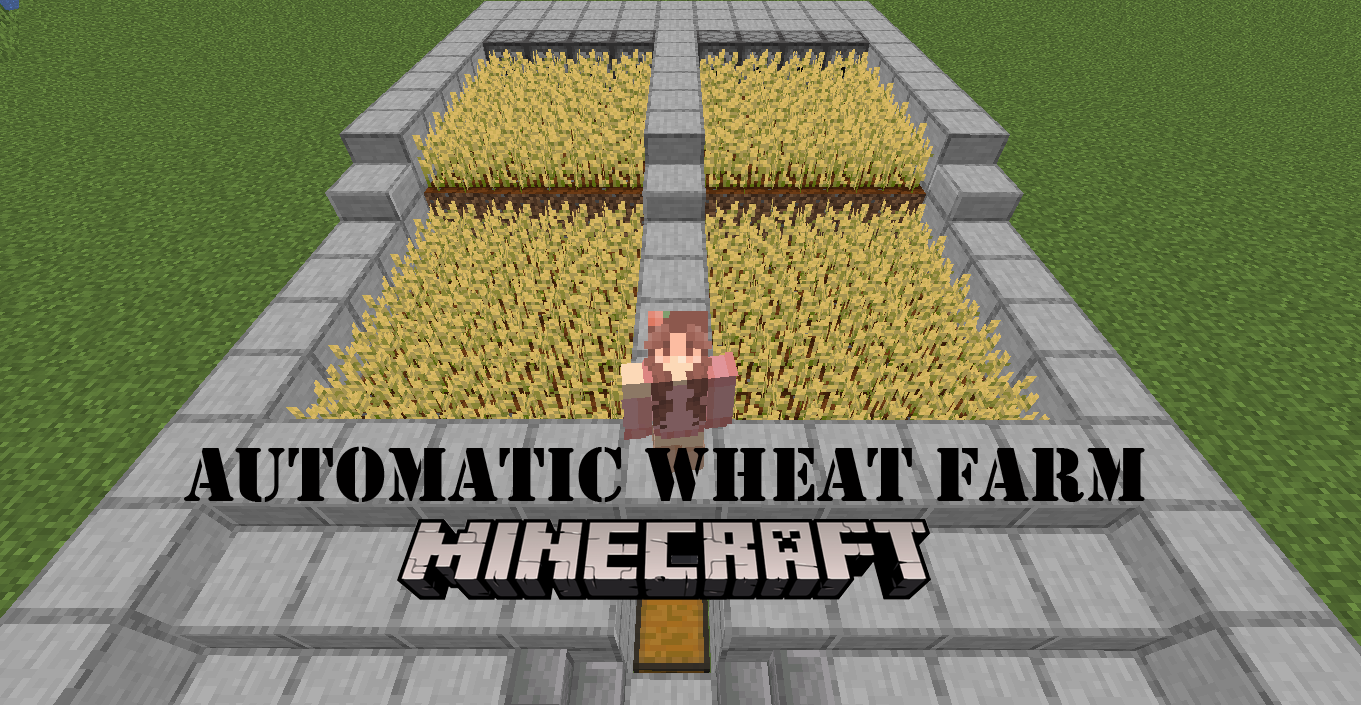
Minecraft is all about gathering resources in order to survive. This guide will teach you how to create your own automatic wheat farm in Minecraft!
Survival is an essential mechanic in the game that players must fulfill in order to beat Minecraft. But to survive, a player must first gather enough resources for crafting gears and equipment. We all admit that farming for these resources isn’t exactly the easiest thing to do nor is it exciting. And over the years, players have created various ways to make things easier for them. One of these ways is to create farming sites for items that are either normally not accessible to players or too much of a hassle to farm for near your base.
There are three ways to farm resources in Minecraft: automatic farming, semi-automatic farming, and manual farming. Based on all three options given, we can all agree that manual farming is too taxing, time-consuming, and inefficient. Whereas automatic farming will do all the work for you and all you have to do is to collect its loot. For this guide, we will show you how to create your very own automatic wheat farm to easily make bread and other food items for sustenance,
How To Make An Automatic Wheat Farm
Dispenser Area
- Dig an 11×4 wide area on the ground and place smooth stone blocks as foundation. This spot will be the redstone mechanism area. You may also use any block available as an alternative to smooth stone blocks.

- Use smooth stone slabs and create a short wall in front of your 11×4 area. Place 4 smooth stone slabs (or a 2-block high wall) on the left, right, and middle section of the wall while placing 2 smooth stone slabs (or a 2-slab high wall) in between them as indicated in the image below.

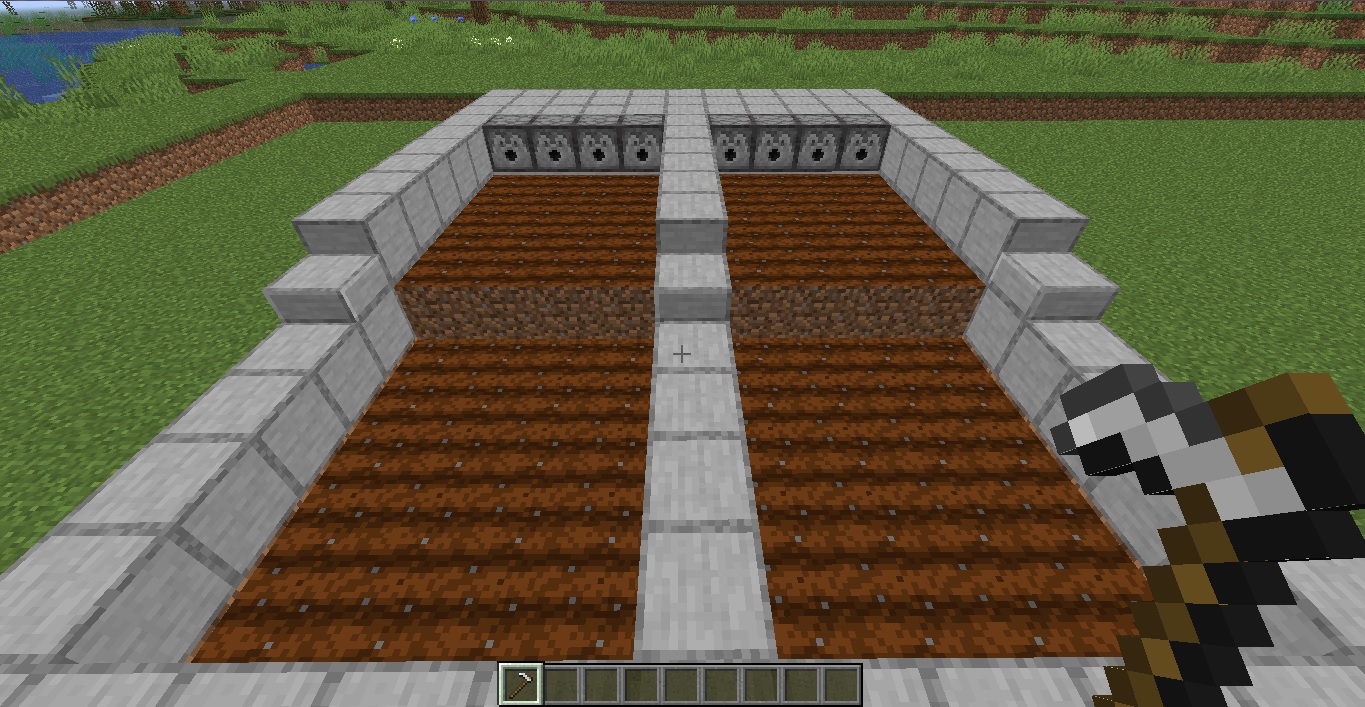
- Place 8 dispensers facing front on the gaps of the wall. This will complete the 2-block high wall.

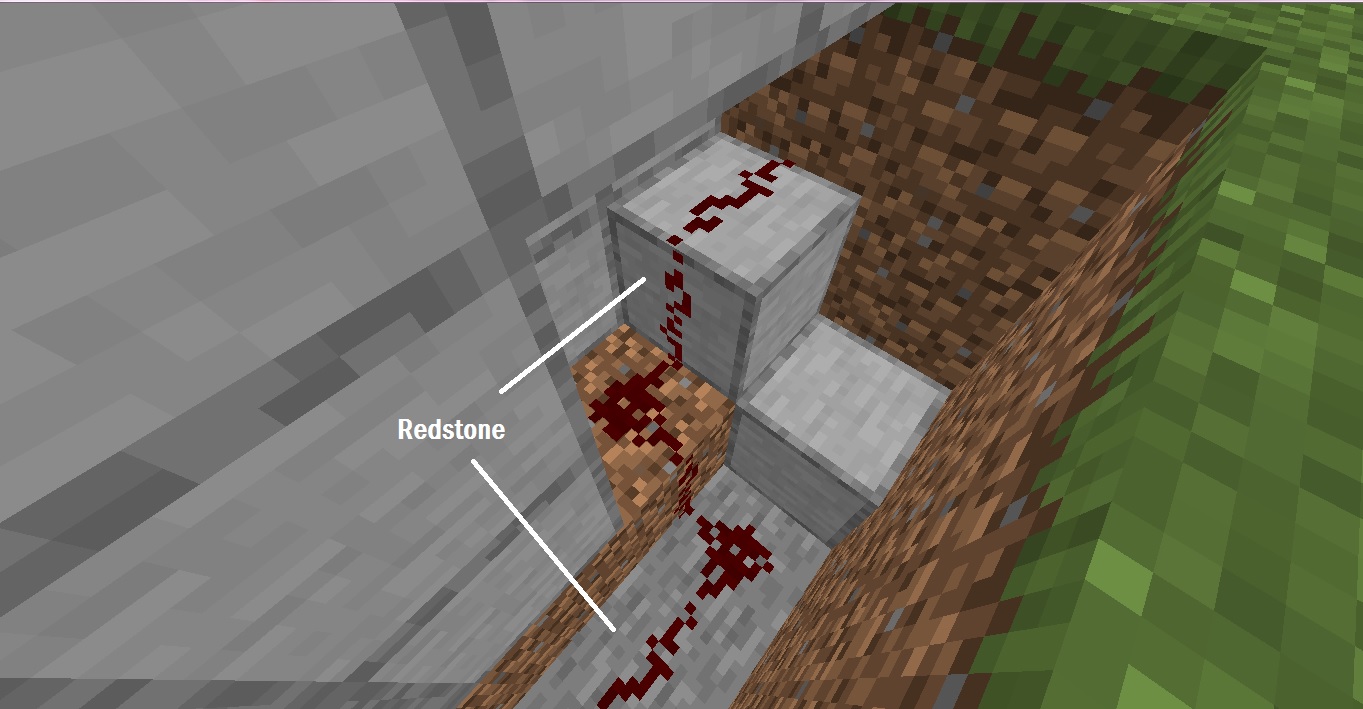
- Go to the back side of the wall. Place 8 redstone repeaters with their arrows facing the dispensers and place 8 redstone dust at the back of each redstone repeater.

- Dig the area between the redstone dust. Dig 1 block down between the redstone dust, 2 blocks down below that, and 3 blocks down going to the right. Then place a redstone dust on top of each block.

- Complete the wall by placing 2 smooth stone blocks or 4 smooth stone slabs around the redstone mechanism.

- Place smooth stone slabs to completely cover the redstone mechanism.

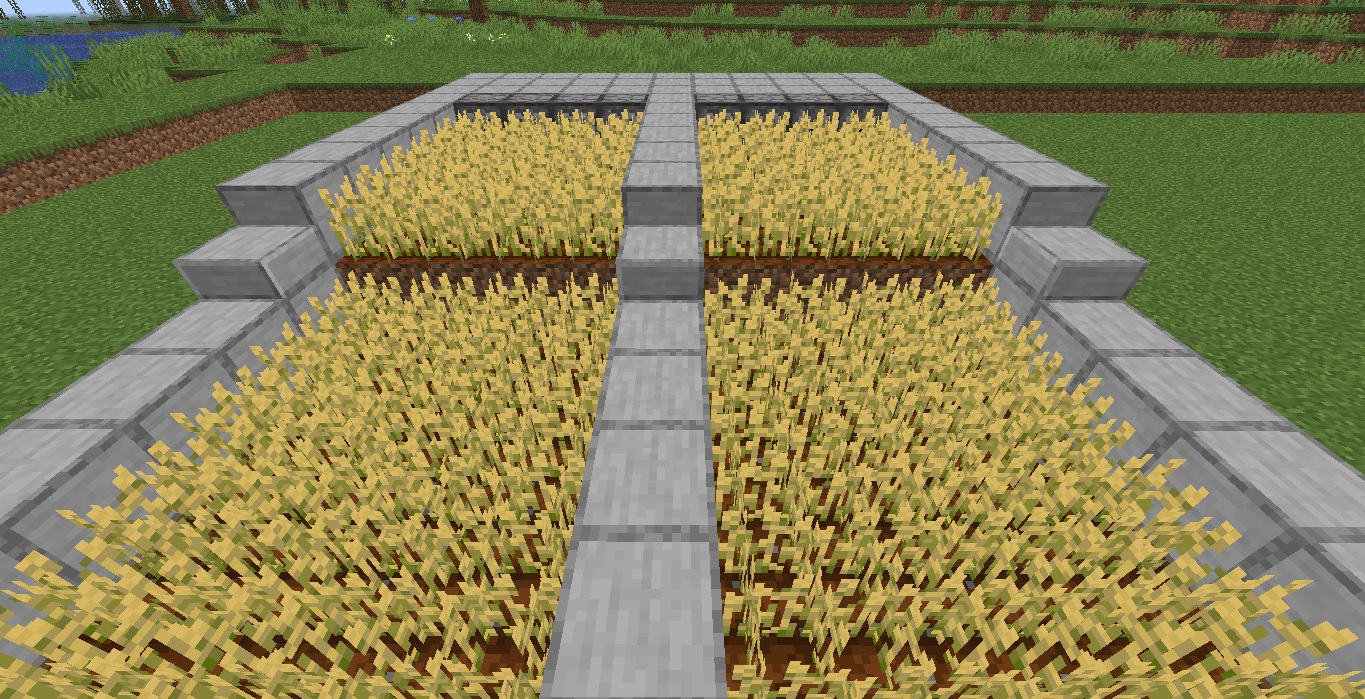
Upper Farmland Area
- Using 40 dirt blocks, place them on top of the ground in a 5×4 wide area. This will create an elevated area for planting crops later on. Make sure that the dirt blocks are in front of the dispensers. You may extend the length of the dirt blocks depending on how long you want your farm area to be.

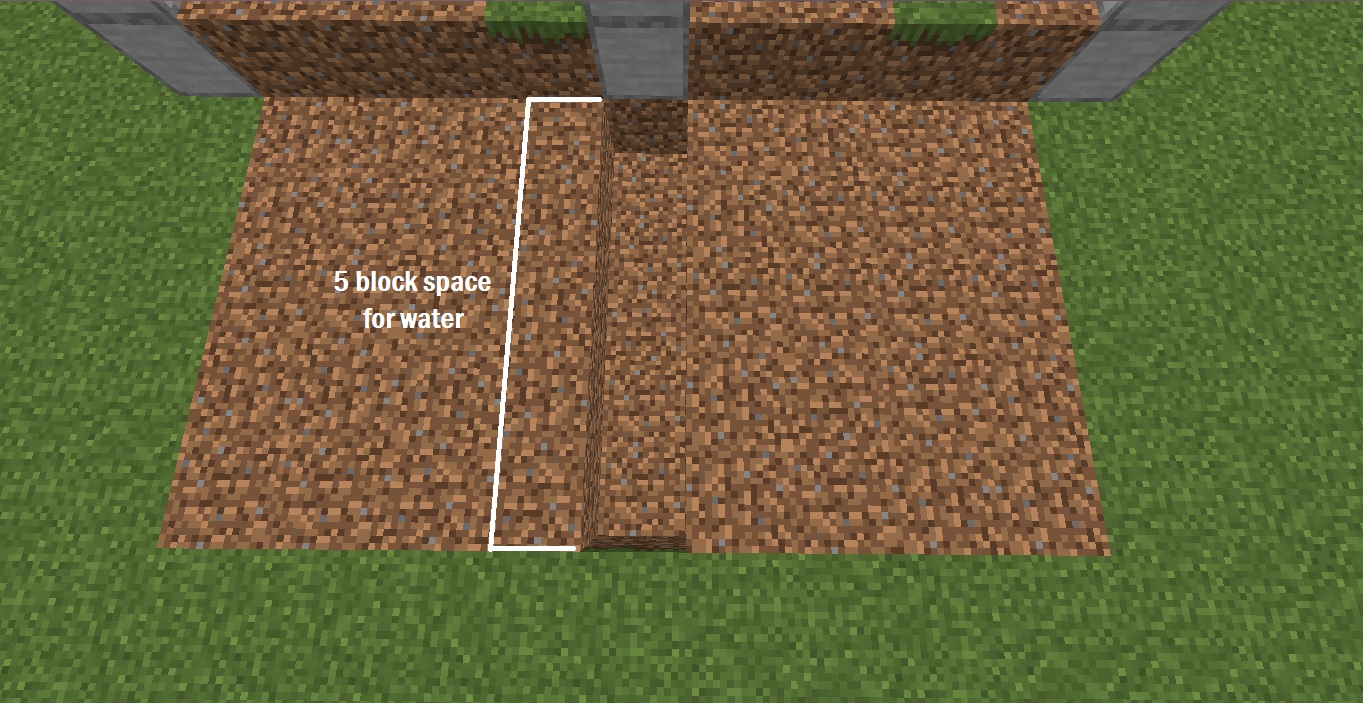
- Place a 2-block high wall on each side of the farm area and one in the middle section as well. Make sure to leave a 4-block space between the dirt blocks for water.

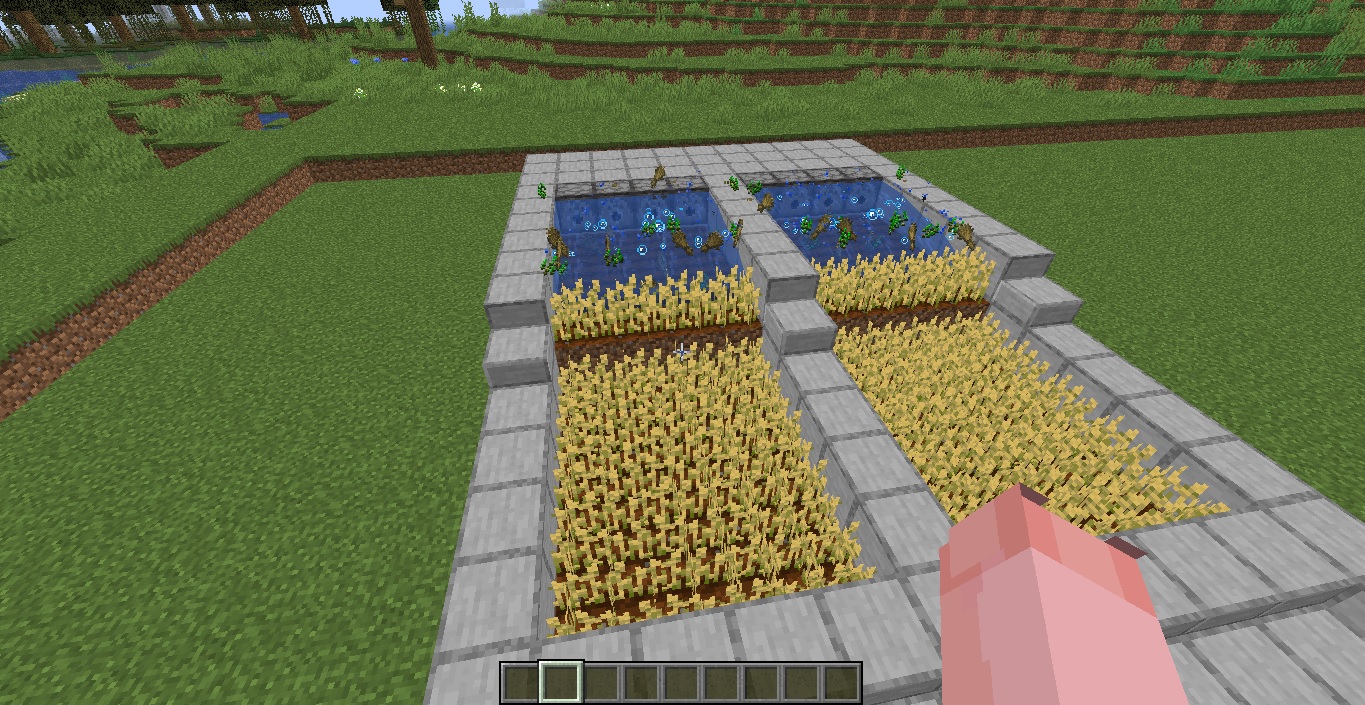
- Using a water bucket, fill in the gaps between the dirt blocks with water.

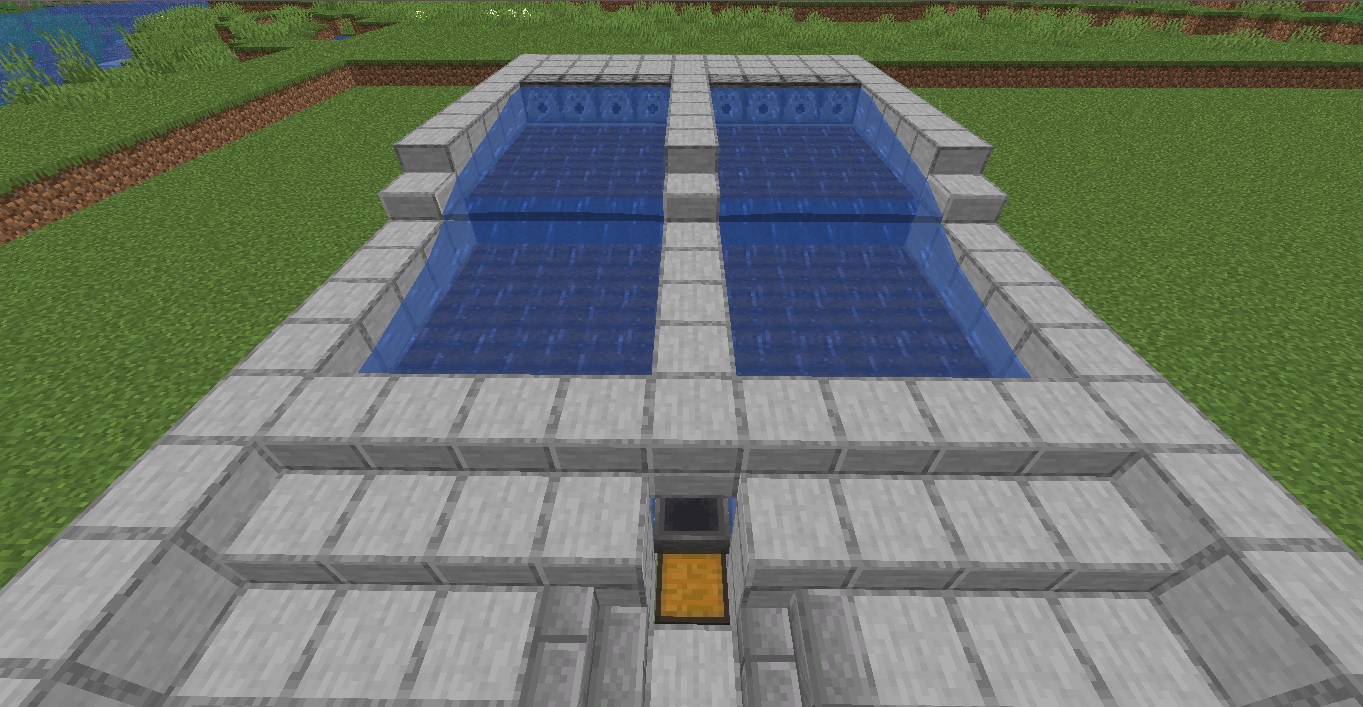
- Use smooth stone blocks to cover the top area of the water to prevent any wheat loss.
Lower Farmland Area
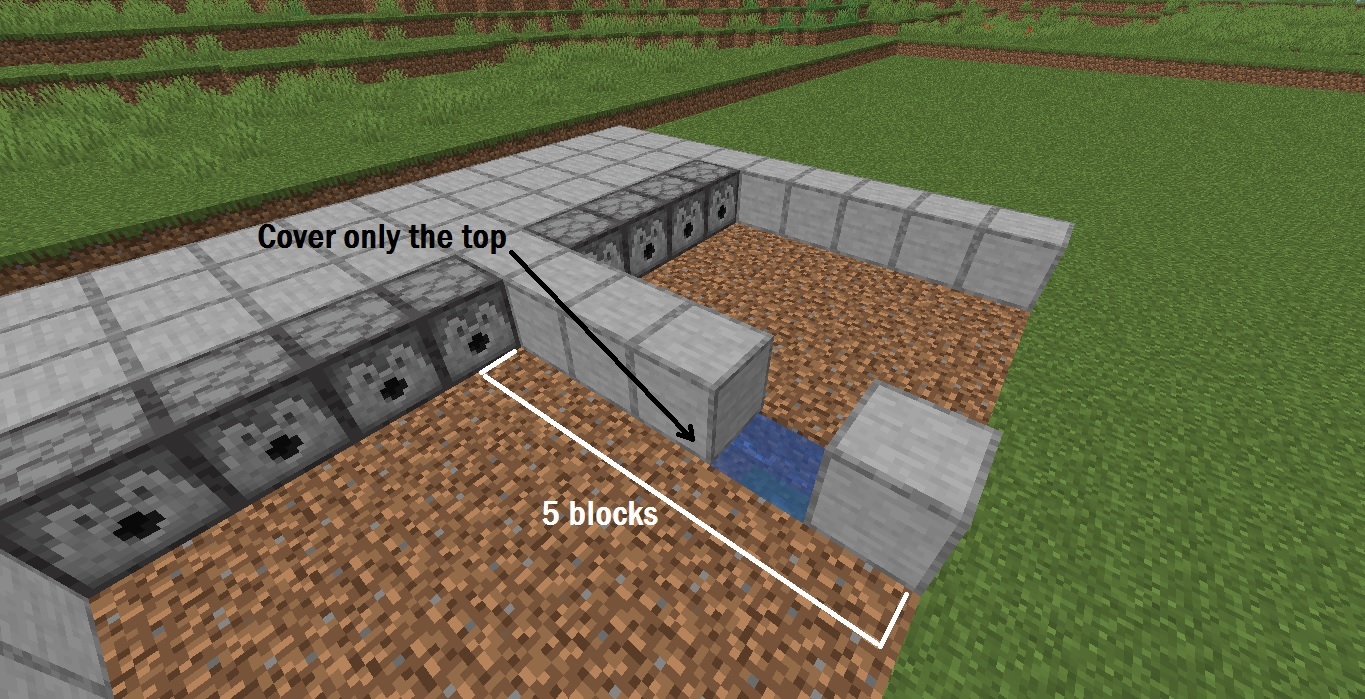
- Prepare a 5×4 wide area in front of the first farm area. The area should either be filled with dirt blocks or grass blocks. This area is simply a lower level extension of your farm. Depending on your preference, you may extend the length of this area as well.
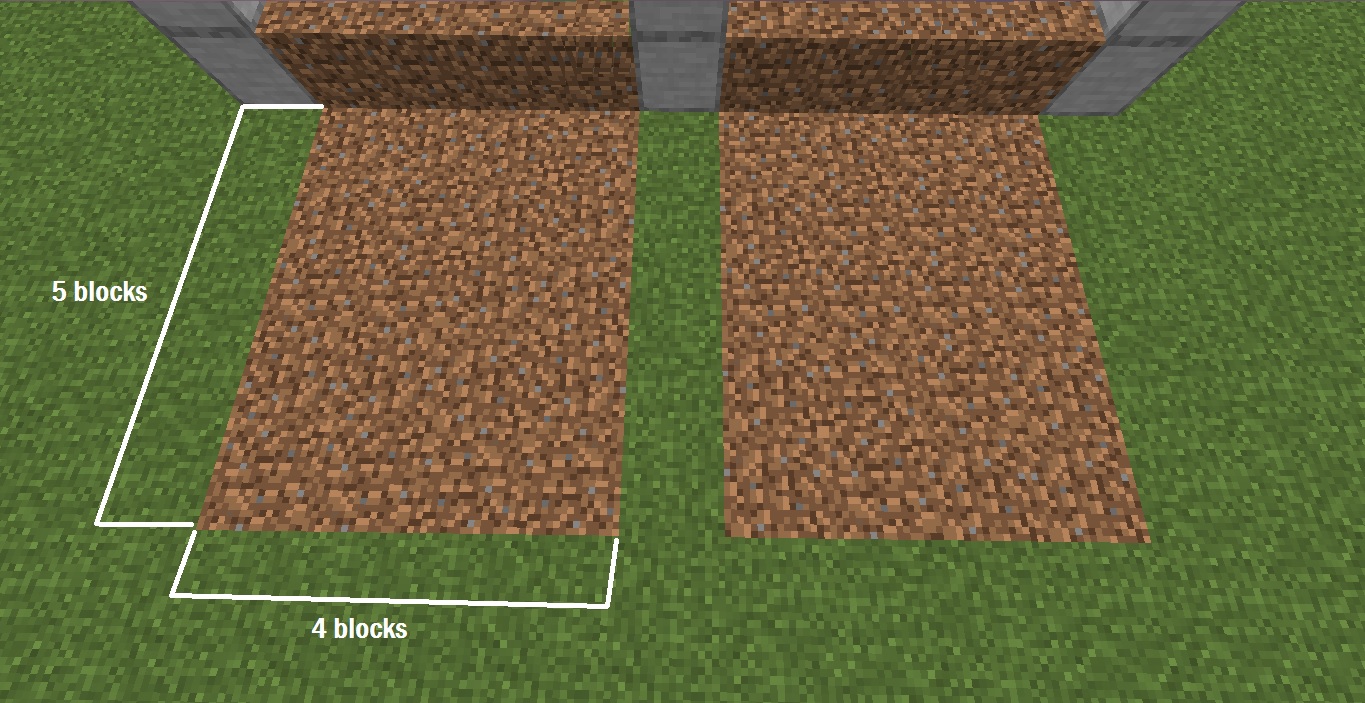
- Dig a 5-block space between the dirt blocks for water.
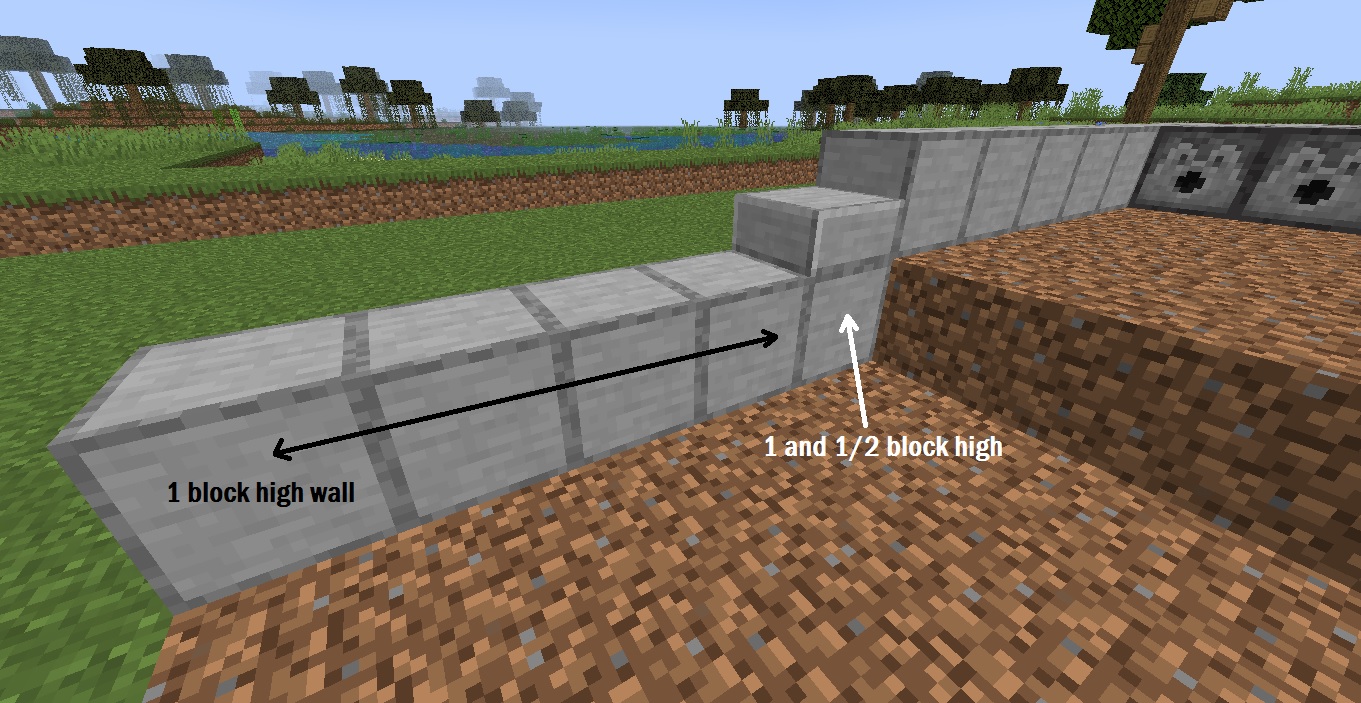
- Complete the wall around this area by placing a 1-block high smooth stone wall. Make sure to place a slab on the wall nearest to the elevated dirt block area. This will prevent the wheat from falling out of the farm during collection.
- Next, fill in the 5-block gap between the dirt blocks with water.
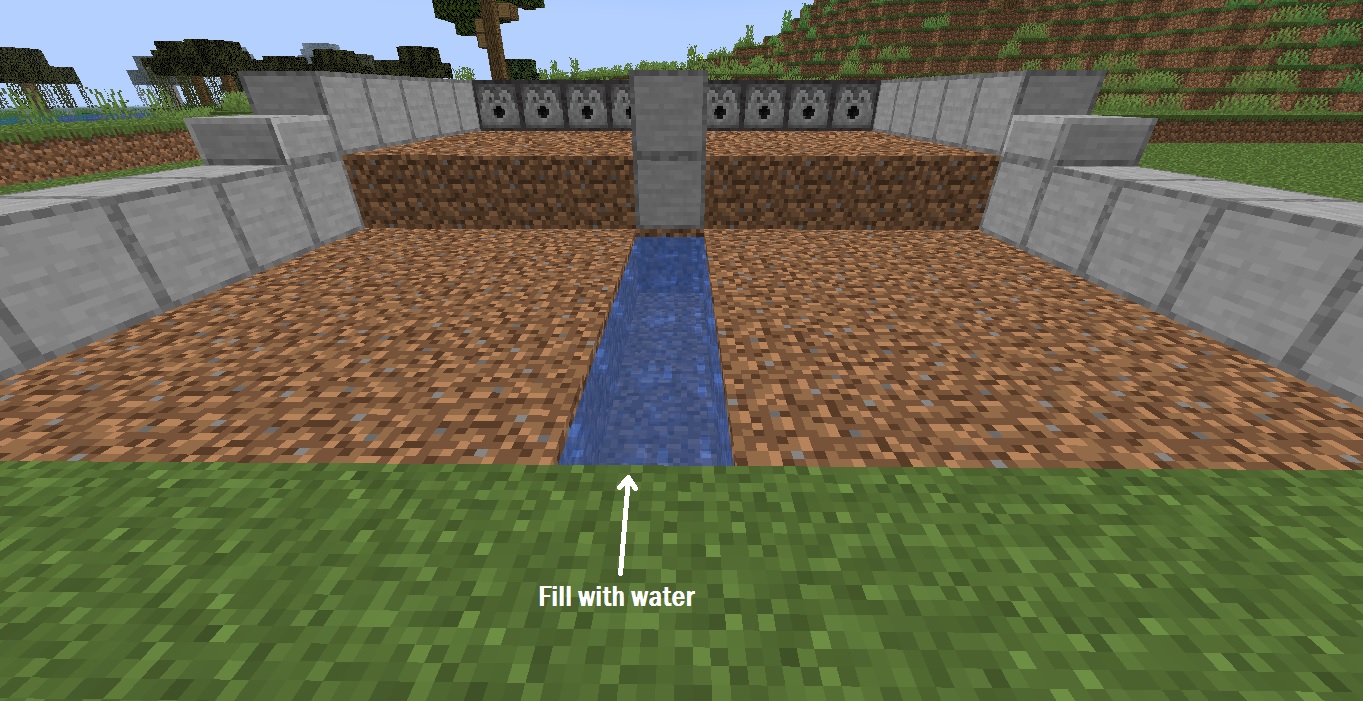
- Replicate the wall surrounding the lower farm area and cover the water with smooth stone blocks to prevent wheat loss.

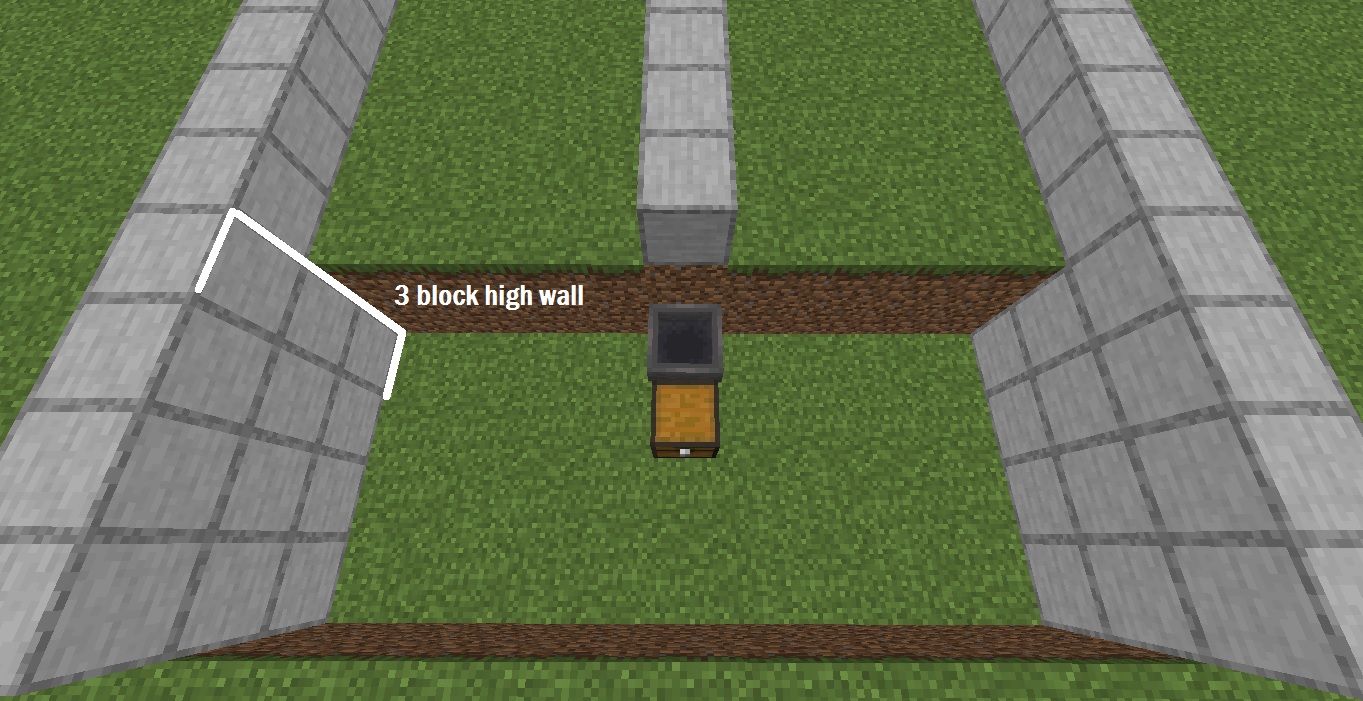
Collection Point
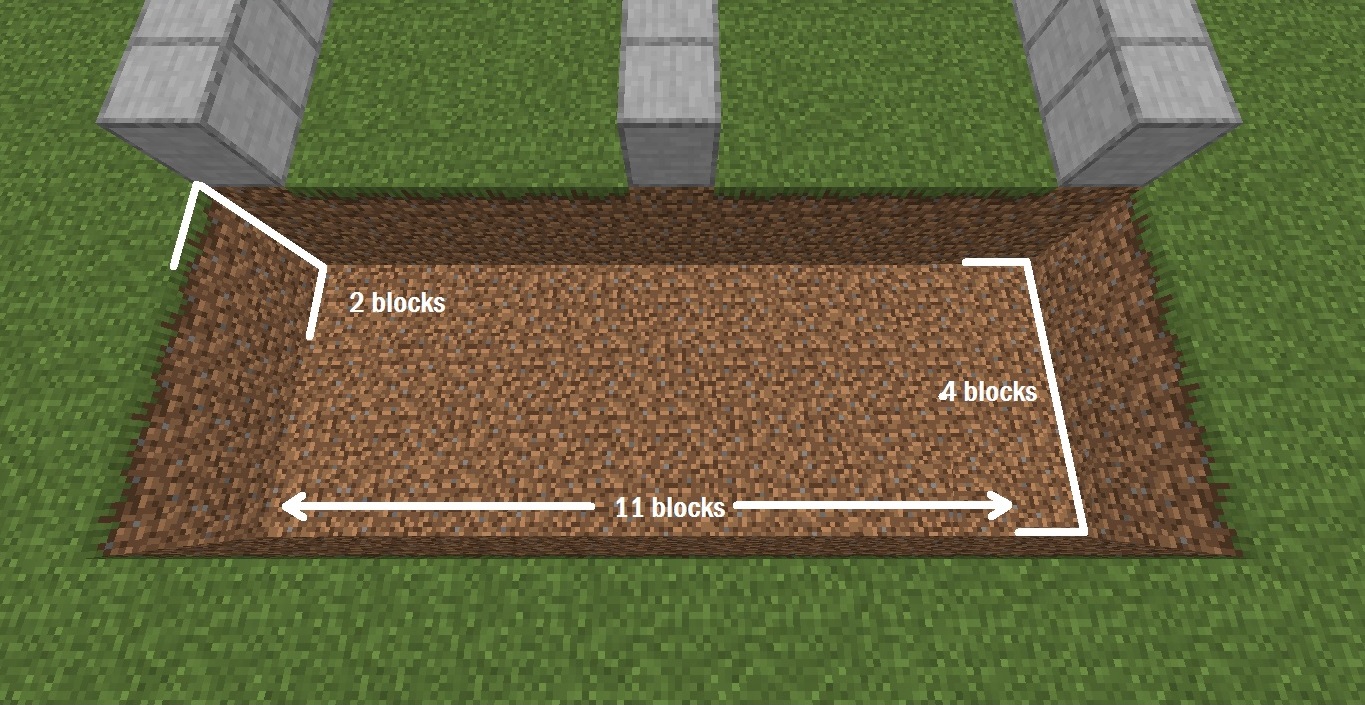
- Now that your farm area is ready, it’s time to prepare the collection area. Dig a 2-block deep, 11×4 wide area in front of the farm.
- Place a hopper in the middle that is connected to a chest for collection. Remember to attach the hopper to the chest; otherwise this mechanism will not work.

- Complete the wall surrounding the collection area by placing smooth stone blocks forming a 3-block high wall.
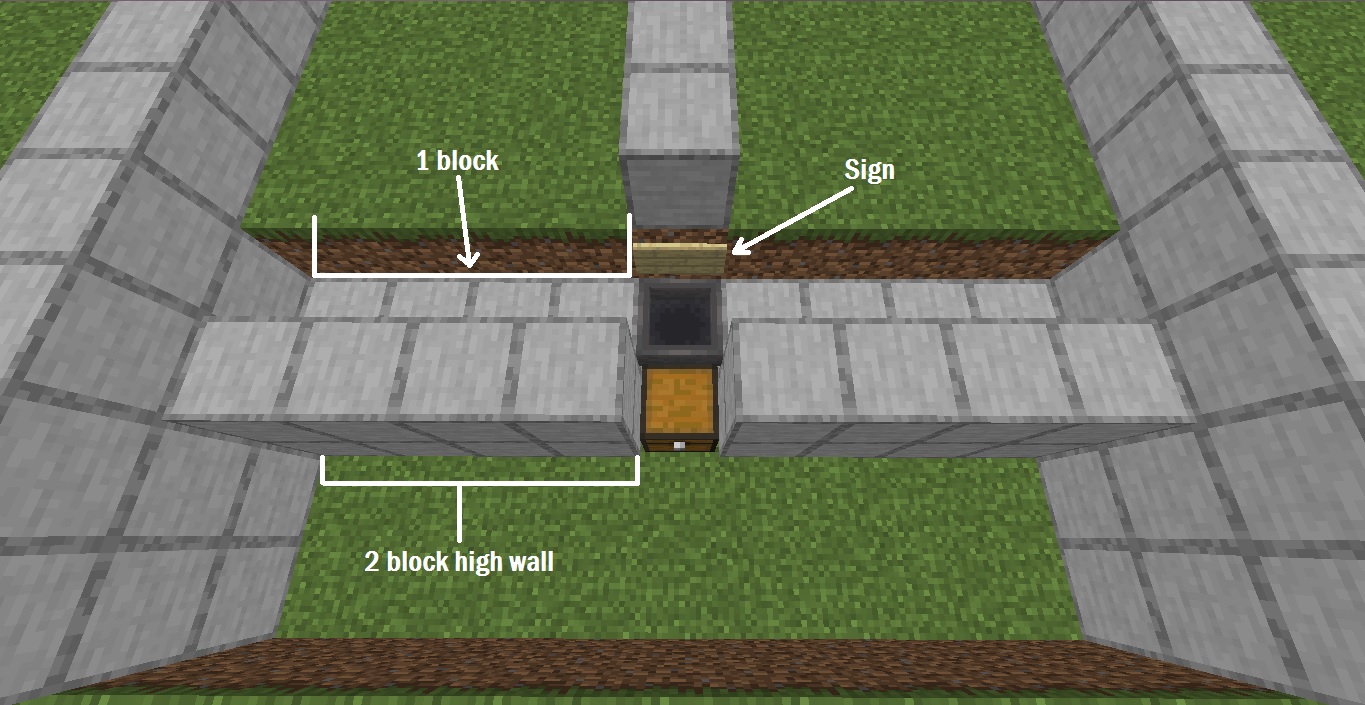
- Place a sign next to the hopper for water prevention. Next, form a 1-block high wall intersecting the hopper and a 2-block high wall intersecting the chest respectively.
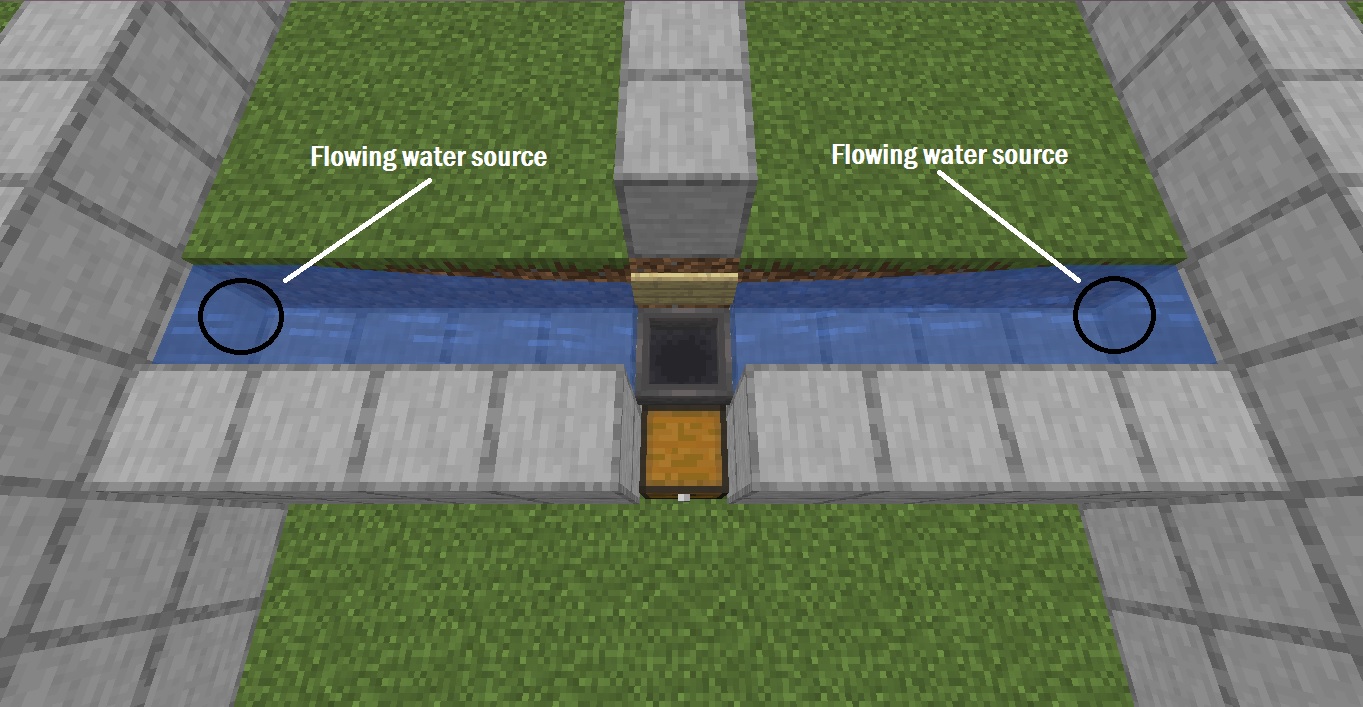
- Using 2 water buckets, place a flowing water source on either sides of the wall as indicated in the image below. You may do this by holding the water bucket in your hand and right-clicking on the wall. Make sure that the water is flowing so that the wheat may float down into the hopper during collection.
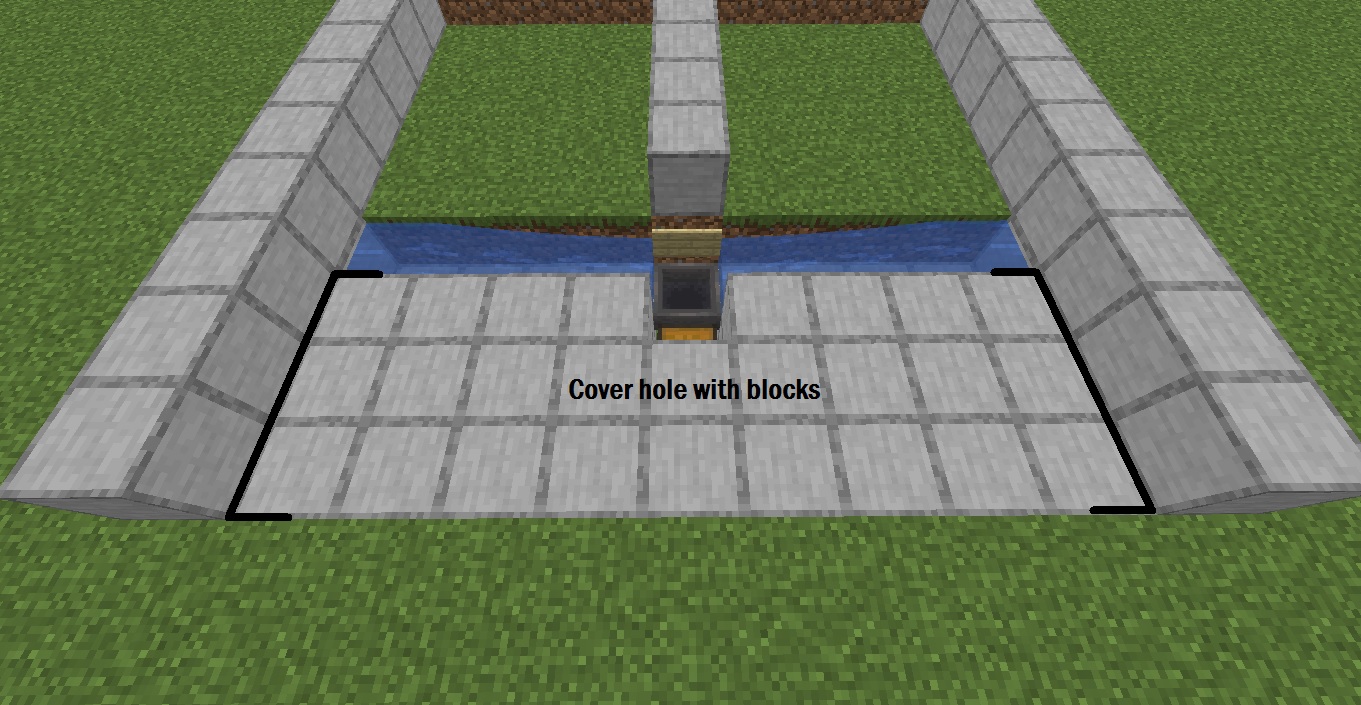
- Next, fill the entire collection area with smooth stone blocks.
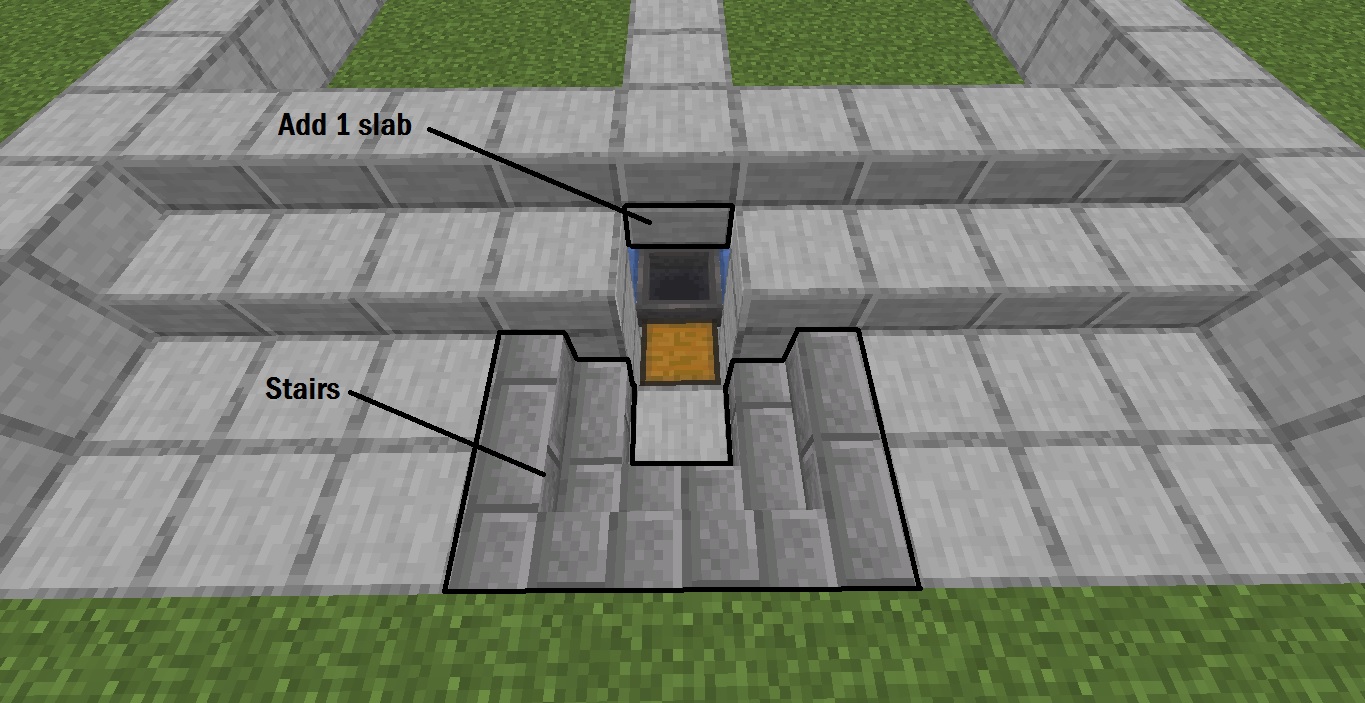
- Place a lower slab line over the chest and an upper slab line over the hopper. Do not cover the chest with a slab.
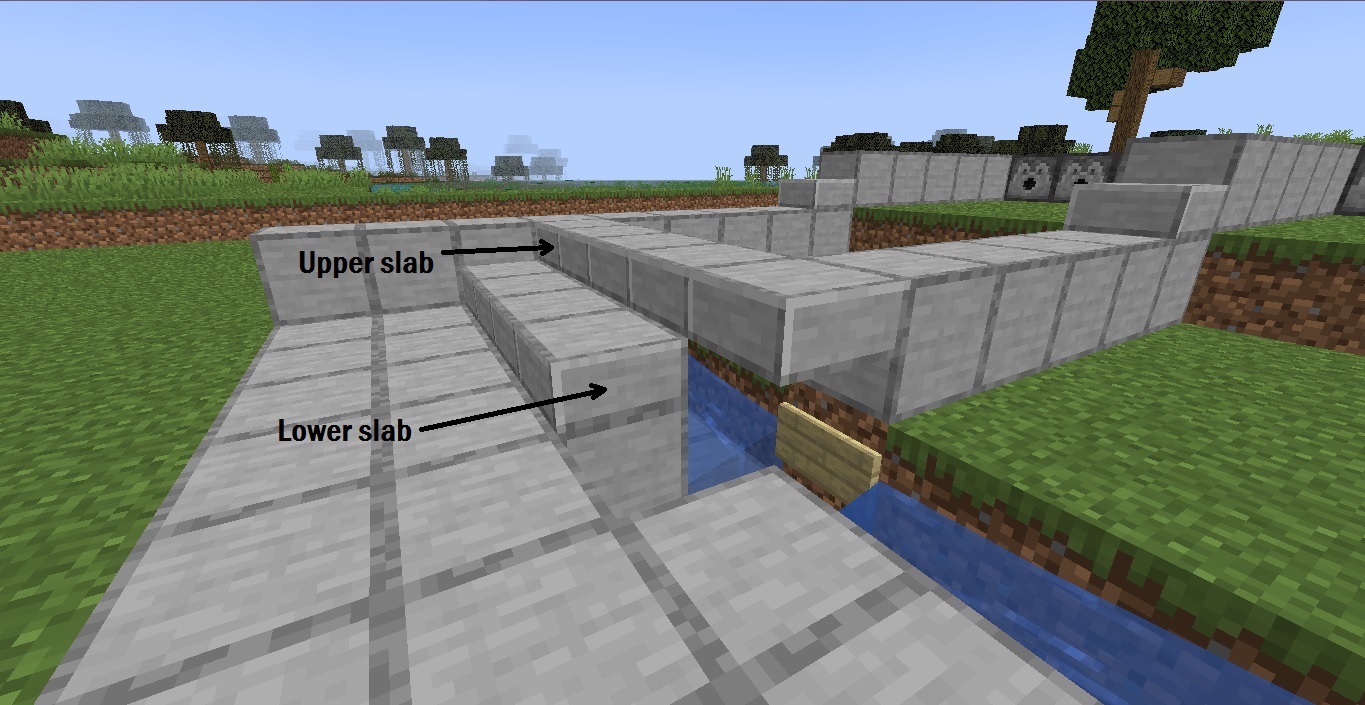
- Place a lower slab below the slab that’s on top of the hopper then remove the blocks surrounding the chest area and replace them with stairs for easier access as shown in the image below.
Redstone Mechanism
- To connect the redstone mechanism, dig out a 3-block deep trench in the left side of the farm. The length of the trench must be the same length as the entire farm.

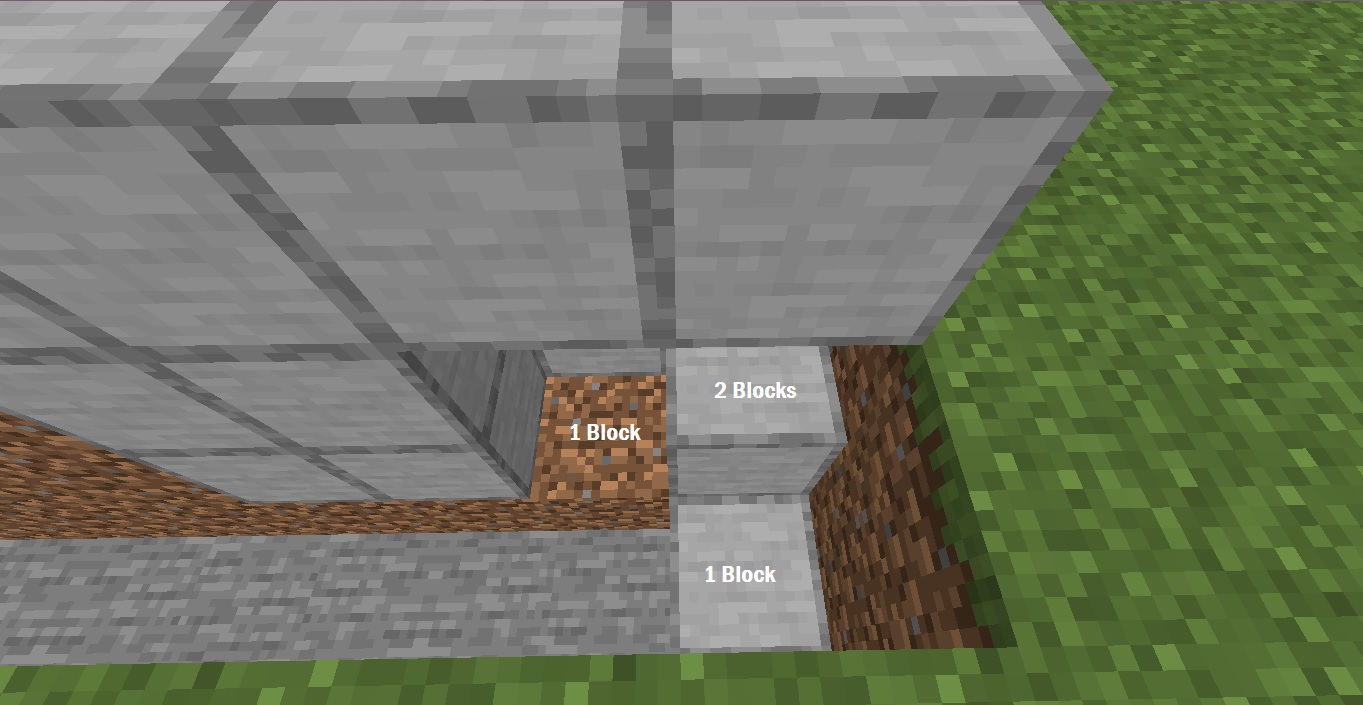
- On the trench’s right side, remove an exact number of blocks as shown in the image below.
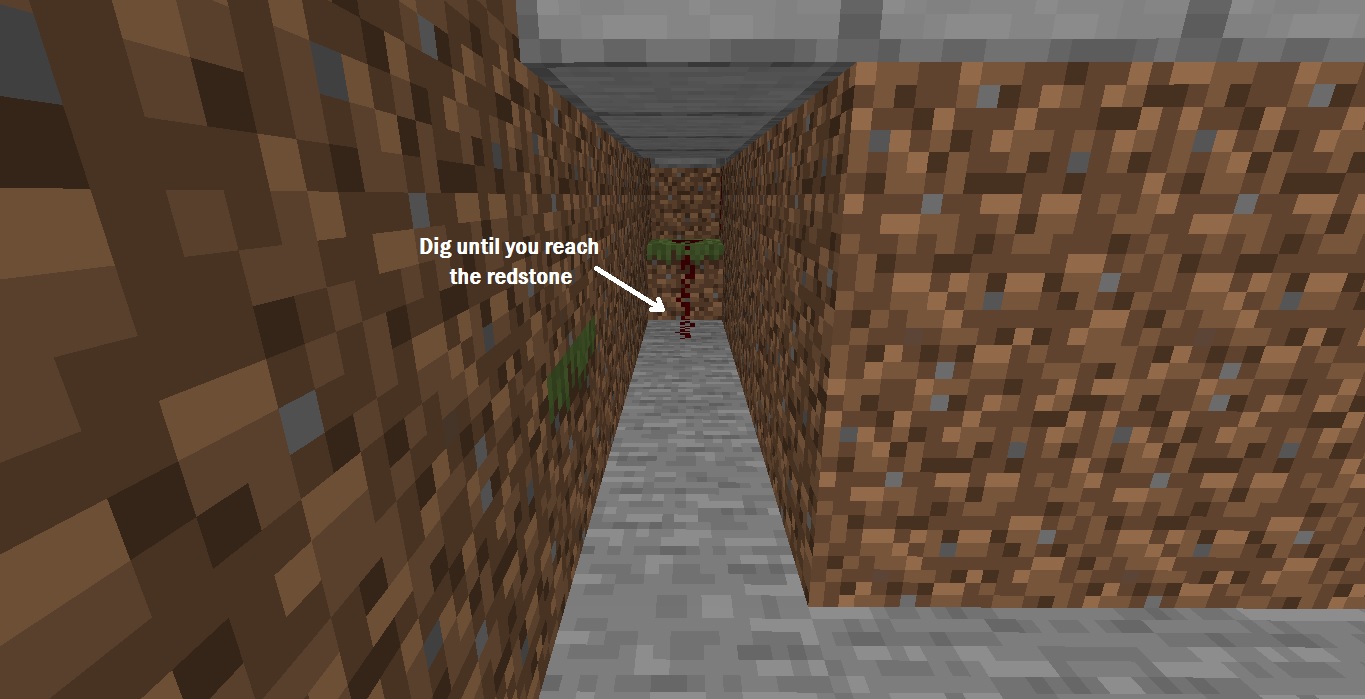
- Then on the trench’s left side, dig until you reach the first redstone mechanism underneath the dispensers.
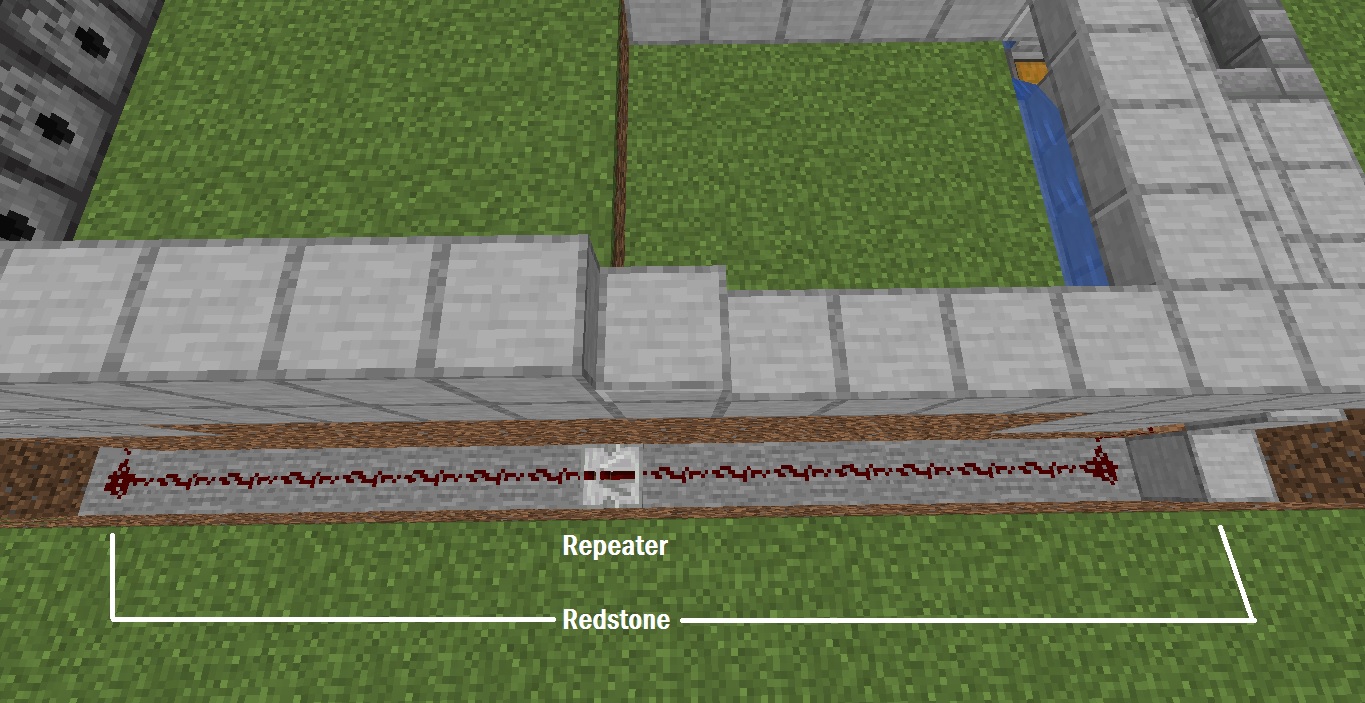
- Start placing redstone dust from the right side of the trench going to the left.
- Place a repeater in between the long line of redstone dust with its arrow facing the dispenser’s side. The repeater will strengthen the redstone connection allowing signal to pass through easily.
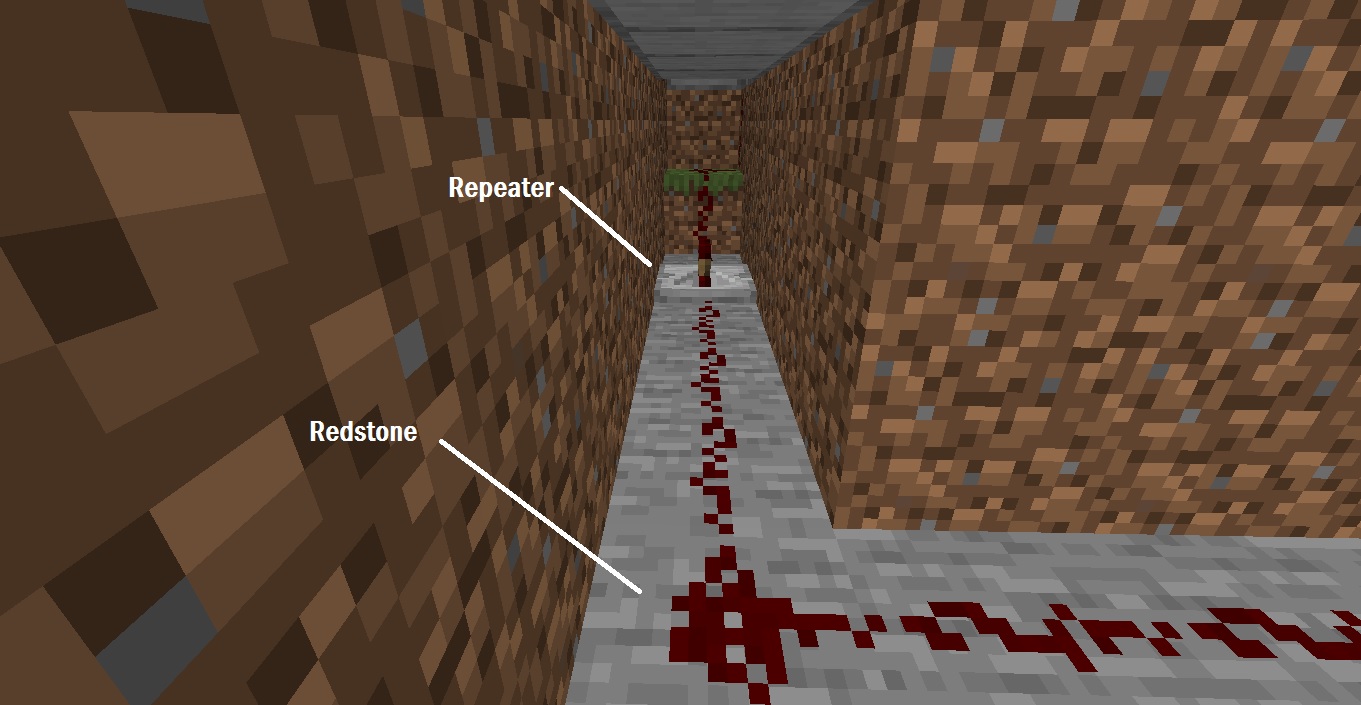
- On the trench’s left side, place another repeater just before connecting the previous redstone dust to the new line. The repeater’s arrow must be facing the old redstone dust line.
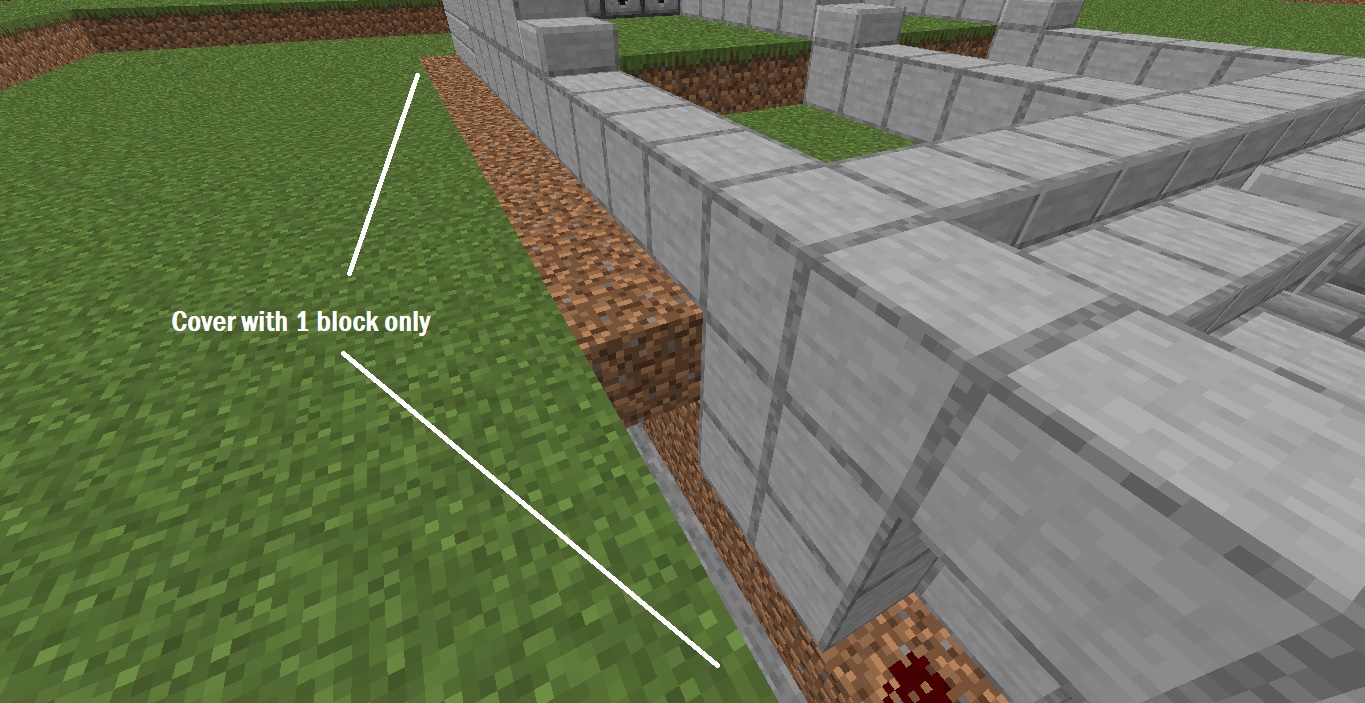
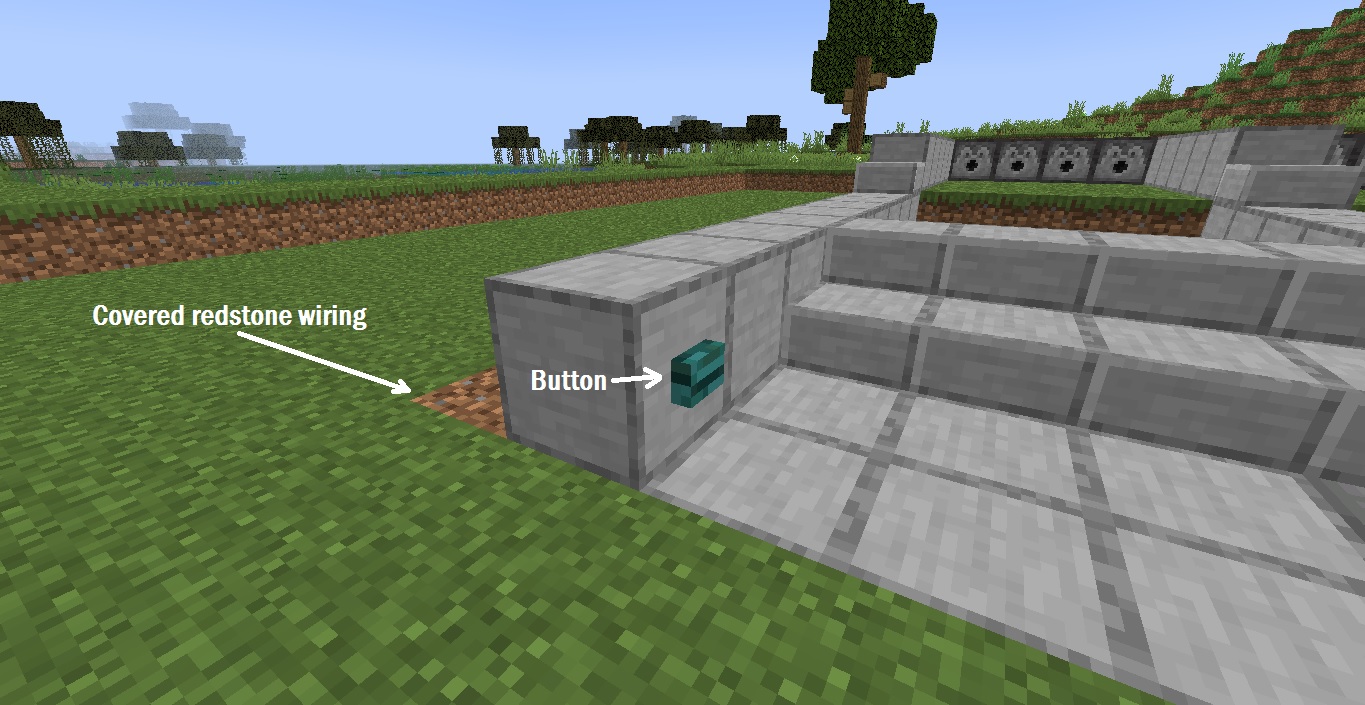
- In the 3-block deep trench, cover only the top most part with 1 line of dirt blocks so as not to interrupt the redstone lining below.
- Then place a button on the block at the edge of the wall.
Planting Crops
- Start tilling the dirt blocks using a hoe. Make sure to till the entire farm area.
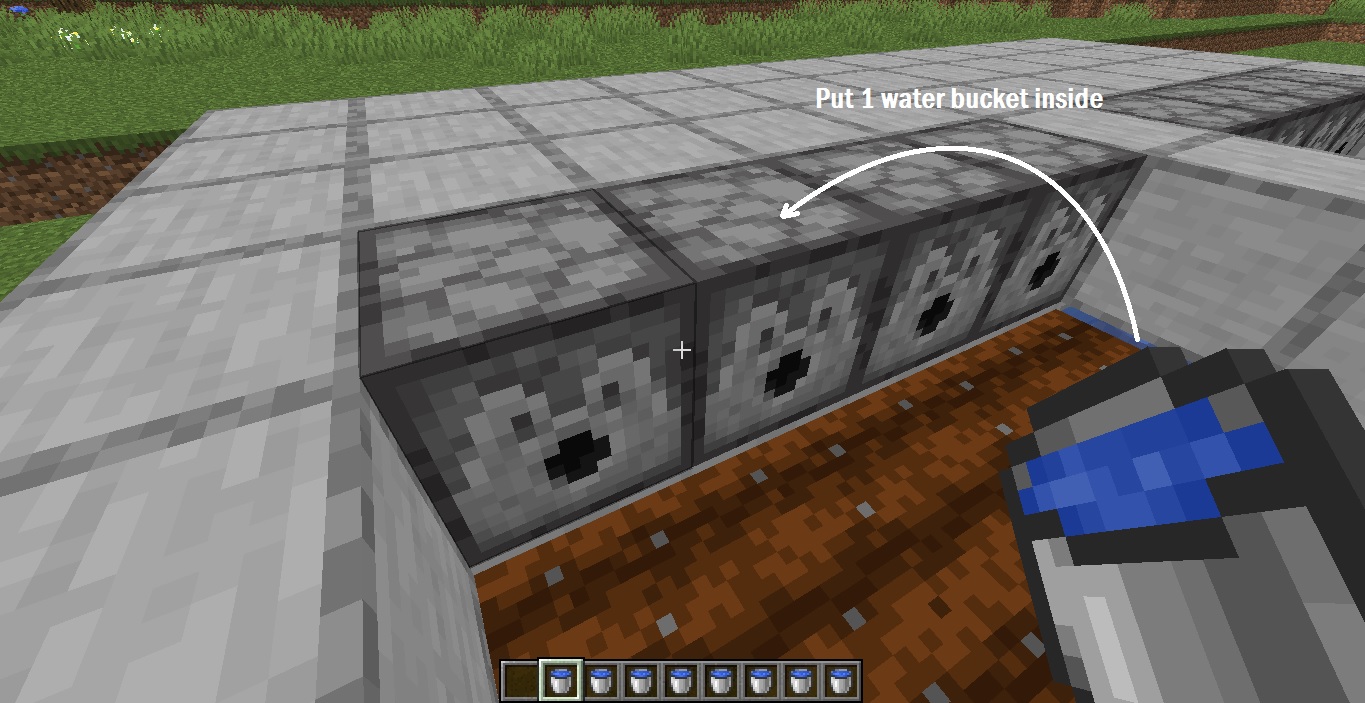
- Using 8 water buckets, place one inside each dispenser by right-clicking on the dispenser and dragging the water bucket into one of its empty slots.
- Plant wheat seeds on each of the tilled soil or farmland blocks.
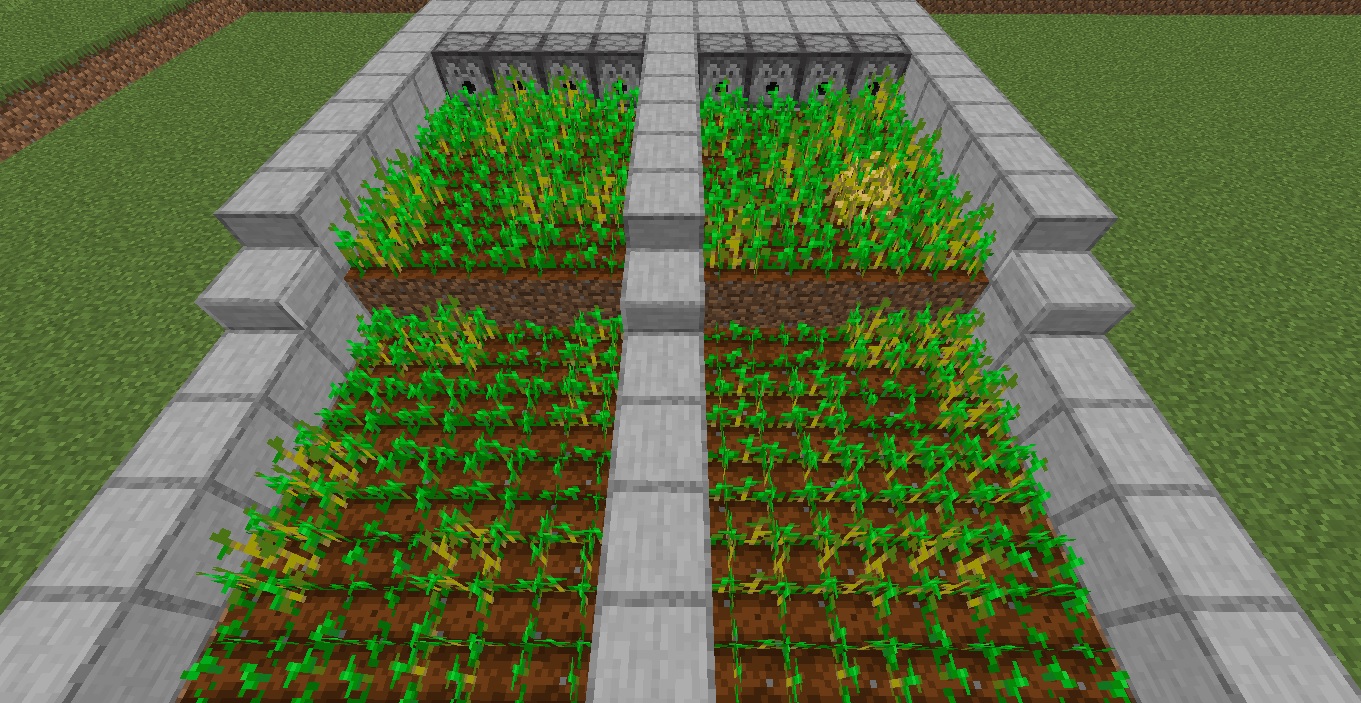
- You must wait for the wheat to fully grow before harvesting otherwise they will only drop seeds. Fully grown wheat will turn a light in color. You may also use bone meal to hasten the growth of the crops.
- Once the wheat is fully grown, press the button to trigger the dispensers to flood the farm with water. This will automatically harvest the wheat and its seeds.
- You must wait until all of the wheat and seeds are fully harvested inside the chest before pressing the button again to disable to flow of water.
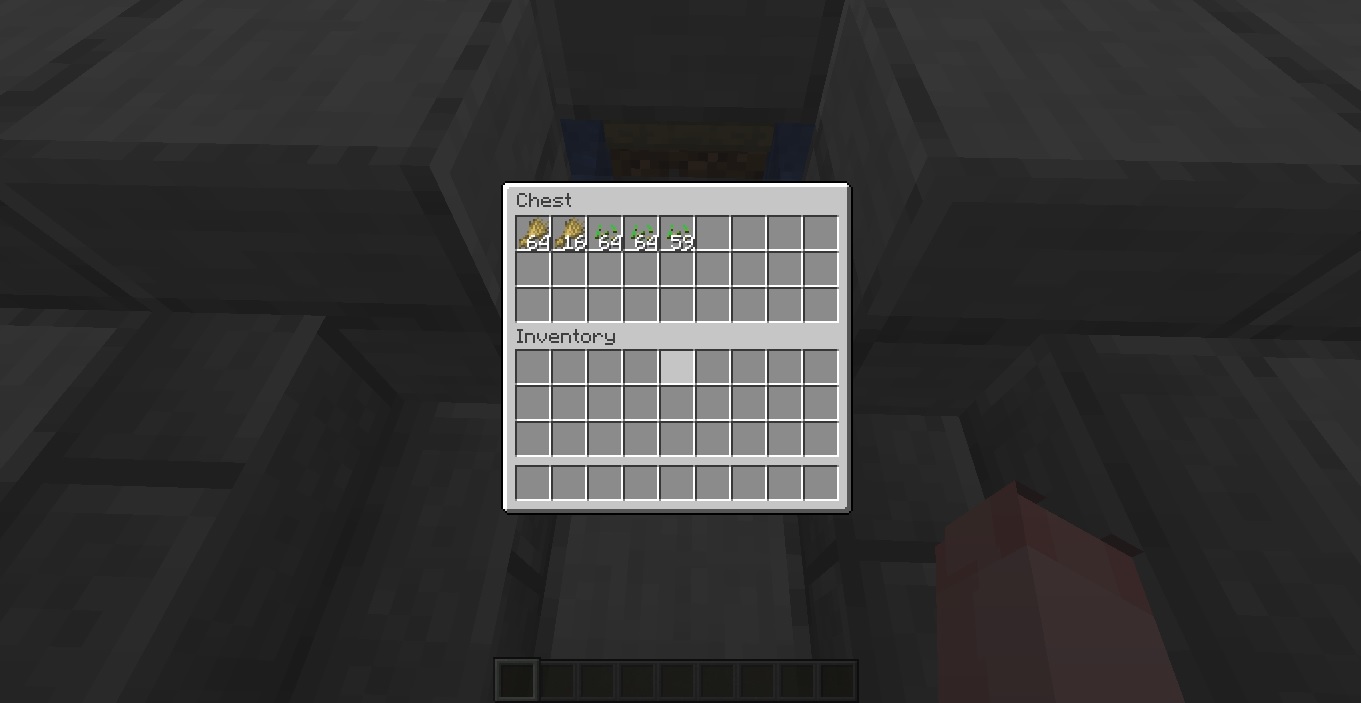
- Open the chest and collect the wheat and seeds inside. You can use those same seeds to replant them in your farm.