Customizing your character in Roblox has become increasingly popular. Users keen on personalizing their gaming experience have taken advantage of the truly unique customization opportunities now available.
If you want to create your own unique piece of virtual headgear, you’ve come to the right place. Here’s how to make a hat in Roblox.
More Ways to Go About It
In essence, a hat in Roblox is basically a mesh; a 3D object, a model, if you will. There are two main ways to make a hat in Roblox. You can choose the easy and the more time-consuming method. Naturally, the more time-consuming option will ultimately yield better results. Here’s more about the two principles.
The Simple Way
You’ve probably Googled something along the lines of “make a hat in roblox” before coming here. In all likelihood, you’ll have found many tutorials on YouTube and other relevant sites. Before explaining how to make your own hat in a simple way, there’s something you should realize. The easy method basically involves taking someone else’s hat design and retexturizing it. In other words, changing the color scheme. No more, no less.
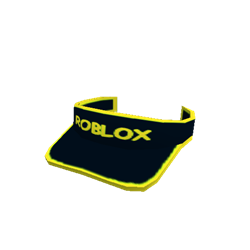
There’s nothing bad about this, it just limits your options. But, anyway, here’s how it basically works.
Load up the Roblox Studio and navigate to the Toolbox, located in the upper-left corner of the studio. Find any hat that you want that’s featured in the game that you’ve loaded up. Once you’ve selected a hat, go to the Explorer section, located in the right-hand side of the screen. Find the item, click the downward-facing arrow next to it and select Mesh. Navigate to the texture ID, located below and you’ll find the asset ID. Copy these ID numbers down carefully.
Now, go back to Roblox and replace any catalog ID with the one that you’ve copied. This will load up the texture ID of a particular hat, the one that you’ve selected. Now, right-click on the said texture and save the image. Now, open the saved picture in a picture editing program. Don’t worry, you can use MS Paint, too.
Now, simply change the color of the hat’s texture according to your preference. Simple as that.
The Advanced Approach
Now, if all you want to do is change the color of a hat in Roblox, there’s no need to mess with the advanced hat creation approach. This method is considerably more difficult and will take a lot of time investment. But if you master this approach in the end, you’ll be able to create any item that you want for your Roblox character.
The only downside here is that we’re kind of delving into the world of 3D modeling – and that’s not something that you should take lightly. It will require a lot of work and it won’t be easy.
There are many tutorials out there that claim to teach you how to create items in programs like Blender, but these videos will often send you down the wrong path. Be careful. Make sure that you learn from your mistakes. In the long run, it will save you a lot of time and effort.
Naturally, outlining this advanced approach here would be downright impossible, as it’s very complex. However, it’s a beautiful introduction to the world of 3D modeling. For that reason alone, why not have a bit of fun while acquiring a new skill?
Creating a Hat in Roblox
As you can see, unless you’re prepared to dedicate time to learning the basics of 3D modeling, you’re going to have to settle for changing your hat’s texture if you want to personalize it. However, most Roblox enthusiasts find this first method more than satisfies their needs.
Have you managed to create a hat in Roblox? Care to share it? Feel free to hit the comments section below and share your thoughts, questions, and, of course, your Roblox hat designs.


