Relics of Seirai is one of the world quests in Genshin Impact that is part of the exploration progress of the Electro nation Inazuma. This quest is readily available by the time you arrive on Seirai Island.
Once you enter the said island, you will come across a woman at the entrance of Koseki Village just before you get to the Statue of the Seven on the island. She is being attacked by monsters, so you need to help her.


This woman is Fujiwara Toshiko, who happens to be looking for treasure that her ancestors have left behind in this abandoned little settlement. She has found the exact location but is having a hard time trying to solve the puzzle and the switch to open the chamber.

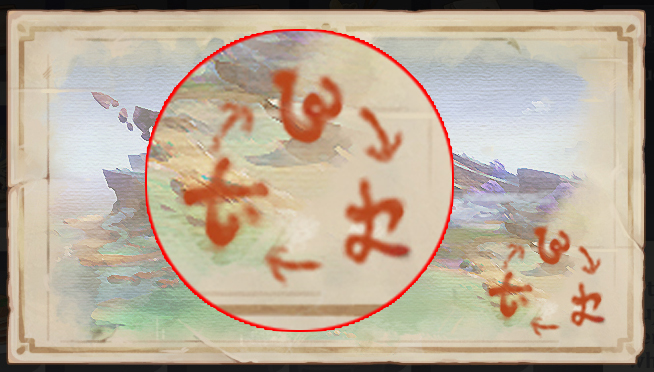
Toshiko will show you a map that contains the clue to unlocking the treasure area and will ask for your help to protect her.

The symbols written at the bottom right of the map are the most important clues to solving the puzzle. For naming convention, we will be calling the symbols A, B, and C.

There are also arrows drawn in between the symbols, which should mean the sequence of the symbols. Regardless of which symbol comes first, A should be followed by B, B should be followed by C, and C must be followed by symbol A.
The location of the treasure is a house in the little village and Fujiwara Toshiko is standing beside the switch.

There are three wooden planks on the floor around the house and each has one of the symbols drawn on Toshiko’s treasure map.
To solve this, you need to activate the switch first and then step on the symbol to light it up. Whichever you choose to step on first, make sure that the next symbol you light up follows the sequence drawn on the treasure map.
Once the sequence is correct, you will hear something collapse which is actually one part of the floor. This will reveal an underground room where a platform puzzle and a sealed treasure chest can be found.

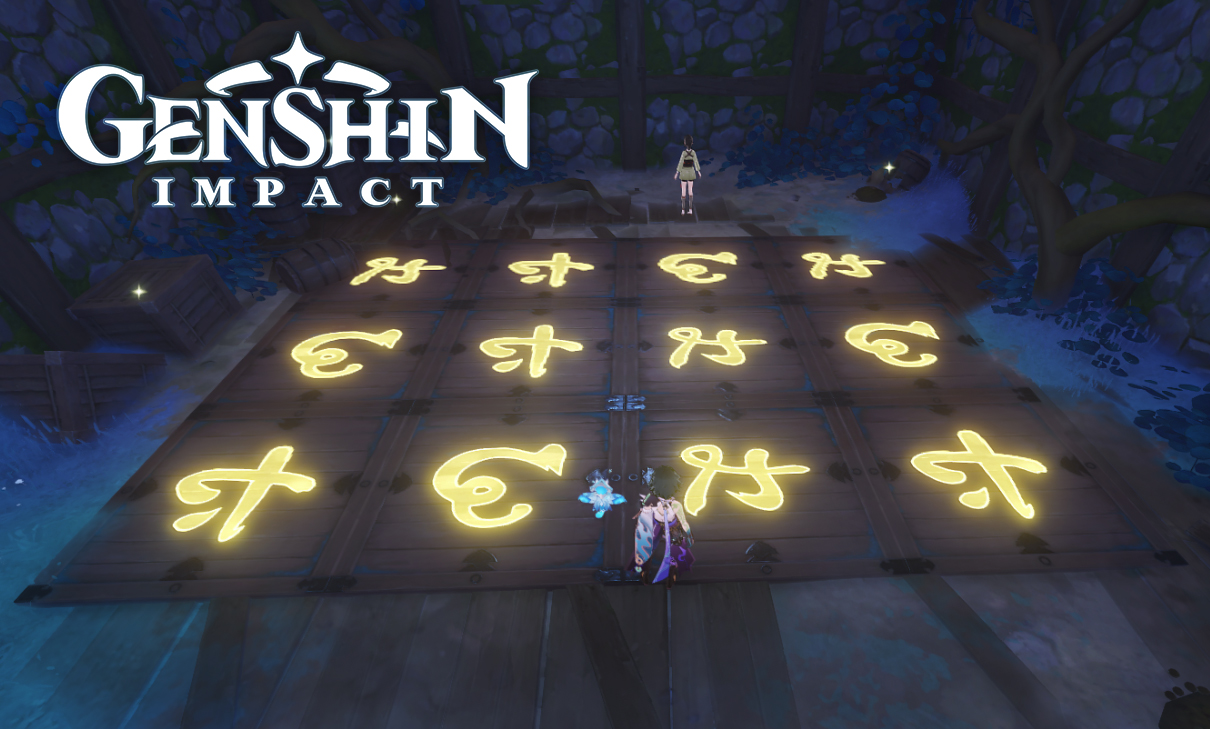
To solve this part, look at the photo of the puzzle below and follow the arrows as this will be the order of how you should step on the symbols. Take note that this still follows the sequence drawn on the treasure map.

After solving this, the puzzle will reset and it seems like it has reshuffled the placement of the symbols.
Again, follow the arrow indicated on the photo below to solve the second puzzle and you are good to go.

After solving the puzzle twice, the treasure chest will be unsealed and Fujiwara Toshiko will get what is inside. However, there is only a single photo inside the chest and since you can’t split it up, Toshiko will offer another reward that is in her camp.
On your way to Toshiko’s camp, you will come across several groups of enemies that want to get at least some information about the treasure. You have to defeat Treasure Hoarders, Nobushis, and some Fatui members.


When you get to her camp, Toshiko will hand you your reward and tell you that she will head back to Inazuma City and ask around to get information about the photo she got from the treasure chest; she will mention Mr. Oda Tarou.

Completing this quest will unlock an achievement titled “It Has to Be Treasure”.


