Learn how to get to the Third Shrine in Tears of the Kingdom!
Like its predecessor, The Legend of Zelda: Tears of the Kingdom also features Shrines. In this game, Link must complete Shrines to obtain Lights of Blessing. Link can exchange these Lights of Blessing to get more hearts or stamina.
At the very beginning of the game, players are taught all the powers and mechanics featured. During this, Link must complete four Shrines before players can explore Hyrule’s lands, skies, and depths. In this guide, we will walk you through how to get to the third Shrine in The Legend of Zelda: Tears of the Kingdom!
The Third Shrine in Tears of the Kingdom
As mentioned above, Link must complete four Shrines of Light in the tutorial area in Tears of the Kingdom, the Great Sky Island. Upon completing all four Shrines, Link can fully explore the vast world that awaits the player in the game.
The third Shrine of Light in the Great Sky Island is the Gutanbac Shrine titled “The Ability to Ascend.” Link will learn a new power called the Ascend ability in this Shrine. Because of that, the Gutanbac Shrine serves as the tutorial area for this ability.
The Ascend ability will enable Link to travel up the solid materials directly above Link and come out on top of it. On the other hand, Link cannot use the Ascend ability if the surface overhead is too far from him.
Location
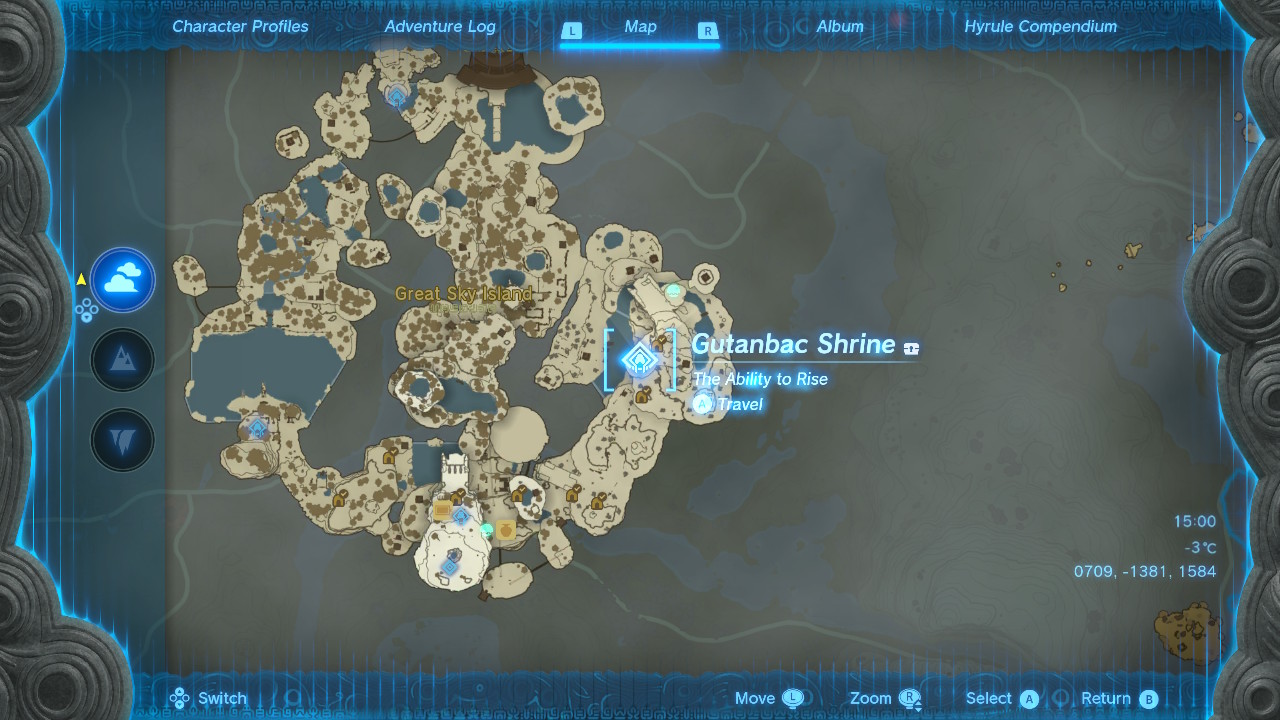
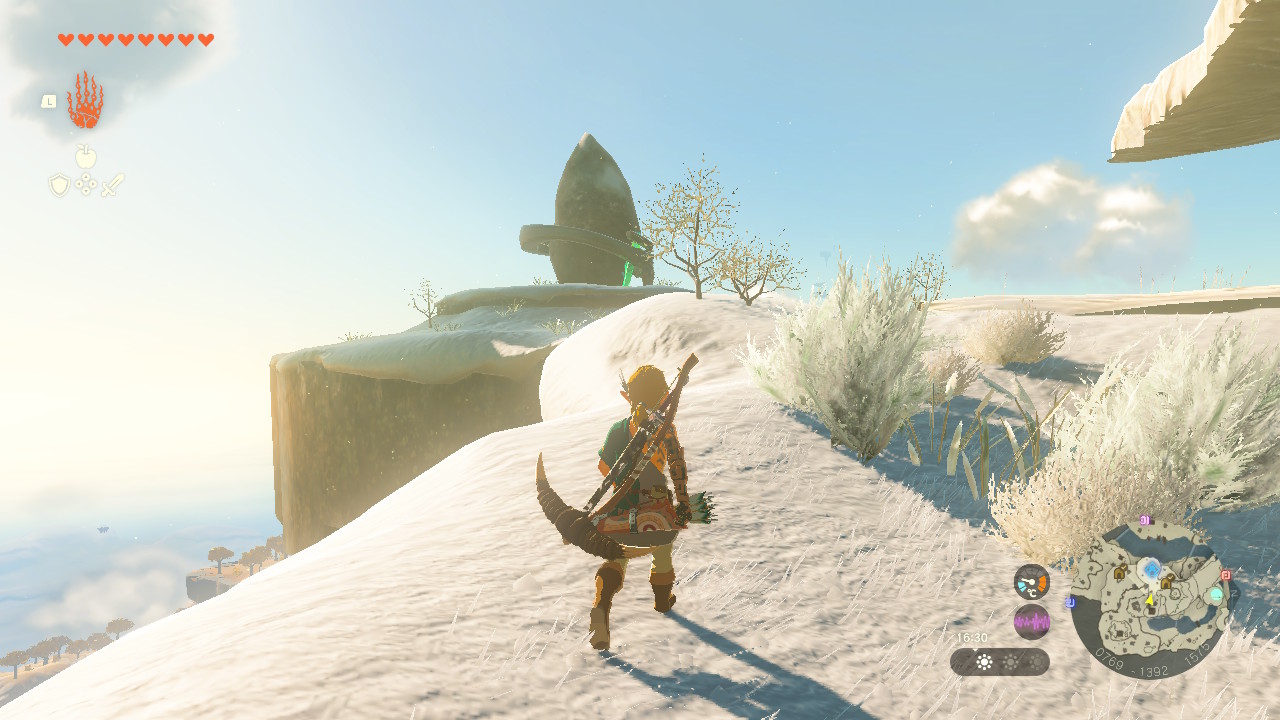
Link can find the Gutanbac Shrine up a mountain atop the Bottomless Cave. This is in the East of the Great Sky Island, just northeast of the Room of Awakening. More specifically, the Gutanbac Shrine is found in these coordinates: 0709, -1381, 1584.
Remembering that the Gutanbac Shrine is in a snowy climate is crucial. This means Link needs equipment that makes him resistant to cold temperatures. Cold-resistant meals and elixirs are examples of such things. Link may simply prepare cold resistance food by cooking the Spicy Peppers picked up in the area.
How to Get to the Third Shrine in Tears of the Kingdom
As the second Shrine, the In-isa Shrine, where Link learns the Fuse ability, is in the western part of the Great Sky Island, Link would have to travel through the southern part of the island to get to the eastern part and find the third Shrine, the Gutanbac Shrine. The travel time to get to the third Shrine is longer than getting to the second.
To get to the third Shrine, these are what Link must do:
- After completing the In-isa Shrine, a Steward Construct will give Link the Energy Cell. Head down the stairs and follow the path on the right, where an enemy Construct exists.
- Keep on following this path down another flight of stairs. At the bottom, there are a couple more Constructs and Chuchus. Follow this path, which will lead south.
- Eventually, Link will find another flight of stairs. Head down, and at the bottom, another Construct and a couple more on the left. While following the path, Link will find a cave called the Pondside Cave. Enter the cave and follow the path.
- Along the path, Link will find several Brightbloom Seeds and two Keeses. In the cave, Link will reach a wide area. Continue through the path on the northern side of the room. Along this path, Link will run into two more Keeses.
- After Link exits the cave, Link will find several working Steward Constructs and a large pond. Here, Link can talk to one of the Stewards Constructs, and they will teach Link how to use Zonai Devices. To continue, Link must pass through the pond.
- To do that, Link must create a raft using the Ultrahand ability. Hold the L button and select the Ultrahand ability with the right stick. Aim on one of the logs in the area and press the A button to grab it.
- Bring it beside another log, hold the R button, and use the directional buttons to rotate if necessary. Press the A button to attach the side of this log to the side of another log. Press the L button again to aim the Ultrahand ability and aim at a different log. Press the A button to grab it and bring its side to the attached logs. Press the A button to attach it so Link now has a raft.
- Link must attach a Zonai Device to move forward in the water. Press the L button to ready the Ultrahand ability and aim at one of the Zonai Fans. Press the A button to grab it, then hold the R button and use the directional buttons to rotate it.
- Rotate the Zonai Fan so that it is upright and the front of the fan is facing Link. Then, bring it to the center of either of the raft’s short sides. The fan should be facing away from the raft. Press the A button to attach the Zonai Fan to the raft.
- This Zonai Fan is enough to let the raft move, but Link can add one more to increase the speed of the movement. This, however, will consume more of Link’s battery.
- Next, press the L button to ready the Ultrahand ability and aim at the created raft. Press the A button to grab it and bring it to the water facing the opposite side of the pond. Hold the R button and use the directional buttons if necessary. Jump towards the raft and attack the Zonai Fan to activate it. The raft will then start moving toward the other side of the pond.
- After that, on the other side of the pond, Link will find another Steward Construct. Head up the stairs on the left, then continue up more flights just ahead. At the top, follow the path on the left with an entrance to a cave ahead and an enemy Construct camp on the left.
- This cave is the Mining Cave. Follow the path inside the cave where Link will find Brightbloom Seeds. Behind a couple of obstructing debris, Link will find a Construct and teach Link how to use Brightbloom Seeds to light up dark rooms.
- Then, the cave will become pitch black. Hold the ZR button to aim Link’s bow and arrow to light parts of the area up, then hold the up directional button. This will allow the player to select an item to attach to Link’s arrow.
- Use the right stick to navigate, select Brightbloom Seeds, and let go of the up-directional button to attach it. Shoot the attached Brightbloom Seed to a dark room to light it up. Alternatively, Link can drop a Brightbloom Seed on the floor and hit it with a weapon to light it up. Link can continually do these to light up dark parts of the cave.
- Then, follow the path inside the cave, and Link will eventually reach the mining part of the Mining Cave. Link can break Zonaite Ores to get some Zonaite or exchange them for Zonai Charges and Crystallized Charges. Talk to the Steward Construct near the cave exit, and it will give Link a few capsules of Zonai Fans.
- To leave the cave, press the L button to ready the Ultrahand ability. Aim on one of the minecarts and press the A button to grab it. Bring the minecart towards the rails. Hold the R button, then use directional buttons to rotate if necessary.
- Press the B button to deactivate the Ultrahand ability and place the minecart on the rails. Then, hold the up directional button, use the right stick to navigate to the Zonai Fan capsule, then press the X button to drop it. Press the L button to ready the Ultrahand ability, aim at the dropped Zonai Fan, and press the A button to grab it.
- Hold the R button and use the directional buttons to rotate it upright. Bring it to the back of the minecart with the front of the fan facing out and press the A button to attach it to the minecart. Then, ride the minecart, hit the Zonai Fan to activate it, and start moving. Link will then be brought to a higher point in the area.
- After that, disembark from the minecart, and Link will find a Zonai Device Dispenser just ahead. Head to the eastern part of the area, where Link will find a large arch and a cave opening next to it. Before entering the cave, pick up the Spicy Peppers near the cave entrance.
- This cave is the Pit Cave. Enter the cave with a Steward Construct near a lit cooking pot. Link will traverse a snowy/very cold area in the next area. To survive this area, Link must become cold-resistant.
- To do that, press the + button to open Link’s Inventory, then press the L or R buttons to navigate to the Materials page. Press the X button to start holding items. Select a few Spicy Peppers, then press the B button to return to the game.
- Approach the lit cooking pot and press the A button to start cooking. Then, Link will make a meal that grants him cold resistance. It is recommended that the player cook several cold-resistant meals to get its buff for longer.
- Next, head up the path inside the cave. On the way, Link will run into two Keeses. Link will climb up walls to follow the path. Near the exit, you will see that there is snow everywhere outside. Before exiting, consume one of the cold-resistant meals.
- Now that Link can resist cold temperatures, exit the Pit Cave and follow the path that leads to the northeast. While following this path, Link will run into an Ice Chuchu, then two enemy Constructs on the left. Continue on the path; then Link will again run into another enemy Construct and two Ice Chuchus.
- From here, Link will find another cave entrance in the east. This is the Bottomless Cave. Enter the cave and follow the path inside. On the way, Link will find a couple of Bomb Flowers. Then, Link will run into a Like Like. Continue up the flight of stairs ahead, then continue on the path. Eventually, near the cave exit, Link will run into another Like Like.
- After that, exit the Bottomless Cave and follow the path. Head up the hill; then Link will find a cliff with icy walls above the cave’s exit. Link must climb up this cliff, but the ice makes the walls slippery. To climb up, cut two nearby trees using a two-handed weapon to get two logs.
- Press the L button to ready the Ultrahand ability, aim at one of the logs, and press the A button to grab it. Bring either end of this log to either end of the other log and press the A button to attach them.
- Press the L button again to ready the Ultrahand ability, aim at the attached logs, and press the A button to grab them. Hold the R button, and use the directional buttons to rotate it upright. Bring the log to the icy wall and place it on a cornered side of the cliff. Press the B button to deactivate the Ultrahand ability.
- Then, climb up the log to get up the cliff. Finally, go to the western part of the cliff, and there, Link will get to the third Shrine, the Gutanbac Shrine!
Now that Link has found the Gutenbac Shrine, it is time to complete it!
The Ability To Rise
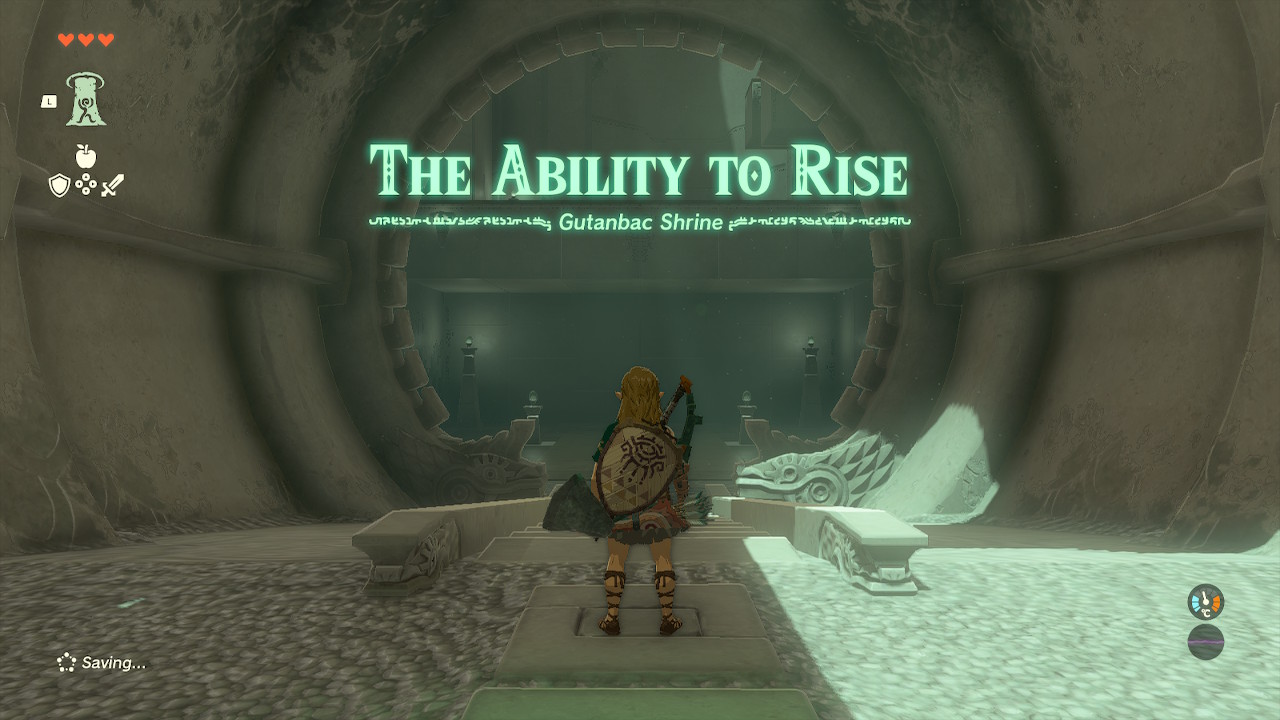
Upon entering the Gutanbac Shrine, Rauru will give Link the Ascend ability. This ability will allow Link to travel up the solid surface directly above Link and come out on top of it.
Gutanbac Shrine Guide
Link must do the following to finish the Gutanbac Shrine:
- Go down the stairs to find an open area beneath a platform. Head beneath the platform, hold down the L button, and use the right stick to select the Ascend ability. Move Link so that the glow/target above is green, and press the A button to use the Ascend ability. Then, press the A button again to come out on top.
- After that, the player will see two tall platforms on the right wall. Go under the platform on the left when facing the wall with the two platforms. Press the L button to ready the Ascend ability, and move Link so that the target above is green. Press the A button to ascend and phase through the platform. Press the A button to come out and find a chest. Open the chest to acquire a Stone Axe.
- Then, drop down and go under the other platform. Press the L button to ready the Ascend ability, and move Link so that the target is colored green. Press the A button to ascend and the A button to reach the surface.
- Next, just ahead, Link will run into a Construct that Link must eliminate. The Construct will drop an Old Wooden Bow, a Soldier Construct Horn, and a Zonai Charge.
- After that, look to the bottom of the right wall to find two wooden crates. Destroy the crates to reveal an opening. Head inside the opening and press the L button to ready the Ascend ability. Move Link so the target above is green, and press the A button to ascend. Press the A button to come out on top and find another chest. Open the chest to obtain a Construct Bow.
- Then, head down from the platform and go to the opposite side of the room. Here, the player will find a rectangular concrete slab held up by ropes on a platform. Strike the ropes to break them and let the large concrete slab topple down.
- Head beneath the concrete slab, Press the L button to ready the Ascend ability, move Link so the target is green, then press the A button to ascend. Once on top, press the A button to come out on top.
- Next, continue on the path to find a moving square platform up a wall. Approach the wall, press the L button to ready the Ascend ability, and standby until the moving platform is above Link. Then, once the target is green, quickly press the A button to Ascend. Press the A button again to come out.
- After that, you will see a stationary platform up the wall. Press the L button again to ready the Ascend ability and standby until Link is underneath the stationary platform. Once the target above is green, press the A button to ascend. Then, press the A button to emerge on top.
- Finally, go near the altar, press the A button to examine the glowing symbol, and Link will receive a Light of Blessing!
After completing this Shrine, Rauru will say that Link has restored some power to his new arm. Then, with that, Link can open its doors to the Temple of Time!