Don’t use Mr. Turret as bait. Place him in these spots on Ascent to cover important spots and angles.
Killjoy’s Turret was once an impenetrable guard on any bombsite its German Sentinel inventor chooses to defend in a round. Nowadays, Killjoy’s Turret has arguably become a glorified scout that will alert teammates of enemy presence in its POV.
Despite the nerfs slapped on Killjoy’s trusty turret, it remains a very important component of Killjoy’s gameplay and setups. Knowing the best spots to place Killjoy’s Turret will help you cover multiple angles around maps.
In this guide, we have listed some of the best Killjoy Turret spots on Ascent that will help you lock down either bombsite on the map with ease.
The Rise and Fall – Killjoy Turret

VALORANT veterans will tell you just how broken Killjoy’s Turret was in the early days. Not only was Killjoy’s Turret tanky but it also dealt decent damage with its burst fire. Oh, and who can forget about getting slowed to a crawl whenever the Turret landed a few shots on them?
A ton of players complained about Killjoy’s Turret and how broken and overpowered it was, especially on Ascent, which led to a nerf back in patch 3.05 that significantly reduced the Turret’s bullet-tag slow from 72.5% to just 29.5%.
This change alone significantly reduced the amount of control Killjoy has over key entry points on most bombsites in VALORANT and forced Killjoy mains to be more creative in their bombsite setups.
Still, Killjoy’s Turret is as close as teams will get to having another player on their team, and gives Killjoy’s team the ability to hold an extra lane/sightline on any map passively.
Best Killjoy Turret Spots on Ascent
A-Rafters Box Turret
The high placement of this Turret will force the Attacking team to aim up high to destroy Killjoy’s Turret. You can use this opportunity to peek out and fire back at the enemy.


A-Entrance Turret
You can’t go wrong with this A-Entrance Turret placement for A-site. The Attacking team will be forced to turn hard right to shoot down the Turret, which you can easily capitalize on if you’re playing from Generator or Dices.
This Turret spot also covers some of A-Tree.


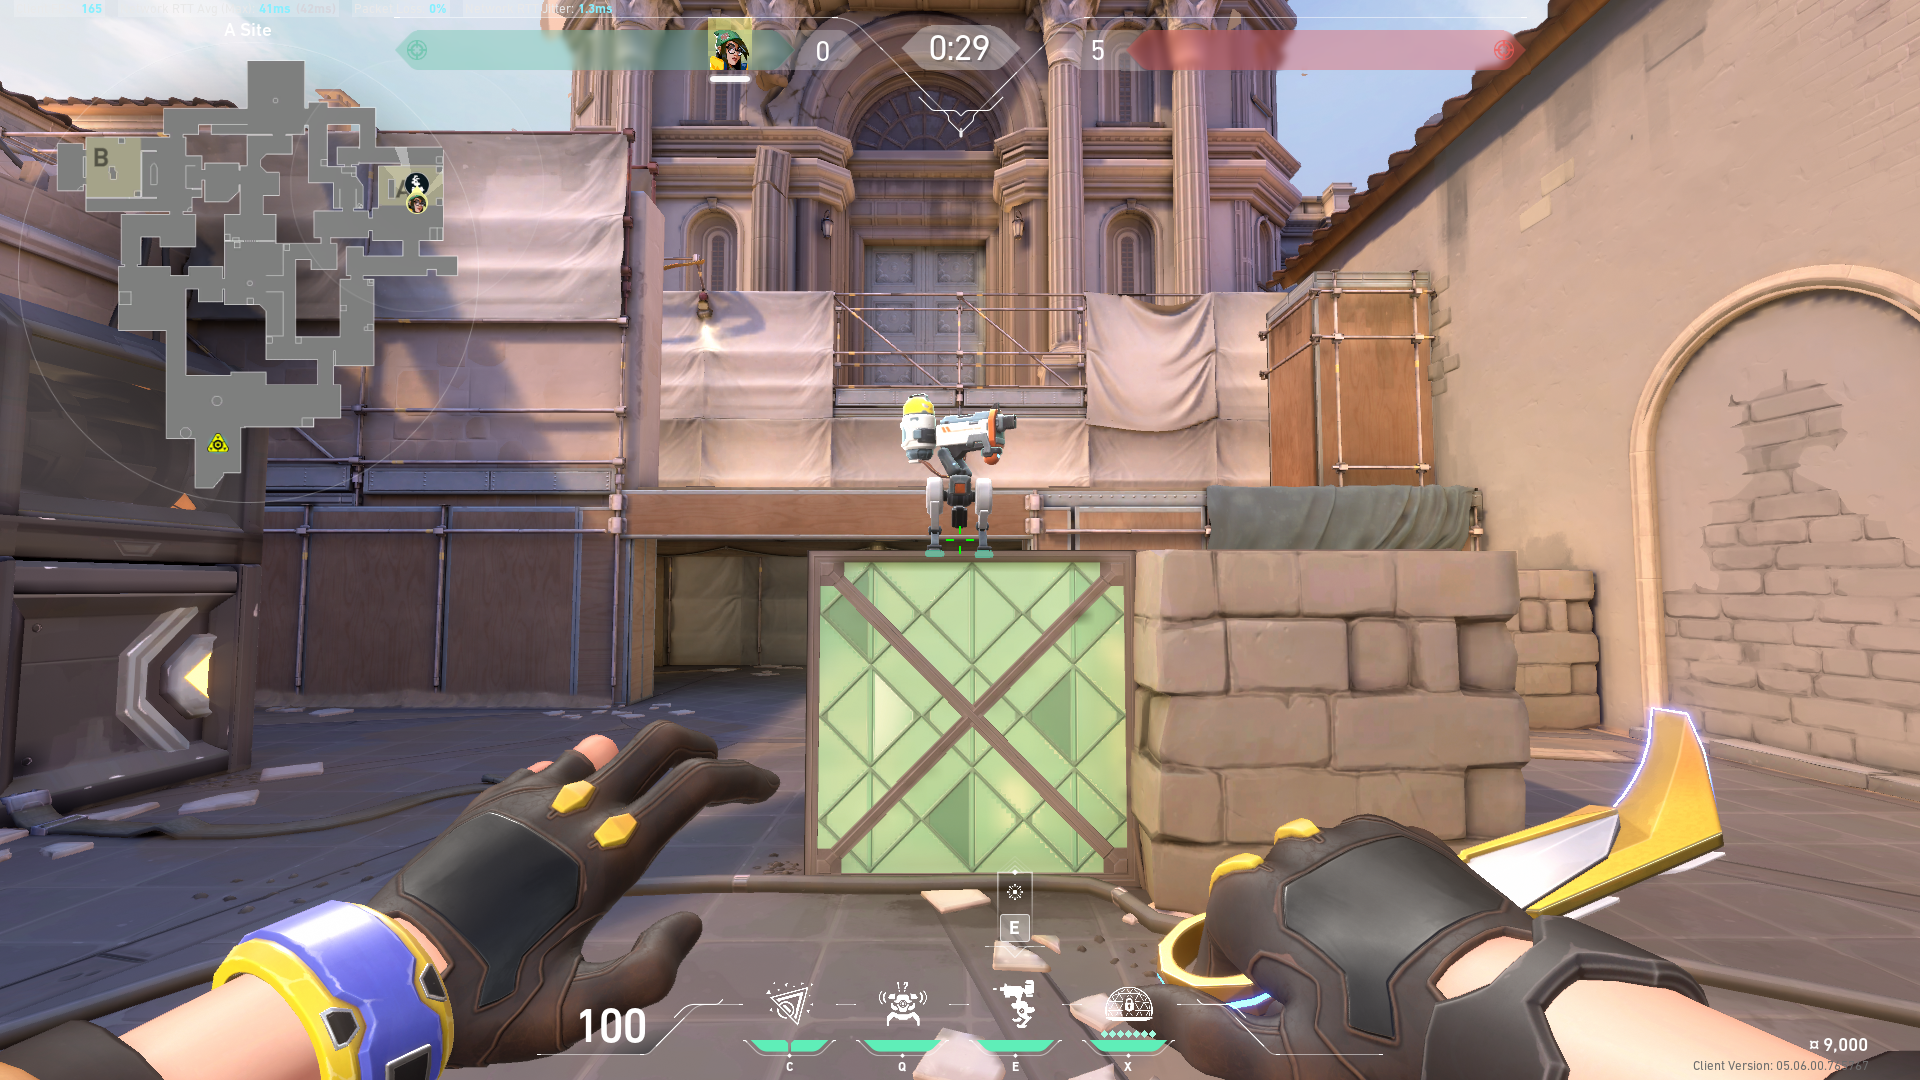
A-site Box Turret
As soon as you use the same Turret spot twice, the enemy team will know where to aim the next time they try and enter A-site. Mix up your Turret placements on A-site with this top box Turret spot that also covers both A-Main and A-Tree.


B-site Barrels Turret
The most famous Killjoy Turret spot on Ascent. Despite the nerf on the Turret’s slow, this spot remains very useful for defending B-site. The placement also makes it difficult to spray down the Turret with Vandals or Phantoms.


B-Logs Turret
A Turret in B-Logs can be very annoying for the Attacking team. This Turret placement also helps increase the effectiveness of your B-Lane Nanoswarm traps.

B-Lobby Turret
Great for flank-watch. Tags Defenders taking Catwalk to flank B-Main.


Ole Reliable
With the right Turret placements, you can easily cover multiple entry points on Ascent. This is especially useful when holding a bombsite on your own as Killjoy, as the Turret can delay the enemy team even if just briefly.
Visit the PlayerAssist website for more Gaming Guides, Gaming News, Game Codes, and other Gaming Content!