Voice chat functionality is a lifesaver when it comes to multiplayer video games. Typing messages can take up precious time, which makes directly speaking a superior method of communication. However, in Valorant, there’s a history of voice chat failing to work as intended.
If you’ve encountered this problem and more, you’re in the right place. Fortunately, the community discovered several solutions for these common communication issues. In addition, we’ll cover some other issues the game’s voice chat feature is facing.
Why Can’t I Hear My Teammates in Valorant?
The community is fed up with Valorant’s problematic voice chat system. Not only are these issues rampant, but sometimes they resurface after a few updates. These bugs require fixing, but Riot Games is usually quick to issue solutions in the form of hotfixes and updates.
In the meantime, you can always see if something on your end is causing issues with hearing your teammates. Sometimes, it’s the other way around or both happening at once. Regardless of the case, here are some essential steps you can take to try and solve the problem.
Reset Valorant’s Audio Settings
The first thing to do is reset your game’s audio configurations. Sometimes, you may have done something you shouldn’t have. Instead of figuring things out one at a time, going back to the default settings often solves the problem.
Here’s how to perform a reset of Valorant’s audio settings:
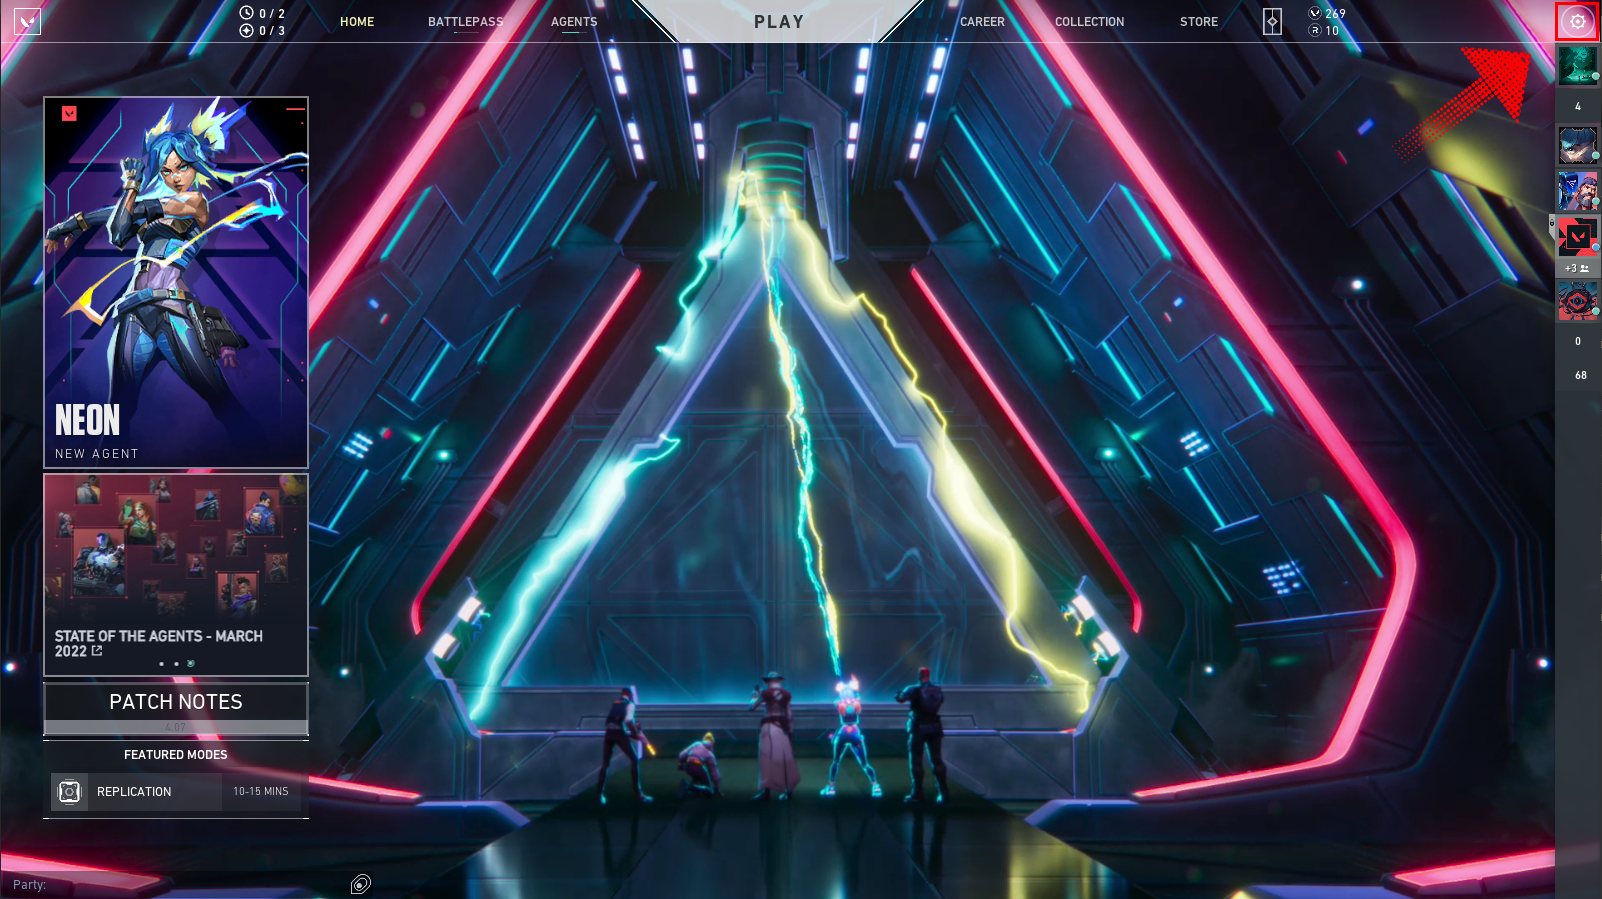
- Go to Valorant’s main menu.

- Select the gear icon at the top-left corner of the screen.
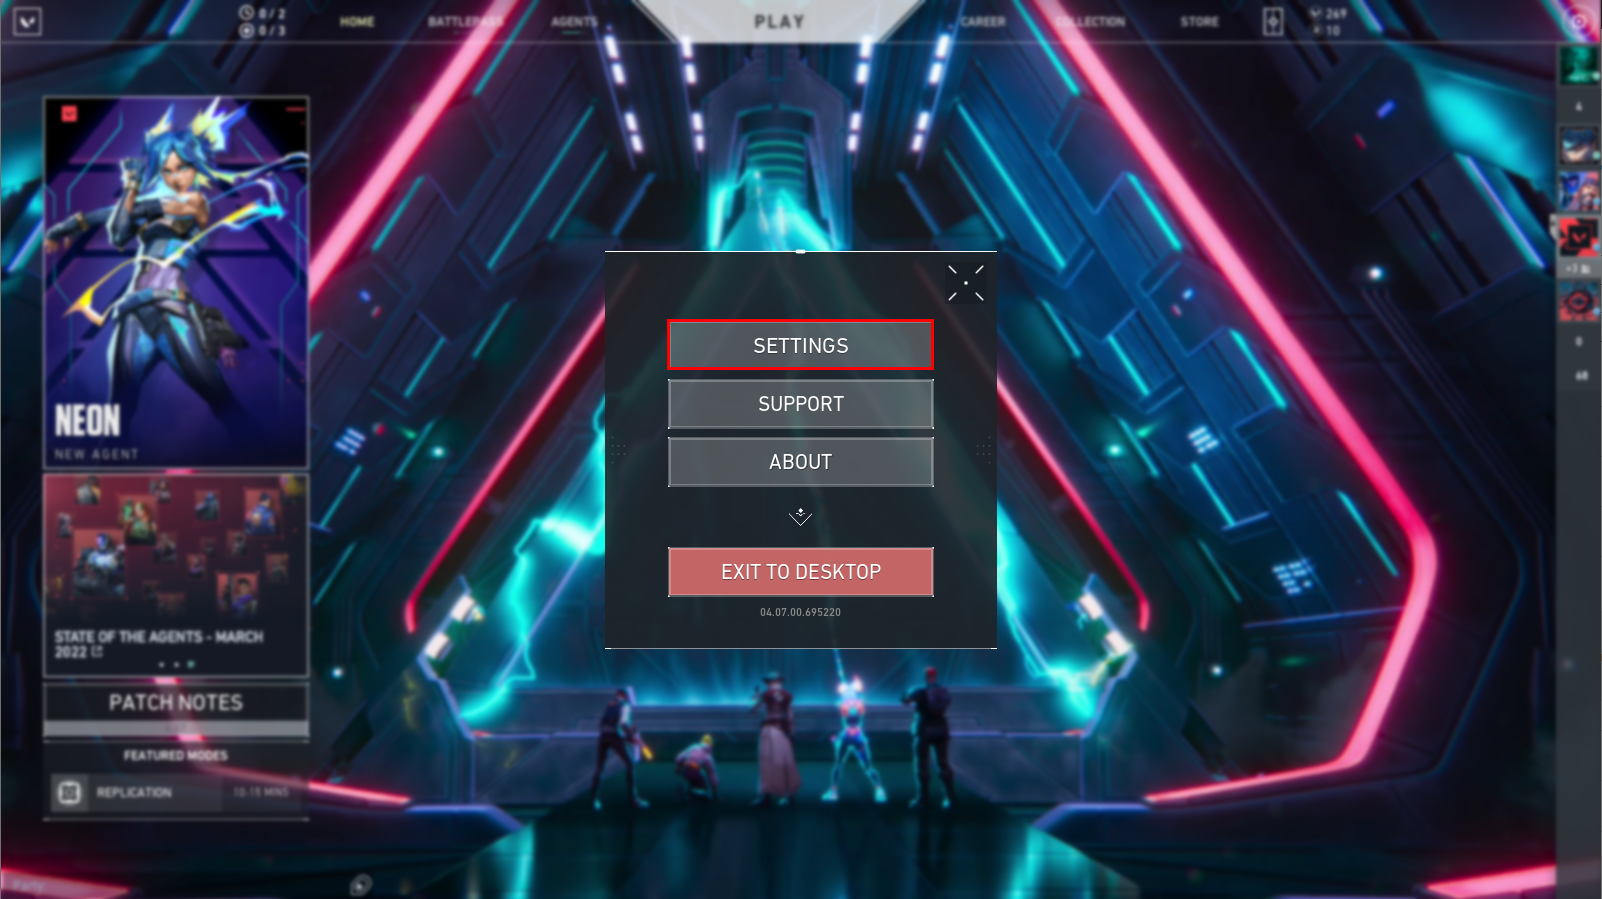
- Select ‘Settings” from the list.
- Go to “Audio.”
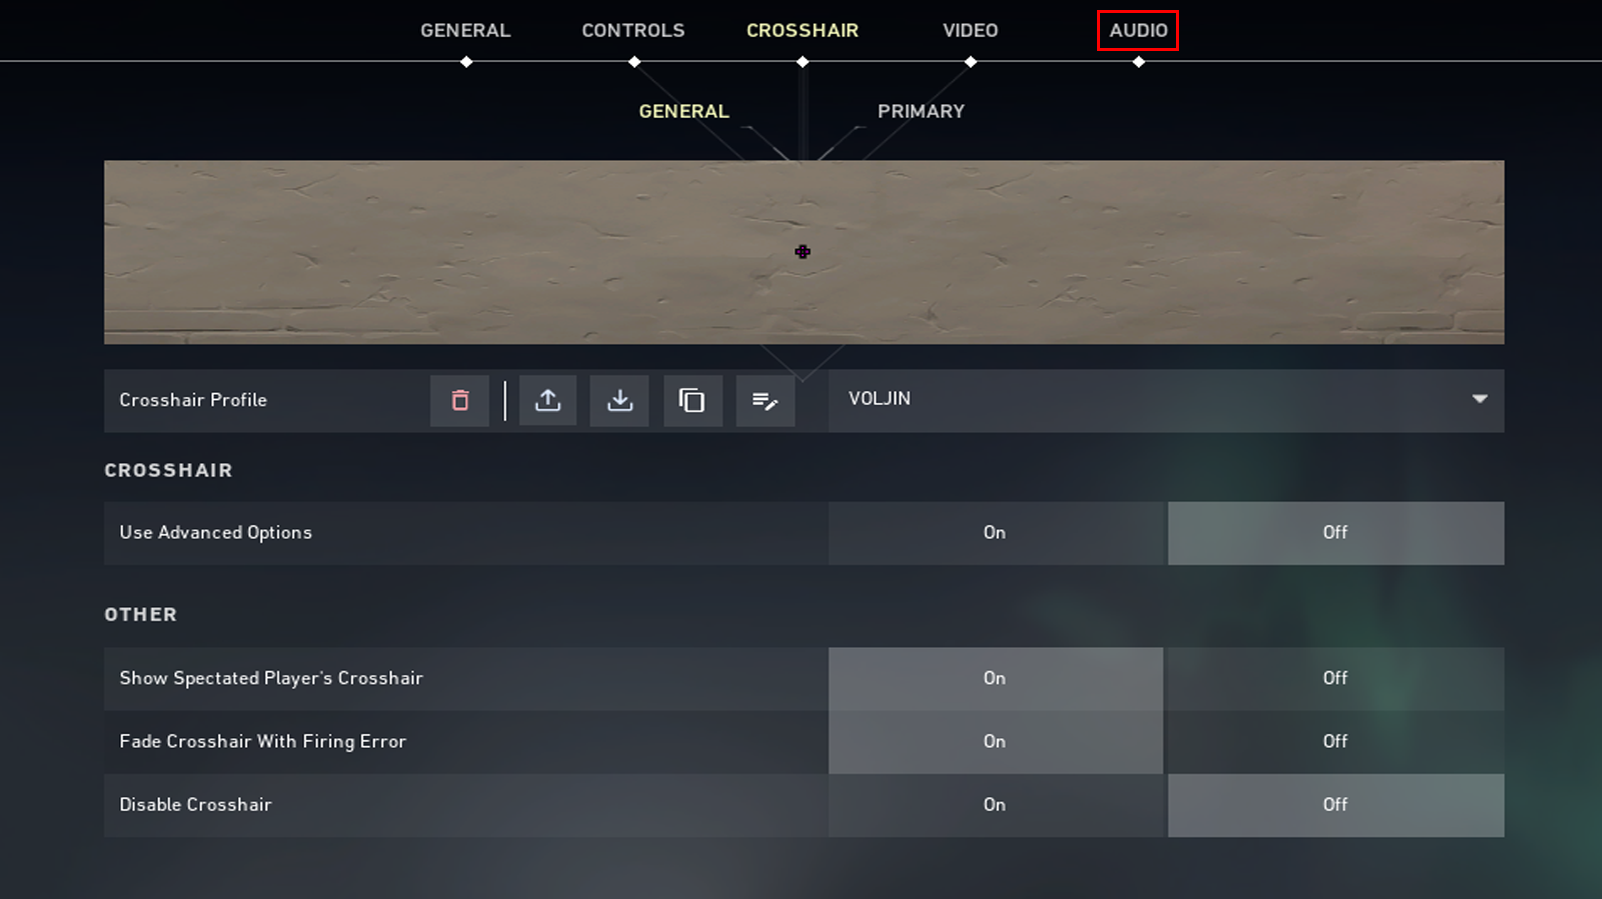
- Select “Voice Chat.”
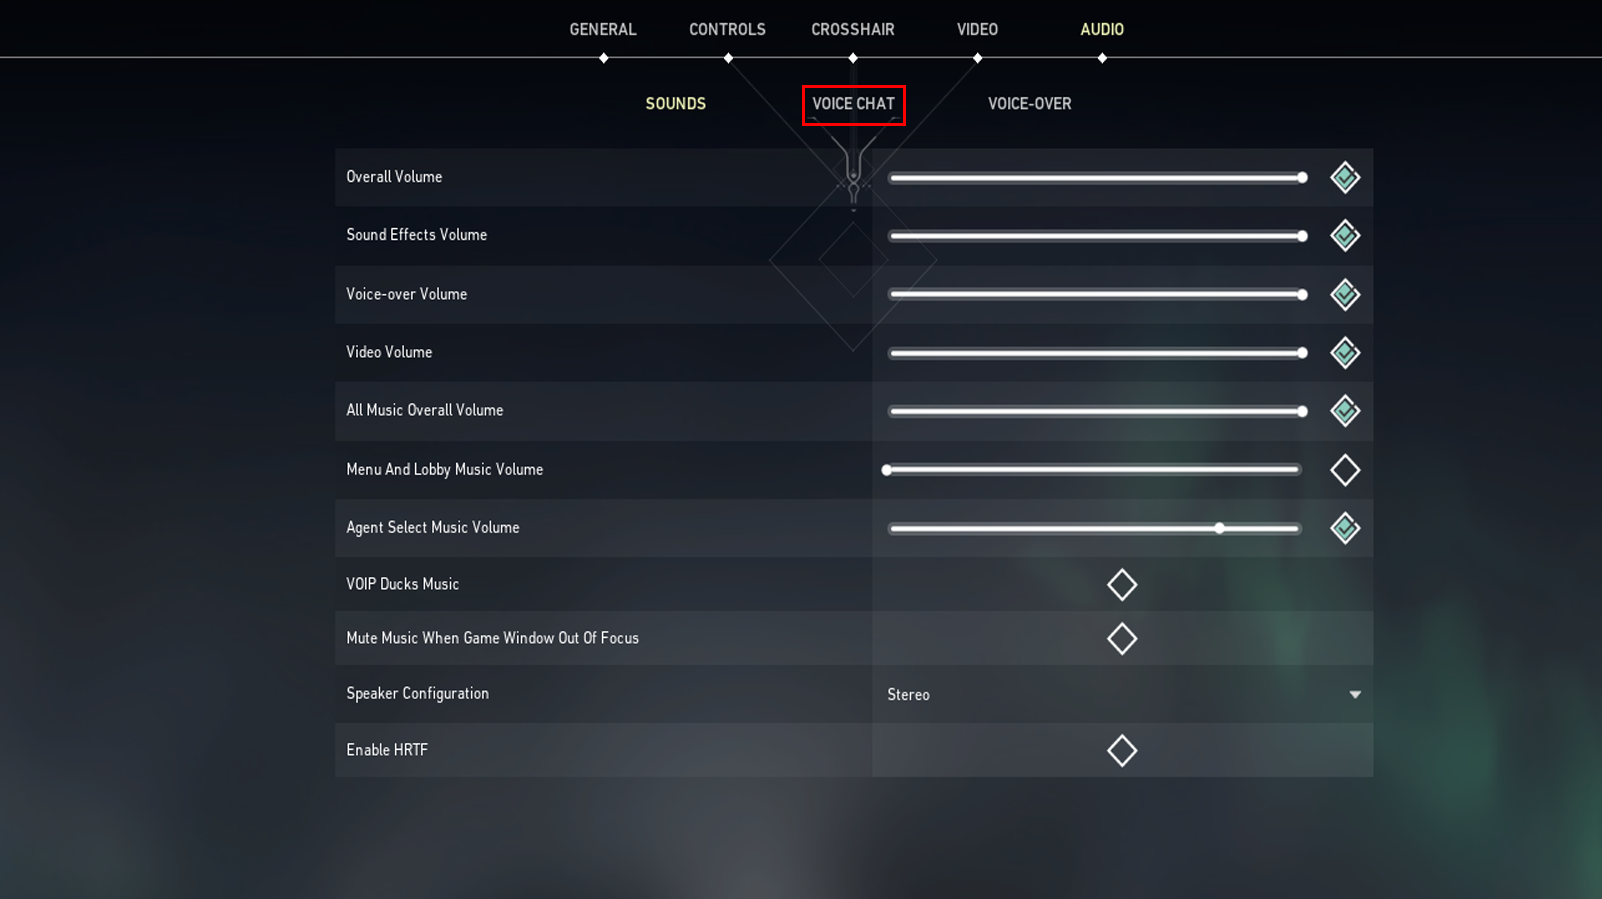
- Make sure the Output Device and Input Device are set to “Default System Device.”
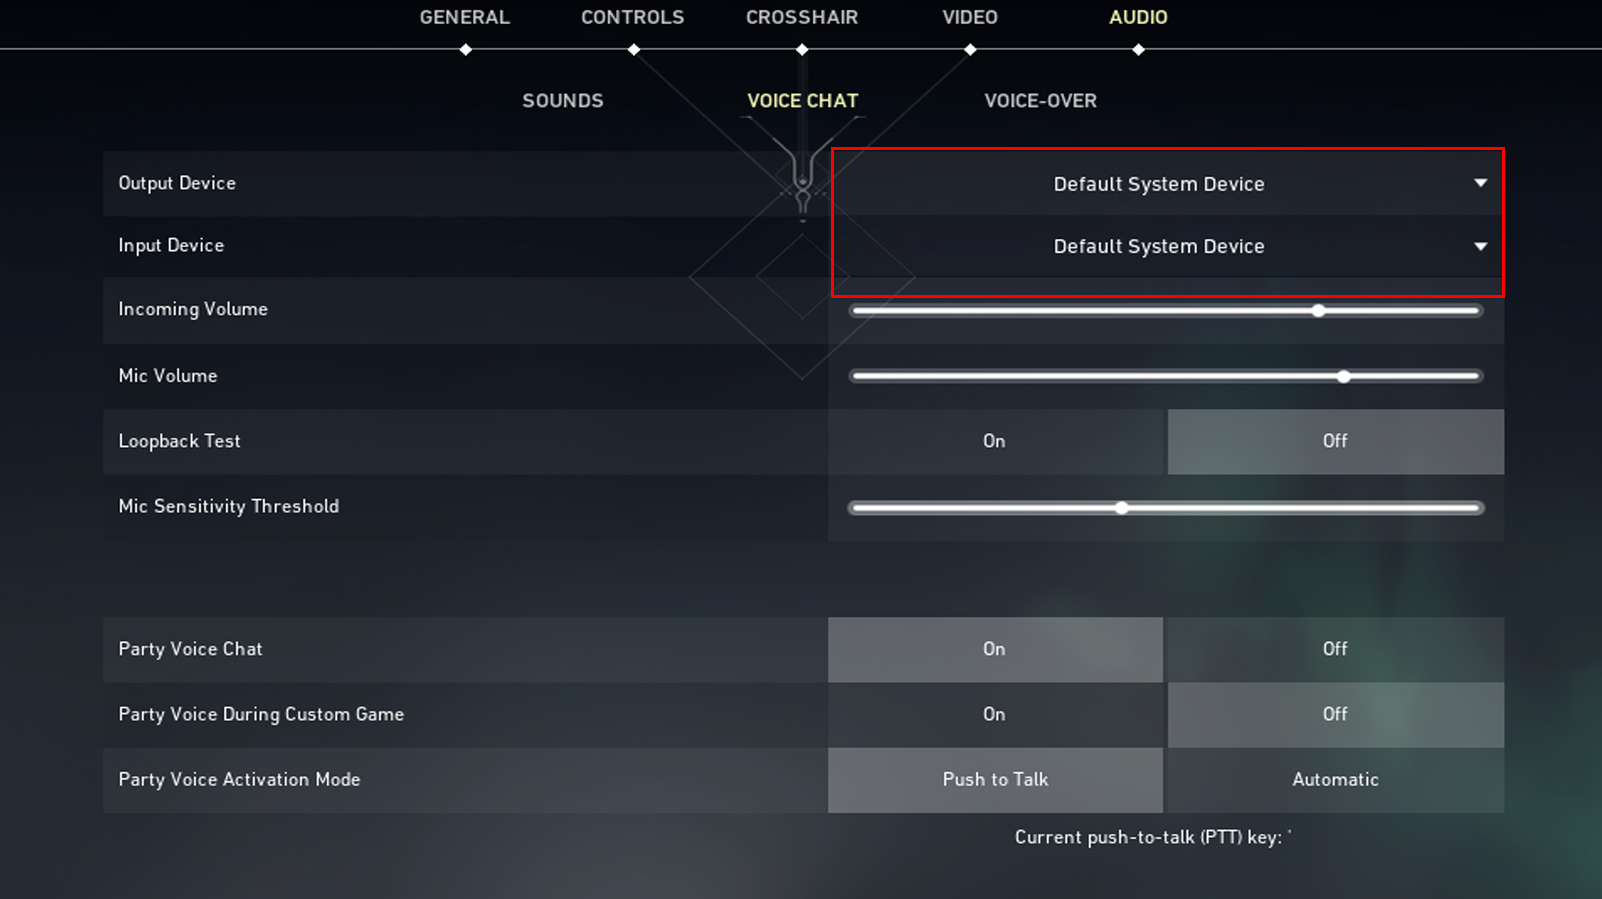
If this is already the case, here is something else you can do:
- Select the device you wish to configure.
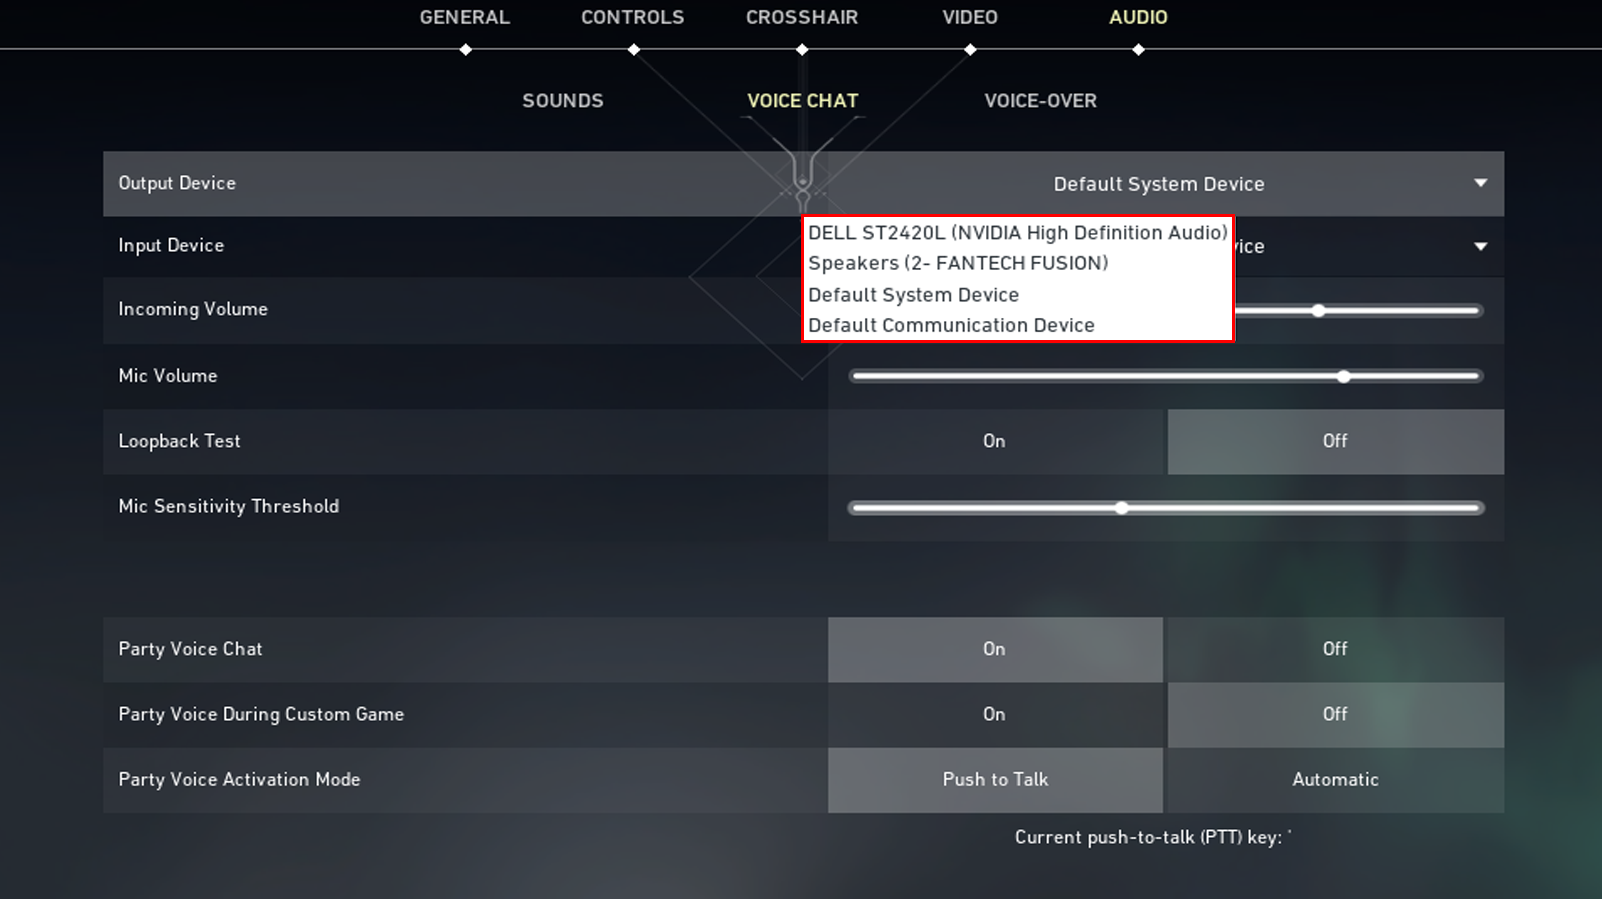
- Adjust both Incoming Volume and Mic Volume to around 50%.
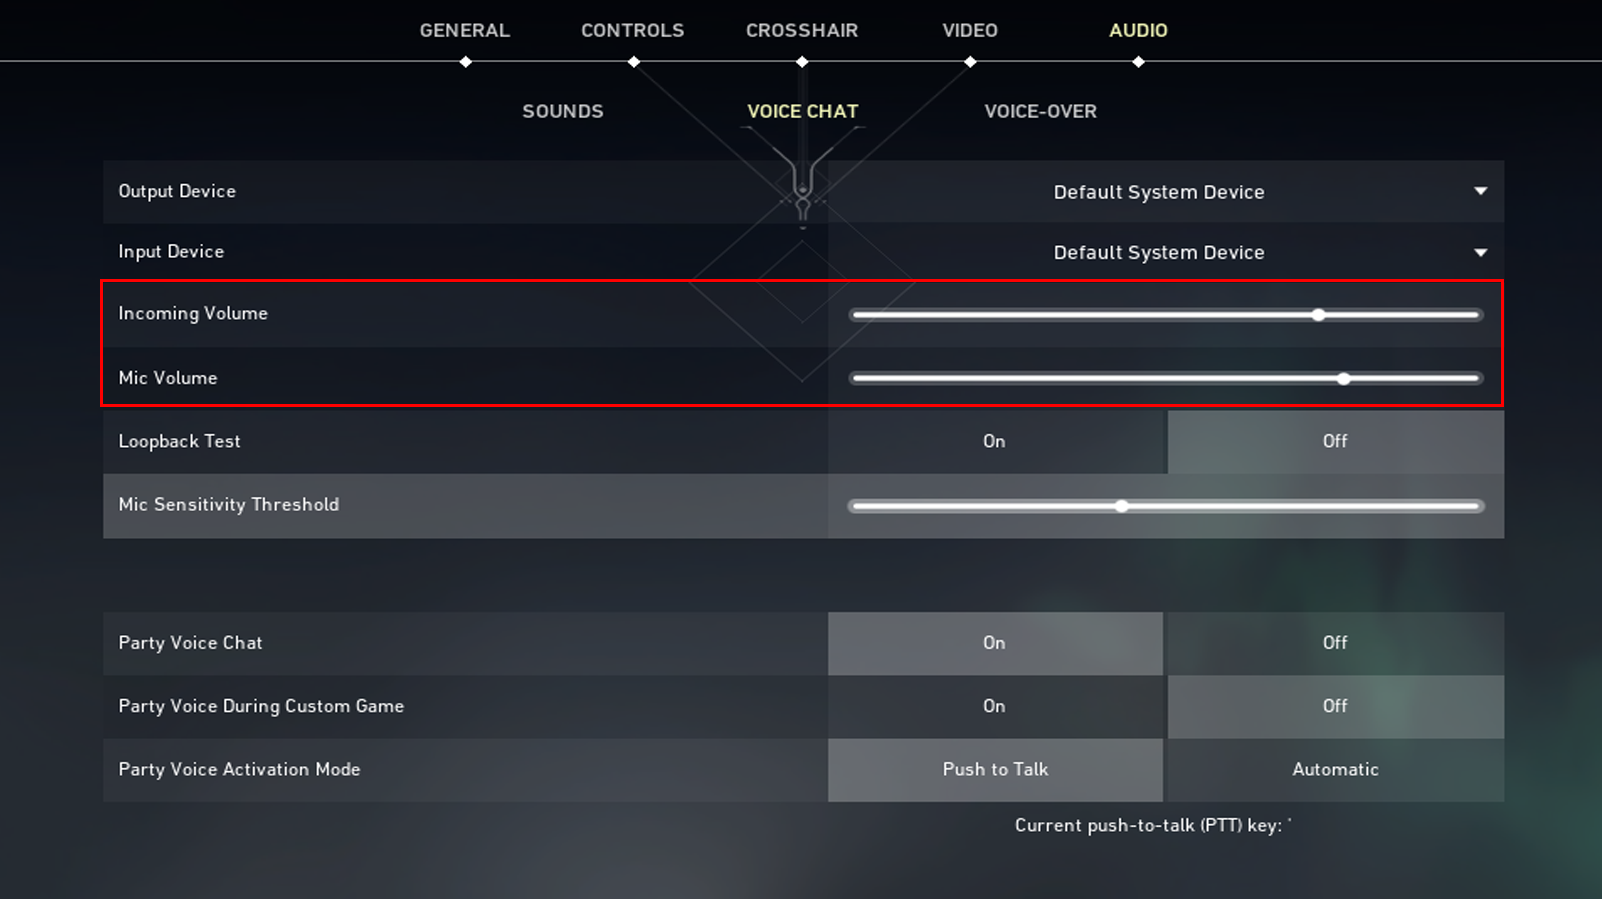
- Check if Party Voice Chat and Team Voice Chat are enabled.
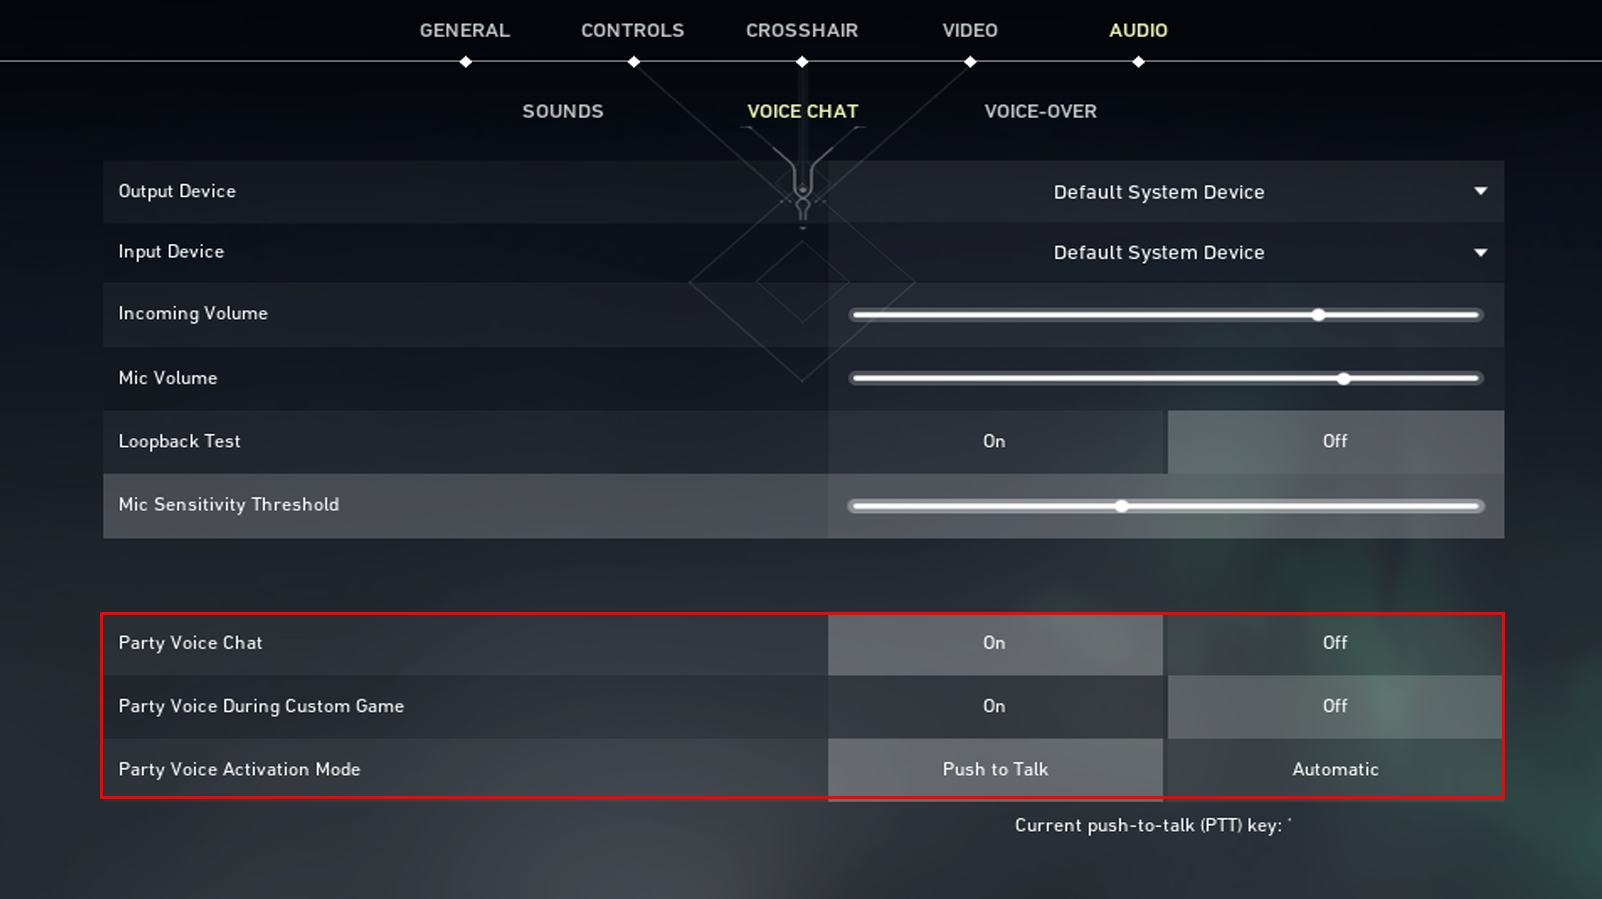
This solution enables team voice chat. However, if you’ve performed the fix and nothing changes, it may not be an issue on your end but your teammates or the game.
Check Your PC’s Input and Output Devices
This solution involves checking Windows’ audio settings. Sometimes, they’ll experience errors, but you can quickly rectify them. Here’s what to do:
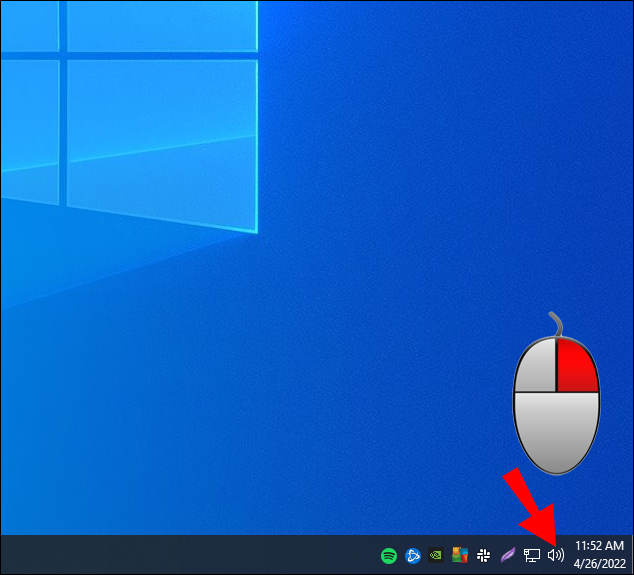
- Head to the right side of Windows’ taskbar.
- Right-click on the sound icon.
- Select “Open Sound Settings.”
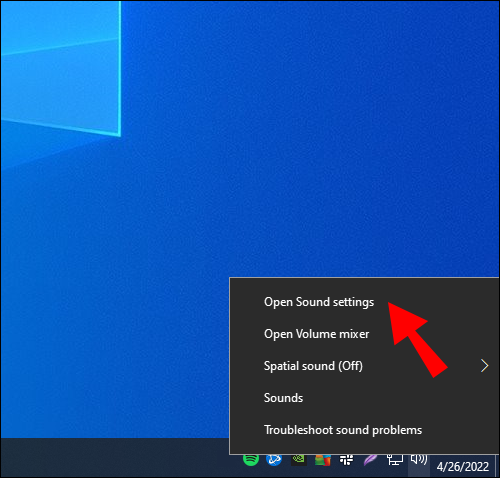
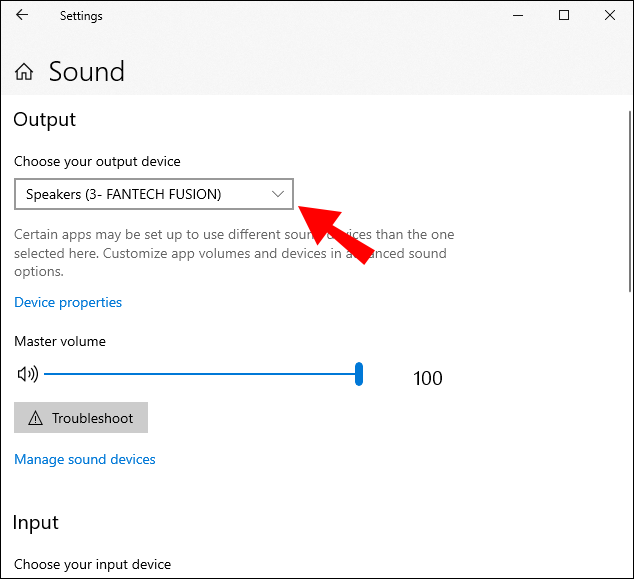
- Ensure that the Output is set to your speakers or headphones of choice.
- As for Input, you can choose the mics you want to use.
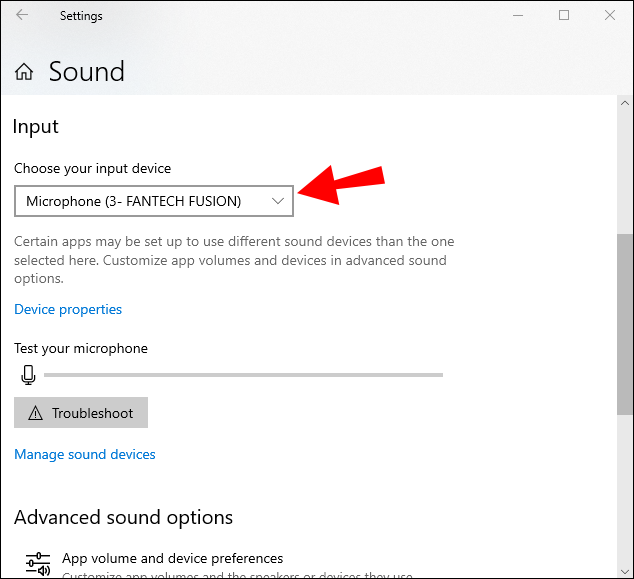
After performing these steps, go into Valorant and see if voice chat works. If not, you may have to complete the next fix.
Allow Valorant to Access Your Microphone
If you’re more conscious of your privacy, you may have denied your desktop apps access to a microphone. This choice will altogether disable any chance of using voice chat or even video calls, as there’s no input at all. To address this issue and talk to your friends, you’ll have to permit apps to use the microphone.
Granting your desktop apps access to audio input looks like this:
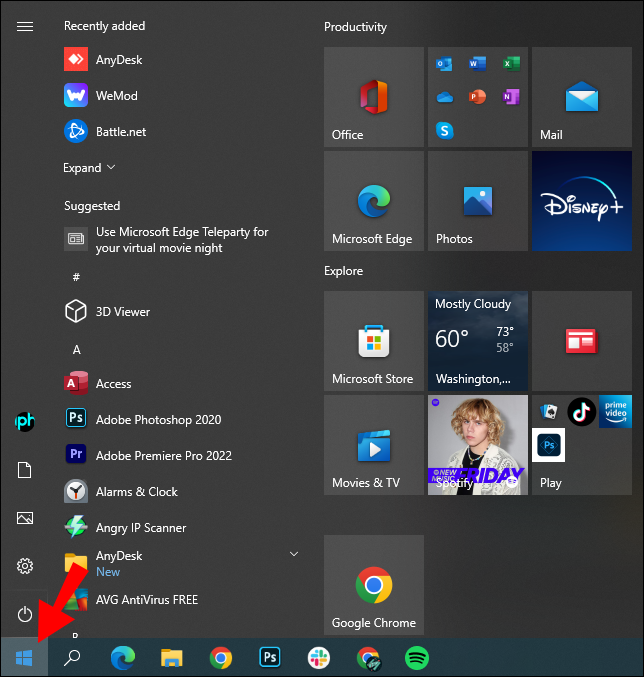
- Open the Start menu on Windows.
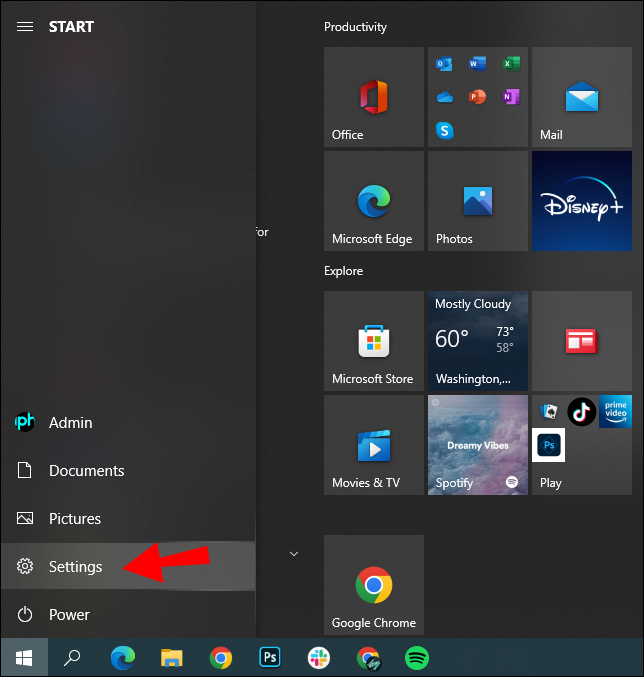
- Click on the gear icon to open the Settings menu.
- Select “Privacy.”
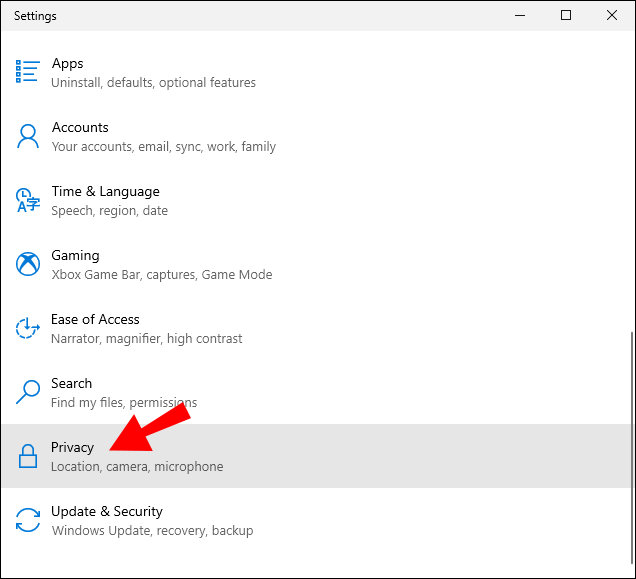
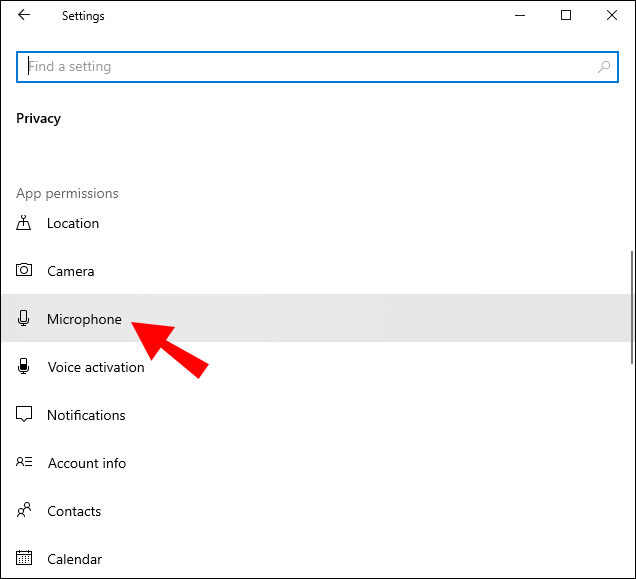
- In the “App Permissions” tab, click on “Microphone.”
- You’ll see a toggle button below the option to let apps access your microphone.
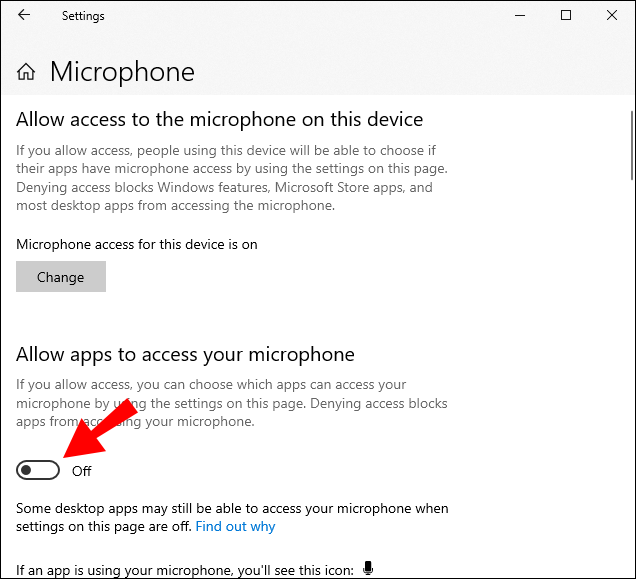
- Make sure you toggle it on.
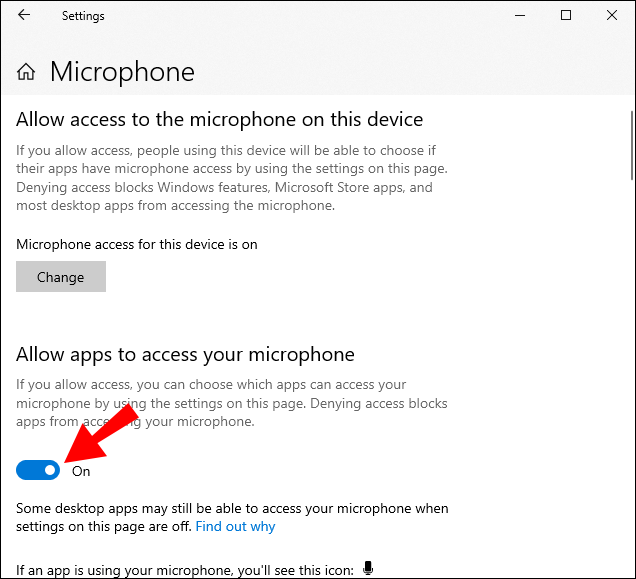
Enabling access will allow the game to use your microphone and broadcast input. Next, you can try the following fix, even if you don’t have audio problems.
Run Valorant as an Administrator
Windows Administrators have more power over their computers, which can also fix some issues with video games. Occasionally, running Valorant this way can fix audio problems. Keep in mind that this isn’t a guaranteed solution for all the audio issues.
To run Valorant as an administrator, follow these steps:
- Open the search box on Windows.
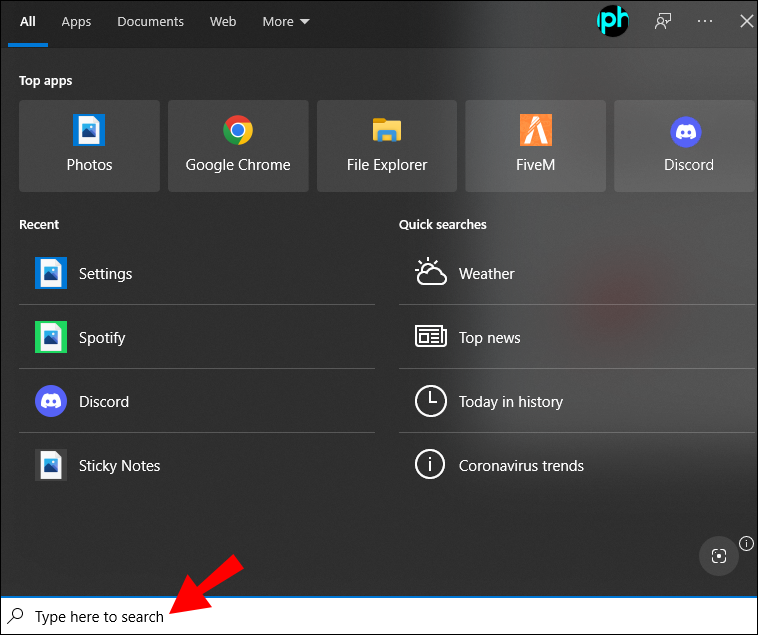
- Look for Valorant.
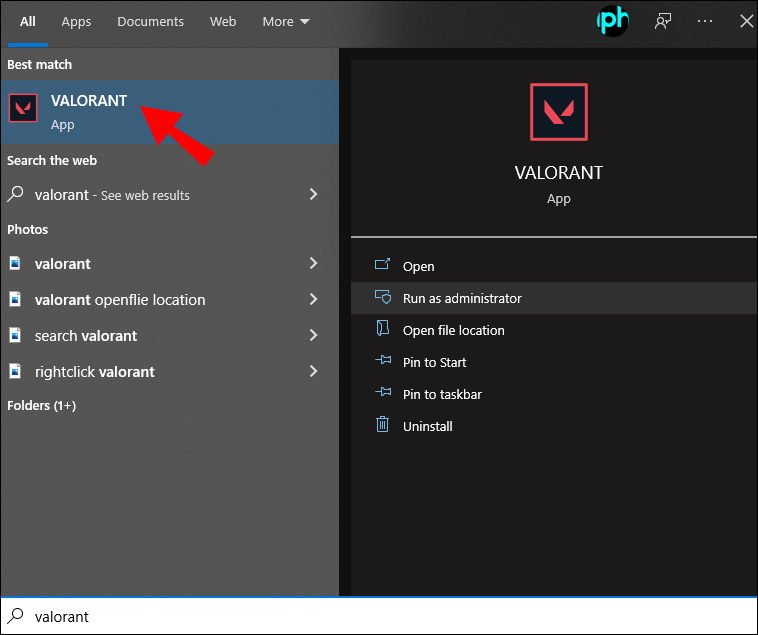
- Right-click the game’s icon.
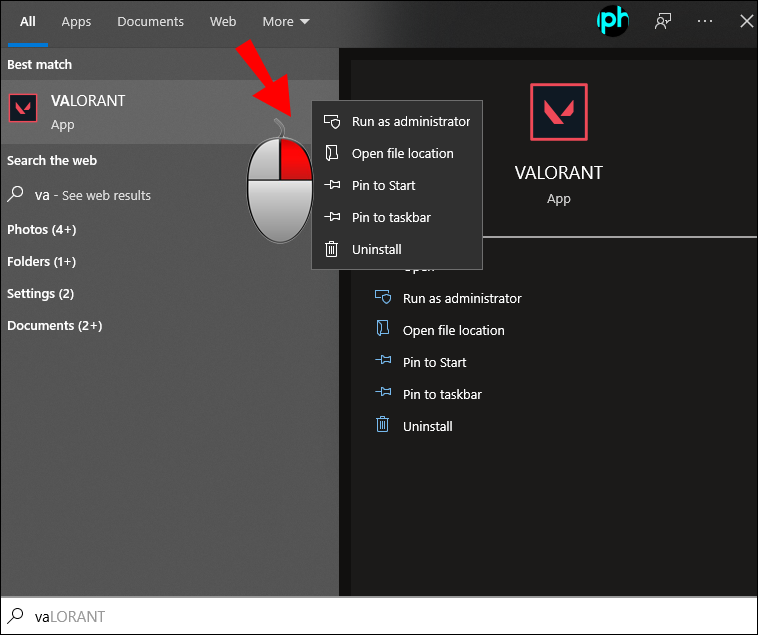
- Select “Open File Location.”
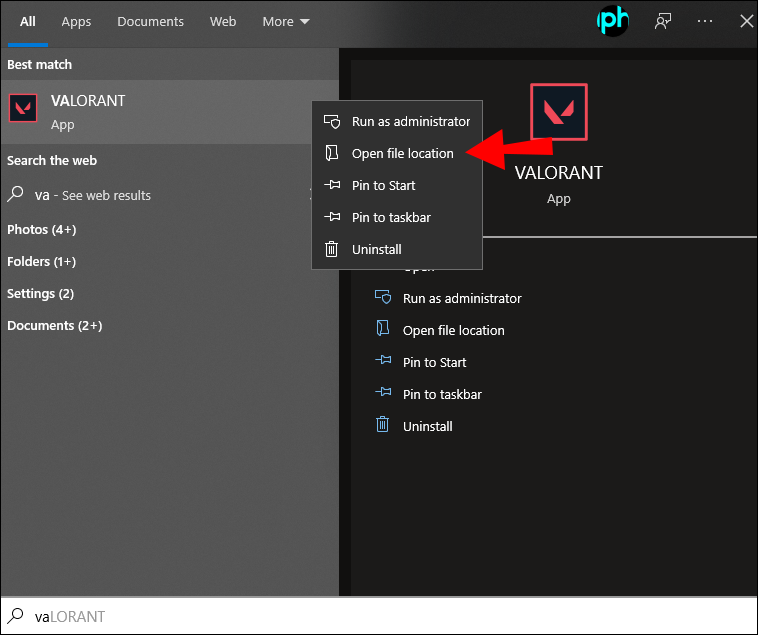
- Once you’ve located the game’s shortcut, right-click it.
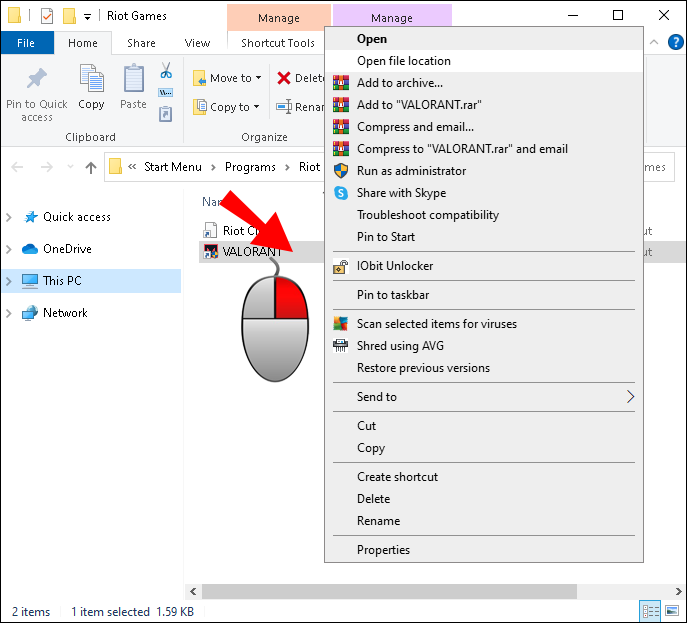
- Select “Properties.”
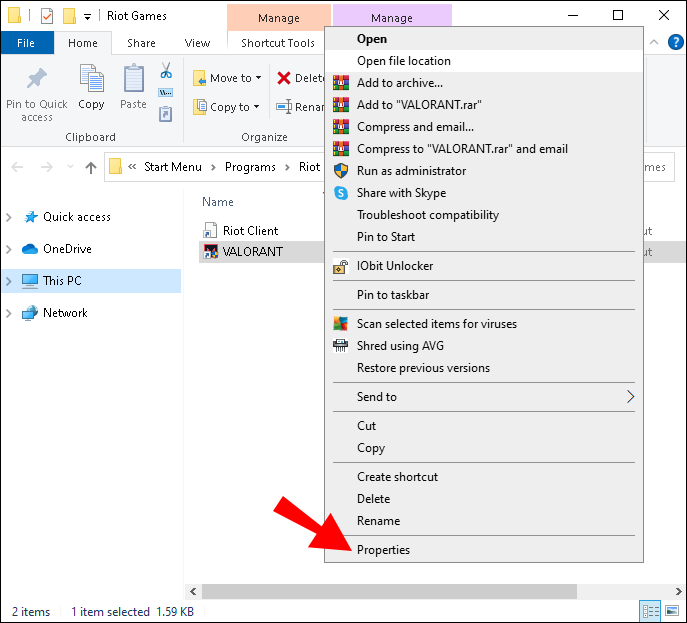
- Head to the “Compatibility” tab.
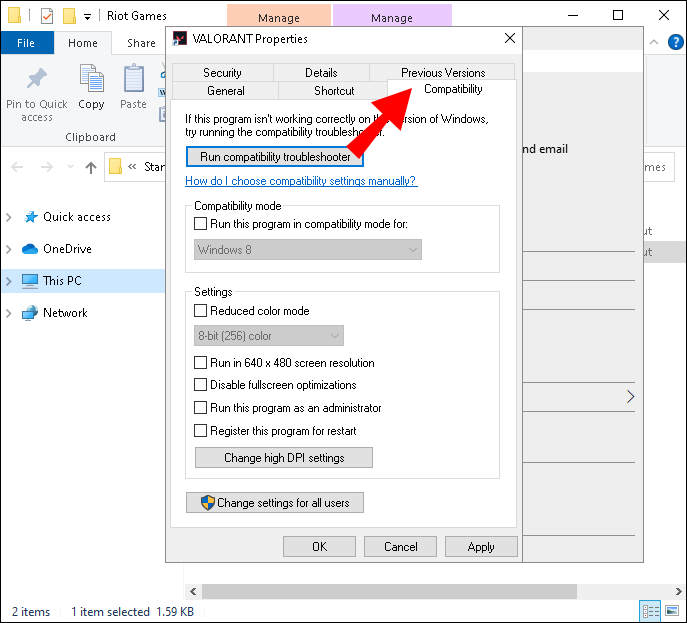
- Check “Run This Program As An Administrator.”
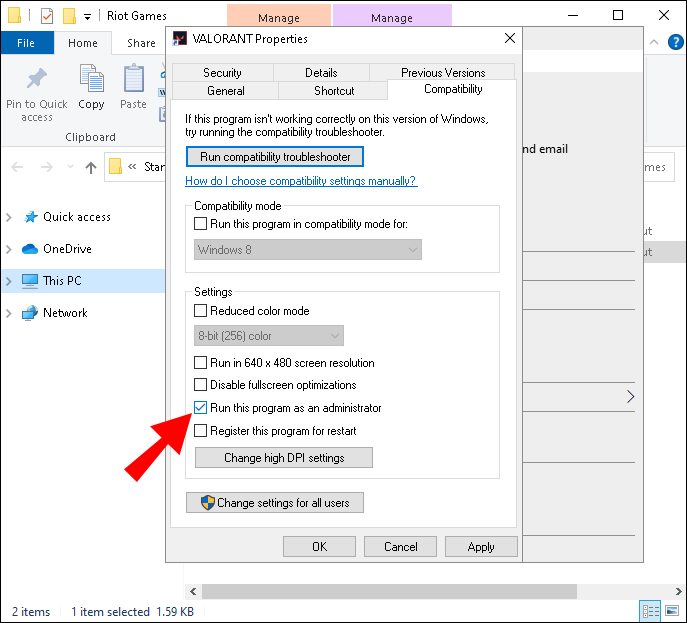
- Select “Apply” and “OK.”
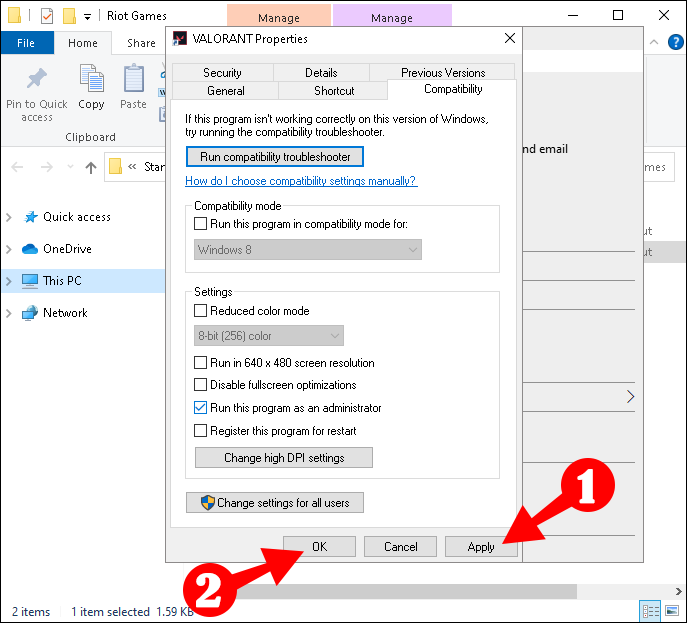
Playing Valorant this way usually solves minor problems.
Update Your PC’s Audio Drivers
Audio drivers are the heart of your PC’s sound experience. If they’re corrupted or outdated, you may experience problems. Like all other apps using audio, Valorant is dependent on your audio drivers.
Should the other fixes not work, you can try updating your PC’s audio drivers. It’s not complicated, and you can either install them manually or automatically.
If you wish to do so manually, you need to know your computer’s exact model and build. You can then search the internet for the latest drivers for your computer. Installing them takes very little time.
For those who wish to keep drivers updated regularly, you can download specific software specializing in this task. There are many of them available, and once you set up the program, you can rest easy that all drivers, including those for sound, will get updated regularly.
Windows already updates drivers automatically, and these drivers are pretty stable. Allow Windows Update to do its job, and you shouldn’t encounter problems with them.
Execute a Clean Boot
A clean boot refers to disabling as many services as possible upon computer startup. It can resolve software conflicts. Make sure not to disable any essential Microsoft services, however.
You can start a clean boot this way:
- Press Win + R on your keyboard.

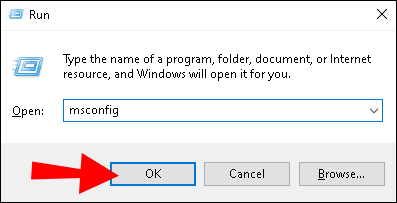
- Type “msconfig” without the quotation marks.
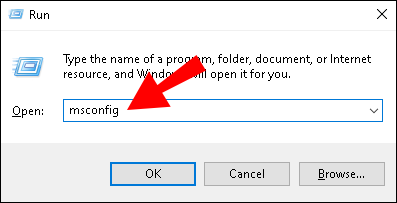
- Click “OK” or press Enter.
- Go to the “Services” tab.
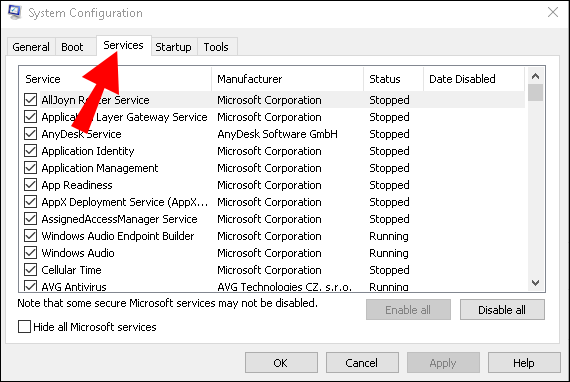
- Check “Hide All Microsoft Services.”
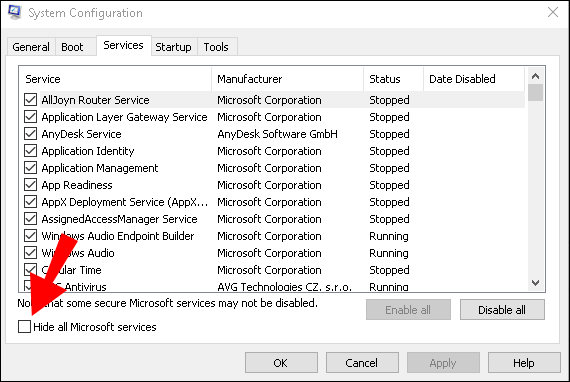
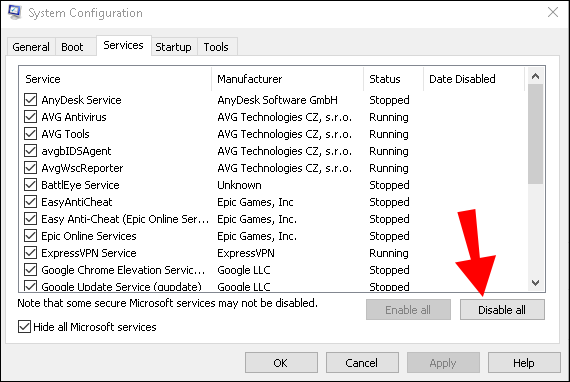
- Select “Disable All.”
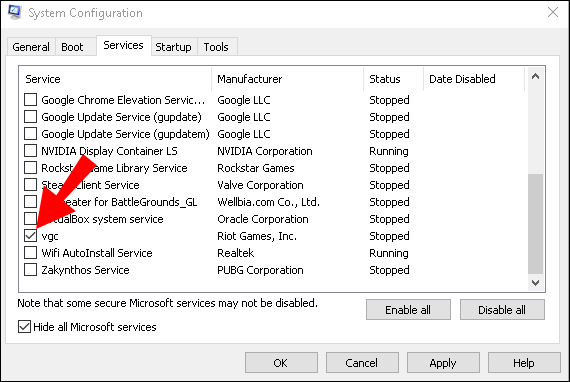
- Look for “vgc” and check it.
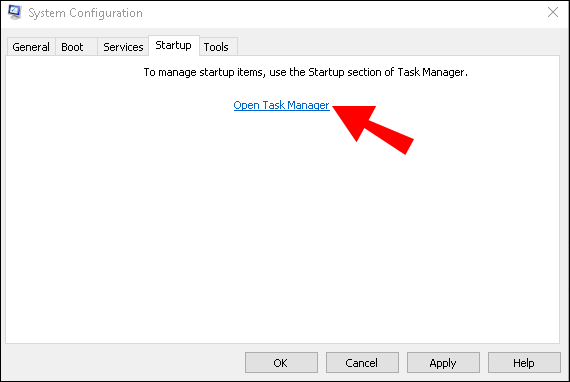
- Go to “Startup.”
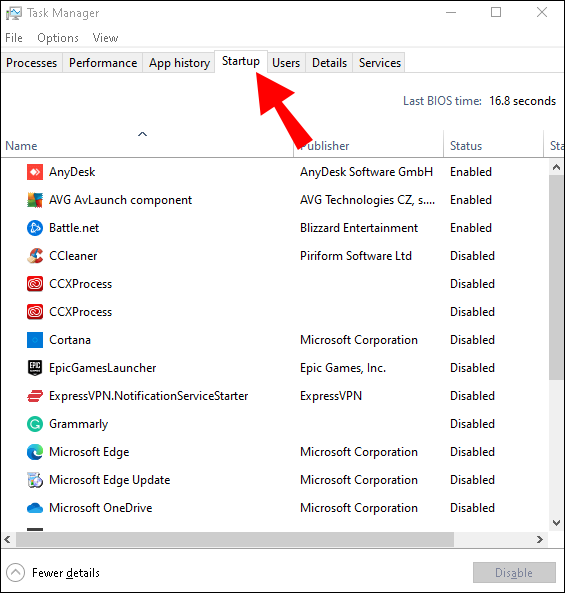
- Click on “Open Task Manager.”
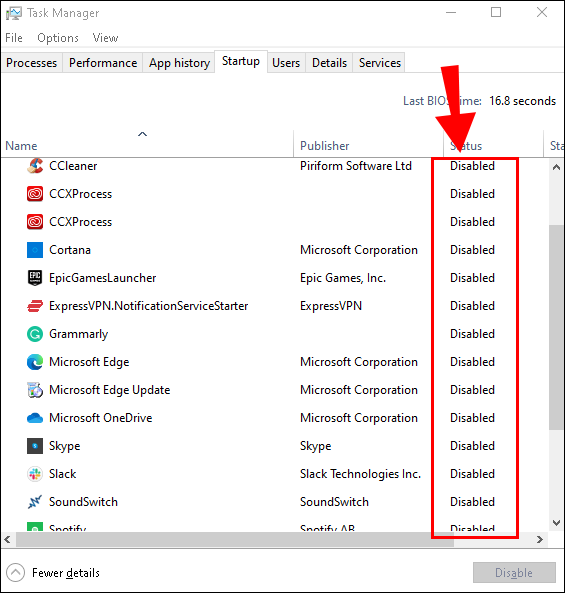
- Disable as many programs as possible on the task manager.
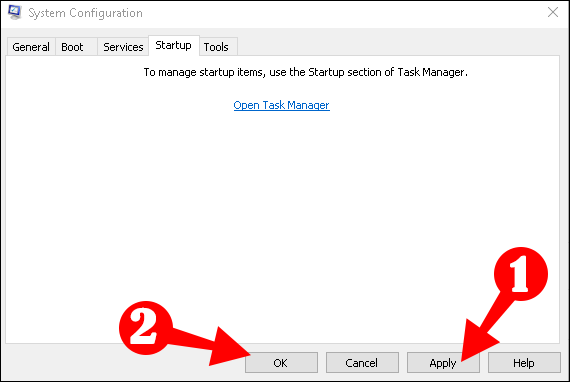
- Back in System Configuration, select “Apply” and “Ok.”
- Restart your computer.
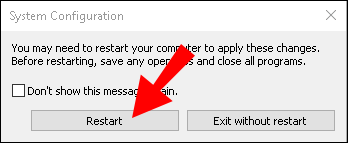
Test if Valorant is working after the clean boot. The clean boot should clear any audio errors from your end.
Other Valorant Audio Issues
Several other audio issues plague the Valorant community, including:
- Hearing muted teammate
- Hearing past teammates
- Self-mutes not working
Most players believe the best solution is to exit Valorant and then stop its process in Task Manager. This method isn’t a permanent fix, however. Another solution is to restart your PC and hope the problems go away somehow. With the latter solution, sometimes it works, and sometimes it doesn’t.
Sadly, all players can do is wait for Riot Games to release a new update. These bugs aren’t new, as they first appeared in December 2020. It was only after 24 hours Riot Games issued a fix.
Riot Games is pretty efficient in fixing game-breaking issues. These audio issues are confusing at best and breaching gamers’ privacy at worst. While there may not be rampant audio issues as of the time of writing, nothing stops them from returning from the dead.
We recommend sending a support ticket to Valorant’s support team if you encounter a previously unknown audio bug. It might take some time, but the professionals can assist you better, and they can even use your case to help others.
Can You Hear Me?
No game is perfect, including Valorant. Its audio bugs have caused much trouble to the community, and even if Riot Games fixes them quickly, the problems can be devastating. We hope that the solutions above will be helpful while waiting for official fixes.
Have you experienced any audio bugs in Valorant? Which fix do you find to be the most effective one? Let us know in the comments section below.


