Killjoy’s Nanoswarm Grenade is a unique molly-type ability in VALORANT. What separates our German Child Prodigy’s molly from similar abilities in VALORANT is Killjoy’s ability to set them up and activate them later on in the round.
Today, we look at some Nanoswarm Setups on Ascent, where we focus on A-site Switch and Generator setups.
Ascending Ascent

Ascent is a beautiful map set in San Marco, Venice, Italy. The map even features landmarks from some iconic sites found in Italy, such as St. Mark’s Campanile and St. Mark’s Basilica.
Ascent is the first-ever map made for VALORANT. Although it was the first map ever to be made, Ascent would, later on, end up as the fourth map to ever be released in-game. The dev team took their sweet time with Ascent, polishing and revising many in-map elements before its official release.
Ascent has a standard two bombsite layout that many Tactical First-person Shooting game enthusiasts have already seen. The most interesting characteristics about Ascent are the mechanical doors (one for each bombsite) that cut down entryways into the bomb sites.
A quick look at the loading screen for Ascent will have players wondering about the reasons why the whole map is, quite literally, in the air.
According to VALORANT lore, Ascent’s location is a victim of a deliberate Spike Bombing set up by mirror Agents from an alternate Earth, which resulted in the whole city being brought up into the air.
German Efficiency Child Prodigy: Killjoy

Killjoy belongs to the Sentinel-class of Agents. Her abilities allow her to lock down bombsites entirely on her own. Allies can rely on the German Prodigy to stall or even stop an enemy team’s push on her own to buy her teammates enough time to rotate over to her bombsite.
Killjoy uses her superior knowledge and skill to employ robots and gadgets to fight on her behalf. Her skill set consists of nanobots, an alarm bot, and a sentry bot that she can set up to give her the best chance at holding down a bombsite. Her ultimate ability allows her to cover a large enough area to cover entire bombsites, giving Killjoy the ability to detain anyone caught in her ultimate.
In the VALORANT lore, Killjoy is known to have a father-daughter relationship with Brimstone. While both characters are not related, Brimstone sees it fit to act as a guide for Killjoy.
Killjoy is in-charge of almost all of the non-Sentinel VALORANT Agents’ tech. She oversees repairs and tech innovation for every Agent. Taking some of the Agents’ voice lines into context, Killjoy seems to be a natural-born tactician, using data she gathers from engagements as inspiration for her next inventions and strategies.
Killjoy Nanoswarm

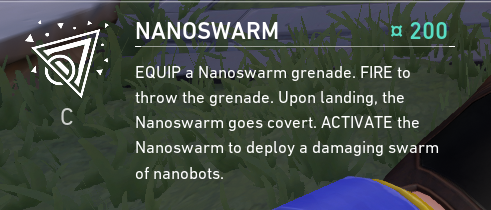
Killjoy’s Nanoswarm is a molly-type ability that deals quick damage over time to a large radius. Killjoy’s Nanoswarm ability can be equipped at the beginning of each round for just 200 credits each and a maximum of two charges.
The thing that sets Killjoy’s Molly Ability apart from other molly-type abilities like Phoenix’s Hot Hands, Viper’s Snake Bite, and KAY/O’s FRAG/MENT is Killjoy’s ability to place the grenades before the start of the round and activate them as she wishes at any time within the round. After placing the Nanoswarm Grenades, they will become completely invisible until enemy players stand next to them.
Among the other molly-type abilities present in VALORANT, Killjoy’s Nanoswarm Grenade is the only molly ability in VALORANT that does not activate upon landing. However, a slight caveat is that KJ’s Nanoswarm Grenades shells can be destroyed when damaged with guns or abilities. Killjoy’s Nanoswarm Grenades also emit a subtle buzzing noise when enemy players stand close enough to the Nanoswarm Grenades.
Ascent A-site – Killjoy Nanoswarm Setup Switch

The first Nanoswarm setup for Ascent A-site can give Killjoy players a few free kills from unsuspecting Attackers.
Whenever Attackers decide to take A-site control, a player or two usually runs towards the “Switch” to close down the mechanical door between A-site and Tree. By no means is this a bad idea as an Attacker because, generally, players will want to cut down on the angles that they have to hold and watch throughout the round.
With that in mind, this first Nanoswarm setup for Ascent A-site will be placed around the “Switch” and “Generator” areas. This setup will ensure that even if Attackers try to run away from your Nanoswarm trap, they will have nowhere to go as the Nanoswarm Grenades are placed so that anyone caught in it will surely have their HP drained to zero in seconds.
First Nanoswarm Placement
- Look for this patch of grass along this wire:

2. Left-click throw your Nanoswarm Grenade while aiming for this grassy patch:

It does not have to be pixel-perfect, as the Nanoswarm radius is large enough to cover the designated area.
Second Nanoswarm Placement
- Look for this Ledge just in front of the Generator:

2. Go to the second tile from the wall:

3. Place the Nanoswarm Grenade where the second and third tile meets:

4. Left-click throw the Nanoswarm Grenade:

Alarm Bot Placement
There is no specific way of placing the Alarm Bot for this Nanoswarm setup. Remember to place the Alarm Bot radius’ top-edge close to the wall:


Turret Placement
For this setup, it is essential to place out your trusty Turret out of sight from incoming Attackers. The goal is to give Attackers a false sense of security to lure them into the site.
The Turret’s angle will ensure it will only activate when an enemy player makes their way towards the Switch where our Nanoswarm trap is located.
Killjoy’s Turret will apply a slow debuff upon enemies hit by its bullets. The resulting slow debuff will make it more difficult for Attackers to fall back from your Nanoswarm radius.
- Go to hell: (No, seriously, go below Rafters/Heaven in A-site)

2. Look for this wood plank on the right side:

3. Place the Turret just behind this wood plank. Rotate the Turret, so it is facing the Switch. Right-click to rotate:


When to Activate Killjoy’s Nanoswarm Setup for A-site Switch
Killjoy players must remember to wait for their Alarm Bot to alert them of any enemies detected when using this setup. Once the Alarm Bot is triggered, immediately activate the first Nanoswarm Grenade followed by the second Nanoswarm Grenade in successive order.
Ascent A-site – Killjoy Nanoswarm Setup Generator
Generator is the most common bomb planting spot for A-site on Ascent. It is no surprise why players choose to plant around the Generator area; Generator offers the largest cover on A-site on Ascent.
We can use this to set up our Nanoswarm Grenade trap around the Generator area to force Attackers to plant at a more open spot on-site. This setup can also help our team retake A-site much easier.
First Nanoswarm Placement
- Look for the left-side plug at the foot of the Generator:

2. Keep yourself against the Generator and crouch:

3. Aim for this corner on the wire plug:

4. Left-click throw your Nanoswarm Grenade:

The Nanoswarm Grenade should land just on top of the wires when done correctly.
Second Nanoswarm Placement
- Go to the left side of the Generator:

2. Look for this corner on the wall:

3. Place yourself against the left wall and left-click your Nanoswarm Grenade on the same corner:


The second Nanoswarm Grenade should settle in the corner when done correctly.
Alarm Bot Placement
For our Alarm Bot Placement, place the Alarm Bot in the middle of the Generator and the wall. Ensure the top edge of the Alarm Bot radius sits along the front edge of the Generator:

Turret Placement
- Look for this corner in Hell:

2. Place the Turret on this corner. Ensure it is facing the Generator:


When to Activate Killjoy’s Nanoswarm Setup for A-site Generator
All that Killjoy players have to remember when using this setup for Generator is to wait for the Alarm Bot to alert them of any enemies detected. Once the Alarm Bot is triggered, immediately activate the first Nanoswarm Grenade followed by the second Nanoswarm Grenade in successive order.
Ascent is Closed For Today
Killjoy is one of the best solo lockdown Agents in VALORANT. Her skill set allows her to take complete control of a bomb site even when she is all on her own. When played well, Killjoy instills fear, uncertainty, and doubt into the enemies’ hearts, making them think twice before entering her bombsite.
Her Nanoswarm Grenade is a great variation of the molly grenade in VALORANT. The Nanoswarm Grenades’ remote activation gives Killjoy the freedom to position herself at almost any map part. When placed strategically, Killjoy’s Nanoswarm Grenade can catch enemies off guard, leaving them no place to run as her trusty Turret is right there to finish the job.
Killjoy shines the most when Defending bombsites. With these Nanoswarm setups for Ascent, Killjoy players will make their enemies’ lives much more difficult.