Rain down on your enemies with Sova’s Double Shock Darts on Pearl.
It feels like it was just yesterday when Riot Games introduced the latest Initiator in Fade in Episode 4 Act 3. Unfortunately, Fade’s introduction was accompanied by nerfs for one of the most popular Agents in the game in Sova. More specifically, the devs saw it fitting to nerf Sova’s Owl Drone and Shock Dart to pull his power levels down to make room for Fade.
Since the nerfs back in Episode 4 Act 3, Double Shock dart lineups have become a rare sight in-game. The nerfs meant that Sova’s Shock Dart had to be landed flush to instantly deal the necessary damage to kill enemies at full HP.
Despite these nerfs, Double Shock Dart lineups are still very viable and can significantly reduce your enemy’s HP if you can land both Shock Darts on them. With that in mind, we have lined up Double Shock Dart lineups you can try on Pearl to help with Attacking and Defending around the map.
Pearl A-site Double Shock Dart Lineups
The most contested spots around Pearl A-site are A-Main Orb, A-Default, and A-Camp. With the A-Main Orb Double Shock Dart lineup featured below, you can easily tag one or two enemies as they cross the Orb on their way to the A-site.
We also have added an A-Default and A-Camp Double Shock Dart lineup to help with post-plant defense.
A-Default from A-Main
- Stand in this corner in A-Main:

2. For the first Shock Dart, line up the upper right corner of the Shock Dart charge bar in this corner on the pillar:


3. 1-bar charge + No Bounce:

4. For the second Shock Dart, aim for the tip of this diamond shape on the dome:

5. 1-bar + 1-bounce:

When done properly, both Shock Darts should land at A-Default:

A-Default from A-Link
- Stand in this corner in A-Link:

2. Place the leftmost tip of the HP HUD line on the bottom left corner of this part of the wall:


3. No bounce + 1-bar charge:

4. For the second Shock Dart, place the right tip of the HP HUD line under this marking on the wall:


5. No bounce + 1-click:

When done properly, both Shock Darts should land at A-Default:

A-Camp from Defender Side Records
- Stand on top of the small box at Defender Side Records:

2. Place the binding letter of Sova’s Owl Drone on this small nib on the roof:


3. No bounce + 2-bar charge:

4. For the second Shock Dart, just place the upper right corner of the Shock Dart mouse indicator on the bottom left corner of the small window:


5. No bounce + 1-bar charge with a JUMP:

When done properly, both Shock Darts should land in A-Camp:

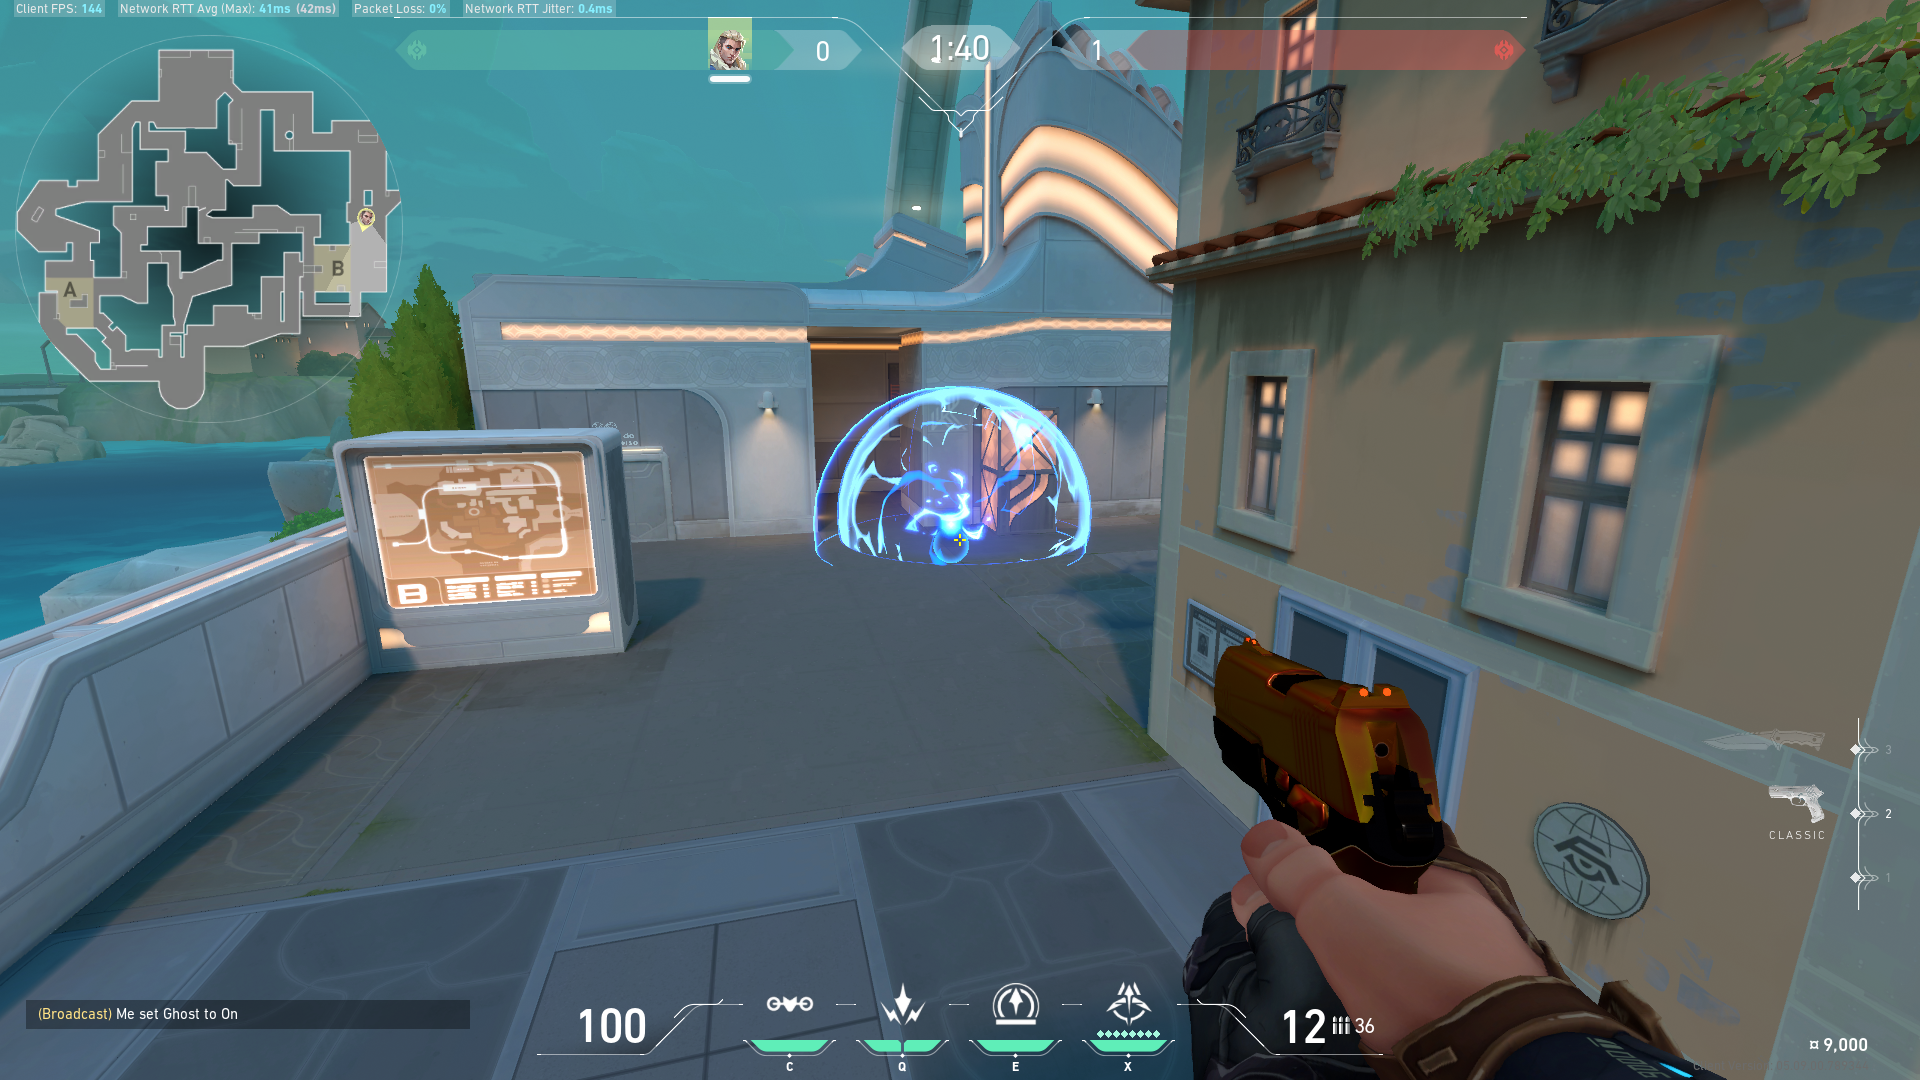
A-Main Orb from Mid Connector
- Stand in this corner in Mid Connector:

2. Place the leftmost tip of the HP HUD line in this spot on the dome:


3. No bounce + 2-bar charge:

4. For the second Shock Dart, place the bottom right corner of the Shock Dart charge bar in this corner on the roof:


5. No bounce + 1-bar charge:

When done properly, both Shock Darts will land at the Orb in A-Main:

Pearl B-Site Double Shock Dart Lineups
There are not many options for Double Shock Dart lineups for catching the incoming enemy team as they enter B-site. This is because the B-site entryway from B-Long is very open, making it difficult to deal maximum damage with Shock Dart’s current state.
You can, however, use Sova’s Double Shock Darts to stop the Spike plant or defend it post-plant. We have featured Double Shock Dart lineups for both situations below.
B-Safe Plant Anti-Plant
- Stand in the middle of this line in Defender Side Records:


2. Place the leftmost tip of the HP HUD line in the corner between the tree and the dome frame:


3. No bounce + 1-bar charge:

4. For the second Shock Dart, simply line up the tip of the left diamond where the roof and the dome frame intersect:


5. No bounce + left-click:

B-Default Post-plant Double Shock Dart
- Line up the left edges of the B-Main and B-Long pillar walls:

2. Place the bend on the HP HUD line in this corner on the B-Ramp wall:


3. No bounce + 2-bar charge:

4. For the second Shock Dart, aim along the bottom of the line on the wall:


5. Two bounce + Max charge:

When done properly, both Shock Darts should land in B-Default:

Double Down
If you can time any of these Double Shock Dart lineups perfectly, you can get at least one kill from each lineup above per game. Of course, once the enemy team realizes that the enemy Sova has some Shock Dart lineups for the spots above, these lineups will immediately become less effective.
With that said, having the ability to defend the Spike post-plant or catch a few enemies off guard with Sova’s Shock Darts will go a long way in both Attacking and Defending Pearl.