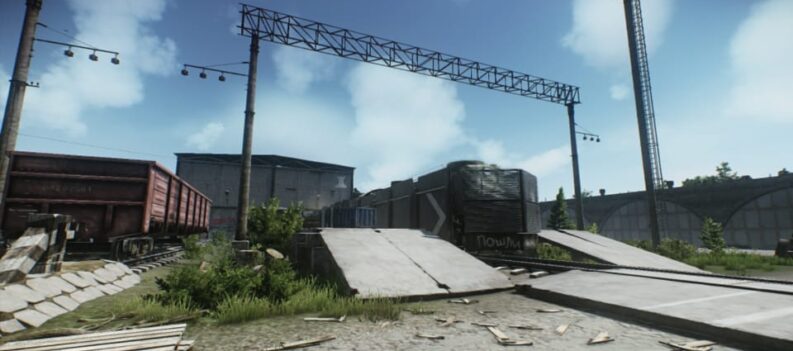
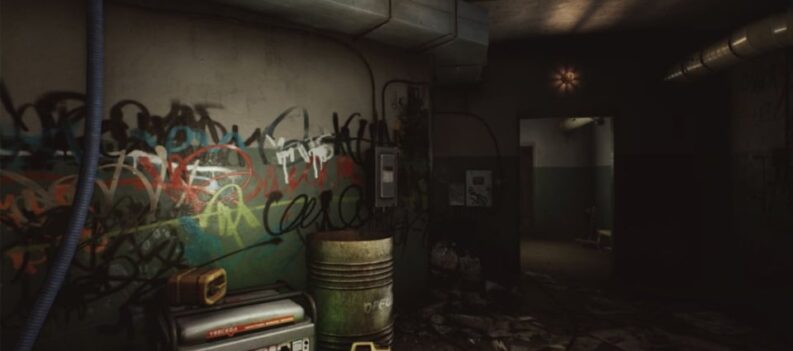
Interchange is a large map full of individually large areas. Warehouses, Stockrooms, storefronts, and parking lots all make for a mix of tight rooms connected by long sightlines.
The height of the mall also means you have to be on the lookout for vertical threats and opportunities. Read more for our detailed interchange map guide!
Interchange Map Guide – Escape From Tarkov
Outskirts – Interchange Map
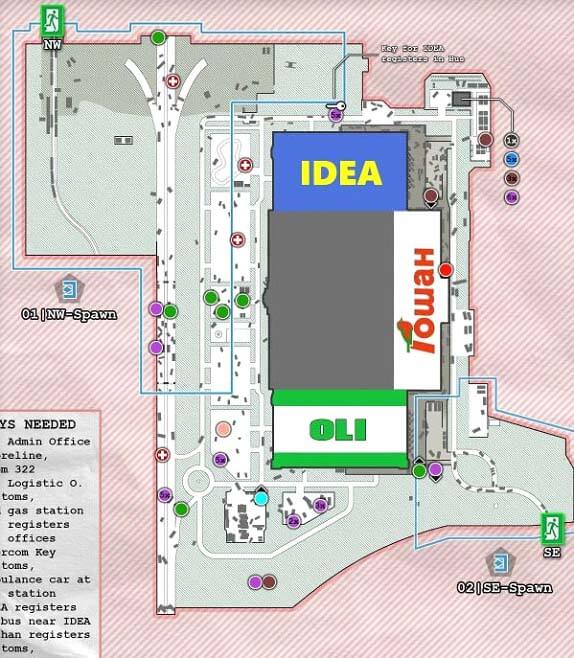
Like all maps, you should go into a raid on Interchange with a plan, and be wary of other players even shortly after spawning. Unlike other maps, a number of long sightlines near and around the parking lots make many very early and long-range engagements technically possible but extremely difficult to actually land so long as the target keeps moving.
If you’re being shot at from the beginning of a raid, there’s a good chance that you’ll be perfectly fine just running through to proper cover. Remember that firing on someone across the map is only going to be burning time and resources as well as giving away your position on an unlikely hail-mary of a shot.
Time is important on Interchange because it’s very common for people to rush to various vantage points on and around the mall at the center of the map. This, coupled with the wide-open entryways of the mall make getting in much more difficult than getting out of the complex. This all means your best bet is to just run straight in. Have a plan, and know where you’re going to loot based on where you spawn, but get there fast.
As an additional note, a power station sits in the north-east corner of the map. There are several valuable loot locations within the mall that can only be accessed after a switch in the power station has been activated.
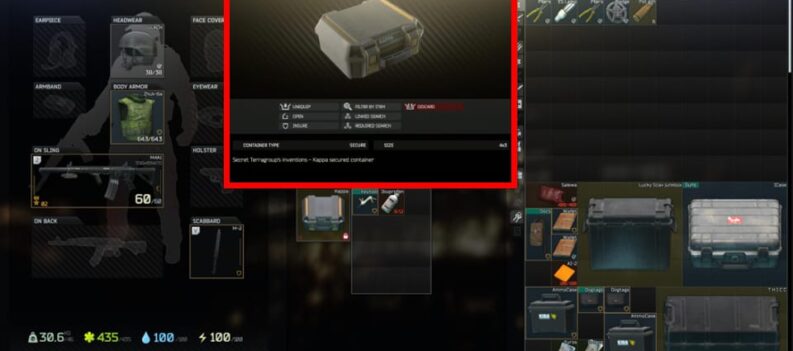
Outside the mall, in the container yard, is a red container with the Terragroup logo resting atop other containers. If the power is on, this container (object 21) can be opened with the object 21WS keycard. This container houses a number of weapons cases.
First Floor in Interchange
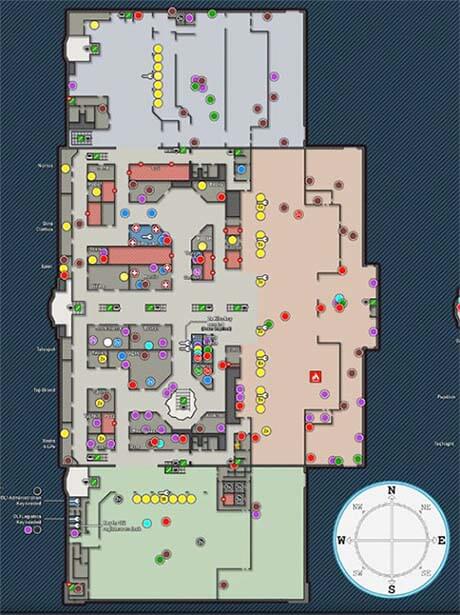
The first floor of the mall can be broken down into four major areas. The central shopping center, and the three major stores IDEA, Goshan, and OLI.
IDEA is a furniture store and makes the northernmost portion of the mall. This store can be entered from every direction and holds a lot of loose loot drops as well as a high number of hardware spawns. Lots of tools, bolts, screws, packs of nails, etc. can be found here. There are also twenty lootable cash registers so long as you have the key for them.
To the east, we have Goshan, a grocery store with 27 cash registers and ten different weapon cases and spawns spread throughout the store and its warehouse. Other than that, the high number of food spawns makes Goshan useful for finishing a number of quests.
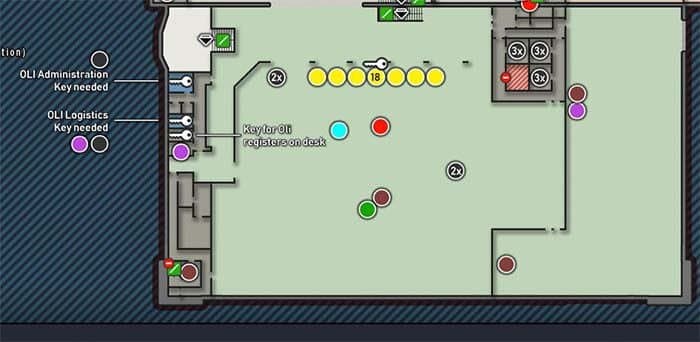
The southernmost portion of the mall is OLI, a hardware store. Another 18 cash registers and a lot of hardware spawns wait for you here. In addition to the normal hardware spawns, OLI actually has a very high chance of spawning car batteries, fuel tanks, gas analyzers, and other high-value high-rarity items.
This, along with the 9 computer spawns in offices in the north-east of the store make OLI one of the most fought over regions of Interchange. Both AI and player scavs have a chance of spawning here, so competition can be pretty fierce even without a lot of PMCs getting involved.
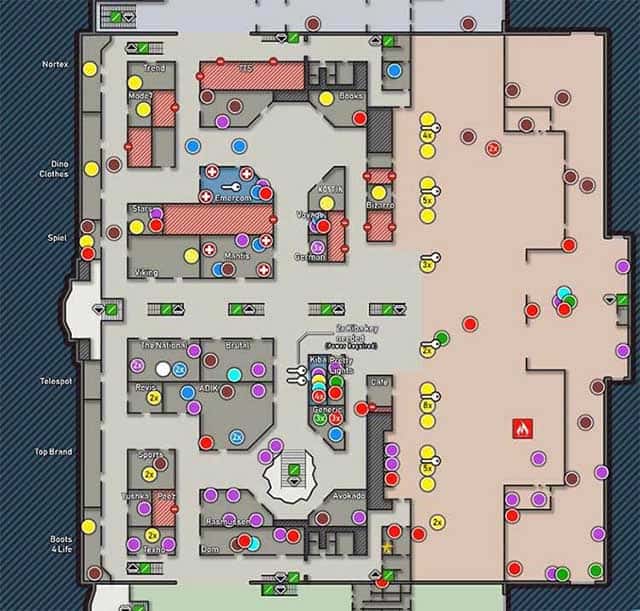
The above map shows the general shopping center portion of the first floor. While basically every store has some amount of loose loot, bags, and jackets available, the areas of particular note are those labeled Generic, Kiba, Emercom, Voyage, Mantis, and Pretty Lights.
In addition to requiring both the Kiba store outlet key and the key to the KIBA Outlet grate door, Kiba will actually trigger an alarm when accessed. The star in the south-east corner of the shopping center map marks a terminal that can be used to disable the alarm.
As a side note, the Emercom medical center also requires a key and has a chance to spawn several very high-value medical items.
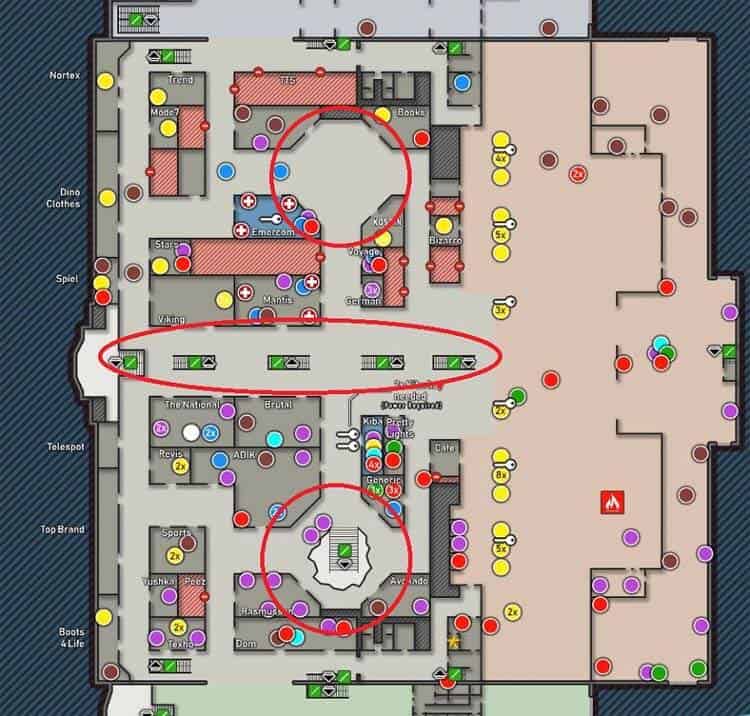
Here I’ve circled the areas that can be easily spotted by players on the floor above.
Second Floor in Interchange
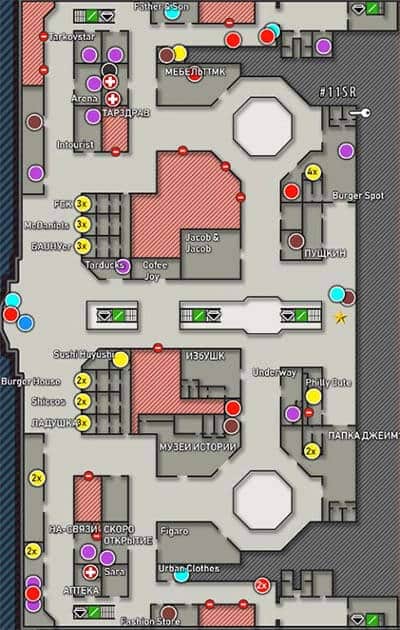
The second floor of the shopping center is less loot heavy and often less contested. Medical spawns, a few weapons cases, and 29 cash registers make up basically all of the loot on this floor.
The south-westernmost portion of the second floor contains the Techlight store, and next to it is a pharmacy that can be accessed with a key after the power station has been activated.
Killa in Interchange Map
In addition to the pharmacy, activating the power station will also allow you to use the object 11SR keycard. In the Burger Spot bathroom is a urinal that after flushing will reveal a keypad. Using this keycard on the keypad will open up Killa’s saferoom in the parking garage which is both an extraction zone and has a switch to open the “Object 14” container in the parking garage which contains a number of weapon cases.
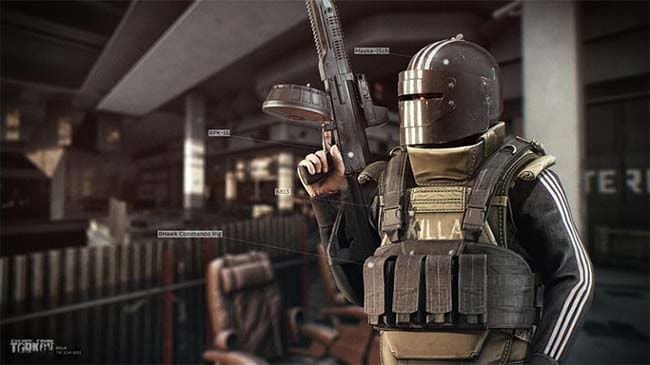
This key is expensive on the flea market and only spawns on the Scav boss “Killa”. Killa is an absolute machine of a Scav boss and has a fairly high chance of spawning.
Killa can be armed with a variety of primary weapons each with their own variety of modification options. Most notably, Killa can spawn with an RPK and a 95-round drum magazine as well as several additional 60-round magazines for backup.
He is always heavily armored, and highly aggressive, attacking even player scavs on-sight. Killa is famously relentless in how he hunts players after spotting them, as well as aggressively charging people down and even power-sliding into them and around cover. If you’re not geared and ready specifically to fight Killa, it’s best recommended to avoid him.
Escape From Tarkov Interchange Hidden Stash Locations
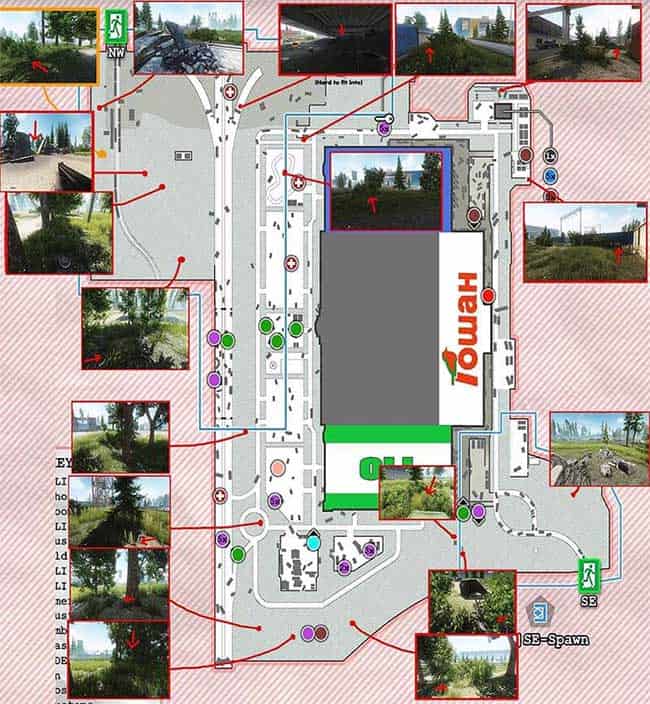
On a closing note, there are a lot of hidden stashes spread across the wooded exterior of Interchange. Due to their sheer number, and the difficulty of explaining some of them, I’m going to leave you with a community map courtesy of the EFT wiki.
