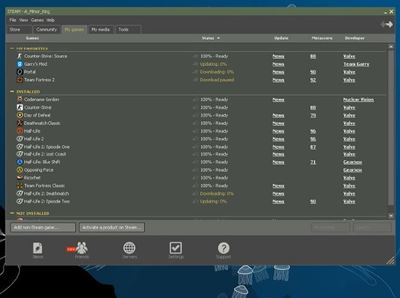
Steam is one of the most popular gaming clients in the world. Steam has pretty much become synonymous with the term “PC gaming.” This client allows you to purchase and launch various games from the app. This, however, isn’t all that Steam can do.

Although it looks like a glorified library, Steam has interesting settings to improve your gaming experience. Here are some cool Steam settings that might surprise you.
Edit Launch Settings
Launching Steam is as easy as pie. Just find the Steam icon or shortcut and run it. You’ll see the Steam login window, where you’ll be prompted to enter your credentials, and then you’ll be able to change other settings.
But wouldn’t it be cool to bypass all this and jump straight into the main Steam window? Well, with some one-off tweaking, this is entirely possible.
First, go to your Steam installation. By default, you’ll find it at C:Program FilesSteam. Then, find the Steam.exe file, right-click it, and click Create Shortcut. Once you’ve created the shortcut, place it wherever you want to, right-click it, and select Properties. In the Properties window, navigate to the Shortcut tab. In this tab, you’ll see the Target box. Here, you can enter particular launch options. Make sure that you separate them with a space.
For instance, insert –login as a launch option to bypass the login window. Do this by entering your login information. The –tcp login option will launch Steam with the TCP protocol instead of UDP. –clearbeta will opt out of the Steam client public beta that you may have opted for and switch to the current release. –silent will launch Steam in the tray; you’ll have to click the Steam icon to launch a normal window.

Advanced Server Options
Online gaming is very popular, and it beats single-player gaming on Steam. In online gaming, everything depends on the server(s) that you’re using. If you’re on a server where spiteful, troll players hang out; you’ll likely have a bad time. The Steam client keeps track of all connected servers. You can use this to keep track of your favorites.
Read: How To Fix Steam Missing Executable
Inside the Steam app, go to the View tab and click Servers to see all the necessary information about connected servers. Use the History tab to see which multiplayer servers you may have played on. Right-click on a server that you liked and select Add Server to Favorites. That’s right; you’ll see that server in the Favorites tab. Do this for all your favorite servers for the best gaming experience.
Download Optimization
The Steam client is primarily used to download and install games without going around the web looking for the best option. Everything is done on this platform, from payment transactions to choosing the install directory. Of course, you may not want an ongoing game download to eat up the entirety of your internet connection and mess around with your online gaming. You also don’t want to have to pause the download.
If you go to Settings and select Downloads, you’ll get many different downloads and install options. Steam will likely have the closest server to you selected, so you probably won’t have to mess around with this option. You can check it out, of course, and select a location closer to you (if there is one).
Other settings include setting the bandwidth limit for your downloads so they don’t clutter your connection. You can also select the time frame when Steam can perform downloads. If you have an excellent high-speed connection, select Allow downloads during gameplay to allow Steam to download while playing.
Get Refunded
Unlike consoles, PCs aren’t necessarily ready for any game you throw at them. This largely depends on your hardware configuration. Therefore, a game might flat-out not work on your system. Alternatively, it may work, but the FPS might be so low that you immediately give up on the game. But what do you have left then? You wasted money on a game that you can’t play.

What you can do here (and what Steam doesn’t advertise) is to get a refund. Simply go to Help and click Steam support; explain that you can’t run a game properly and most likely get a refund. The condition here is that you’ve played the game for fewer than two hours and bought the title within the previous fortnight.
Broadcast Your Gaming
People love watching gamer streams, and Twitch is an insanely popular platform nowadays. While Twitch will still reign supreme in this field, you should know that Steam also comes with native broadcasting tools. Go to Steam, select Settings, and click Broadcasting to set things up. Here, you’ll get to choose your stream’s video quality, tweak the audio broadcast settings, etc.
You can also disable broadcasting altogether, allow/prevent your friends from sending requests about watching your gaming sessions, and allow anybody to watch your gaming. Of course, Steam won’t broadcast your game until somebody starts watching it.
Family Sharing
Did you know you can allow your friends and family to play Steam games when you aren’t? With Steam family sharing, you can allow them to play your games for free.
Remember to enable Steam Guard protection for all accounts you want to share your games with. Afterward, your friend/family member can log in to your Steam account from their computer. Next, they should go to Steam, Settings, and Family. In this window, they should check the Authorize Library Sharing on this computer. Then, you can allow up to five Steam accounts to join your “Steam family.”
Neat Steam Settings
You probably didn’t know about these cool Steam settings to boost your gaming experience. Whether you’re into single-player or online gaming, you can use these tips for more quality gaming time.
Which cool Steam setting did you find the most intriguing? Do you know about another useful setting that wasn’t mentioned here? Share your thoughts in the comments section below.


