Professional thieves turn superheroes for a day.
When Franklin, Michael, and Trevor are not out looking for their next big score, you will find them teaming up with the FIB to save the entire country. In Monkey Business, Dave Norton and Steve Haines team up with Franklin, Michael, and Trevor to retrieve a deadly nerve toxin before a terrorist can use it in one of his bombs.
This guide has outlined everything you need to know about Monkey Business Mission in GTA 5. Follow the Gold Medal objectives guide we have for you below to complete the mission with a Gold Medal.
Monkey Business Synopsis
Michael arrives first at Cape Catfish, followed closely by Franklin. After a quick greeting, Franklin checks up on Michael and asks whether he is heard from his family the entire time he is away from Los Santos. Michael attempts to lie about his family situation by telling Franklin he’s heard back from his family, but he quickly takes it back and admits he lied.

Trevor arrives shortly after, and after greeting Michael and Franklin, Steve Haines and Dave Norton also arrive at the site.
Steve quickly asks the trio where the other three guys are since he expected to take a six-man team with him on this important mission. When Michael tells Steve nobody told them to bring along an extra three men, confusion ensues. Dave proceeds to blame Steve for his blunder, which Steve quickly downplays by saying he never does things wrong.

Michael loses interest in the job and tells Trevor and Franklin to leave with him. Steve stops them by saying the trio can do it by themselves. Knowing just how difficult this mission will be, Michael tells Steve to do the job himself.
After a short argument between Michael and Steve, Trevor butts in and tells Dave and Steve to join them in the mission if they want the job done. The pair hesitantly agree.
Steve proceeds to explain the mission, which involves breaking in and stealing a nerve toxin that’s allegedly going to be used for terrorism. Steve assigns Trevor and Franklin to getaway duties. Meanwhile, Michael will go with Steve and Dave and attempt to steal the nerve toxin from the lab.

Steve, Dave, and Michael get on a Dinghy and drive toward the discharge tunnel that connects to the nearby lab. Michael cuts down the grill covers of the discharge tunnel so they can swim through it and make their way inside the lab. Despite Michael’s doubts about Steve’s intel, they eventually make it through the tunnel and into the facility.

The trio quickly gets to work, disabling any guards or scientists they encounter in the lab with their taser guns. They eventually get to the room where the toxin is being held, which Michael takes out very carefully from its container.
After securing the toxin, Michael, Dave, and Steve ditch their taser guns for real guns as the lab’s guards storm in an attempt to stop the trio. Michael, Dave, and Steve eventually safely make it to the lab’s exit. Michael immediately makes his way to the refrigeration unit to secure the toxin.

Trevor arrives in a Cargobob just in time, but Steve warns the team about the incoming Agency response team who has already made it into the building. After a quick argument between Michael and Steve, Steve volunteers to stay behind and provide cover.

To become a hero, Steve stays behind and shoots himself in the leg but is detained by Agency agents instead. Trevor and the rest of the team arrive at Sandy Shores and place the container in the truck that Franklin has prepared.

Franklin, Michael, and Trevor wind down from the mission in one of the hangars. Michael receives a message from Lester informing Michael that Martin Madrazo has accepted the peace offering. However, Madrazo has one last request – bring Patricia home.

Trevor delivers Patricia back home himself, but before Trevor leaves the compound, he makes sure to leave Martin Madrazo a warning to treat Patricia right.

Monkey Business Gold Medal Objectives

- Stunner: Stun eight enemies with the Stun Gun.
- Use the Stun gun for every agent/scientist you encounter before you obtain the toxin.
- Headshots: Kill 15 enemies with a headshot.
- Use Michael’s ability to land those easy headshots.
- Accuracy: Finish with a shooting accuracy of at least 70%.
- Feel free to spam Michael’s special ability.
- Time: Complete within 13:30.
- Skip all cutscenes.
Monkey Business Mission Guide
Drive towards the target location marked yellow on the map.


Dive into the water and follow Dave and Steve.


Try your best to aim at the green markers to break the bars quickly. Keep an eye on your fuel gauge as well.

Swim towards the lab.


Taze this first scientist. Only seven more to go to complete the Stunner Gold Medal objective.

Make sure you use your Stun gun and nothing else for the first few waves of guards/scientists.

Make your way to the elevator. Stun the scientist inside the elevator and take his green card.


Stun both of these scientists as well.

Take cover, so you don’t alert the incoming guards immediately. Once their backs are completely turned, feel free to use the Stun gun.


Wait for this scientist to open the door. To complete the Stunner Gold Medal objective, you can stun him with the Stun gun afterward.

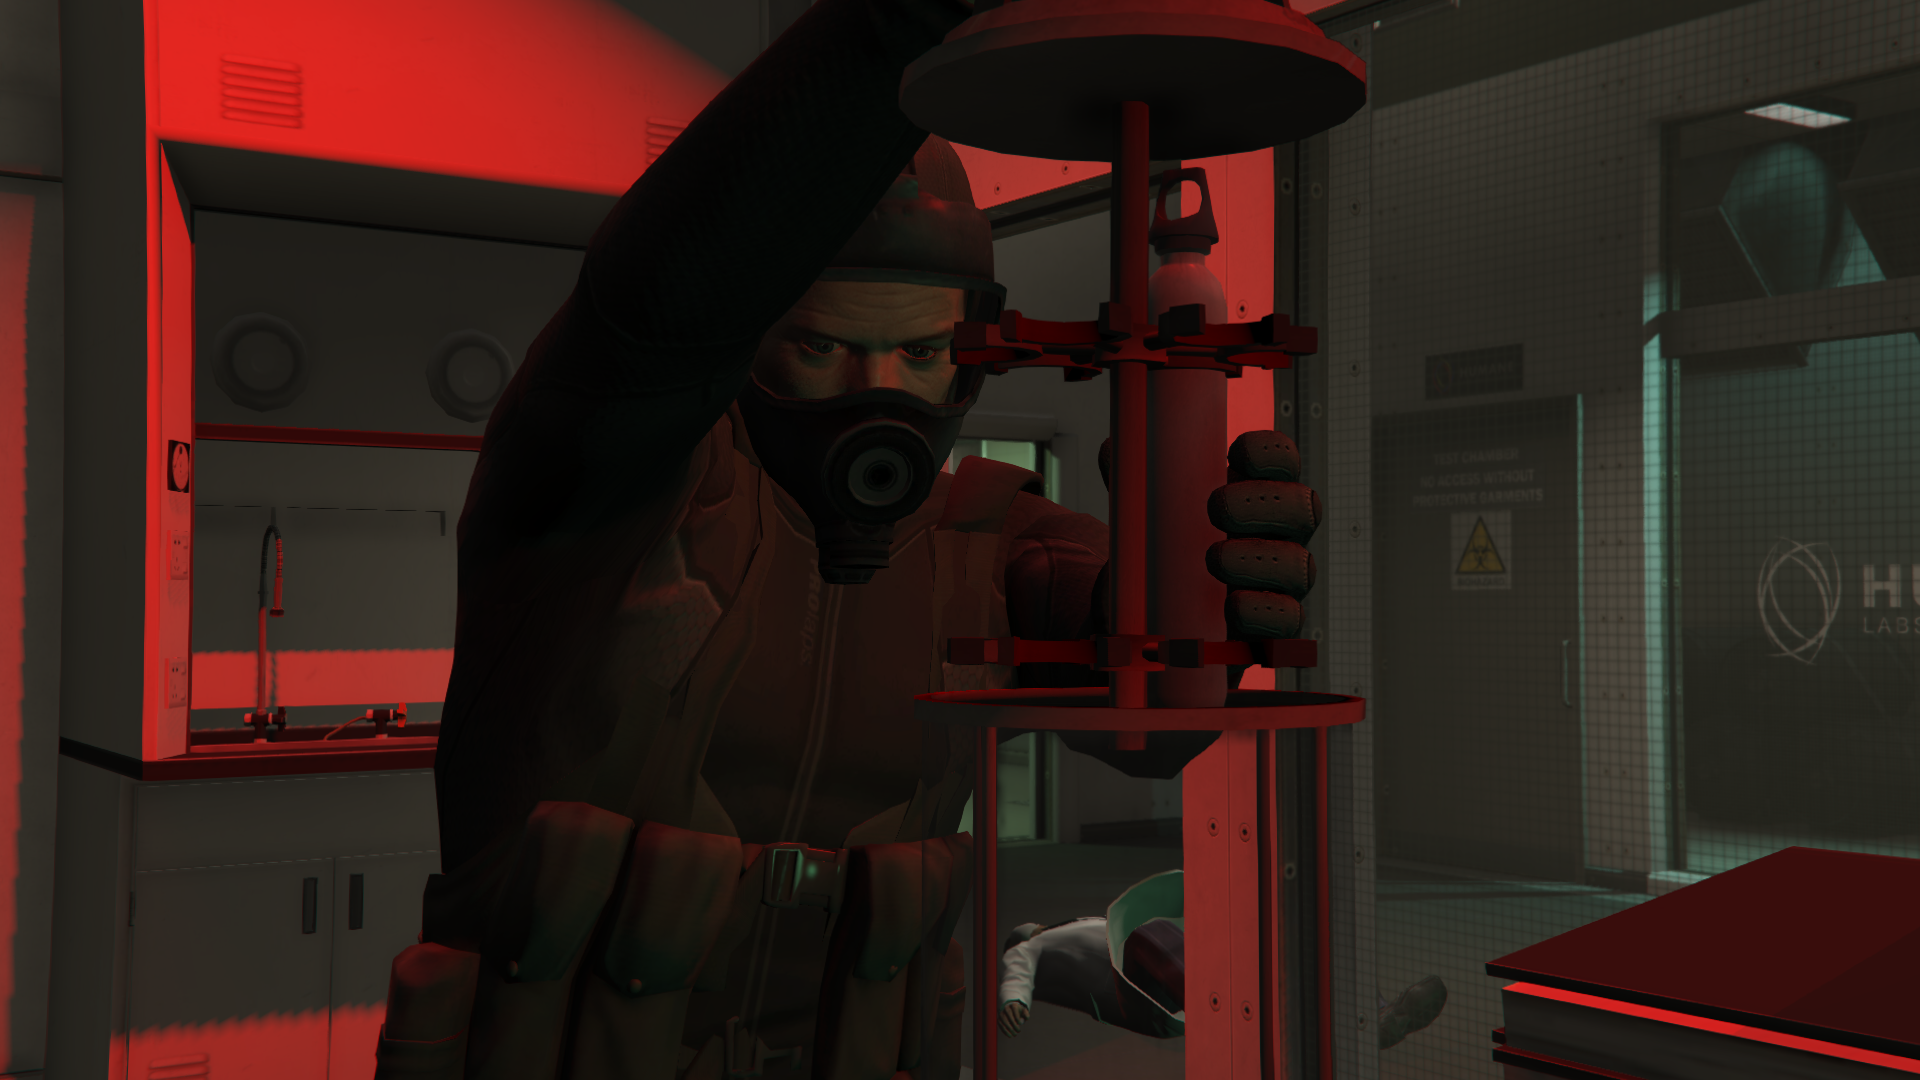
Take the nerve toxin inside the red room.


Switch to your suppressed pistol as soon as you take the nerve toxin. Now is the time to rake in those headshots.

Feel free to use Michael’s special ability to land those headshots more easily.

Put the nerve toxin in the refrigeration unit.

The play will switch to Trevor. First, fly towards Michael, Dave, and Steve. After which, take the crate back to the airfield.

Carefully land the crate on the trailer.


After successfully landing the crate, land the helicopter on the yellow marker.

The play will switch to Trevor as soon as the cutscene ends. Drive towards Martin Madrazo’s farmhouse to deliver Patricia.


Three Little Monkeys
The good news Michael receives about Martin Madrazo finally puts an end to his unforeseen exile from Los Santos. All that was left was for Trevor to bring Patricia home, which he does hesitantly.
The Gold Medal objectives for Monkey Business are fairly straightforward to complete. Feel free to spam Michael’s special ability, as three of the four Gold Medal objectives rely on good aim, which Michael’s special ability can help a ton. Skip as many cutscenes as you can, as these can take at least 3 minutes away from the time you have to finish the mission.
Visit the PlayerAssist website for more Gaming Guides, Gaming News, Game Codes, and other Gaming Content!