Yae Miko is the head shrine maiden or the Lady Guuji of the Grand Narukami Shrine. She is not just the descendant of Hakushin Kitsune’s lineage but also Eternity’s servant and friend. She has as many nicknames as her changeable moods. Lady Yae is undoubtedly gorgeous, but hidden under her beautiful appearance are unimaginable intelligence and cunning nature.
Attending every shrine ceremony dressed up nicely and in her proper place in the sanctuary is something that Yae Miko finds as an inconvenience of being the head shrine maiden. As such, looking for fun things to do in every nook and cranny can only be the most reasonable and necessary course. If she were to, say, utilize her authority as Guuji in making fun things happen – why, some things are unavoidable, are they not?

Yae Miko also serves as the editor-in-chief of the Yae Publishing house, a publisher of light novels. There has once been a time when the publishing house’s editors submitted a well-written and clearly thought out manuscript, but unexpectedly, Yae Miko was not pleased with this. To her, things like “top sellers” and “genre fiction” are nothing but fads that would come and go every decade. Getting with the times was a shortcut, but if work had the quality that could surmount this tide, why go with the flow nonetheless?

When asked how she got her Vision, Yae Miko told varying stories to entertain the ones asking, or most likely herself. One story was during a magic contest where the foe split the seas as they strode across the skies. In the middle of the grinding battle, just when the Guuji began to falter, a bolt of lightning descended like a falling star before her, and a glimmering Vision appeared.
Another story Yae Miko told was that she got the Vision the day she had a most vicious Ramen Duel down in Hanamizaka. Yae Miko gave a thin, enigmatic smile as she was faced with the traveler’s curiosity and asked if you would believe her if she said her Vision is purely ornamental.
Contents
- How to Get Yae Miko
- Team Role and Play Style
- Talents
- Constellation: Divina Vulpes
- How to Build Yae Miko
- Yae Miko’s Character Ascension
- Yae Miko’s Talent Level-Up Materials
How to Get Yae Miko
Yae Miko is a 5-star character that was introduced along with the release of the Electro nation Inazuma. She can only be obtained by making wishes on a time-limited Character Wish Banner. This banner will only feature a special 5-star character if that character is involved in the game’s current contents, like story quests and events.

If Yae Miko is currently featured on the Character Wish Banner, you will have a chance to do a test run of the character and see if you like her play style.
Please see our guide on the topic to learn more about acquiring characters in Genshin Impact by clicking this link.
Team Role and Playstyle
Main DPS Character
As your team’s main DPS or damage dealer, Yae Miko will utilize all her combat talents. This play style includes summoning the maximum Sesshou Sakura possible and throwing normal and charged attacks to the opponents before casting her elemental burst. This is the combat rotation of the main DPS Yae Miko.

Do note that, to get the optimal output of Yae Miko’s elemental skill, you should ensure that the maximum number of Sesshou Sakura is still present on the field.
Sub-DPS Character
A sub-DPS character, also called an off-field DPS or damage-dealer, is one that can still attack even if they are not on the field. With Yae Miko’s elemental skill, Yakan Evocation: Sesshou Sakura, she can play the part.

The play style for this type is to have Yae Miko on the field to summon the maximum number of Sesshou Sakura and then switch back to your main DPS character. Each of these summons will last 14 seconds, giving you enough time to deal damage with the main DPS before switching back to Yae Miko again.
Talents

Combat Talents
Normal Attack: Spiritfox Sin-Eater
This talent allows Yae Miko to summon forth kitsune spirits to initiate a maximum of 3 attacks that deal Electro Damage.


When the button for this attack is held down, a charged attack will be initiated instead. This will deal AOE Electro Damage after a short casting time. The damage is greater than when the button is pressed, but this version will consume a certain amount of Stamina. This means it cannot be used when your Stamina is not enough.


A plunging attack can be performed if the button for this talent is used while Yae Miko is jumping or suspended high enough. She will plunge towards the ground, damaging all opponents in her path with thunderous might. This version of the attack deals AOE Electro Damage upon impact with the ground.
Elemental Skill: Yakan Evocation: Sesshou Sakura
Using this talent allows Yae Miko to move swiftly in any direction and leave behind a Sesshou Sakura. A total of 3 Sesshou Sakura can exist on the field, and this talent has three charges that allow immediately reaching the maximum number summoned.


Each Sesshou Sakura will periodically strike one nearby opponent with lighting that deals Electro Damage. When there are other Sesshou Sakura nearby, their level will be increased and the damage of the lightning strike they dealt will also be boosted.
Also, if a new Sesshou Sakura is created too close to an existing one, the existing one will be destroyed.
Elemental Burst: Great Secret Art: Tenko Kenshin

Yae Miko’s elemental burst allows her to summon a lightning strike that deals AOE Electro Damage. When Yae Miko uses this talent, she will unseal nearby Sesshou Sakura, destroying their outer forms to transform them into Tenko Thunderbolts that descend from the skies.


Each Sesshou Sakura destroyed in this way will create one Tenko Thunderbolt that deals AOE Electro Damage. This means to maximize this talent, three Sesshou Sakura should be present before using the elemental burst.

This action is one of the manifestations of a kitsune’s might or “kitsunetsuki” in the legends, which are common in Inazuma’s folktales. One that particularly captures the imagination is that of the Sky Kitsune, said to cause lightning to fall down upon the foes of the Grand Narukami Shrine.
Passive Talents
The Shrine’s Sacred Shade
With this passive talent unlocked, each time Great Secret Art: Tenko Kenshin is used, every Sesshou Sakura destroyed will reset the cooldown for one charge of Yakan Evocation: Sesshou Sakura.
This means that the elemental skill will already be ready for use when Yae Miko’s elemental burst is used right after summoning the maximum number of Sesshou Sakura.
Enlightened Blessing
This passive talent will increase the damage of the lightning strikes that a Sesshou Sakura does based on Yae Miko’s Elemental Mastery. For every point she possesses of the said stat, the damage dealt by Sesshou Sakura is increased by 0.15%
For an off-field DPS play style, increasing Yae Miko’s Elemental Mastery is not a bad idea.
Utility Passive: Meditations of Yako
Yae Miko’s utility passive is one that you can use in crafting talent materials. Choosing her when doing so will give you a 25% chance of getting 1 regional Character Talent Material, with the item’s rarity similar to that of the base material.
Constellation: Divina Vulpes

Constellation Level 1: Yakan Offering
The first constellation level of Divina Vulpes will help with the high Elemental Energy requirement of her elemental burst. With this unlocked, when Yae Miko uses Great Secret Art: Tenko Kenshin, and Tenko Thunderbolt is activated, she will restore 8 Elemental Energy for herself.
Constellation Level 2: Fox’s Mooncall
Divina Vulpes’ second level will help Yae Miko’s elemental skill to reach its maximum capability. With this unlocked, Sesshou Sakura starts at level 2 when created, and the maximum damage level goes up to 4. Aside from that, the attack range of each Sesshou Sakura is increased by 60%.
Constellation Level 3: The Seven Glamours
The third level of Yae Miko’s constellation increases the level of Yaka Evocation: Sesshou Saku, her elemental skill, by 3 and upgrades its maximum level from 10 to 15.
Constellation Level 4: Sakura Channeling
With the fourth level of Yae Miko’s constellation unlocked, when Sesshou Sakura’s lightning hits opponents, all nearby party members will obtain an Electro Damage Bonus increase of 20% for 5 seconds.
Constellation Level 5: Mischievous Teasing
The fifth level of Yae Miko’s constellation increases the level of Great Secret Art: Tenko Kenshin, her elemental burst, by 3 and upgrades its maximum level from 10 to 15.
Constellation Level 6: Forbidden Art: Daisesshou
The final level of Divina Vulpes is one that further enhances Yae Miko’s elemental skill. With this unlocked, the attacks of the Sesshou Sakura will ignore 60% of the opponents’ Defense, making the summons a more powerful way of dealing damage to the enemies.
How to Build Yae Miko

Elemental DPS Build
As the main DPS who uses a catalyst for a weapon, Yae Miko’s attacks are elemental and deal elemental damage, and since she’s an Electro Vision user, you need to increase her Electro Damage as much as you can.
Prioritizing Electro Damage on artifacts set should be done, followed by a decent amount of 1,600 – 2,000 ATK.
Off-Field DPS
As mentioned above, an off-field DPS is a support damager or a sub-DPS character. This is a possible role for Yae Miko, given the nature of her kit, especially her elemental skill. For this type, you still need to increase her Electro Damage and then her Elemental Mastery. The reason for the latter is because the damage of the lightning strikes of each Sesshou Sakura will be increased based on the amount of Elemental Mastery that Yae Miko has.
Critical Rate and Critical Damage
These two stats greatly increase the overall damage output of most damage-dealing characters. For Yae Miko, since her hidden ascension stat is Critical Rate, you will most likely just need a few of it in her equipment to reach the ideal number of around 75 – 100%. For Critical Damage, you can focus on this once you have a decent amount of Electro Damage, ATK, and Critical Rate.
Weapon: Catalyst
Catalyst is Yae Miko’s weapon and the ones you need to equip her are ideally the ones with Critical Damage as its secondary stat. However, all other catalysts that will increase Yae Miko’s overall damage will work more than enough for her.
5-Star Catalysts
Kagura’s Verity

As a 5-star weapon, this catalyst has a high Base ATK compared to the lower rarity ones. Its secondary stat is Critical Damage which allows you to prioritize building Critical Rate and ATK to reach the ideal amount.
The passive effect of this catalyst is called Kagura Dance of the Sacred Sakura and it grants the weapon wielder a Kagura Dance effect when they use an elemental skill. The Kagura Dance effect will temporarily increase the damage of the character’s elemental skill and this effect can be stacked up to 3. When the maximum stack of Kagura Dance is reached, the weapon user will have an additional increase to all their elemental damage.
Yae Miko can easily trigger the maximum refinement effect of this weapon based on her play style. As she uses her elemental skill, the Kagura’s Verity will also gain a Kagura Dance effect. When the maximum 3 Sesshou Sakuras have been summoned on the field, so will the stack of Kagura Dance. Having the maximum stack of the Kagura Dance of the Sacred Sakura’s effect, Yae Miko’s elemental damage is increased, increasing the damage of her normal and charged attacks.
The Kagura’s Verity is a time-limited 5-star catalyst that was first introduced with the arrival of the game’s 2.5 version. This means the catalyst can be obtained by making wishing on the Weapon Event Wish Banner only when it is the featured item.
Lost Prayer to the Sacred Winds

This is another 5-star weapon that is considered the top choice for any DPS character that uses a catalyst. Its secondary stat is Critical Rate which makes it easier for you to achieve the ideal amount of the said stat.
The Lost Prayer to the Sacred Winds is also best for a play style where you keep the character on the field and rarely switch to other characters. This is because of the elemental damage bonus given by the weapon’s Boundless Blessing passive effect, which can only be gained if the character stays on the field for at least 4 seconds. If that character leaves the field, let’s say you switched to another character even for just a slight second, the bonus will be removed or canceled.
Skyward Atlas

Another 5-star catalyst that Lisa can use is the Skyward Atlas. This weapon can provide a lot of ATK for Yae Miko, thanks to it being the catalyst with the highest base ATK of 674 at level 90, plus the secondary stat of ATK% bonus of up to 33%.
Wandering Clouds is the passive effect of this weapon, which increases elemental damage of the character using the weapon. This effect also provides the character’s normal attack hits a 50% chance to earn the favor of the clouds, which actively seek out nearby opponents to attack for 15 seconds. This certain attack deals 160% damage at refinement level 1, but can only be triggered once every 30 seconds.
Memory of Dust

This weapon can increase her overall ATK stat better than the other weapons. However, you need better Critical stats from your artifacts to have a better damage output.
This weapon’s passive effect also requires you to always pick up an Elemental Shard to have a shield and trigger the additional damage bonus, unless you have a shielder on the team with Yae Miko.
4-Star Catalysts
The Widsith

The Widsith is a 4-star catalyst with a secondary stat of Critical damage bonus. This weapon is popular among those who like to do damage showcase videos because of its passive effect, which greatly increases the character’s damage output.
With the weapon’s passive effect called Debut, when the user wielding this catalyst takes the field, one of three stat boosts will be randomly bestowed to that character. The stat boost can be an increase in ATK, elemental damage, or Elemental Master. However, this effect can only be triggered when switching between characters in the party. Thus, making the passive useless in a coop game setup.
Solar Pearl

If you are willing to spend real money for this game you might want to consider purchasing the Battle Pass to unlock one of the weapons in it, which is the catalyst, Solar Pearl.
This 4-star weapon has a secondary stat of Critical Rate bonus and its passive effect that works well with Lisa’s playstyle.
With Solar Shine, the weapon’s passive effect, if an elemental skill or elemental burst hits an opponent, the normal attack of the weapon wielder will be increased. Likewise, if a normal attack hits an opponent, the damage of the weapon wielder’s elemental skill and elemental burst are increased.
Blackcliff Agate

Another 4-star catalyst weapon that can boost Yae Miko’s Critical Damage is the Blackcliff Agate. This weapon is perfect against a group of enemies where weaker opponents are present because its passive effect called Press the Advantage grants an increase in Lisa’s ATK for 30 seconds if she defeats one of those enemies. This effect can be stacked up to 3.
This weapon can be purchased from the Paimon’s Bargains shop using 24 Masterless Starglitters.
Dodoco Tales and Eye of Perception
These two 4-star catalysts have the same base ATK and secondary bonus stat of ATK%.
When using Dodoco Tales, Yae Miko’s normal attack hits on opponents will increase the damage of her charged attacks and vice versa.

If you participated in the Midsummer Island Adventure event in the Golden Apple Archipelago during the 1.6 version of the game, you will have a copy and refinement materials of the Dodoco Tales catalyst. It is a weapon exclusive to that event and cannot be obtained anywhere else.

With the Eye of Perception’s (EOP) Echo passive effect, the character’s normal and charged attacks will have a 50% chance to fire a Bolt of Perception that will deal damage as it bounces from 1 to 4 enemies.
The passive effects of these two weapons are pretty easy to trigger based on Yae Miko’s play style as a DPS character.
Mappa Mare

This catalyst is one of the weapons that you can craft with the city smithy. With Elemental Master Bonus as its secondary stat, this weapon is good for an elemental reaction type catalyst user. When the said character triggers an elemental reaction while using this weapon, their elemental damage will temporarily increase.
Since Yae Miko’s Sesshou Sakura constantly attacks opponents, triggering an elemental reaction is very likely, and thus, activating the Infusion Scroll passive effect of Mappa Mare is possible. The secondary stat of this weapon, which is Elemental Mastery, will help boost the damage of Sesshou Sakura if Yae Miko’s passive talent Enlightened Blessing has been unlocked.
Oathsworn Eye and Royal Grimoire
These two 4-star catalysts have ATK% as a secondary stat, which is safe for most DPS characters, including Yae Miko.

The Oathsworn Eye’s passive effect, People of the Faltering Light, increases the energy recharge of the character for 10 seconds after using an Elemental skill. This effect can make up for the high energy requirement of Yae Miko’s elemental burst talent.

On the other hand, the Royal Grimoire’s Focus passive effect increases the Critical Rate of the character upon dealing damage to an opponent. This effect can be stacked up to 5 times, but once a critical hit has been triggered, all existing stacks of this effect will be removed.
Artifacts
The main sources of stats that greatly affects a character’s build are the artifacts. For Lisa, as an elemental damage dealer, the first stat bonus you should look for are the ones that boost her Electro damage.
4-Piece Sets
Thundering Fury and Thundersoother
The Thundering Fury and Thundersoother artifact sets are the sets that are dedicated to Electro DPS characters.

With Thundering Fury, its 2-piece set will give a 15% bonus to the character’s Electro damage. When 4 pieces are equipped and a bonus of 40% to the damage caused by Overload, Electro-Charged, and Superconduct is added. Triggering the 4-piece set effect will also decrease the cool-down time of the artifact user’s elemental skill.
The 4-piece set of this artifact is best for Elemental Reaction damage build Yae Miko.

The Thundersoother works best for Yae Miko if the 4-piece set is equipped. The 2-piece set will only increase her resistance to Electro, but with the 4-piece set, her damage against enemies affected by Electro is increased by 35%.
With Yae Miko’s talents and play styles, she can quickly maximize the effect of this artifact set.
Wanderer’s Troupe

This artifact gives the character a bonus of 80 Elemental Mastery, making it a good choice if you want to increase Yae Miko’s elemental reaction damage. If four pieces of this set are equipped, the damage of Yae Miko’s charged attacks will also be increased by 35%.
Noblesse Oblige

The 4-piece set of the Noblesse Oblige artifact is a good option for a support type Yae Miko. Its 2-piece set increases the damage of the character’s elemental burst, and with four pieces equipped, an additional effect of granting the entire party a boost to their ATK of 20% for 20 seconds whenever Yae Miko uses her elemental burst.
2-Piece Sets Combination
The following are artifacts with 2-piece sets that can be combined with each other and still provide decent stats for Yae Miko.
Thundering Fury
Thundering Fury’s 2-piece set will give a 15% bonus to the character’s Electro damage.
Noblesse Oblige
The 2-piece set of this artifact increases the damage of the character’s elemental burst by 20%.
Wanderer’s Troupe
The 2-piece set of Wanderer’s Troupe grants the character an increase of 80 points to their Elemental Mastery. This effect is great for a support type Yae Miko because it will increase the lightning strike damage of her Sesshou Sakura.
Gladiator’s Finale, Shimenawa’s Reminiscence, Echoes of an Offering, and Vermillion Hereafter


The 2-piece sets of these artifact sets will grant the character an 18% increase to their ATK. This is a safe stat to have on most characters; thus, making use of it is still a good choice.
Artifact Parts’ Main Stat
A Goblet of Eonothem with the main stat of Electro damage bonus should be equipped for a DPS type Yae Miko.

Depending on what Yae Miko is lacking or needs, you can choose to have a Circlet of Logos with either Critical Rate, Critical Damage, or ATK as its main stat.


If you want your Yae Miko to lean towards an Elemental Reaction damage type, a Circlet of Logos, Goblet of Eonothem, and Sands of Eon with Elemental Mastery as their main stat should be used. This also works best for a sub-DPS type and will increase the damage to her Sesshou Sakura.
Yae Miko’s Character Ascension

What is Character Ascension in Genshin Impact
Each character has a certain level cap depending on their current ascension phase, and a character can be ascended up to 6 phases to reach the maximum character level, which is 90. When a character is ascended to certain phases, passive talents and special ascension stats will also be unlocked.
Ascension Materials
Ascending a character will need several items to be used as ascension materials, and for Yae Miko, the materials and the amount needed for each ascension phase are listed below.
Mora: 420,000

Mora is Genshin Impact’s main currency unit. It is accepted in all the nations of Teyvat and is also used to upgrade weapons, artifacts, talents, and character level.
Dragonheir’s False Fin: 46
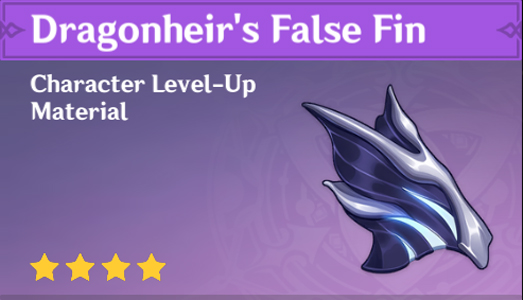
This material may look like a fin of some kind but it does not actually have any function at all for the monster it fell from. It is a biological tissue that you can find after defeating the Bathysmal Vishaps in the depths beneath Dainichi Mikoshi of Enkanomiya.
The said creature has a distinctive ability to choose what trait it wishes to pass on to its offspring and will eventually lose any visual acuity by the time they reach maturity. At the same time, they have also evolved a certain degree of elemental polymorphism for combat purposes. This gives these creatures the ability to manipulate either Cryo or Electro.
Vajrada Amethysts


These mineral crystals can be obtained from boss enemies manipulating the Electro element. Boss enemies such as Electro Regisvines, Electro Hypostasis, Primo Geovishap, the Raiden Shogun Puppet, the Thunder Manifestation, the Bathysmal Vishap Herd, and even Azhdaha on certain weeks.
You can also get these from quest and commission rewards and by crafting them using the ones with lower rarity level.
The amounts needed for each are as follows: Vajrada Amethyst Sliver: 1; Vajrada Amethyst Fragments: 9; Vajrada Amethyst Chunks: 9; Vajrada Amethyst Gemstones: 6.
Sea Ganoderma: 168
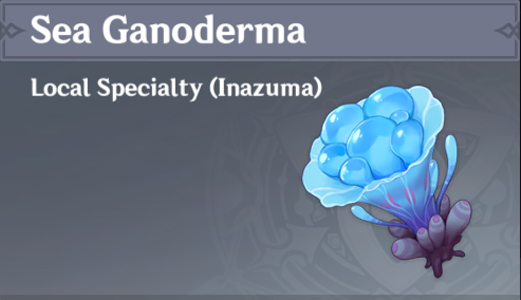
A plant that though looks like a fungus of some sort comes from a substance secreted by certain soft-bodied organisms. This plant species only grows in specific regions and islands of the ocean and is a local specialty of the archipelago of Inazuma.
Nobushi Handguards


These are different types of handguards mounted on the blades of Nobushis of all levels.
You can obtain these handguards by defeating Fiery Might and Dancing Thunder Kairagi, Hitsukeban, Jintouban, and Kikouban Nobushi. It can also be purchased from Paimon’s Bargains shop in exchange for Masterless Stardusts. Handguards of higher rarity can also be crafted using the ones with lower rarity.
The amounts needed for each are as follows: Old Handguard: 18; Kageuchi Handguard: 30; Famed Handguard: 36.
Ascension Phases
Ascension Phase 1
This first ascension will be done after the character reached level 20 and they cannot proceed to the next level without ascending to the next phase. The character level cap will be increased to 40, and Yae Miko’s first passive talent, The Shrine’s Sacred Shade, will be unlocked.
Materials:
- Mora – 20,000
- Vajrada Amethyst Sliver – 1
- Sea Ganoderma – 3
- Old Handguard – 3
Unlocked Talent: The Shrine’s Sacred Shade (1st Passive Talent)
Ascension Phase 2
Ascension Phase 2 can be reached at character level 40 and will increase the character level cap to 50. After this ascension, the talents of the character can now be upgraded or leveled up. Yae Miko will also unlock a special ascension stat on this phase: the Critical Rate Bonus of 4.8%.
Materials:
- Mora – 40,000
- Vajrada Amethyst Fragments – 3
- Sea Ganoderma – 10
- Old Handguard – 15
- Dragonheir’s False Fin – 2
Unlocked Special Stat: 4.8% Critical Rate Bonus
Unlocked Feature: Allows leveling combat talents from 1 to 2
Ascension Phase 3
After reaching level 50, Yae Miko can ascend to ascension phase 3, increasing her character level cap to 60. The 3rd ascension phase will also double the Critical Rate Bonus special stat from 8% to 16%. Additionally, Raiden Shogun’s combat talents can then be increased up to level 4.
Materials:
- Mora – 60,000
- Vajrada Amethyst Fragments – 6
- Sea Ganoderma – 20
- Kageuchi Handguard – 12
- Dragonheir’s False Fin – 4
Unlocked Stat: Critical Rate Bonus increased from 4.8% to 9.6%
Unlocked Feature: Allows leveling combat talents from 2 to 4
Ascension Phase 4
At level 60, you can ascend Yae Miko to ascension phase 4 and upgrade her character level cap to 70. After ascending, you will unlock her second Passive Talent called Enlightened Blessing, and all her Combat Talents can then be leveled up to 6.
Materials:
- Mora – 80,000
- Vajrada Amethyst Chunks – 3
- Sea Ganoderma – 30
- Kageuchi Handguard – 18
- Dragonheir’s False Fin – 8
Unlocked Feature: Allows leveling combat talents from 4 to 6
Unlocked Talent: Enlightened Blessing (2nd Passive Talent)
Ascension Phase 5
The 5th ascension phase can be reached when Yae Miko is at level 70, and ascending will increase her character level cap to 80. Her special ascension stat, Critical Rate Bonus, will be increased to 14.4% at this phase. Yae Miko’s combat talents will also upgrade their level cap from 6 to 8.
Materials:
- Mora – 100,000
- Vajrada Amethyst Chunks – 6
- Sea Ganoderma – 45
- Famed Handguard – 12
- Dragonheir’s False Fin – 12
Unlocked Stat: Critical Rate Bonus increased from 9.6% to 14.4%
Unlocked Feature: Allows leveling combat talents from 6 to 8
Ascension Phase 6
Yae Miko’s final ascension phase is at level 80, and it will increase her character level cap to 90. Her special ascension stat, the Critical Rate Bonus, will be increased to 32%, and her Combat Talents can now be upgraded to the maximum level of 10.
Materials:
- Mora – 120,000
- Vajrada Amethyst Gemstones – 6
- Sea Ganoderma – 60
- Famed Handguard – 24
- Dragonheir’s False Fin – 20
Unlocked Stat: Critical Rate Bonus increased from 14.4% to 19.2%
Unlocked Feature: Allows leveling combat talents from 8 to 10
Yae Miko’s Talent Level-Up Materials
What are the Talent Level-Up Materials for Yae Miko
Aside from Mora and Nobushi Handguards, you will also need a few of The Meaning of Aeons to increase the level of Yae Miko’s combat talents.
The Meaning of Aeons

This material is a piece of headgear that you can obtain once the dust has settled in the Plane of Euthymia. You can collect a few of these by defeating the Magatsu Mitake Narukami no Mikoto – Raiden no Inazuma Tono at the End of the Oneiric Euthymia Domain Memories: Guardian of Eternity in Inazuma.
Talent Level Book: Light


The talent scrolls you will need for Yae Miko to master her combat capabilities are the ones of the “Light” series, which you can obtain from the Violet Court Domain of Mastery: Vine–Infested Ruins in Narukami Island, Inazuma.
These scrolls include the Teachings of Light, Guide to Light, and the Philosophies of Light. The last two can be crafted using the crafting bench in the town.
Crown of Insight

Leveling a combat talent up from level 9 to 10 will need a Crown of Insight, which is a special item that can only be obtained as a reward from the game’s events.
- Mora: 1,652,500
- Slime Condensate: 6
- Slime Secretions: 22
- Slime Concentrate: 31
- Teachings of Diligence: 3
- Guide to Diligence: 21
- Philosophies of Diligence: 38
- Dvalin’s Claw: 6
- Crown of Insight: 1