Minecraft is one of the most successful sandbox games in the industry today. As each new update became a game-changing experience for players; Minecraft continuously grew and improved throughout the years. It is no surprise that the game has garnered immense popularity and success. Game mechanics rely on a player’s creativity and survival skills as they delve deep into a vast open world where wonder and mystery await them.
When you first spawn into the game, what you thought was just exploration and fun is much more than that. It is a race against time—time that will determine your chances of survival in the world of Minecraft. The moment you spawn, your first thought should be to gather enough resources to survive your first night in Minecraft. As nighttime comes, darkness approaches alongside various hostile mobs looking for you.
Each Minecraft adventure is different for every player. Some veterans may even have a different approach on how to survive their first night in the Overworld. For others, survivability is only second to exploration and discovery. And some may even go looking for trouble intentionally. Whatever the case may be, it is always good to know what to do the moment you start. In this guide, we will teach you the basics of how to get started and what you need to do to survive your first day in Minecraft.
STEP 1: INITIAL SPAWN

When you generate a new world, you will spawn in a random location in the Overworld, and you will need to take stock of your surroundings.
Take note of all the resources that you can see in your area. If there are little to no resources, you might want to move to another spot. Before you leave your initial spawn area, make sure to create an indicator to mark your spawn point. Any indicator will do such as digging a hole in the ground or digging dirt to build a short pillar. Doing this will help you navigate back in case you have to respawn.


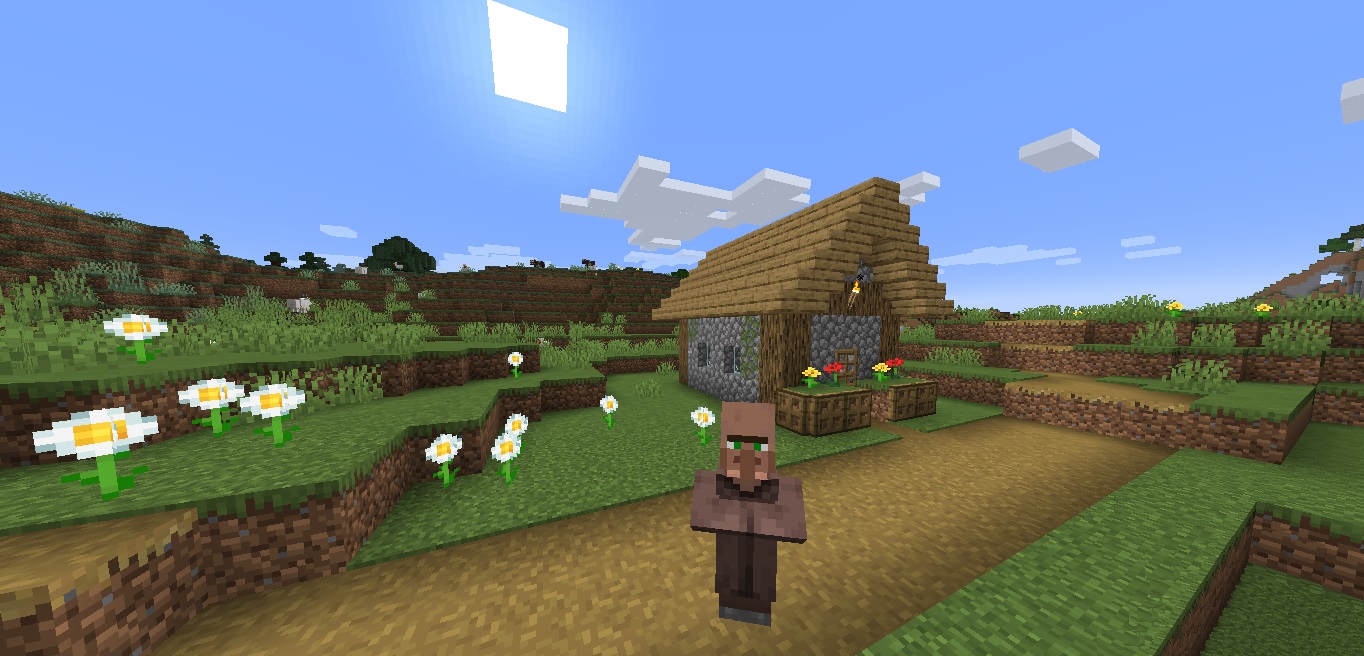
This is also a great time to determine which biome you spawned in. There are about 67 Overworld biomes in Minecraft’s Java edition and only 66 Overworld biomes in the Bedrock edition—all of which differ in geography, plants, and more. Depending on the type of biome, some mobs and resources will vary. Two of the most common biomes players usually spawn in are the plains biome and forest biome. The birch and oak forest biomes are common forest biomes filled with trees as far as the eye can see. However, the plains biome is characterized by large, flat areas of land commonly home to sheep, pigs, cows, and horses.
STEP 2: CHOP DOWN WOOD

The moment you start the game, your first task should be to chop down wood. You need to gather logs to create your first set of tools and equipment. To chop wood, break the trees with your hands. Although this process will take a while, it becomes quicker once you craft your first set of tools. It is important to gather at least 6 logs at the start of the game. You will use those logs to create planks that will make sticks and tools. Gather as many logs as you can before the day ends. You can do this with or without tools. It will save you a lot of time if you have enough resources before you start crafting.

If some trees are too high to chop down, you can either move to a different tree or create a nerd pole to chop it down. A nerd pole is a Minecraft technique that players use to reach high places. To do the nerd pole technique, you have to jump and quickly place a block underneath you. Doing this will help elevate the ground beneath you so you can reach taller trees and efficiently chop down wood.
STEP 3: CRAFTING WOODEN TOOLS
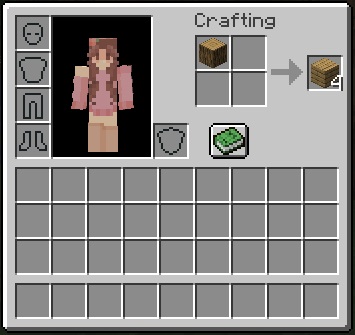
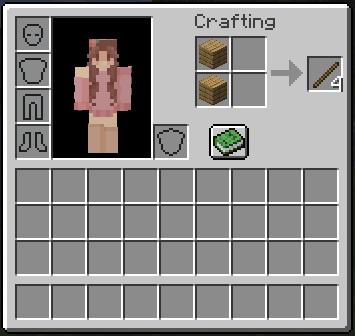
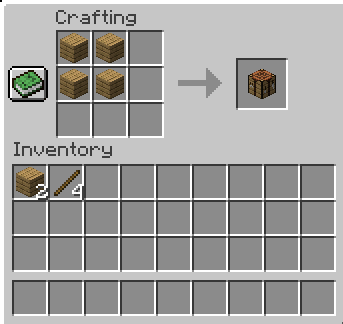
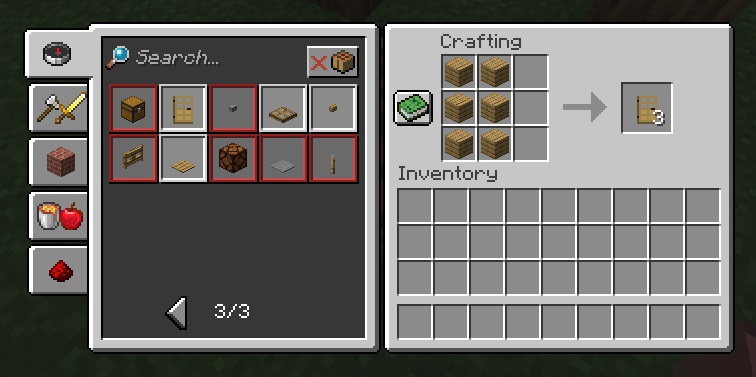
Once you have finished gathering six logs, you can now create planks and sticks. Place one log on the crafting grid to make four planks. Then place two planks vertically on the crafting grid to make four sticks. Now that you have planks, it’s time to make a crafting table. You will need four planks arranged in a 2×2 pattern on the crafting grid to build it. The crafting table is a utility block that allows you to craft all the materials you need to survive, such as tools, weapons, base equipment, and more.
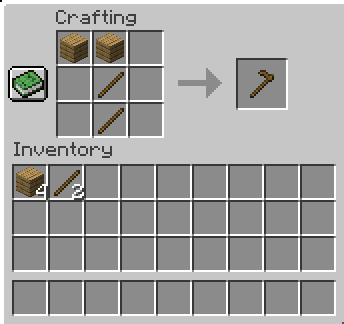
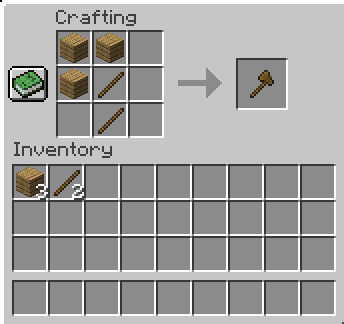
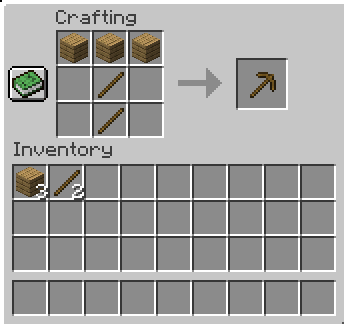
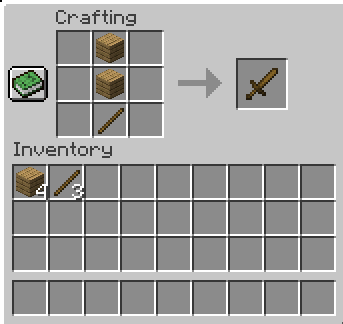
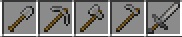
You can craft many items with the crafting table, including the tools and weapons needed to survive. Some of the essential tools you need are a wooden ax, a wooden pickaxe, and a wooden sword. You can upgrade your tools later on, but these wooden tools will do for now. You can chop wood quicker by building an ax first, ensuring you have enough wood for your first night.
STEP 4: BUILD A SHELTER

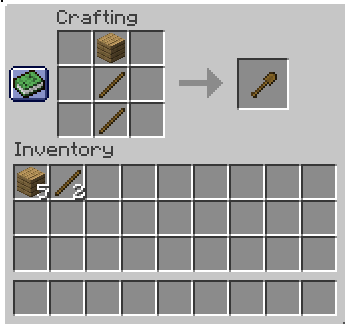
Now that you have some tools, it is time to build a shelter. One of the easiest shelters during this stage is a dirt shelter. Dirt shelters are temporary makeshift shelters made of dirt. You will need to find a small dirt hill and dig a hole into it to make this. You can use a shovel to make digging faster. Ensure the hole is big enough to fit you and some items you may craft later, such as chests or furnaces.

Another shelter you may want to build is a temporary base. This can be expanded and upgraded as needed and often becomes a permanent base. Temporary bases are most commonly made of planks. Since planks come from logs, you will need to invest a little more time into chopping wood, especially if you wish to make this your first night.

After building your shelter, you should craft a door to cover the entrance of your temporary base. Doors are made from six planks arranged vertically in the crafting grid.
STEP 5: MINING

Mining isn’t essential on your first day, but if you have enough time and enough logs collected, then why not go mining? Mining gives you a lot of resources you can use to craft different materials later on. You can start by mining stone using a wooden pickaxe if you see some on your way. Mining stone will drop cobblestone for you. The cobblestone will be used to make a furnace and craft better tools such as stone axes and stone pickaxes.

If you come across some coal as well, make sure you collect it. Coal can be used as fuel in a furnace or for crafting torches, your primary source of light in Minecraft. Coal ore looks like stone blocks with black spots in them.
STEP 6: CRAFTING STONE TOOLS AND EQUIPMENT
Now that you have logs, cobblestones, and a shelter, you need to craft better tools. Stone tools have the same recipe and crafting grid pattern as wooden tools, except you have to replace the planks with cobblestone to make them. Stone tools such as a stone ax and a stone pickaxe are more efficient than wooden ones as they mine and chop faster than their wooden counterparts.
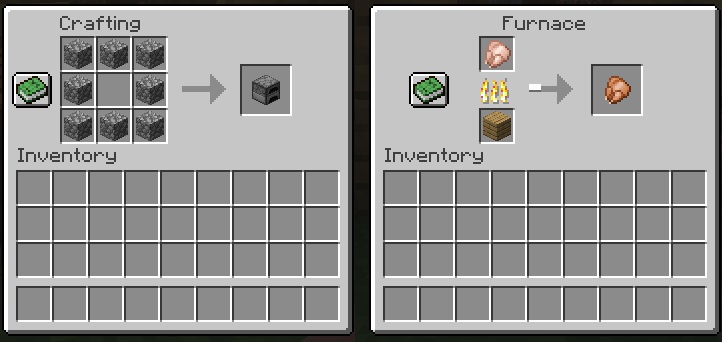
You can craft a furnace by placing eight cobblestone in a 3×3 pattern, leaving the middle spot empty in the crafting grid. Furnaces are used for smelting ores and cooking food. To use the furnace, you will need a fuel source and an item to smelt/cook. You may use logs, planks, saplings, lava buckets, coal, or charcoal as fuel for the furnace. Charcoal can be acquired by burning logs in the furnace.
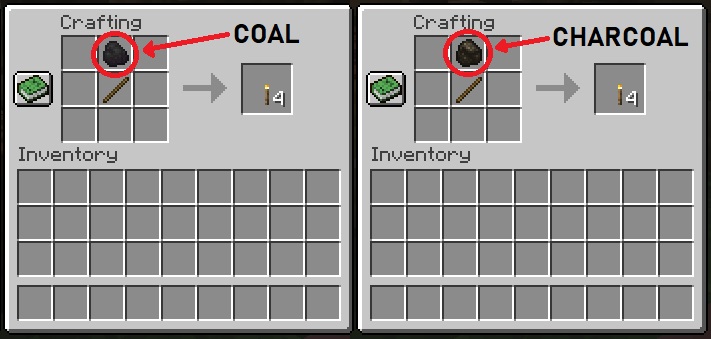
If you’ve gathered coal or charcoal, you can make torches now. Torches are vital as they light your way at night and prevent hostile mobs from spawning in dark places. You can either use one coal or charcoal and one stick arranged vertically in the crafting grid to make a torch. This will produce four torches which you can place inside your base and the area around it. Remember that coal is only acquired through mining, while charcoal can be obtained from burning logs in the furnace.
You can make chests and place them inside your base to store materials and resources that you have gathered. Making a lot of chests can be a big help later on as your inventory starts filling up with unnecessary items. Place eight planks in a 3×3 pattern in the crafting grid, similar to making a furnace to craft a chest. Placing one chest on the ground will create a small chest. Placing two chests side by side will create one large chest. A small chest will have 27 free slots, while a large chest will have 54 free slots.

STEP 7: GATHERING FOOD
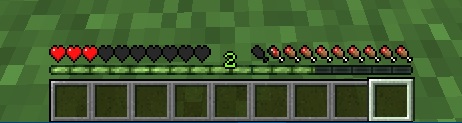
Let’s not forget that running around and doing a lot of work can make you hungry. It is crucial to gather a lot of food items as early as possible. Food is your primary source of energy and health. Monitoring your hunger level and keeping it high will help with your health recovery rate. There are various ways to obtain food. One way to obtain food is to kill passive mobs for meat. Pigs drop raw pork chop, chickens drop raw chicken, cows drop raw beef, sheep drop raw mutton, and rabbits drop raw rabbit.


Note that raw food items give lower health and hunger levels than cooked ones, so it is best to cook all raw food before consuming it. Another method is farming. You may not be able to do this on your first day, but you can do this later on as you progress through the game. Farming involves tilling the ground and planting seeds to yield crops for food.
STEP 8: SURVIVING THE FIRST NIGHT

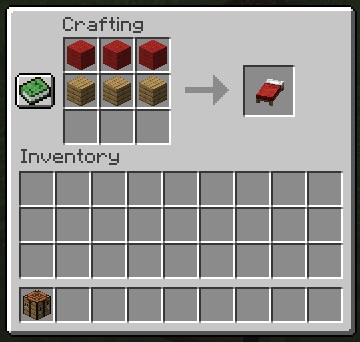
As the sun sets, your first day is finally over. Time to head back to your base, barricade yourself inside, and wait until morning comes. Nighttime in Minecraft lasts approximately 7 minutes. Take this time to craft more tools and equipment, so you are ready for the next day. You could craft a bed if you happened to come across some sheep along the way. You will need three blocks of wool and three planks arranged horizontally on the crafting grid to craft a bed. The bed will become your respawn point once you click on it, and you may also use it to sleep through the night or during thunderstorms. Sleeping on a bed will skip the night and fast-forward to the following morning. Important: You can not sleep if hostile mobs are within ten blocks of your sleeping point.
If you have nothing else to do, you can either wait the night out or try to kill some hostile mobs outside to increase your experience level. Experience or EXP can be used on the anvil or enchanting table to upgrade your tools, weapons, and armor.

Be very careful when you fight hostile mobs. Without any decent armor and weapons, you may not survive being surrounded by a horde of zombies or skeletons. Avoid creepers at all costs on your first night. One explosion can kill you. Upon death, you will immediately drop all your items and respawn at your spawn point. This would be your original spawn point or your bed if you managed to craft one and use it.
STEP 9: THE NEXT DAY

Once the sun rises, undead mobs will start to burn and eventually disappear. You are now safe to leave your base. Be wary of hostile mobs such as creepers and spiders, as they tend to stay in place even during daylight. Creepers could potentially destroy your makeshift base and all the items you stored inside it. Always keep weapons in hand for any danger that might lurk in the corners. Now it is time to continue gathering resources. Any materials that you might require going forward should be farmed now. Collect food, start planting crops, expand your base, craft more materials, and wisely use your 10 minutes of daylight. Gather as many resources as you can and upgrade your gear to survive another day in Minecraft.