In The Legend of Zelda: Tears of the Kingdom, traversing Hyrule’s gorgeous landscapes provides a breathtaking journey. Out of all the possible and ever-expanding ways to explore, the glider stands out as one of the most important.

This gives Link tremendous flexibility and the ability to reach isolated regions. This guide will walk you through how to get the glider in the game. Get ready to reach new heights and embark on an adventure to expand Link’s wider world. It is time to learn how to get the glider in Tears of the Kingdom!
Tears of the Kingdom Glider
Like in Breath of the Wild, the Tears of the Kingdom glider is called the Paraglider. Link can glide down while in mid-air with this glider. Link can go to more distant locations with this crucial item instead of just falling. Link’s stamina is depleted while utilizing the Paraglider.
He will cease gliding if Link’s stamina runs out while using the Paraglider. As a result, Link will simply plummet straight down. Link needs to be within a few feet of the ground if it happens. Otherwise, Link will suffer fall damage.
Link can use the glider to rise in addition to gliding down. To accomplish this, Link can use the glider over an updraft. Updrafts are wind gusts that blow upwards. Wind gusts, including Link, will carry anything in their path if he uses a glider. Updrafts can emerge in various ways: some occur naturally, such as surrounding Dragons and in the Flight Range. Some updrafts are created from fire, such as a flaming patch of grass or a few bundles of firewood.
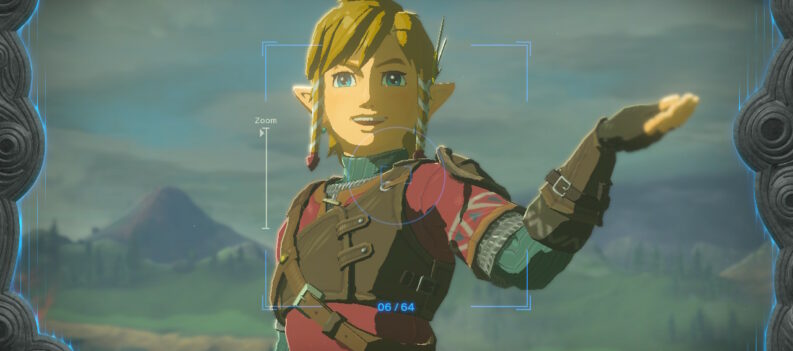
In contrast to Breath of the Wild, Link can now use the Scope while using the glider. To do that, the player can press the left stick. Time will slightly slow down around Link while doing this. This allows the player to utilize Scope and check regions quicker than the standard gliding speed permits.
How to Get the Glider in Tears of the Kingdom
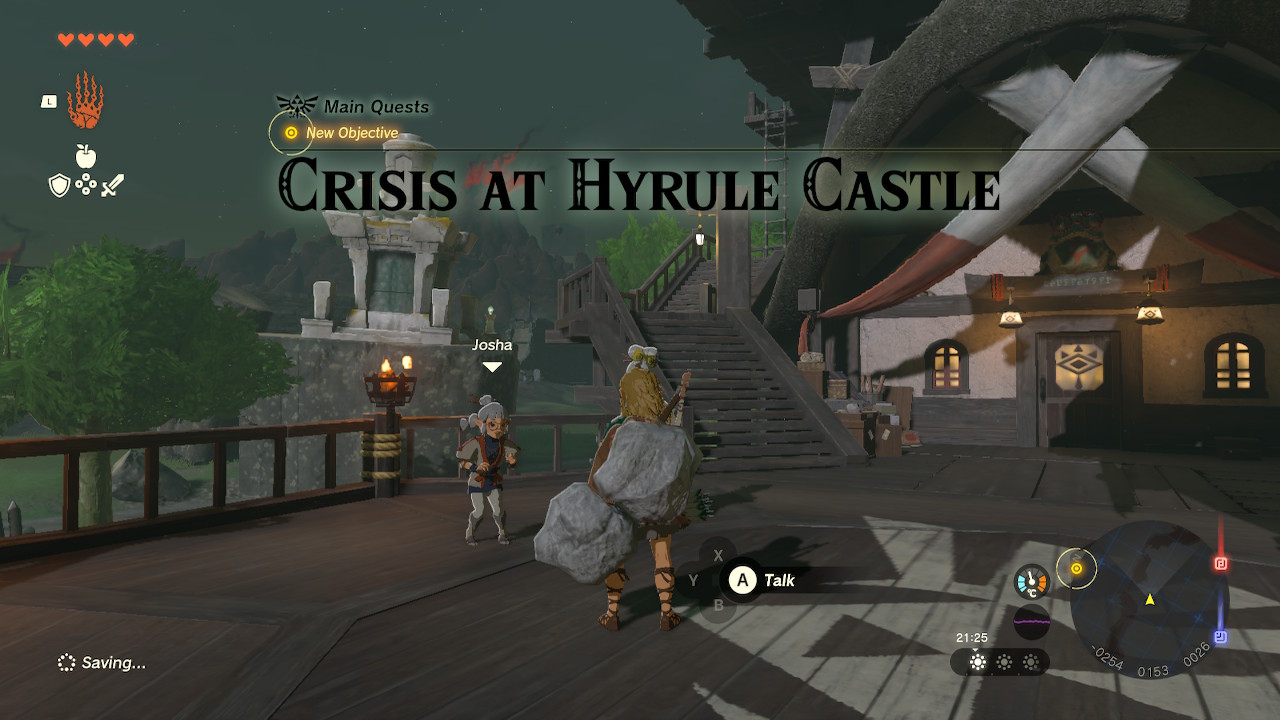
Link will obtain the glider differently in this game than in previous Zelda games. Link must complete the “Crisis at Hyrule Castle” Main Quest to get the glider.
Crisis at Hyrule Castle
To start this main quest, Link must first actually reach the surface of Hyrule. Link begins his journey in Tears of the Kingdom on the Great Sky Island. This location is a vast island high in Hyrule’s skies. The Great Sky Island is where Link learns the game’s core mechanics.
Entering the Temple of Time is one of the key objectives of Great Sky Island. After that, Link must now reach the other side of the temple. Once Link has done that, Zelda’s voice instructs him to find her. Then, Link will obtain a new Main Quest titled “To the Kingdom of Hyrule.”
Link must plunge from here to reach the Hyrule’s surface. After dropping to the surface, the player must follow the quest marker of the “To the Kingdom of Hyrule” Main Quest. Link will arrive at Lookout Landing after reaching the objective point.
Link will meet a girl named Josha on the second floor of Lookout Landing’s northern section. Speak with Josha, and she will recognize Link and call Purah. Purah, the head of Lookout Landing, will ask what happened to Link and Zelda, to which Link will answer.
Purah will show Link the rising Hyrule Castle after Link tells the story. Then she’ll declare that she requires Link to meet up with the Princess Zelda search party in Hyrule Castle. Purah will instruct Link to seek out and work with Hoz, the captain in command of the search. The “To the Kingdom of Hyrule” Main Quest concludes, and the “Crisis at Hyrule Castle” Main Quest starts!
Captain Hoz
After speaking with Purah, proceed to the north of Lookout Landing. Link will travel through Central Square on his way to the huge gates of Hyrule Castle. Link will also come across the Kyononis Shrine titled “Combat Training” on his path to Hyrule Castle.
When Link reaches the Hyrule Castle gates, he can use his Ultrahand ability to pull the gates open. After that, Link will arrive at the First Gatehouse, following the path inside after a twisting road. Link will discover a few decayed weapons, a cooking pot, and a couple of wooden crates inside. Link can discover a flight of stairs on the left outside of the First Gatehouse. Ascend the platforms to get to the roof of the First Gatehouse. Link can find Captain Hoz up here.
Speak with Hoz, and he will be shocked that Link is still alive. Then, Link will explain all that has transpired to Hoz. Hoz then expresses his relief that Link is here to assist them, as he says they need some good news. He will also describe how much the gloom has overwhelmed them. Toren, on the other hand, will appear and say that he sees Princess Zelda.
Then, in the distance, Princess Zelda is standing, staring back at them. She’ll gaze up and begin to float. She will then shine and transform into light, ascending into the sky. Captain Hoz will then become quite perplexed. As a result, Hoz will request that Link report what has just occurred to Purah as quickly as possible.
Purah
Return to Lookout Landing and head back up the second floor to seek out Purah and Josha. Speak with Purah, and Link will describe what he and Captain Hoz saw. As a result, Purah will suggest that they focus their efforts on learning more about the Upheaval. Purah will then check Link’s Purah Pad and explain that map data for the area around Lookout Landing is missing. She will elaborate that Link must first activate Skyview Towers.
Afterward, Josha will show Link the next-door Skyview Tower but will indicate that its travel point has to be fixed. Purah will, therefore, excuse herself to fix it. Purah will request Link to rest at the Emergency Shelter while the repairs are being made. She will additionally show Link Mubs’ shop, where he can buy armor. Then she’ll tell Link she’ll meet him at the Skyview Tower once he’s ready.
Following that, proceed to the center of Lookout Landing, where Link will meet a soldier named Scorpis. Speak to him, and he will unlock the hatch in the center of Lookout Landing, which is the entrance to the Emergency Shelter.
Scorpis will clarify that the royal family also used this underground vault as an emergency shelter. Link will find a couple of mattresses, a cooking pot, a goddess statue, and several people if he goes to the Emergency Shelter. Link can also discover some weapons here that he can acquire. Rest in one of the beds for as long as you wish.
The Glider
Afterward, proceed up the ladder in the center of the room to leave the Emergency Shelter. Proceed to the previously shown Skyview Tower. Link can find Purah inside. Speak to her, and she will say she needs Link’s assistance now. Josha will then flip a switch, activating every Skyview Tower throughout Hyrule.
Afterward, follow Purah’s instructions and approach the glowing terminal, pressing the A button to interact with it. Link will then place the Purah Pad on top of the terminal. Doing so will activate the Skyview Tower’s travel point. This will enable the Link to travel quickly to this location.
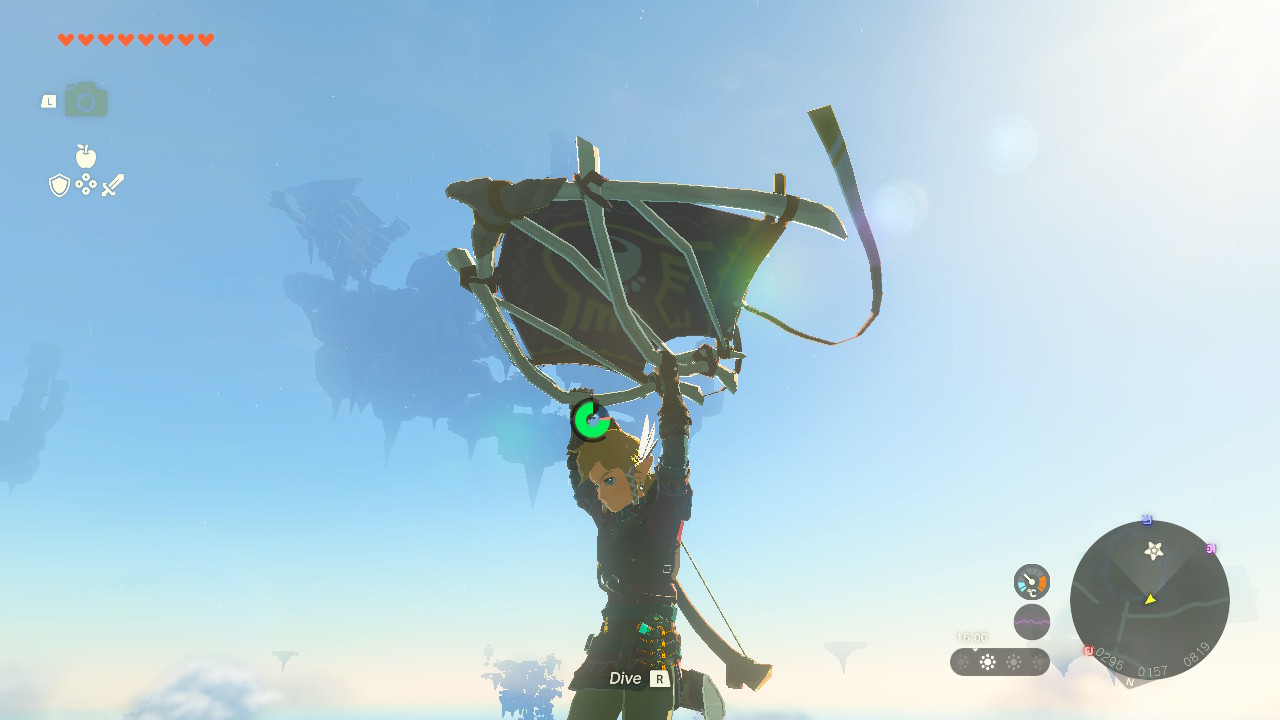
Purah will clarify that the Skyview Towers’ main intent is to assist the Purah Pad in scanning the area to add to the map. Finally, Purah will give Link the Paraglider! She will clarify that this requires a great deal of ability and that no one has what it takes to use it. They have not yet tested the Skyview Towers since they require Link.
Skyview Towers
Link isn’t off the hook just because he owns the glider. To interact with the circle in the center of the terminal, approach it and press the A button. After that, some robotic tentacles will appear and grab Link, hook up a roll of cables to Link’s belt, and plug something into the Purah Pad.
The tentacles will immediately vanish, and the platform Link is standing on will abruptly rise, launching Link into the air. Link will utilize the Purah Pad to examine the surroundings around the Skyview Tower as he falls. The map for the location and the sky is then unlocked in Link’s Purah Pad!
While dropping, the player can dive down and speed up the fall with the R button. Link is now able to use the glider by pressing the X button. When Link is near the ground, use the glider to land safely. Then, return to Lookout Landing’s second floor to find Purah and Josha. To continue the quest, speak with Purah.
Glider Fabrics for Tears of the Kingdom
Tears of the Kingdom introduces a new Paraglider feature. Link will now be able to modify the fabric design of the glider in this game!
From Around Hyrule
The following are glider Fabric designs, as well as the things, Side Adventures, or Side Quests that Link must complete to obtain them:
| Design | Specifications |
|---|---|
| Ordinary Fabric | Get the Paraglider |
| Sheikah Fabric | Purchase any type of armor from Claree in Kakariko Village. |
| Horse-God Fabric | Get 5 Pony Points from whichever stable |
| Nostalgic Fabric | When the Korok Forest has returned to normal, go inside the Great Deku Tree to find the inn and mushroom store. Then, using the Ascend ability, ascend to the ceiling using the Ascend ability to find a Korok called Oaki. Give Oaki two Giant Brightbloom Seeds and four Blue Nightshades. |
| Cece Fabric | Talk to Sayge at Hateno Village’s Kochi Dye Shop. |
| Royal Hyrulean Fabric | Access the chest located east of the Hyrule Castle Moat in the Lockup. |
| Addison’s Fabric | Help Addison in erecting all Hudson Signs across Hyrule. |
| Korok Fabric | When the Korok Forest has returned to normal, go inside the Great Deku Tree to find the inn and mushroom store. Then, using the Ascend ability, ascend to the ceiling to find a Korok called Oaki. Give Oaki two Giant Brightbloom Seeds and four Blue Nightshades. |
| Hudson Construction Fabric | Construct a house in Tarrey Town. |
| Gerudo Fabric | Complete the Desert Racecourse in the Southern Oasis Training Area of the Gerudo Desert. |
| Yiga Fabric | In the Yiga Clan Minigame, Link must defeat three opponents. |
| Lucky Clover Gazette Fabric | Complete at least two of the Lucky Clover Gazette Side Adventures |
| Monster-Control-Crew Fabric | Finish these Side Adventures: “Bring Peace to Hyrule Field,” “Bring Peace to Necluda,” “Bring Peace to Faron,” “Bring Peace to Hebra,” “Bring Peace to Eldin,” and “Bring Peace to Akkala.” |
| Zonai Survey Team Fabric | Complete the “Messages from an Ancient Era” Side Adventure. |
| Zonai Fabric | Complete the “Legend of the Great Sky Island” Side Adventure. |
| Lurelin Village Fabric | Take on the “Rattled Ralera” Side Quest |
| Goron Fabric | Complete the “Mine-Cart Land: Death Mountain” Side Quest |
| Chuchu Fabric | Complete the “Photographing a Chuchu” Side Quest |
| Zora Fabric | Complete “The Blue Stone” Side Quest |
| Koltin’s Fabric | Gather 101 Bubbul Gems and give them to Koltin |
| Robbie’s Fabric | Finish Link’s Hyrule Compendium |
From Sayge and the Camera
The glider Fabric designs that Link will obtain for taking a photo with the Camera and showing it to Sayge in the Kochi Dye Shop are as follows:
| Design | Specifications |
|---|---|
| Cucco Fabric | Use the Camera ability to photograph a Cucco and then show it to Sayge in Hateno Village. |
| Horse Fabric | Use the Camera ability to photograph a Horse and then show it to Sayge in Hateno Village. |
| Aerocuda Fabric | Use the Camera ability to photograph an Aerocuda and then show it to Sayge in Hateno Village. |
| Grizzlemaw Bear Fabric | Use the Camera ability to photograph a Grizzlemaw Bear and then show it to Sayge in Hateno Village. |
| Eldin Ostrich Fabric | Use the Camera ability to photograph an Eldin Ostrich and then show it to Sayge in Hateno Village. |
| Stalnox Fabric | Use the Camera ability to photograph a Stalnox and then show it to Sayge in Hateno Village. |
| Lynel Fabric | Use the Camera ability to photograph a Lynel and then show it to Sayge in Hateno Village. |
| Gleeok Fabric | Use the Camera ability to photograph a Gleeok and then show it to Sayge in Hateno Village. |
From Amiibos
The following are the glider fabric designs Link will receive from various Amiibos:
| Design | Amiibo |
|---|---|
| Champion’s Leathers Fabric | Tears of the Kingdom Link Amiibo |
| Gerudo-King Fabric | Unreleased Tears of the Kingdom Ganondorf Amiibo |
| Princess Zelda Fabric | Unreleased Tears of the Kingdom Zelda Amiibo |
| Hylian-Hood Fabric | Link (Rider) from Breath of the Wild Amiibo |
| Tunic of Memories Fabric | Link (Archer) from Breath of the Wild Amiibo |
| Hyrule-Princess Fabric | Zelda from Breath of the Wild Amiibo |
| Zora-Champion Fabric | Mipha from Breath of the Wild Amiibo |
| Goron-Champion Fabric | Daruk from Breath of the Wild Amiibo |
| Rito-Champion Fabric | Revali from Breath of the Wild Amiibo |
| Gerudo-Champion Fabric | Urbosa Breath of the Wild Amiibo |
| Ancient-Sheikah Fabric | Guardian from Breath of the Wild Amiibo |
| Bokoblin Fabric | Bokoblin from Breath of the Wild Amiibo |
| Sword-Spirit Fabric | Link (Skyward Sword) Amiibo |
| Goddess Fabric | Zelda & Loftwing (Skyward Sword) Amiibo |
| Princess of Twilight Fabric | Zelda from Super Smash Bros. Amiibo |
| Demon King Fabric | Ganondorf from Super Smash Bros. Amiibo |
| Sheik Fabric | Sheik from Super Smash Bros. Amiibo |
| Mirror of Twilight Fabric | Either the Link from Twilight Princess Amiibo or the Link from Super Smash Bros. Amiibo |
| Lon Lon Ranch Fabric | Either the Young Link from Super Smash Bros. Amiibo or the Link from Ocarina of Time Amiibo |
| Bygone-Royal Fabric | Zelda from The Wind Waker Amiibo |
| King of Red Lions Fabric | Either of the two Toon Links from The Wind Waker amiibos |
| Egg Fabric | Link from Link’s Awakening Amiibo |
| Majora’s Mask Fabric | Link from Majora’s Mask Amiibo |
| Pixel Fabric | 8-bit Link from the original The Legend of Zelda Amiibo |
Changing Glider Fabric Designs in Tears of the Kingdom
Despite unlocking all the glider designs, Link cannot alter them on the fly. Link has to do the following steps to change the design of his paraglider:
- Go to Hateno Village.
- Next, visit the Kochi Dye Shop in the village.
- Afterward, speak with Sayge inside the shop and choose “Rework the Paraglider” from the prompt.
- Lastly, give Sayge 20 Rupees after that to finalize the change!
Conclusion
As you now know about obtaining the glider in The Legend of Zelda: Tears of the Kingdom, the sky’s boundless expanse awaits your exploration. With this key item, Link can gracefully glide over landscapes and reach places previously unseen.
Remember, this glider is not just an item in Tears of the Kingdom; it’s your ticket to soaring adventures and hidden discoveries. So, spread your wings, take to the skies, and uncover the secrets that await as you continue your unforgettable journey through Tears of the Kingdom!