Sorry, Attackers, Pearl is closed until further notice – Sage.
Riot Games takes a quick break from designing unorthodox map layouts like the one seen on Fracture and introduces a new map that features a more classic A-site-Middle-B-site layout with Pearl.
The classic layout is generally played the same strategically with maps of a similar layout – whoever gets mid-control gets a bigger chance of winning any round on the map, as Pearl features two entry lanes towards A-site and B-site.
With this in mind, Agents that can completely lock down one of these entry lanes into any bombsite are a must-have on Pearl. Specifically, you will need a Sentinel such as Sage, who can block lanes towards bomb sites.
Sage Wall Orb

Sage’s Wall Orb is one of the game’s most powerful stalling/blocking abilities, forcing enemy team players to either wait for the wall to break or break the wall themselves – exposing their general location in the process.
What’s great about Sage’s wall is that it can be used defensively or offensively, depending on the general needs of the team for a particular round.

Nevertheless, Sage’s Wall arguably offers the most value when used to block entryways into bomb sites. With the help of Sage’s Slow Orb, you have a very potent rush-stalling or push-stopping combo that works for most VALORANT maps.
Pearl’s narrow entryways and tight corners are perfect for Sage’s Wall Orb and Slow Orb, making Sage a great Sentinel pick on Pearl.
Best Wall Orb On Pearl
A-Main Sage Wall

More often than not, the Attacking team will be rushing through A-Main on their way to A-site. While the Defending team has the advantage in terms of angles on A-site, a 5v2 or 5v1 situation on A-site is not something that you or your teammate can win most of the time.
A simple Wall Orb across the entire A-Main entrance should be enough to deter the Attacking team from rushing into the A-site, giving you and your team enough time to rotate players around the map.
Mid-doors Sage Wall

The Attacking team will want to take control of Mid-doors and subsequently, B-Link or Mid-connector if they plan on taking A-site or B-site on Pearl. As you can imagine, giving the Attackers free reign at Middle will spell disaster for your team as you’re left with little to no options for retaking either bombsite.
With that in mind, Pearl Middle is a “none shall pass” zone for Sage, and a well-placed Wall Orb can help you achieve that.
B-Main Sage Wall

The rationale for placing Sage’s Wall Orb across B-main is more or less the same as A-main – to stop or stall the enemy team from taking ground towards B-site too quickly. This should give your team enough time to rotate towards B-site after you’ve reported a full-team rush towards the bomb site.
Of course, you’re giving up a powerful Mid-doors Sage Wall by blocking off B-Main, so make sure you have someone watching middle in your stead.
B-Screen Sage Wall Boost

If you are leading the enemy team by a couple of rounds comfortably or the enemy team is on an eco round while you are on a buy round, you can try and activate your best Battle Sage impression with this Sage Wall Boost behind B-site Screens.
The enemy team will not see it coming, and you will most likely come out on top, thanks to your more powerful weapon.
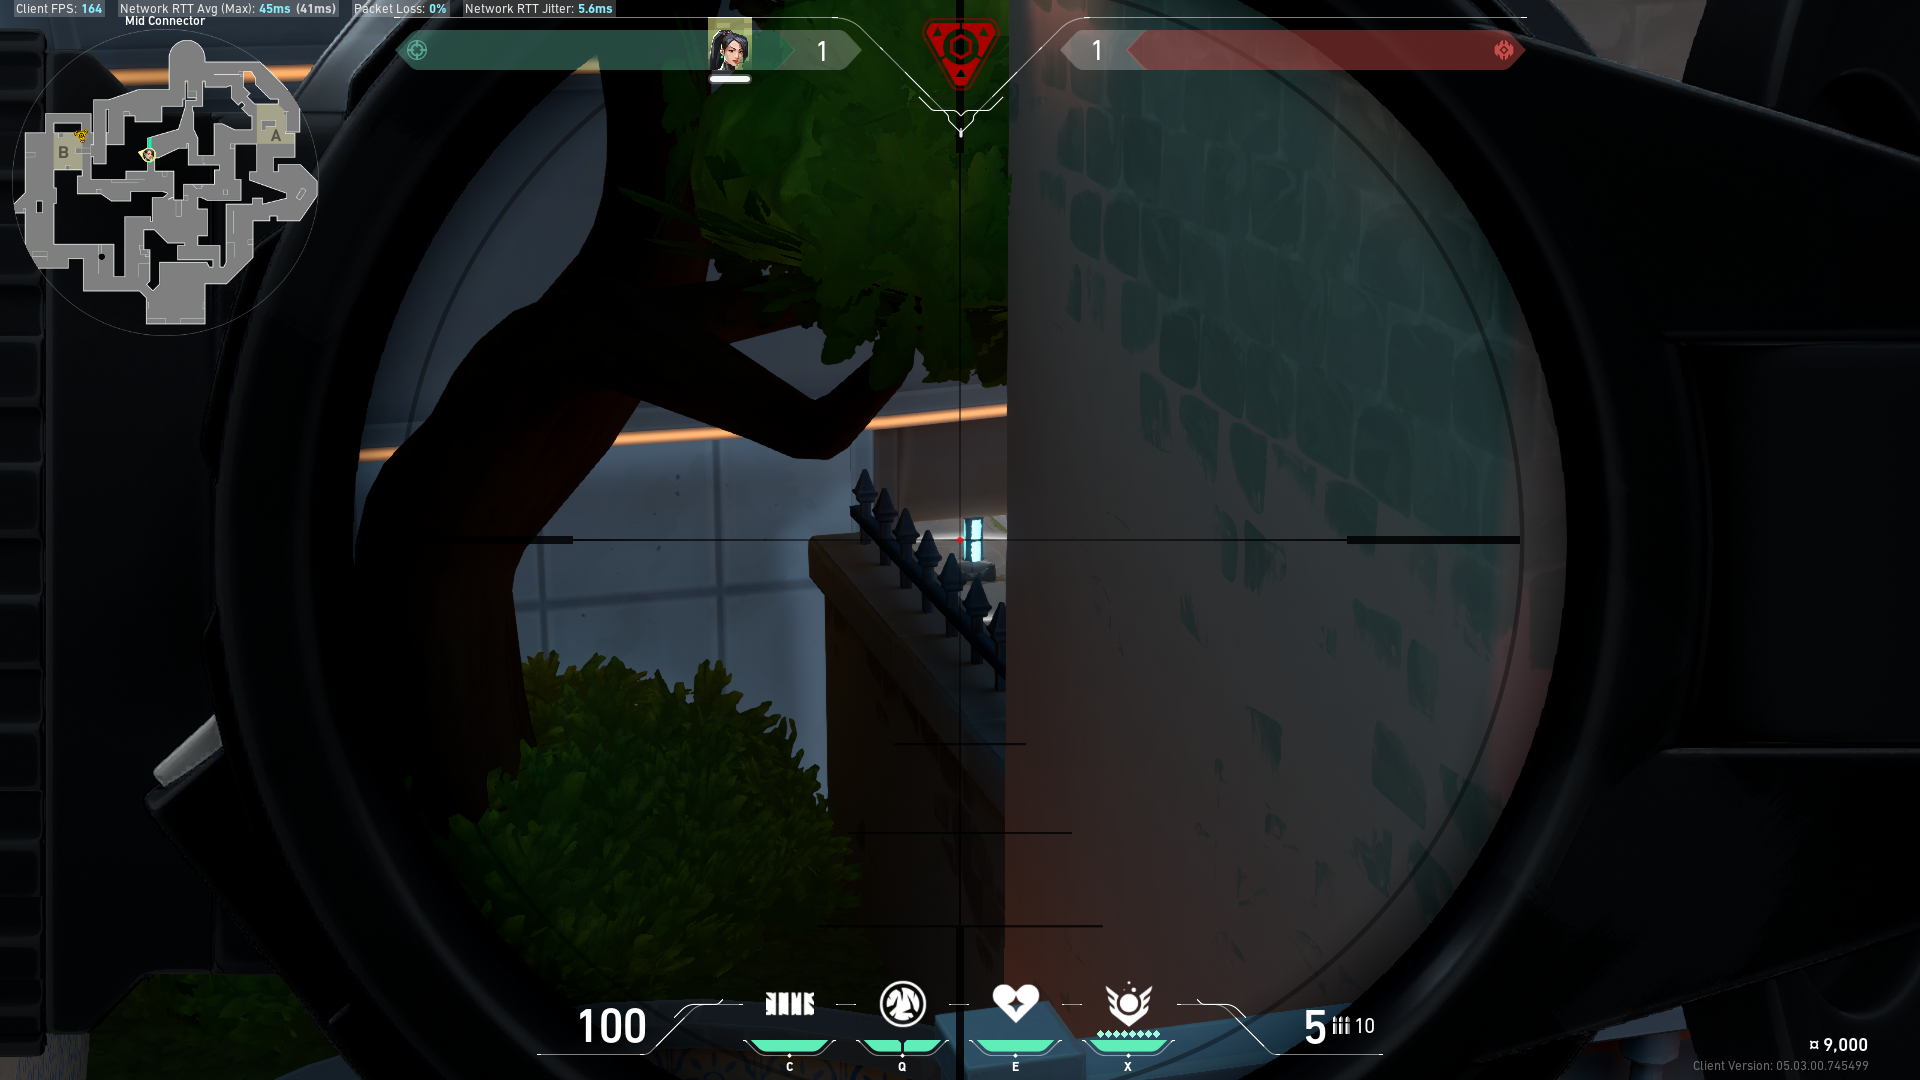
Sage Mid Connector Post-plant Wall Boost

If you are really stomping the enemy team and are just looking to have a few giggles with your mates, this post-plant Sage Wall Orb will leave the enemies scratching their heads and crying hacks.
The Operator will be the best weapon for this wall boost, but a Vandal or a Marshall should work as well.
To do this, spawn a Sage Wall along this wall at Mid Connector:

And peek through the small gap with your weapon of choice (preferably an Operator)

Of course, you will have to plant the Spike at a specific spot at B-site. In which case, plant the Spike along this corner:

Please do not try this when the rounds are close, or you risk getting flamed for throwing a perfectly winnable round.
Still, this is one of those rare one-way wall-boosts that can give players an unfair but impractical way of defending the Spike post-plant.
Great Wall of China
Sage’s Wall Orb and Slow Orb work the best on maps with narrow entryways, such as Pearl, where Sage’s Wall Orb can completely block off key lanes around the map and where she can follow up with some Slow Orbs when needed.
You can not go wrong with Sage on Pearl, and with the Wall Orb placements we have featured above, your teammates will thank you for making defense on the Attacker-sided map much more manageable.
Visit the PlayerAssist website for more Gaming Guides, Gaming News, Game Codes, and other Gaming Content!