Watch hopelessness unfold on your enemies’ faces post-plant.

Sage’s Wall is a powerful control utility that gives Sage the ability to control important lanes and choke points on just about any map in VALORANT.
Some more aggressive Sage players have even found a way to take Wall placements to the next level by self-boosting themselves to awkward angles around bomb sites, giving them access to powerful off-angles
One underrated use for Sage’s Wall is using the ability to block off the Spike on post-plant, making it nearly impossible to defuse in time. We have compiled some of the cheesiest post-plant Spike Sage Walls in this guide.
Great Wall of the VALORANT Protocol
Sage’s Wall does two very important things if you decide to use it as soon as the Barrier drops at round start. First, Sage’s Wall allows you to block key entryways toward bombsites on most maps, which ensures that the enemy team will not be able to rush into your bombsite and overwhelm you with their numbers.
Second, the wall forces the enemy team into two tough decisions – break the wall and give up their positions or wait for the wall to break (which takes quite a while), increasing the risk of getting flanked by the enemy team and losing precious time to re-strategize a bombsite take.
On Attack, Sage’s Wall functions similarly to smokes and is typically used to block off key rotation lanes toward bomb sites or used to force enemies into more predictable spots.
Alternatively, cheeky players can use the wall to self-boost and gain access to powerful angles, which can net them a few easy kills.
Sage’s Wall can be used in various ways in VALORANT, from blocking off lanes to using the wall to self-boost, bringing out your best impression of a Battle Sage.
One thing is for sure – how you use Sage’s Wall can be the difference between having to play Retake on Defense or botching post-plant.
Post-plant Sage Walls
The following Sage Walls will make the Spike almost impossible to defuse without breaking Sage’s Wall first. Try these post-plant Sage Walls the next time you play any of the maps featured below.
Ascent
Multiple spots allow you to use Sage’s Wall to block off the Spike post-plant on Ascent. On A-site, you can plant the Spike in A-Hell and then block it off with a Sage Wall to delay the enemy team’s Spike defuse.
On B-site, you can plant the Spike at B-Boat House and get similar results.
A-site

- Plant the Spike in this spot:

2. Cover the entire length of A-Hell with Sage’s Wall:

B-site

- Plant the Spike in this spot at B-Boat House:

2. Make sure to cover both entrances with Sage’s wall:

Split
If you thought the A-Hell post-plant Sage Wall on Ascent was cheeky, wait until you see the post-plant Sage Walls we have featured for Split.
On A-site, a small recessed corner in A-Backsite allows you to plant the Spike and block it off completely with a Sage Wall.
For B-site, an insanely cheeky post-plant Sage Wall at A-Alley will leave your enemies scratching their heads in confusion.
A-site

- Plant the Spike in this corner in A-Backsite:

2. Cover the Spike with Sage’s wall:

B-site

- Plant the Spike in the middle of the B-Alley entrance:

2. Place Sage’s Wall across the entrance. Ensure the wall is close enough to the Spike so the enemy team cannot reach the Spike post-plant.


Icebox
Icebox’s Nests make a great post-plant Sage Wall spot that completely blocks off the Defending team’s access to the Spike post-plant.
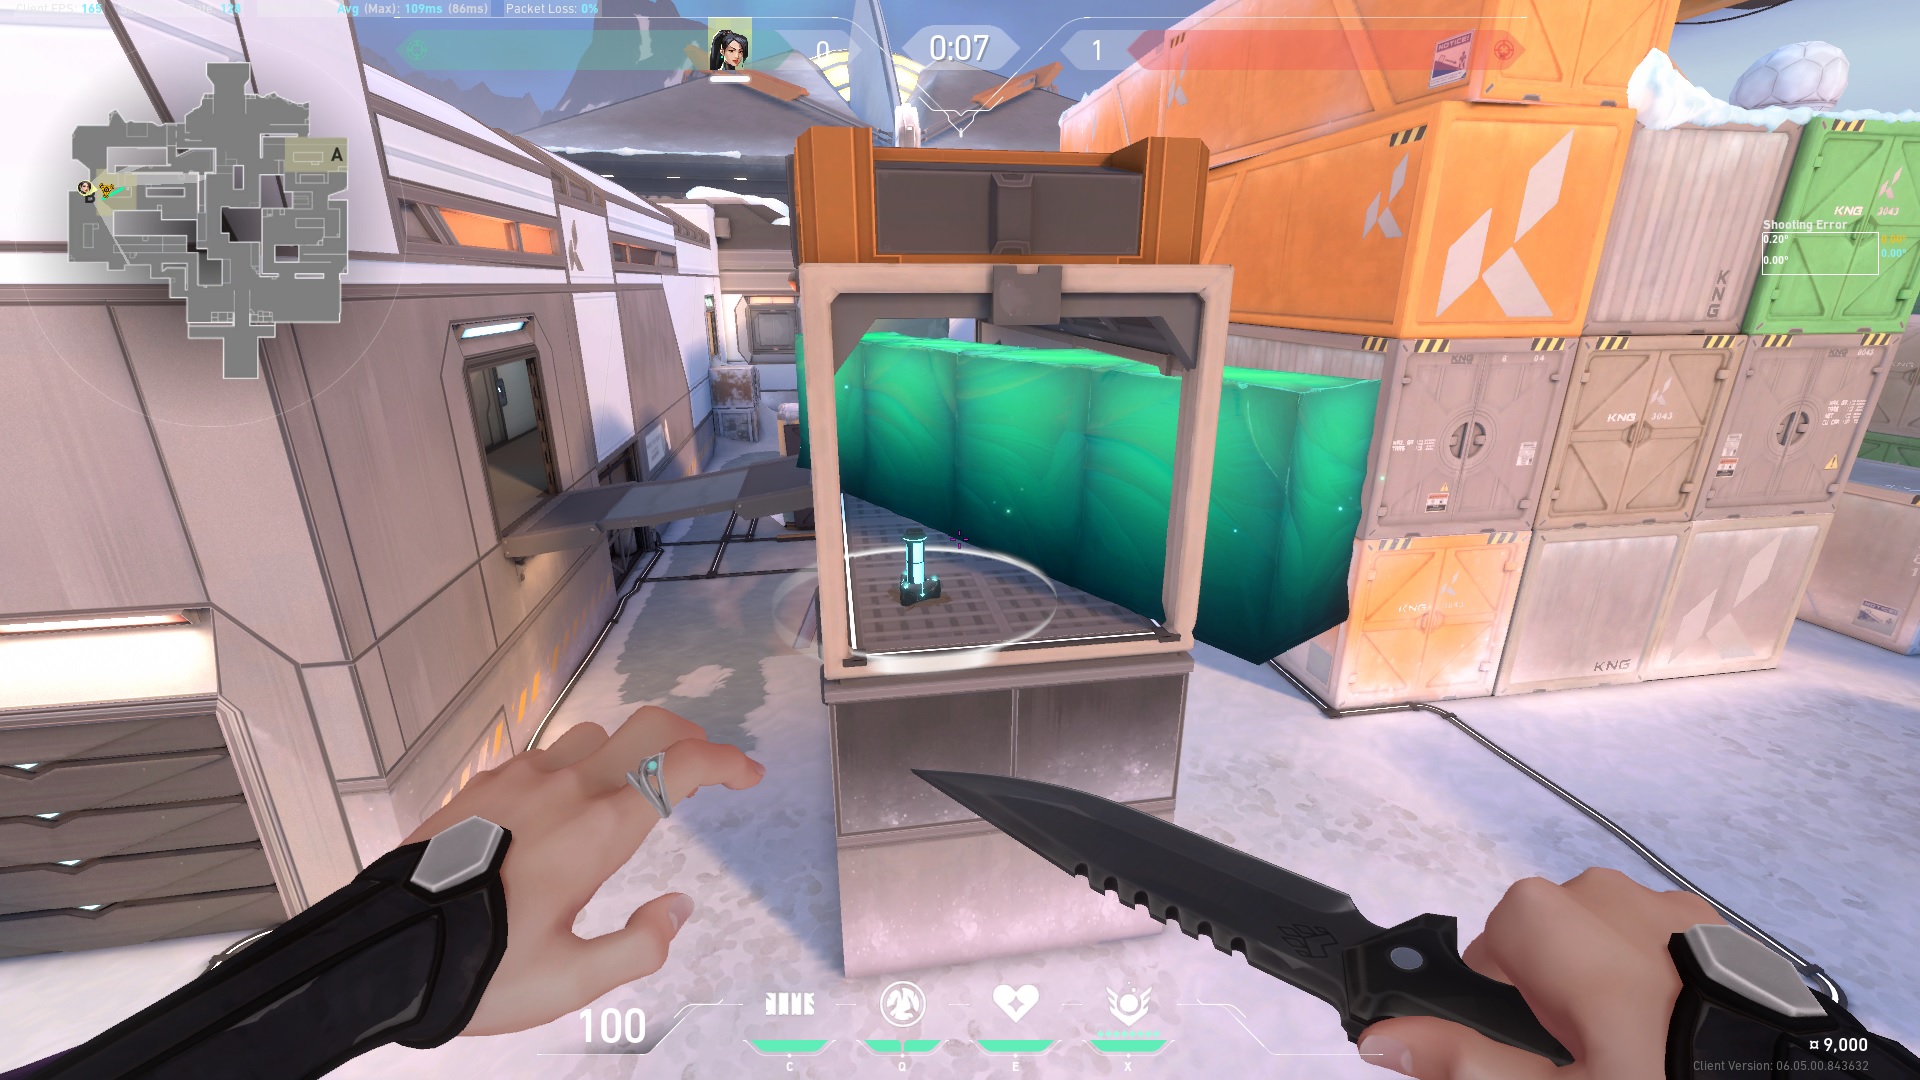
On A-site, planting the Spike along the A-Nest window and shoving a Sage Wall along the length of the Nest will deny the Spike from the Defending team.
It is a similar story back at B-site, where a well-placed Sage Wall that blocks Ropes and the bridge makes it impossible to defuse the Spike post-plant.
A-site

- Plant the Spike along this edge on A-Nest:

2. Cover the entire length of A-Nest using Sage’s Wall:

B-site

- Plant the Spike in this corner:

2. Place Sage’s wall so it covers both the entrance from B-Kitchen and the Rope:

Defuse the Spike!
If you’re looking for new and fun ways to use Sage’s wall on post-plant, look no further than the post-plant Sage Walls featured above. These Sage Wall placements should have you covered on most maps in the Competitive rotation in VALORANT.


