Upgrading the Nail in Hollow Knight is crucial to the game’s progression. The Knight can upgrade their trusty weapon by seeking out rare resources and visiting skilled blacksmiths, granting it increased power and effectiveness.
These upgrades open up new possibilities for combat and exploration, allowing the player to face formidable challenges with a sharpened edge. In this guide, we’ll learn each step the Knight needs to take to upgrade the Nail in Hollow Knight.
Why Upgrade the Nail?
As the Knight’s primary weapon, the Nail starts as a basic tool but can be transformed into a formidable instrument of combat. These upgrades increase damage and improve effectiveness against enemies and bosses. The Knight gains a significant edge in their battles by investing in Nail upgrades. This enables the Knight to overcome more challenging bosses and navigate through treacherous areas of Hallownest with greater confidence.
The following are the differences in base damage in each version of the Knight’s Nail:
| Nail | Base Damage |
|---|---|
| Old Nail | 5 |
| Sharpened Nail | 9 |
| Channelled Nail | 13 |
| Coiled Nail | 17 |
| Pure Nail | 21 |
It is important to note that these are just the Nail’s base damage and can still be improved using various Charms. Because of these Charms, the Knight’s Nail can have a bigger impact on enemies, like further increasing the damage output. The following are the Charms that affect the Knight’s Nail:
| Charm | Effect |
|---|---|
| Fragile Strength Charm or Unbreakable Strength Charm | Increases the damage output of the Knight’s Nail by 50%. |
| Heavy Blow Charm | Increases the force of the Knight’s Nail, which causes enemies to be pushed back further whenever they are hit. |
| Quick Slash Charm | Increases the speed at which the Knight strikes using the Nail. |
| Longnail Charm | Increases the range of the Knight’s Nail by 15%. |
| Mark of Pride Charm | Increases the range of the Knight’s Nail by 25%. |
| Fury of the Fallen Charm | Increases the damage output of the Knight’s Nail by 75% whenever the Knight is at 1 Mask remaining. |
How to Upgrade the Nail
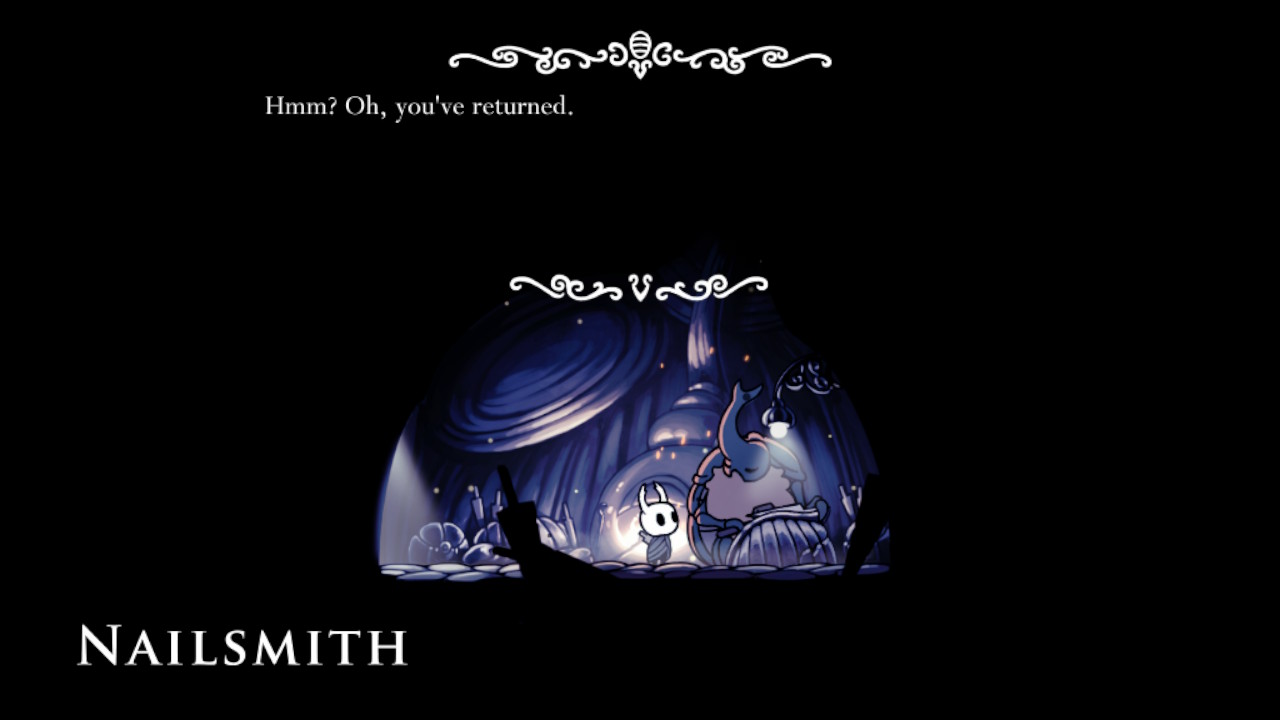
To upgrade the Nail, the Knight must head to the Nailsmith and give him the necessary items to start the process.
Nailsmith
The Nailsmith in Hallownest is a strong survivor, enduring the downfall of Hallownest and the changing world while remaining stubbornly dedicated to his craft. He sharpens his skills with fierce determination, driven by a single goal: to make his greatest masterpiece, a Pure Nail. Everything around his small home is littered with nails, concrete evidence of his mastery and the enormous time he has spent honing his craft.

The Nailsmith, located in an isolated hut on the southwestern corner of the City of Tears, welcomes weary explorers in pursuit of increased power. Initially, he offers the Knight his skills to refine the Old Nail into the Sharpened Nail for a small fee of Geo. However, when players seek to improve their weapons, the Nailsmith’s requirements increase. Each consecutive upgrade necessitates both Pale Ore and a larger amount of Geo.
The Nailsmith will improve the Knight’s Nail four times in total. The following are the Nail upgrades available to the Knight and the number of Geos and Pale Ores required for the Nailsmith to begin the process:
| Nail | Geos Needed | Pale Ores Needed |
|---|---|---|
| Sharpened Nail | 250 Geos | n/a |
| Channelled Nail | 800 Geos | 1 Pale Ore |
| Coiled Nail | 2000 Geos | 2 Pale Ores |
| Pure Nail | 4000 Geos | 3 Pale Ores |
Geos are easy to find as enemies drop Geo when they are defeated. The only item needed now is Pale Ores.
Pale Ore
Pale Ores in Hollow Knight are rare and valuable minerals relevant to the game’s lore and mechanics. These items possess a pale look and emit an icy chill.
According to game lore, pale Ores are supposed to have been utilized to manufacture strong weapons and artifacts. The Knight will discover the dispersed remains of these Pale Ores as they proceed through the game, buried away in hazardous corners of the kingdom of Hallownest.
There are six Pale Ores that can be found all over Hallownest. Without going into too much detail, the following are the locations of the Pale Ores in Hallownest:
Pale Ore #1

A Pale Ore is west of the Tram Station in the northwestern part of the Ancient Basin. The Knight will face fewer Mawleks, Shadow Creepers, Belflies, and Aspid Hunters in this Pale Ore’s general vicinity.
There aren’t any spells required to find this Pale Ore. But to reach the Pale Ore, the Knight must first have the Mantis Claw ability. This ability allows the Knight to cling to walls and jump off them.
Pale Ore #2

A different Pale Ore may be discovered at the top of Crystal Peak called the Hallownest’s Crown. The Pale Ore can be discovered in the base of the Radiance statue.
The Knight does not have to defeat any bosses to get this Pale Ore. However, the Knight will encounter the following enemies: a Husk Miner, Crystallized Husks, Crystal Hunters, Shardmites, and a Glimback.
The Knight must use some abilities to get to this Pale Ore. One is the Monarch Wings ability, which allows the Knight to make a second jump in mid-air. Another is the Mantis Claw ability, which allows the Knight to cling to walls and jump off them.
Finally, the Knight must have the Crystal Heart ability, which allows the Knight to dash indefinitely unless the Knight hits a surface, receives damage, or cancels the ability purposely. Aside from that, the Knight must have purchased the Lumafly Lantern, which aids in illuminating dark rooms.
Pale Ore #3
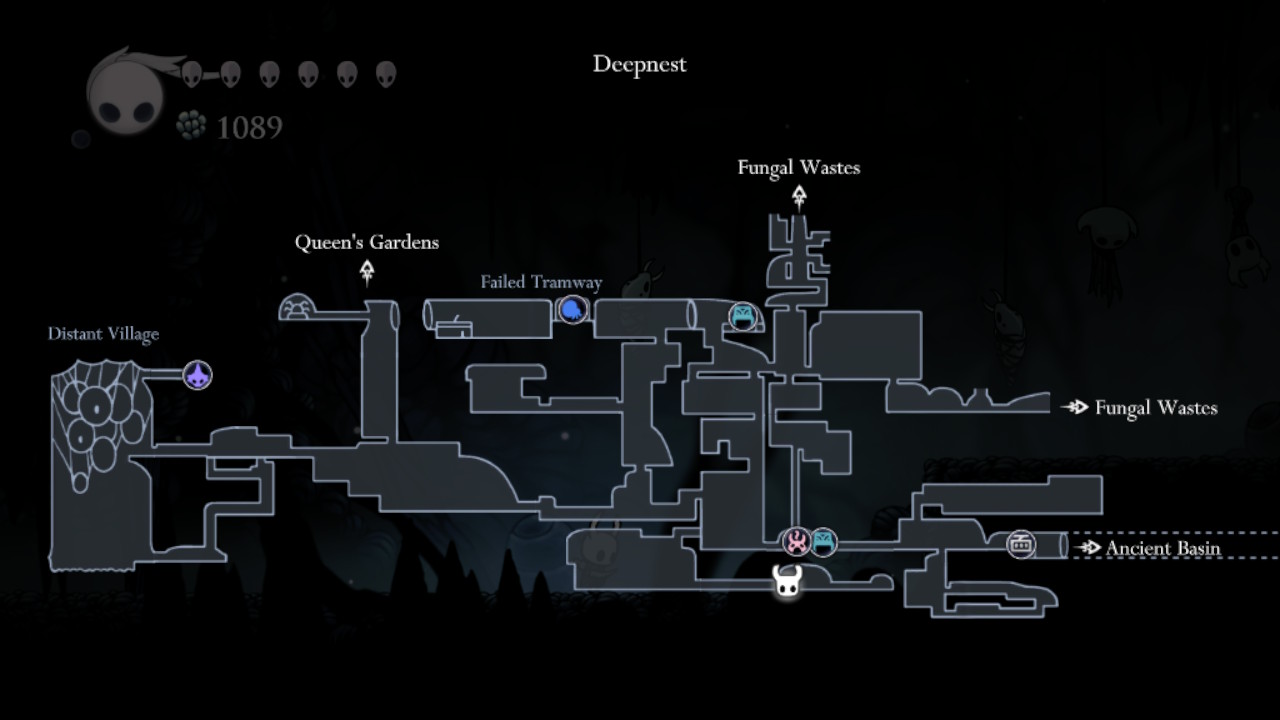
The Knight can find another Pale Ore behind a breakable wall near a hot spring after a series of hidden passageways in Deepnest’s southeastern corner. However, before the Knight may obtain this Pale Ore, the Knight must first eliminate the nearby Nosk.
Nosk is a frightening and intriguing hidden boss in Hollow Knight. It appears as a shape-shifting spider-like creature capable of taking on the appearance of loved ones or familiar faces to entice unsuspecting prey. Nosk’s origins are unknown, with the beast lurking deep within the damp bowels of the Deepnest. Meeting Nosk in Hollow Knight is a terrifying and intimidating event that tests the player’s resilience and resourcefulness.
Before the Knight reaches Nosk and gets Pale Ore, the Knight must learn a few abilities. The first is the Mothwing Cloak ability, which gives the Knight the ability to dash forwards horizontally. The next ability is the Mantis Claw ability, which allows the Knight to cling to walls and jump off them.
Finally, the Knight must have the Monarch Wings ability, which gives the Knight the ability to jump again in mid-air. The Lumafly Lantern, which can be bought from Sly in Dirtmouth, is also required for the area. This item will aid in illuminating pitch-black rooms.
Although not required, it is advised that the Knight also has the Shade Cloak ability (the upgrade to the Mothwing Cloak ability). This is because this ability allows the Knight to dash through enemies. The Knight can use this ability to dash through Nosk’s attacks.
Combined with the Sharp Shadow Charm, this ability would make an excellent combination. The Sharp Shadow charm allows the Knight to deal damage while utilizing the Shade Cloak ability to dash through foes.
Pale Ore #4

Little Fool will reward the Knight with a Pale Ore after completing the second Trial, the Trial of the Conqueror, in the Colosseum of Fools. This challenge is at the very top of Kingdom’s Edge.
The Colosseum of Fools is where challengers can participate in difficult Trials. The Colosseum itself is constructed from the hollowed-out remnants of an enormous bug. Strong chains support this bug’s massive shell.
To reach the Colosseum of Fools, the Knight must first have Isma’s Tear ability. This ability allows the Knight to swim safely in pools of acid. It is also recommended that the Knight has the Monarch Wings ability. This ability enables the Knight to jump mid-air again. En route to the Colosseum, the Knight will encounter Booflies, Primal Aspids, Belflies, and Hoppers.
Challengers can put their battling abilities to the test against constant waves of enemies during the Trails. The Colosseum offers three Trials: the Trial of the Warrior, the Trial of the Conqueror, and the Trial of the Fool.
Trial of the Conqueror
The Trial of the Conqueror is the second Trial that the Knight can take on, and it is more difficult than the previous Trial. To attempt this Trial, the Knight must first beat the Trial of the Warrior. Then, the Knight can talk to Little Fool and pay Little Fool 450 Geo to take on the Trial of the Conqueror.
In addition to a Pale Ore, finishing the Trial of the Warrior for the first time grants the Knight 2000 to 2020 Geo and unlocks the Conqueror achievement. The Knight will only be rewarded 2000 to 2020 Geo in future victories of the Trial of the Conqueror.
There are parts of this Trial where the Knight cannot stand on the ground. So, before starting this Trial, the Knight must first have the Mantis Claw ability. This ability allows the Knight to cling to walls and jump off them. Additionally, although not required, the Shade Cloak ability can assist the Knight in dodging enemies. This ability allows the Knight to dash through foes and attacks.
Remember to heal at least one mask between waves when taking on the Trial. This is where the Quick Focus Charm comes in handy. Furthermore, Nail Arts are useful in the Colosseum of Fools Trials. They can take out enemies in the Trial’s floorless waves.
Pale Ore #5

The Grubfather will reward the Knight with a Pale Ore after the Knight successfully frees 31 Grubs from glass jars all over Hallownest. This NPC can be found in the Grubhome in the northwesternmost part of the Forgotten Crossroads.
To access the Grubhome, no abilities or spells are necessary. The Knight will encounter enemies such as Crawlids, a Tiktiik, and Gruzzers along the route.
All over Hallownest, the Knight will find tiny green creatures trapped within glass jars known as Grubs. When a Grub is in the Knight’s proximity, the Knight can hear high-pitched weeping even if it isn’t visible on screen. This sound can be an excellent auditory indicator that a Grub is around. Once found, the Knight can use the Nail to smash the glass container and free the Grub.
The Knight will discover a total of 46 Grubs scattered around Hallownest. The Grubfather will then give the Knight rewards for freeing several Grubs. Among the rewards are Geos, a Mask Shard, the Grubsong Charm, a Rancid Egg, a Hallownest Seal, a Pale Ore, a King’s Idol, and the Grubberfly’s Elegy Charm.
Pale Ore #6

The Seer will reward the Knight a Pale Ore once the Knight has accumulated 300 Essence using the Dream Nail.
Essence is the energy gathered from various sources when utilizing the Dream Nail ability. The Knight can obtain Essence from Spirits, Whispering Roots, Warrior Dreams, and Dream Bosses. Regular foes have a chance to drop Essence as well.
Warrior Dreams and Dream Bosses are the quickest way to gather a lot of Essence at once. This is because eliminating a Warrior Dream will grant the Knight at least 100 Essence (depending on the specific Warrior Dream since some will grant 150, 200, or 250 Essence), and defeating a Dream Boss will grant the Knight 300 Essence (except for Lost Kin, which grants 400 Essence).
The seer will reward the Knight items for accumulating a certain number of Essence. Among these rewards are a Hallownest Seal, a Spirits’ Glade opened, a Pale Ore, the Dream Wielder Charm, a Vessel Fragment, the Dreamgate, an Arcane Egg, a Mask Shard, the Dream Nail is awoken, the Awakening achievement, and the Ascension Achievement.
As previously stated, to receive Pale Ore from Seer, the Knight must collect 300 Essence from all across Hallownest.
Conclusion
Upgrading the Nail in Hollow Knight is of utmost importance, enhancing combat effectiveness which, in turn, unlocks new possibilities in exploration. With enough Pale Ores and Geo, the Nailsmith can improve the Knight’s Nail and create his masterpiece– the Pure Nail! Strengthen the Nail, conquer challenges, and unravel the mysteries of Hallownest!


