Following reports of Attacker movement on Bind, VALORANT’s dry-desert map, Brimstone sends Killjoy to the Moroccan town to set up her Nanoswarm traps to stop the incoming Attackers from taking control of the entire map.
With the help of her trusty Turret, hyperactive Alarm Bot, and her energetic Nanoswarm Bots, Killjoy can delay or even completely stop the Attackers from sucking the already desert town dry of Radianite.
In this edition of Killjoy’s Nanoswarm Setup series, we follow Killjoy as she plays Defense on Cypher’s hometown – Bind. We will look at some great Nanoswarm traps you can use to ensure that even if Attackers hide, they cannot run.
Rabat, Morocco

Bind is one of just four playable maps in the initial release of VALORANT. Bind released with the Codename: Duality.
Each VALORANT map seeks to set itself apart from the other maps by featuring a “Dynamic Element” that adds to the in-map gameplay. For example, the Dynamic Elements of Split are the Ascenders or Ropes that allow players to move up to higher map areas.
In Bind’s case, the Dynamic Elements that set it apart from the other maps in VALORANT are the One-way Teleporters that instantly transport players from one side of the map to another.
Another unique quality Bind possesses is the absence of a “Middle” area on the map. Bind is simply an A and B bombsite map that does not feature a splitting lane in the middle.
Lore-wise, Bind is Cypher’s hometown located in Rabat, Morocco. Bind is currently Kingdom Corporation’s Radianite Refinery, which explains the presence of multiple generators, extractors, and storage facilities within the map. Bind is also the setting of VALORANT’s Official Lore Cinematic titled “Duality.”
German Efficiency Child Prodigy: Killjoy

Killjoy belongs to the Sentinel class of Agents. As such, her abilities allow her to lock down bombsites entirely on her own. Allies can rely on the German Prodigy to stall or even stop an enemy team’s push on her own to buy her teammates enough time to rotate over to her bombsite.
Killjoy uses her superior knowledge and skill to employ robots and gadgets to fight on her behalf. Her skill set consists of nanobots, an alarm bot, and a sentry bot she can set up to give her the best chance at holding down a bombsite. Her ultimate ability allows her to cover a large enough area to cover entire bombsites, giving Killjoy the power to detain anyone caught in her ultimate.
In the VALORANT lore, Killjoy is known to have a father-daughter relationship with Brimstone. While both characters are not related, Brimstone sees fit to act as a guide for Killjoy.
Killjoy is in-charge of almost all of the non-Sentinel VALORANT Agents’ tech. She oversees repairs and tech innovation for every Agent. Taking some of the Agents’ voice lines into context, Killjoy seems to be a natural-born tactician, using data she gathers from engagements as inspiration for her next inventions and strategies.
Killjoy Nanoswarm

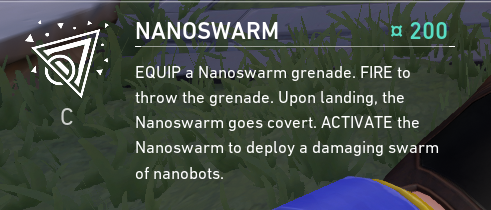
Killjoy’s Nanoswarm is a molly-type ability that deals quick damage over time to a large radius. Killjoy’s Nanoswarm ability can be equipped at the beginning of each round for just 200 credits each and a maximum of two charges.
What sets Killjoy’s Molly Ability apart from other molly-type abilities like Phoenix’s Hot Hands, Viper’s Snake Bite, and KAY/O’s FRAG/MENT is Killjoy’s ability to place the grenades before the start of the round and activate them at any time within the same round. After placing the Nanoswarm Grenades, they will become completely invisible until enemy players stand next to them.
Among the other molly-type abilities present in VALORANT, Killjoy’s Nanoswarm Grenade is the only molly ability in VALORANT that does not activate upon landing. However, a slight caveat is that KJ’s Nanoswarm Grenades shells can be destroyed when damaged with guns or abilities. Killjoy’s Nanoswarm Grenades also emit a subtle buzzing noise when enemy players stand close enough to the Nanoswarm Grenades.
Bind Defending – B-site Hooka Nanoswarm Setup

B-site Hooka is a common Attacker rush area on B-site, especially when the enemy team has a Raze or Jett on their side. Raze players can take advantage of the slight elevation that Hooka provides to maximize the distance they can cover with their Satchels. On the other hand, Jett players can get a good vantage point of B-site whenever they dash into the bomb site from Hooka.
You can quickly deal with a Raze or Jett on their way to the bomb site. However, you cannot allow the rest of their teammates inside the bomb site as it makes it much more difficult for your team to defend or retake B-site.
This Nanoswarm Setup aims to stop a full-team rush into B-site with that in mind. This Nanoswarm Grenade setup covers most of the Hooka entrance into B-site and some area around the bottom of Hooka. This setup can net Killjoy players a few easy kills once the enemy team commits to pushing out of Hooka.
First Nanoswarm Placement
- Look for this corner between the large box and the Hooka wall:

2. Stand in the corner and crouch:

3. Left-click-throw the Nanoswarm Grenade directly into the corner:

The Nanoswarm Grenade should tuck into the corner nicely.
Second Nanoswarm Placement
- Look for this small floor cushion inside Hooka:

2. Left-click-throw your Nanoswarm Grenade towards this floor cushion:

Alarm Bot Placement
Place the Alarm Bot against the Hooka Entrance into B-site:

Turret Placement
The original Turret placement for this setup is on top of the box at the backsite. However, experience tells us that whenever players are detected or even tagged by Killjoy’s Turret, they either:
- Fall back.
- Destroy the Turret and push forward into site.
The Turret plays a major part in the success of Killjoy’s Nanoswarm setups. The Turret ensures that enemies will not run thanks to the slow debuff the Turret applies on enemies it tags.
The original Turret placement scares enemy players from taking more space inside Hooka. This is the complete opposite of what you want them to do, as you want them to fall into your Nanoswarm Grenade trap.
With this in mind, we opted to move the Turret a little more towards the left side of Tube when viewed from Hooka. This angle gives the Turret vision of any enemies pushing out of Hooka and ensures that the Turret can do its job by slowing down enemies to a halt.
- Get on top of Tube and look for the rightmost “+” sign:

2. Place the Turret on top of the “+” sign:

Bind Defending – B-Garden Nanoswarm Setup

B-Garden is one of two entryways into B-site on Bind. The entrance from B-Garden into B-site is pretty narrow as well, which means you can make use of some Nanoswarm setups to catch unsuspecting enemies as they make their way into the site.
One of the Nanoswarm placements in this setup covers the leftmost corner of B-Garden as well. B-Garden is an important spot to cover with Killjoy’s Nanoswarm Grenade as this provides Attackers a bit of cover from Defenders within B-site.
The cubby outside B-Garden is a common spot for Attackers to occupy since it provides a bit of cover from Defenders holding B-Default. One of the Nanoswarm Grenades is placed to cover the entire cubby area as well.
Once again, your Turret will be standing by inside the cubby to make sure everything goes according to plan.
First Nanoswarm Placement
- Look for the left door frame of B-Garden:

2. Crouch and left-click-throw the Nanoswarm Grenade around the middle part of this door frame:

Second Nanoswarm Placement
- Look for the point where the imaginary lines between the right wall corner and this line on the wall interest:

2. Left-click-throw the second Nanoswarm Grenade into this spot:

Alarm Bot Placement
Place the Alarm Bot against the right door frame to hide it from the Attacker’s line of sight.

Turret Placement

Place the Turret on top of this wooden plank to hide it from the Attackers’ line of sight from Hooka and B-Garden.
Remember to rotate the Turret, so it is facing towards the site.
Putting Attackers in a Bind
B-site Bind is a powerful space for Killjoy as a defender. Killjoy can use the narrow entrances from Hooka and Garden to set up some nasty traps that will put enemies in a Bind real quick. Pun intended.
A decent Killjoy player can hold down B-site completely on her own, or just enough to buy some time for her teammates to join in on the B-site party.
These Nanoswarm Grenade setups will be the keys to your B-site dominance. The large area Nanoswarm covers and the quick damage over time that it deals to enemies caught within it will ensure that enemies think twice before rushing into your site.